Profile
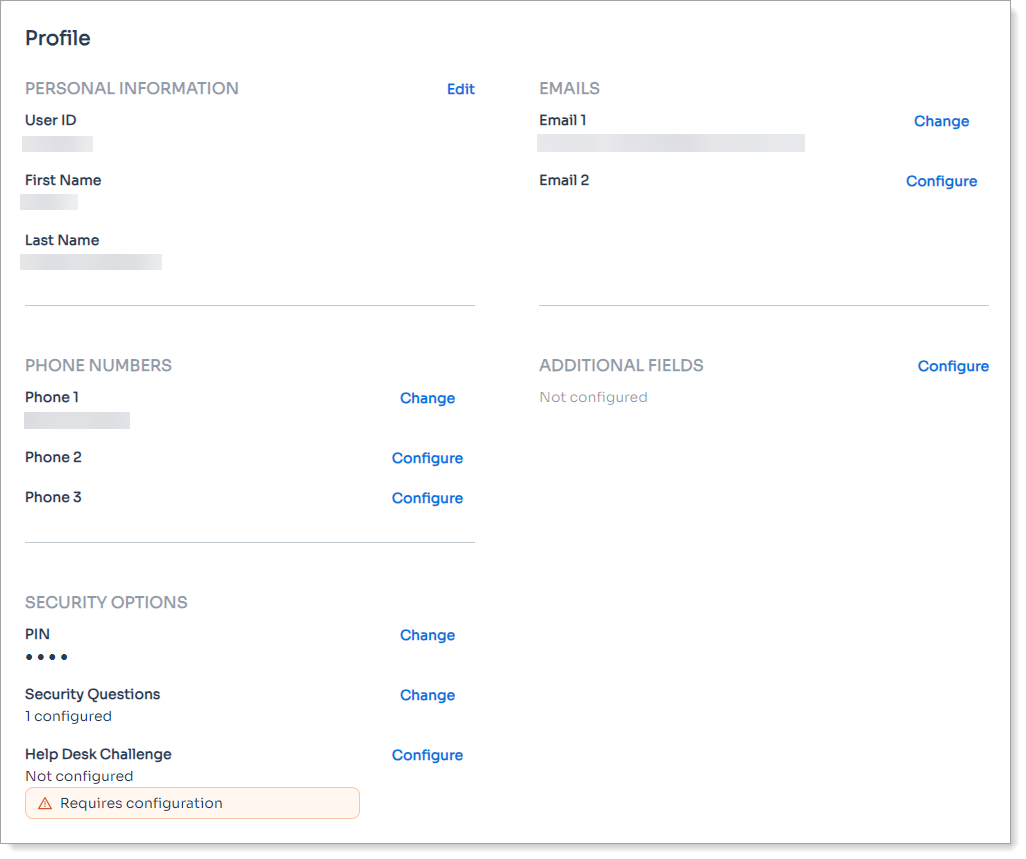
For each user profile field, set and configure how the field is to display on the User Account page for your end users.
 |
Sample end user page showing their profile information
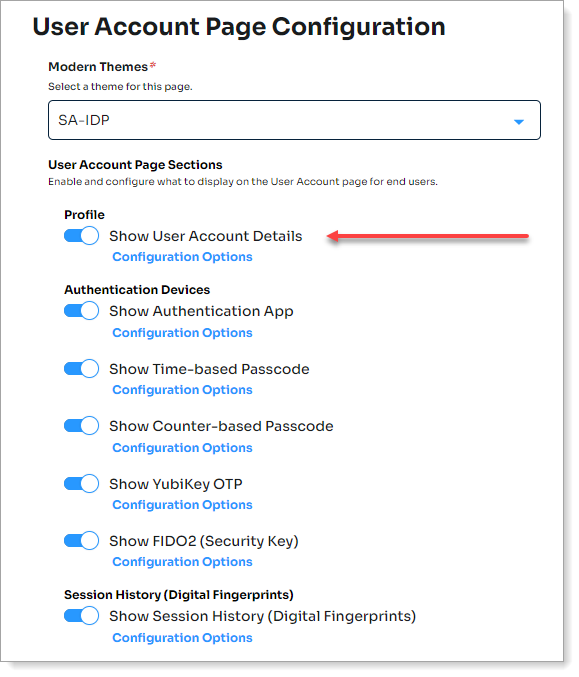
In the Internal Application Manager, add or edit a User Account page.
For more information, see User Account page configuration.
Under Profile, enable Show User Account Details and click Configuration Options.

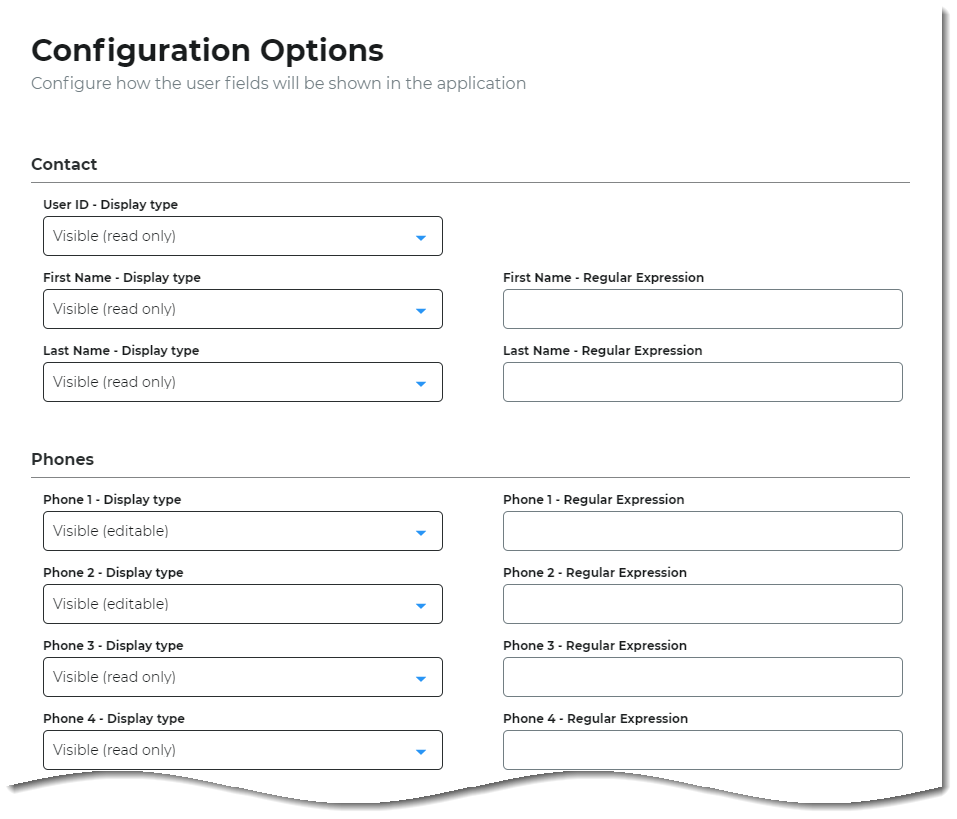
Result: The Configuration Options page displays.
For each user profile field, set and configure how the field is to display on the User Account page:
<Profile Field> such as:
Contact info
Phones
Emails
Aux IDs
For each field, set how the field is to display on the User Account page. Choose from the following options for the User Account page.
Hidden – Do not show the field.
Visible (read only) – Show read-only field.
Visible (editable) – Show and allow user to edit information in this field.
Visible (editable and required) – Show and require edits in this field.
Regular Expression
Use Regular Expression (regex) settings to limit user-entered info and ensure data consistency. Regex defines specific patterns for secure and consistent data formats.
For more information, see the Restrict allowed information in employee Self Service page knowledge base article.

In the Personal Identification Number section, set the following:
PIN - Display type
Set to one of the following options for the PIN field on the User Account page.
Hidden – Do not show this field.
Visible (editable) – Allow user to enter or edit their PIN.
Visible (editable and required) – Set the PIN field as required. User must enter their PIN on the User Account page.
Open PIN
When the PIN - Display type is enabled (visible, editable, or required), set one of the following options.
False – User can set numeric-only PIN. PIN value is encrypted with asterisks on the User Account page.
True – User can set an alphanumeric PIN. PIN value is not encrypted; user can see their PIN on the User Account page.
PIN Min Length
When the PIN - Display type is enabled (visible, editable, or required), set the minimum number of characters required for a PIN.
Choose a number from 0 to 6.
PIN Max Length
When the PIN - Display type is enabled (visible, editable, or required), set the minimum number of characters required for a PIN.
Choose a number from 4 to 10.

In the Security Questions section, set the following:
Security Questions - Display type
Set to one of the following options for the Security Questions field on the User Account page.
Hidden – Do not show this field.
Visible (editable) – Allow user to edit and use Security Questions.
Visible (editable and required) – Set this field as required. User must answer this field on the User Account page.
Security Questions - Allowed
Set how many Security Questions can answer.
Choose a number from 0 to 6.
Security Questions - Required
Set how many Security Questions the user must answer.
For example, you can allow up to 4 security questions, but the user must answer at least 2.
Choose a number from 0 to 6.

In the Help Desk Challenge section, set the following:
Help Desk Challenge Question - Display type
Set to one of the following options for the Help Desk Challenge field on the User Account page.
Hidden – Do not show this field.
Visible (editable) – Allow user to set up this field.
Visible (editable and required) – Set this field as required. User must set up this field on the User Account page.
The Help Desk Challenge Question is visible on the Help Desk page when retrieving a user profile. This question is used in support calls to verify the user's identity. It is distinct from the user's private Security Questions.

In the Social identity Providers section, set the following:
Social Identity Providers - Display type
Set whether to allow users to connect their social ID for user verification.
If you set this to True, you will need to configure this integration on the Workflow tab in the Advanced settings.
For more information, see the Social Identity section in the Workflow Tab Configuration topic.

In the More Actions section, set the following:
Send Email - Action type
Set whether to send a notification email to the user after they make a change to their profile on the User Account page.
