Authentication Devices
For each authentication device or type, set and configure the authentication device permissions on the User Account page for your end users.
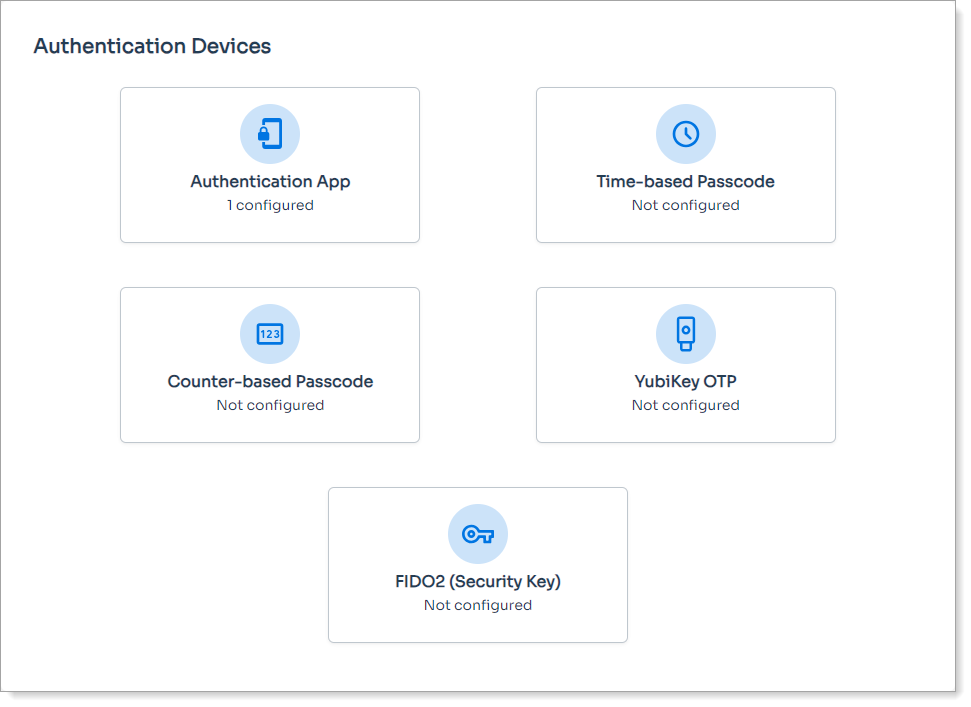 |
Sample end user page for enrolling authentication devices
In the Internal Application Manager, add or edit a User Account page.
For more information, see ???.
Under the Authentication Devices section, enable an authentication device or type and click Configuration Options.
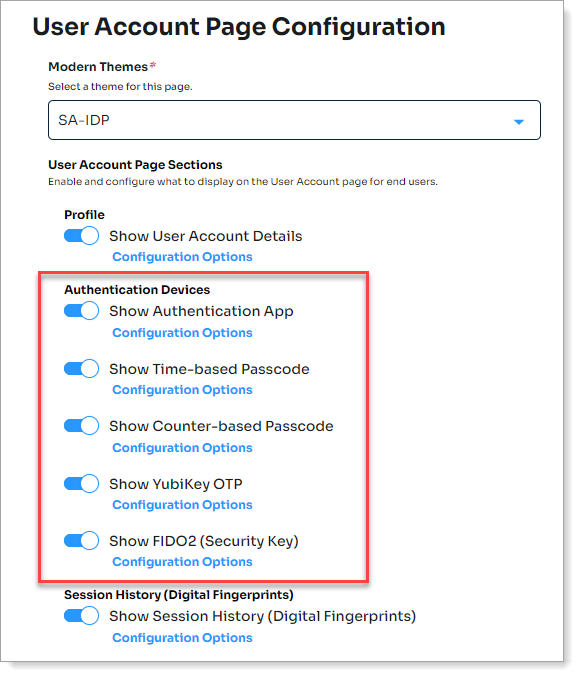
Configuration options for Authentication Devices
See the following sections to configure a specific authentication device.
Define the end user experience for enrolling an authenticator app. This allows end users to enroll SecureAuth Authenticate on their mobile device using a QR code.
The Authentication Apps settings in the global Multi-Factor Methods determine how the Authenticate app options behave during enrollment. These configurations control the display and availability of Authenticate app options for end users. To learn more, see Authentication apps global MFA settings.
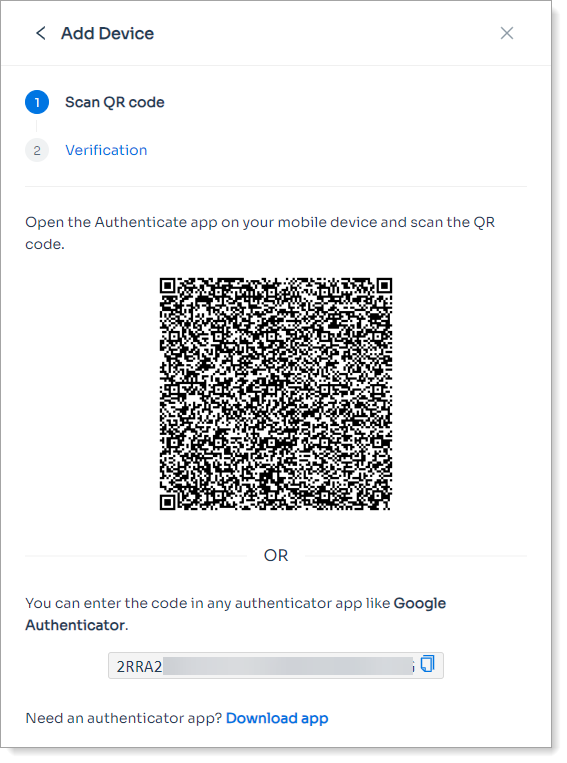 |
Sample end user page for a mobile device enrollment
Under Authentication Devices, enable Show Authentication App and click Configuration Options.
Result: The Configuration Options page displays.
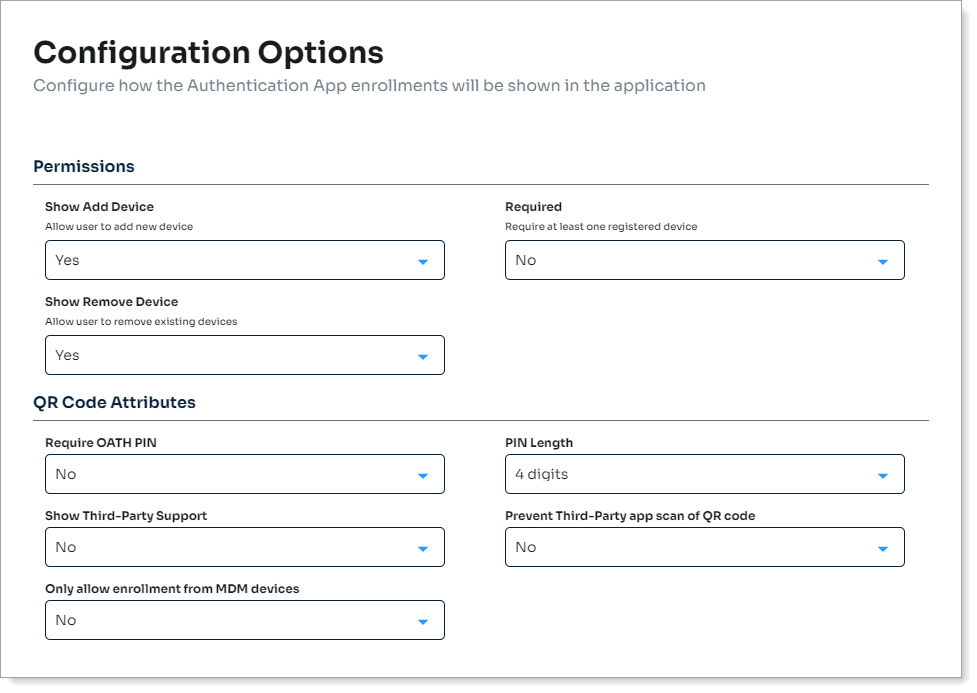
In the Permissions section, set the following:
Show Add Device
Set to allow users to add a mobile device with the SecureAuth Authenticate app to their profile.
Required
Require users to to enroll a mobile device with the SecureAuth Authenticate app.
Show Remove Device
Set to allow users to remove a mobile device with the SecureAuth Authenticate app from their profile.
In the QR Code Attributes section, set the following:
Require OATH PIN
Set to one of the following options:
True – To view the time-based one-time passcode (TOTP) on the Authenticate app, require users to provide a PIN or biometric ID (fingerpint)
False – PIN is not required to view the TOTP on the Authenticate app
PIN Length
Set the number of digits in the PIN (4, 6, 8, or 10 digits).
Show Third-Party Support
Set this to allow users to enroll their mobile device using a third-party authenticator app.
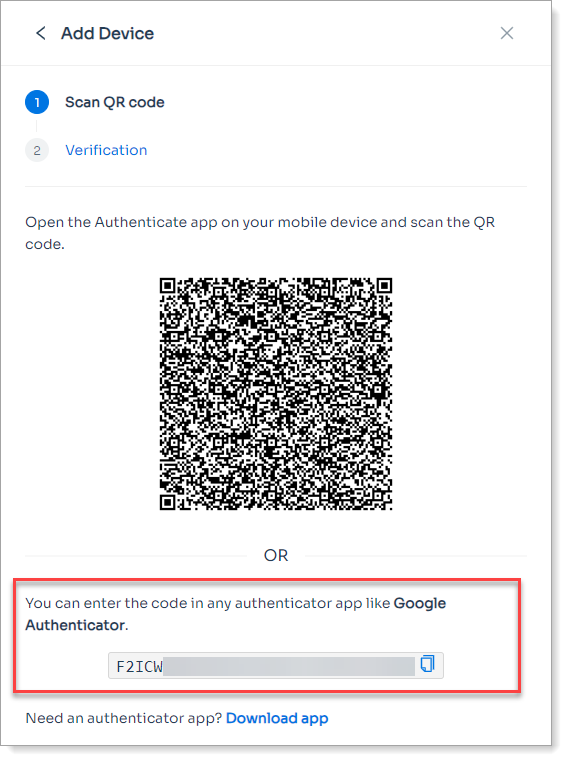
Prevent Third-Party app scan of QR code
Set this to allow or block users from scanning the QR code with third-party apps during enrollment.
Only allow enrollment from MDM devices
Set this to only allow mobile device enrollment from mobile device management (MDM) devices.
Define the end user experience for enrolling a device that can generate time-based passcodes. For example, you can allow users to add a hard or soft token that is capable of generating time-based passcodes.
The Authentication Apps > One-Time Passcode Settings in the global Multi-Factor Methods determine how the Time-based Passcode device behaves during enrollment. These configurations control the display and availability of Time-based Passcode device options for end users. To learn more, see Authentication apps global MFA settings.
This also known as TOTP device.
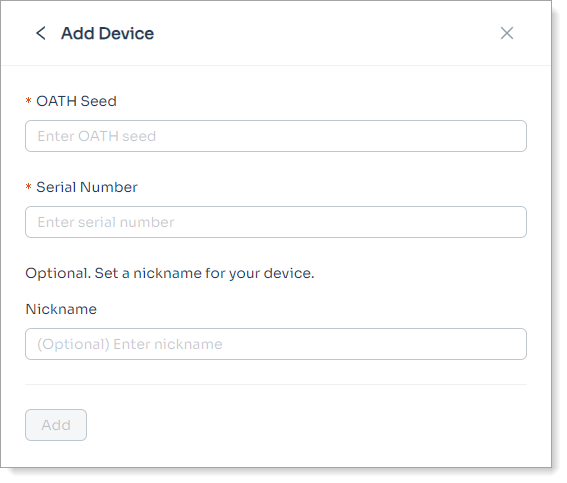 |
Sample end user page for adding a time-based hard or soft token
Under Authentication Devices, enable Show Time-based Passcode and click Configuration Options.
Result: The Configuration Options page displays.
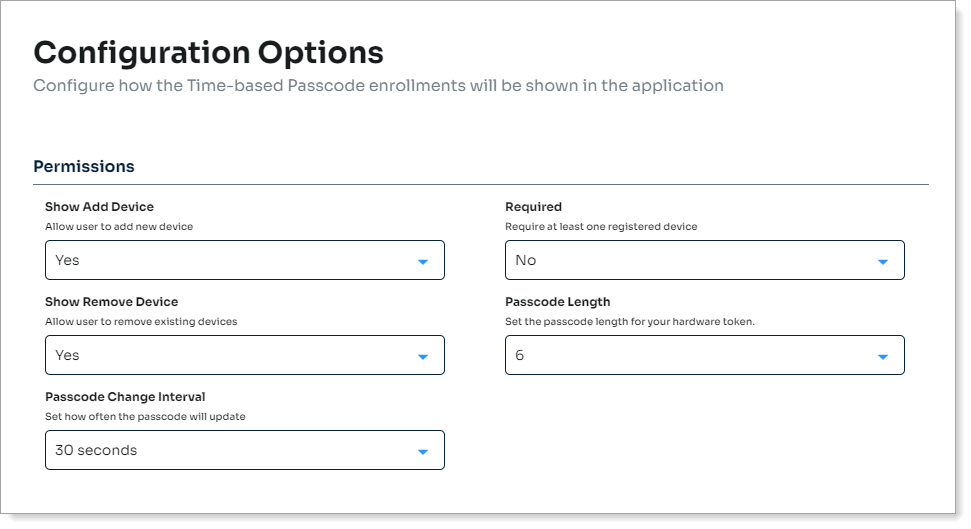
In the Permissions section, set the following for a hard or soft token.
Show Add Device
Set to allow users to add a hard or soft token capable of generating a time-based passcode (TOTP) to their profile.
Required
Require users to to enroll a hard or soft token to their profile.
Show Remove Device
Set to allow users to remove a hard or soft token from their profile.
Passcode length
Set the length of the passcode in the hard or soft token at six, eight, or nine digits.
Passcode change interval
Set how often in seconds, the passcode updates in the hard or soft token.
Define the end user experience for enrolling a device that can generate a counter-based passcode. For example, you can allow users to add a hardware or software token that is capable of generating a counter-based passcode.
This is also known as a HOTP (HMAC-based one-time passcode) device.
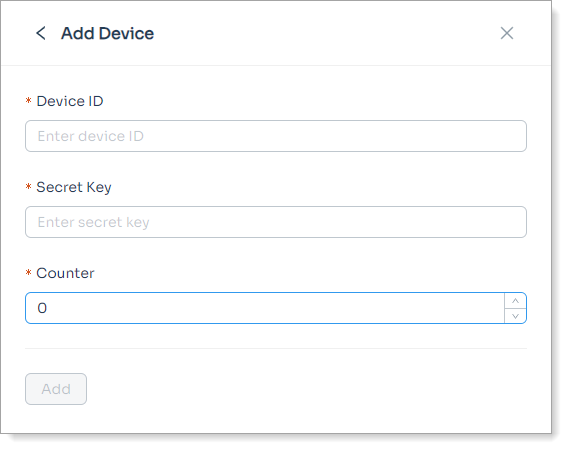 |
Sample end user page for adding a counter-based passcode device
Under Authentication Devices, enable Show Counter-based Passcode and click Configuration Options.
Result: The Configuration Options page displays.
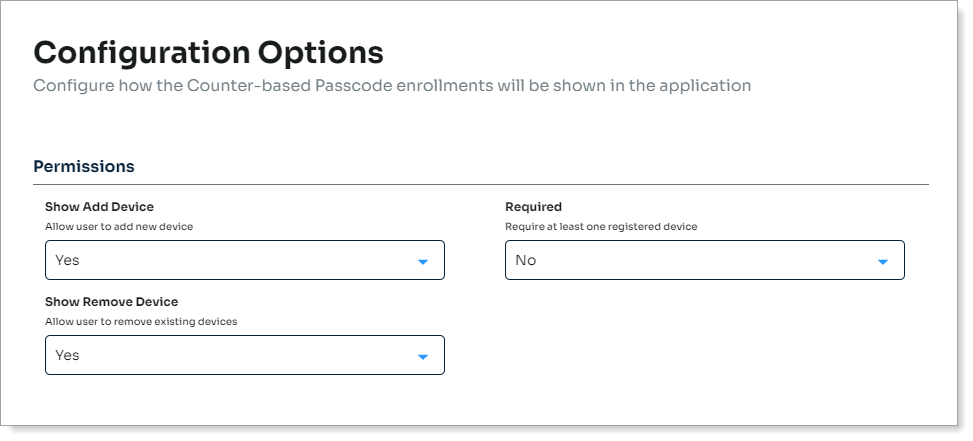
In the Permissions section, set the following for a hard or soft token.
Show Add Device
Set to allow users to add a device capable of generating a counter-based passcode to their profile.
Required
Require users to to enroll a counter-based device to their profile.
Show Remove Device
Set to allow users to remove a counter-based device from their profile.
Define the end user experience for enrolling a non-FIDO2 YubiKey device. This is for YubiKey types that generate a passcode by touch when inserted into a USB port.
The YubiKey (non-FIDO2) settings in the global Multi-Factor Methods determine how the YubiKey device options behave during enrollment. These configurations control the display and availability of YubiKey device options for end users. To learn more, see YubiKey global MFA settings.
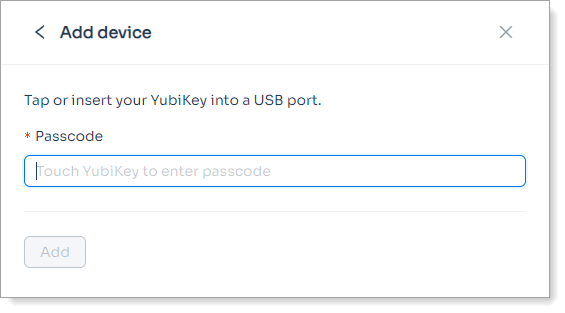 |
Sample end user page for adding a non-FIDO2 YubiKey device
Under Authentication Devices, enable Show YubiKey OTP and click Configuration Options.
Result: The Configuration Options page displays.
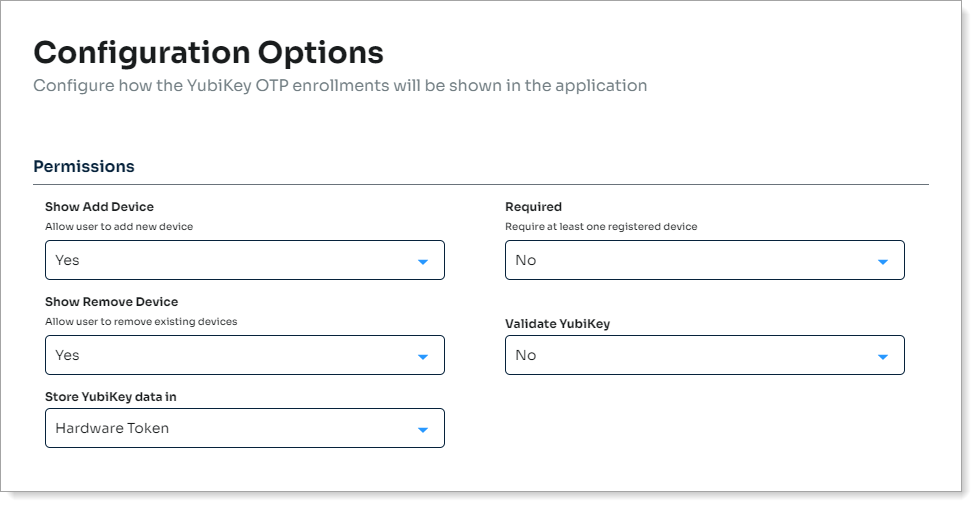
In the Permissions section, set the following for a hard or soft token.
Show Add Device
Set to allow users to add a non-FIDO2 YubiKey device to their profile.
Required
Require users to to enroll a non-FIDO2 YubiKey device to their profile.
Show Remove Device
Set to allow users to remove a non-FIDO2 YubiKey device from their profile.
Validate YubiKey
Use one of the following options:
Yes – The Identity Platform sends a request to Yubico to validate the non-FIDO YubiKey device during enrollment.
No – Bypass this validation with Yubico.
Store YubiKey data in
Set the data store profile property to store the non-FIDO2 YubiKey data.
Define the end user experience for enrolling a FIDO2 (Security Key) device. You can allow users to register their FIDO2 authenticators as a login multi-factor (MFA) option.
Note
FIDO2 authenticators could be known as external security keys or built into devices like phones and laptops. In the Identity Platform UI, the term device is interchangeable to mean either device or security key.
The FIDO2 settings in the global Multi-Factor Methods determine how FIDO2 options appear during enrollment. These configurations control the display and availability of FIDO2 options for end users. To learn more, see FIDO2 WebAuthn global MFA settings.
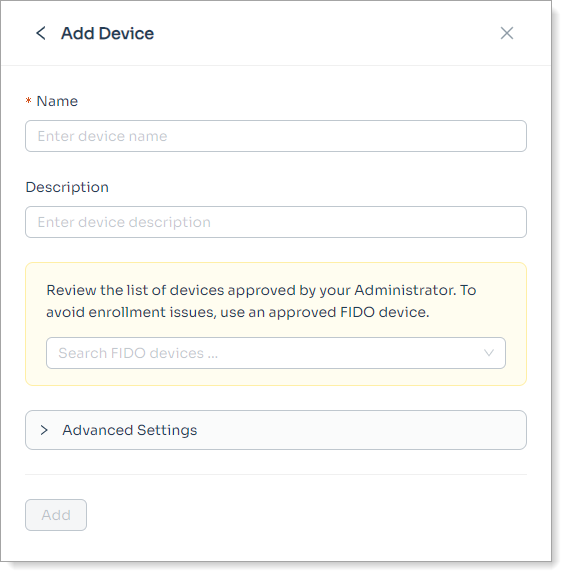 |
Sample end user page for adding a FIDO2 (Security Key) device
Under Authentication Devices, enable Show FIDO2 (Security Key) and click Configuration Options.
Result: The Configuration Options page displays.
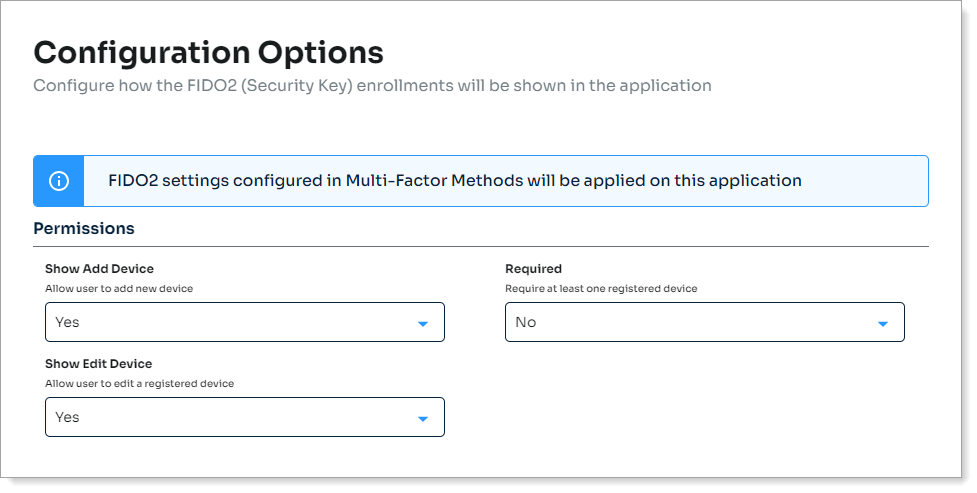
In the Permissions section, set the following for a hard or soft token.
Show Add Device
Set to allow users to add a FIDO2 authenticator device to their profile.
Required
Require users to to enroll a FIDO2 authenticator device to their profile.
Show Edit Device
Set to allow users to edit their FIDO2 authenticator device in their profile.