Release notes: Early feature set
Screen Capture of desktop violations
Open the SG Console and go to Configurations > Alerts.
If the Alerts feature is enabled, the system will send an email to the email address defined in the Recipient field every time a violation happens. Exception, when a Delayed Alert feature is enabled.
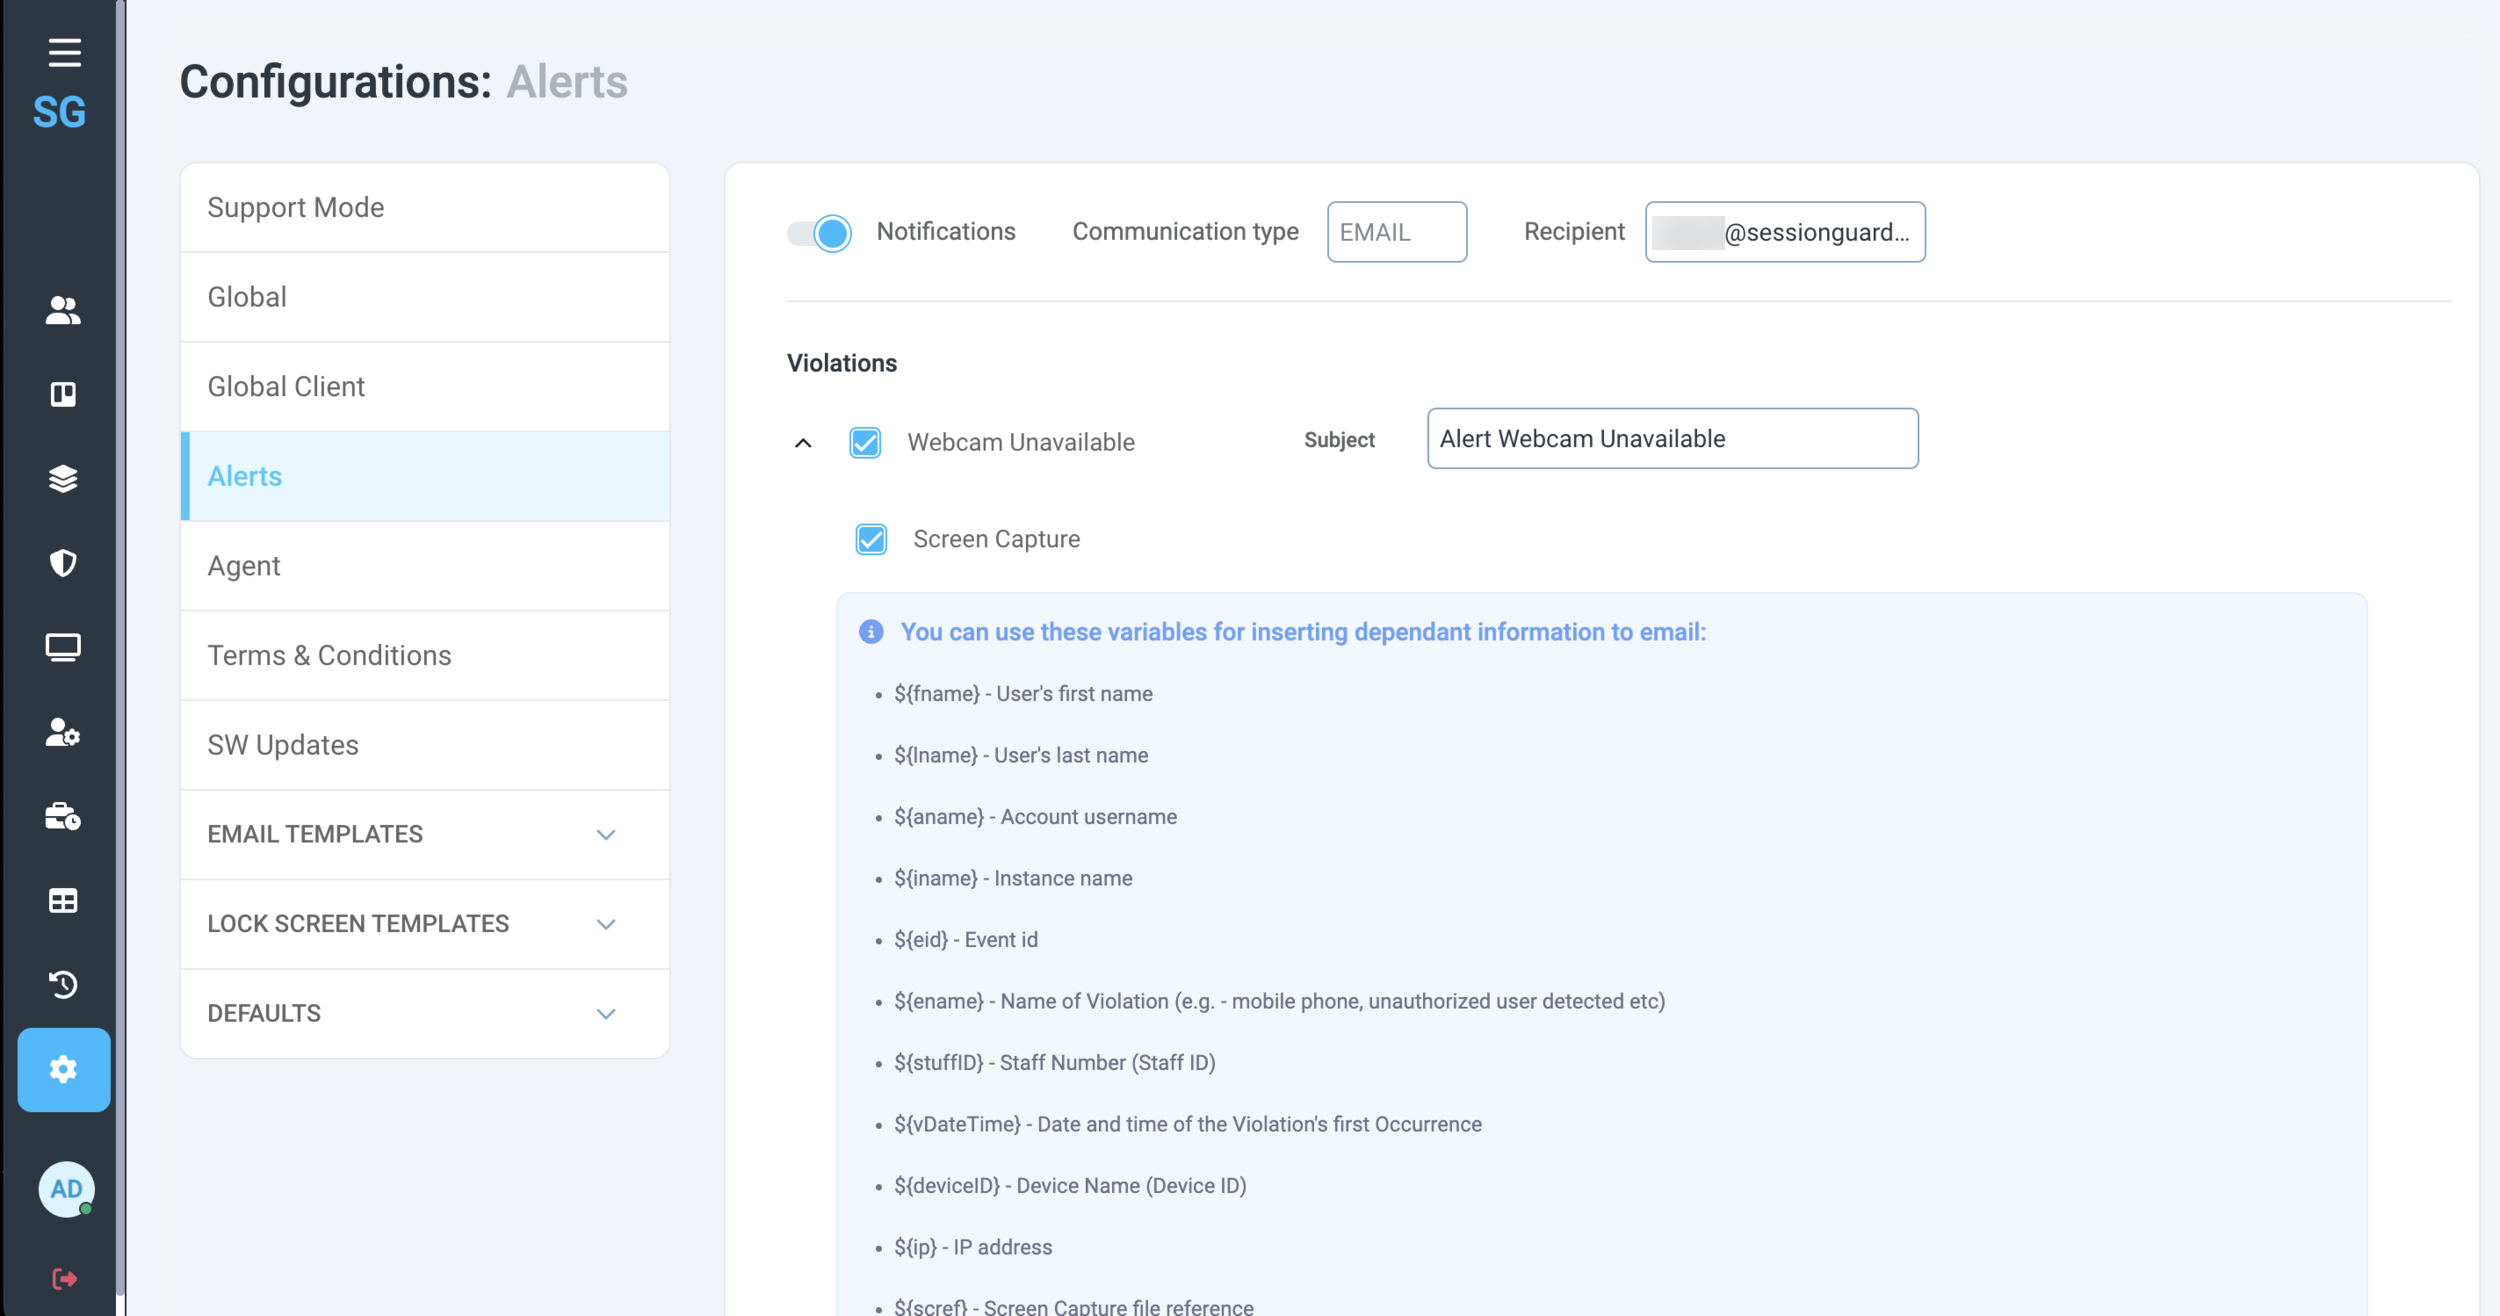 |
Under each Violation configuration block you’ll find a new checkbox: Screen Capture.
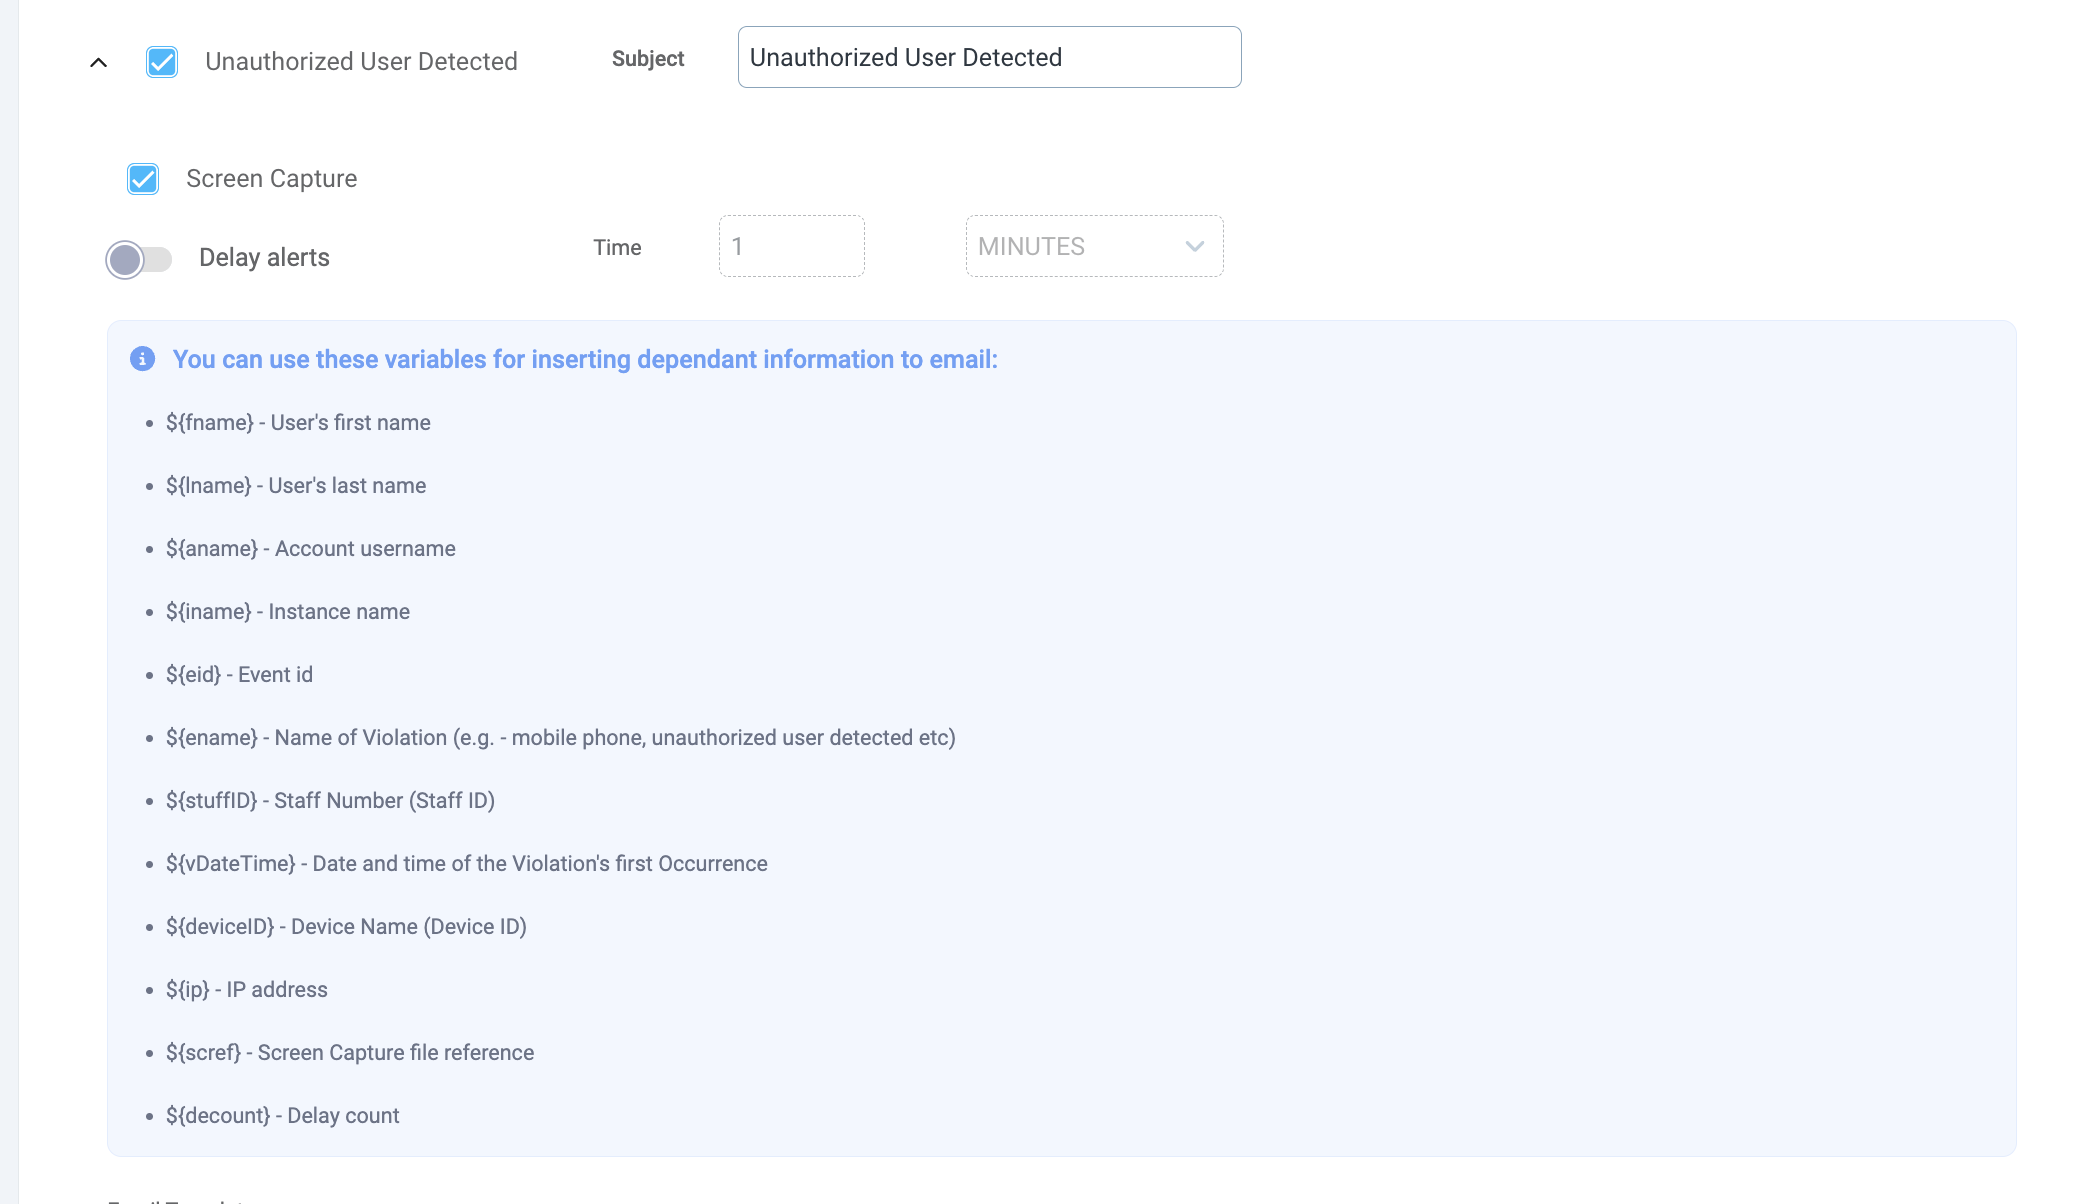 |
Once the checkbox is ticked, it tells the SG Service Desktop to capture the screen’s content at every moment of the violation’s occurrence.
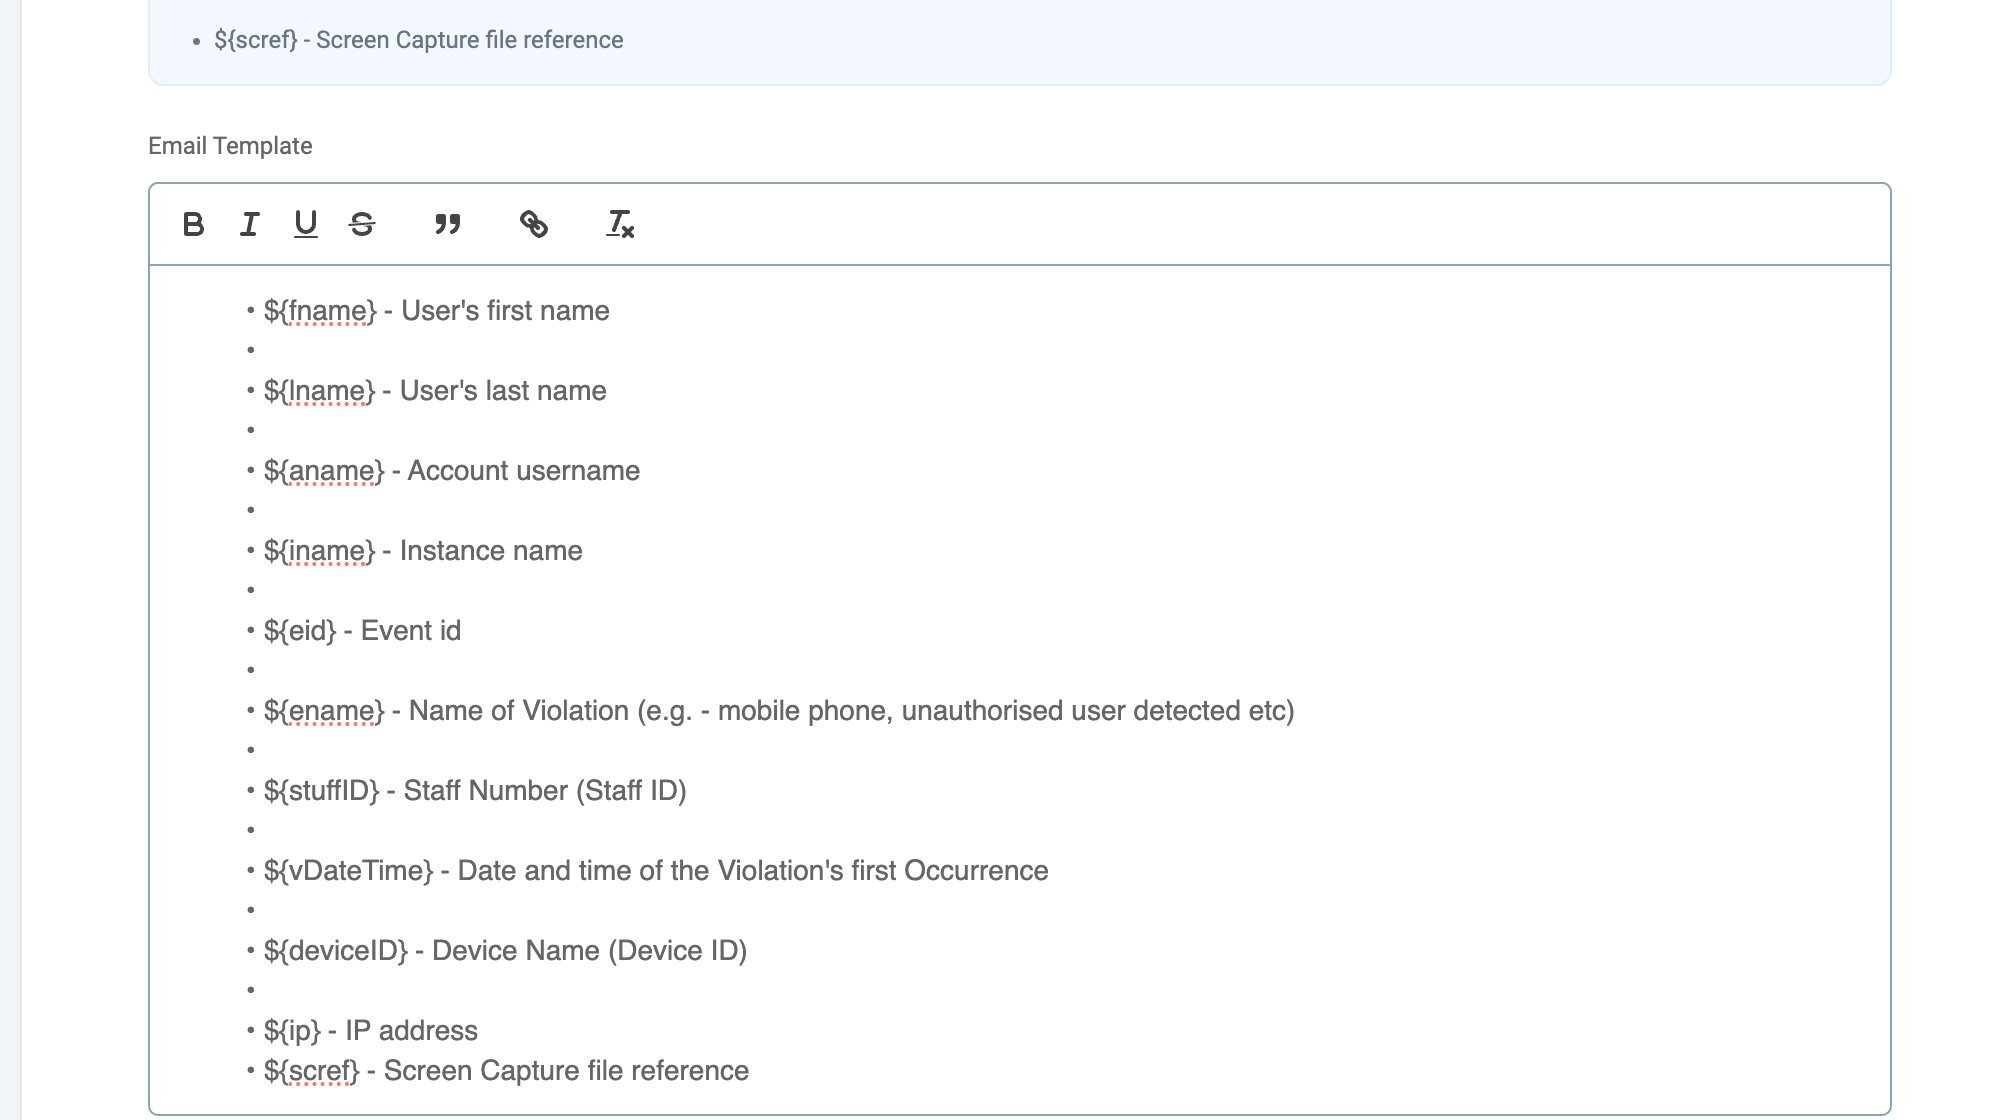 |
In order to receive a link to the image in the Alert email, email template has to be configured so the screen content can be reviewed by the Alert Recipients.
By default the application is configured to store the images of captured screen content in the main S3 bucket (the bucket that the application uses for file storage).
However, if you’d like to overwrite and use another S3 storage, please refer to the following two environment variables which can be updated:
sge.escalated-alerts.screen-capture.s3-storage.bucket=sge.escalated-alerts.screen-capture.directory-name=- the default value isalert/screen-capture
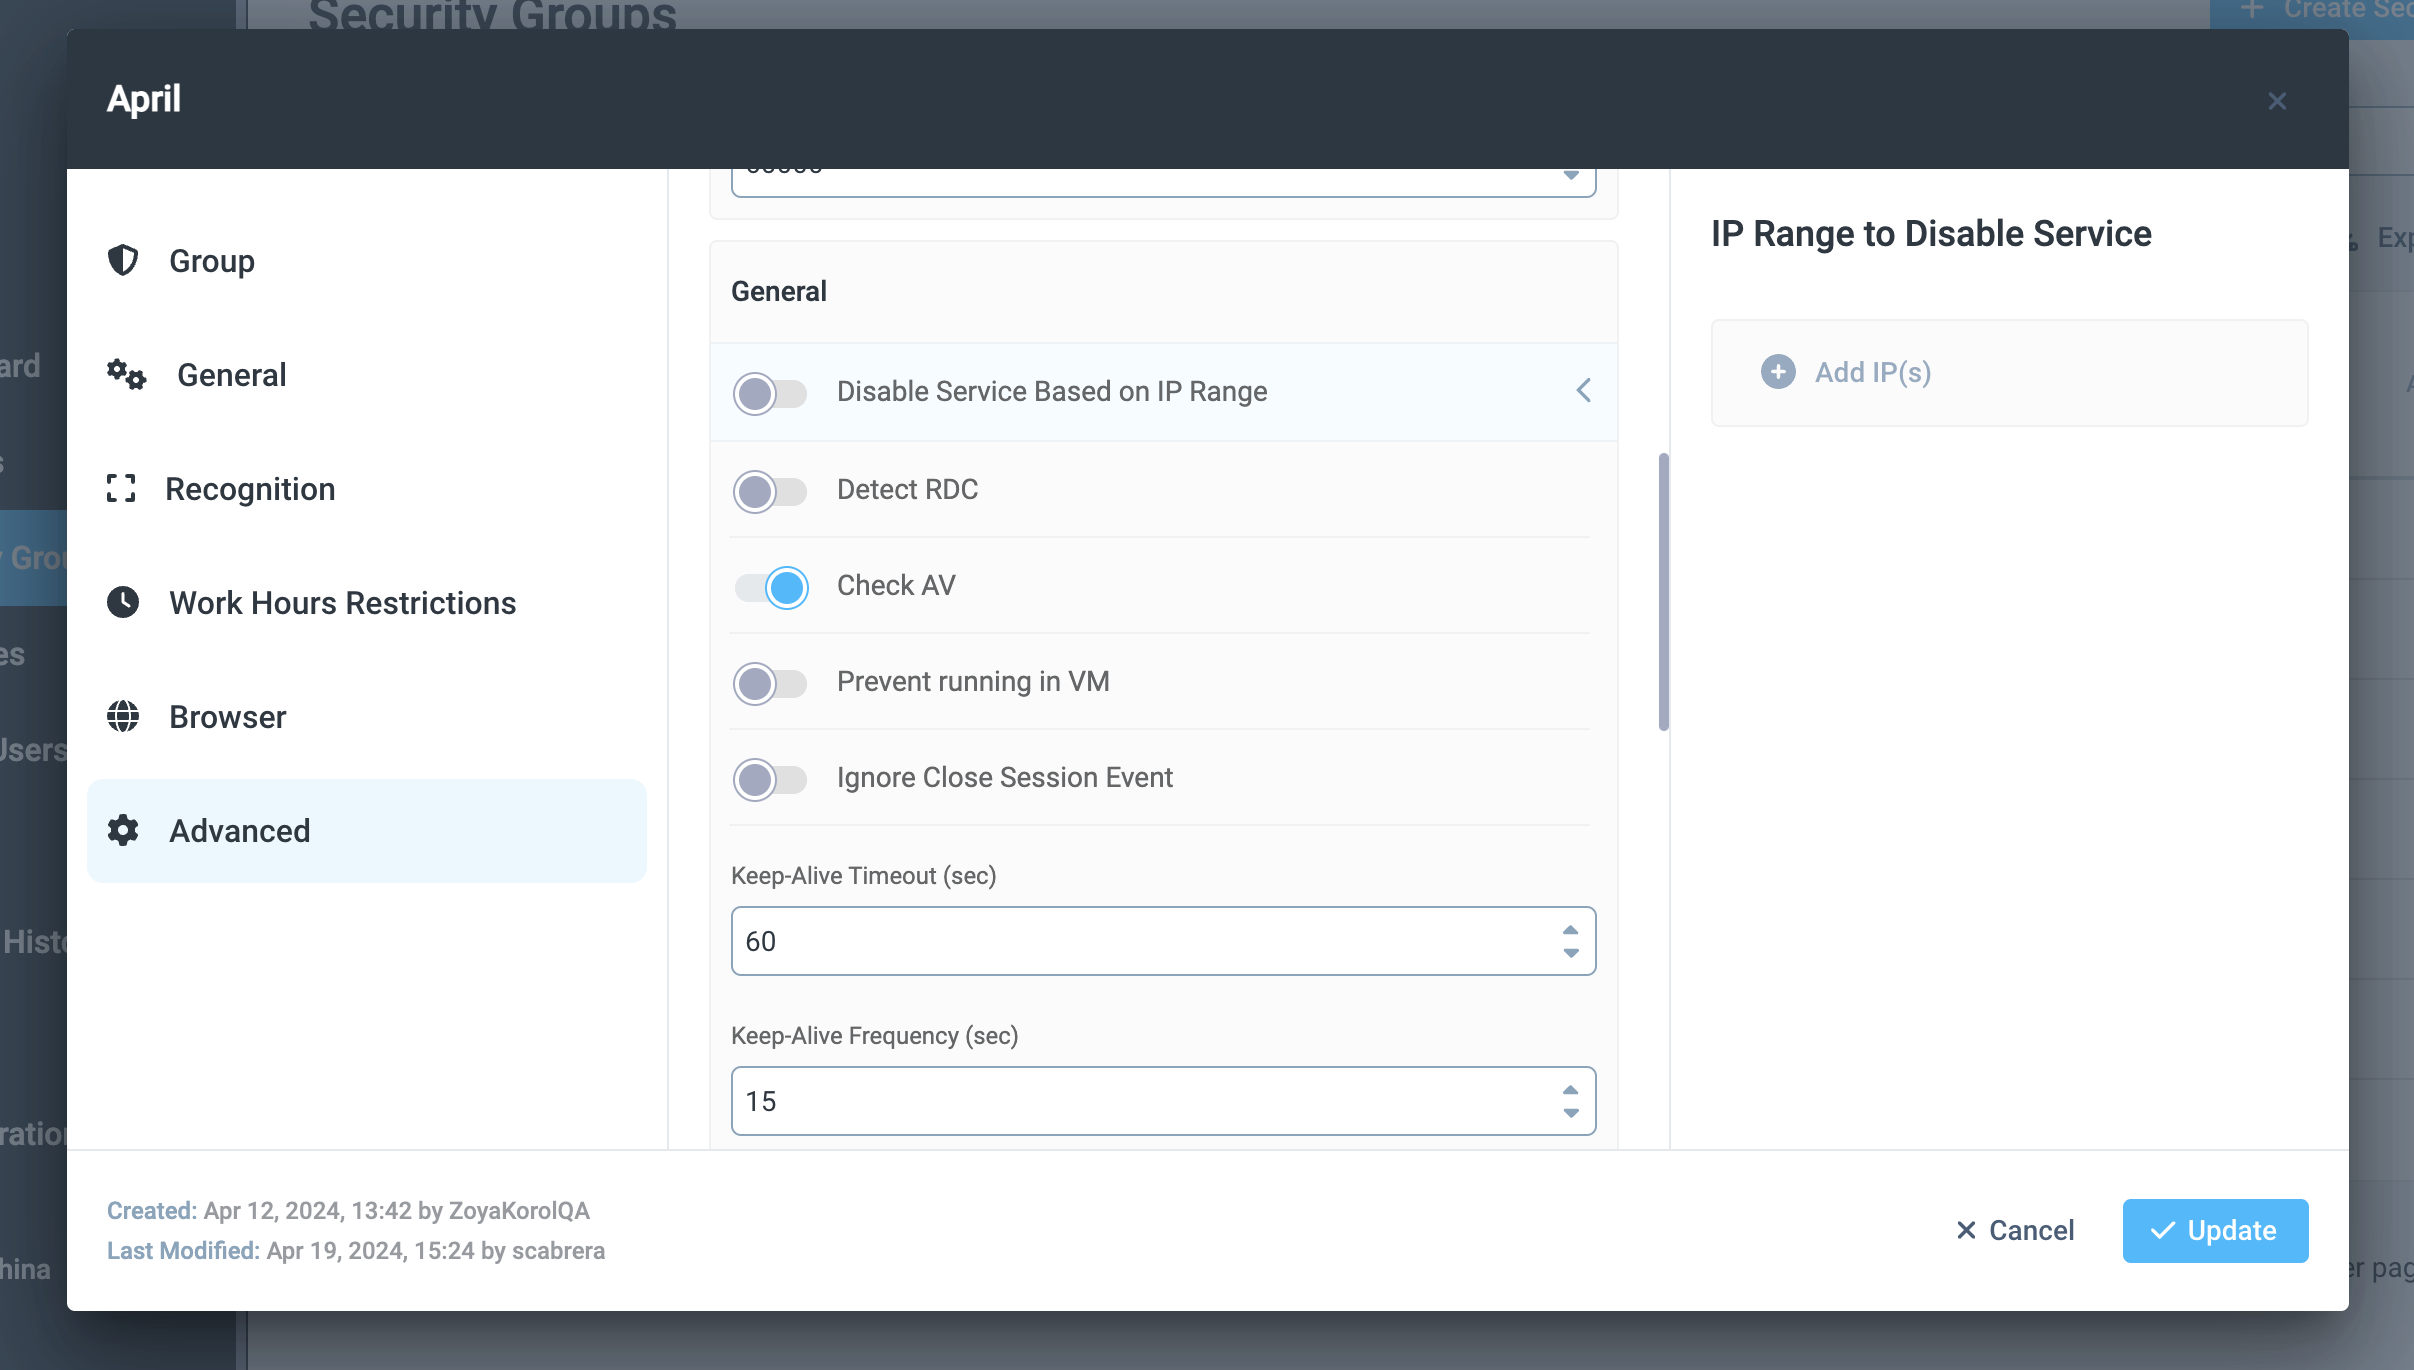
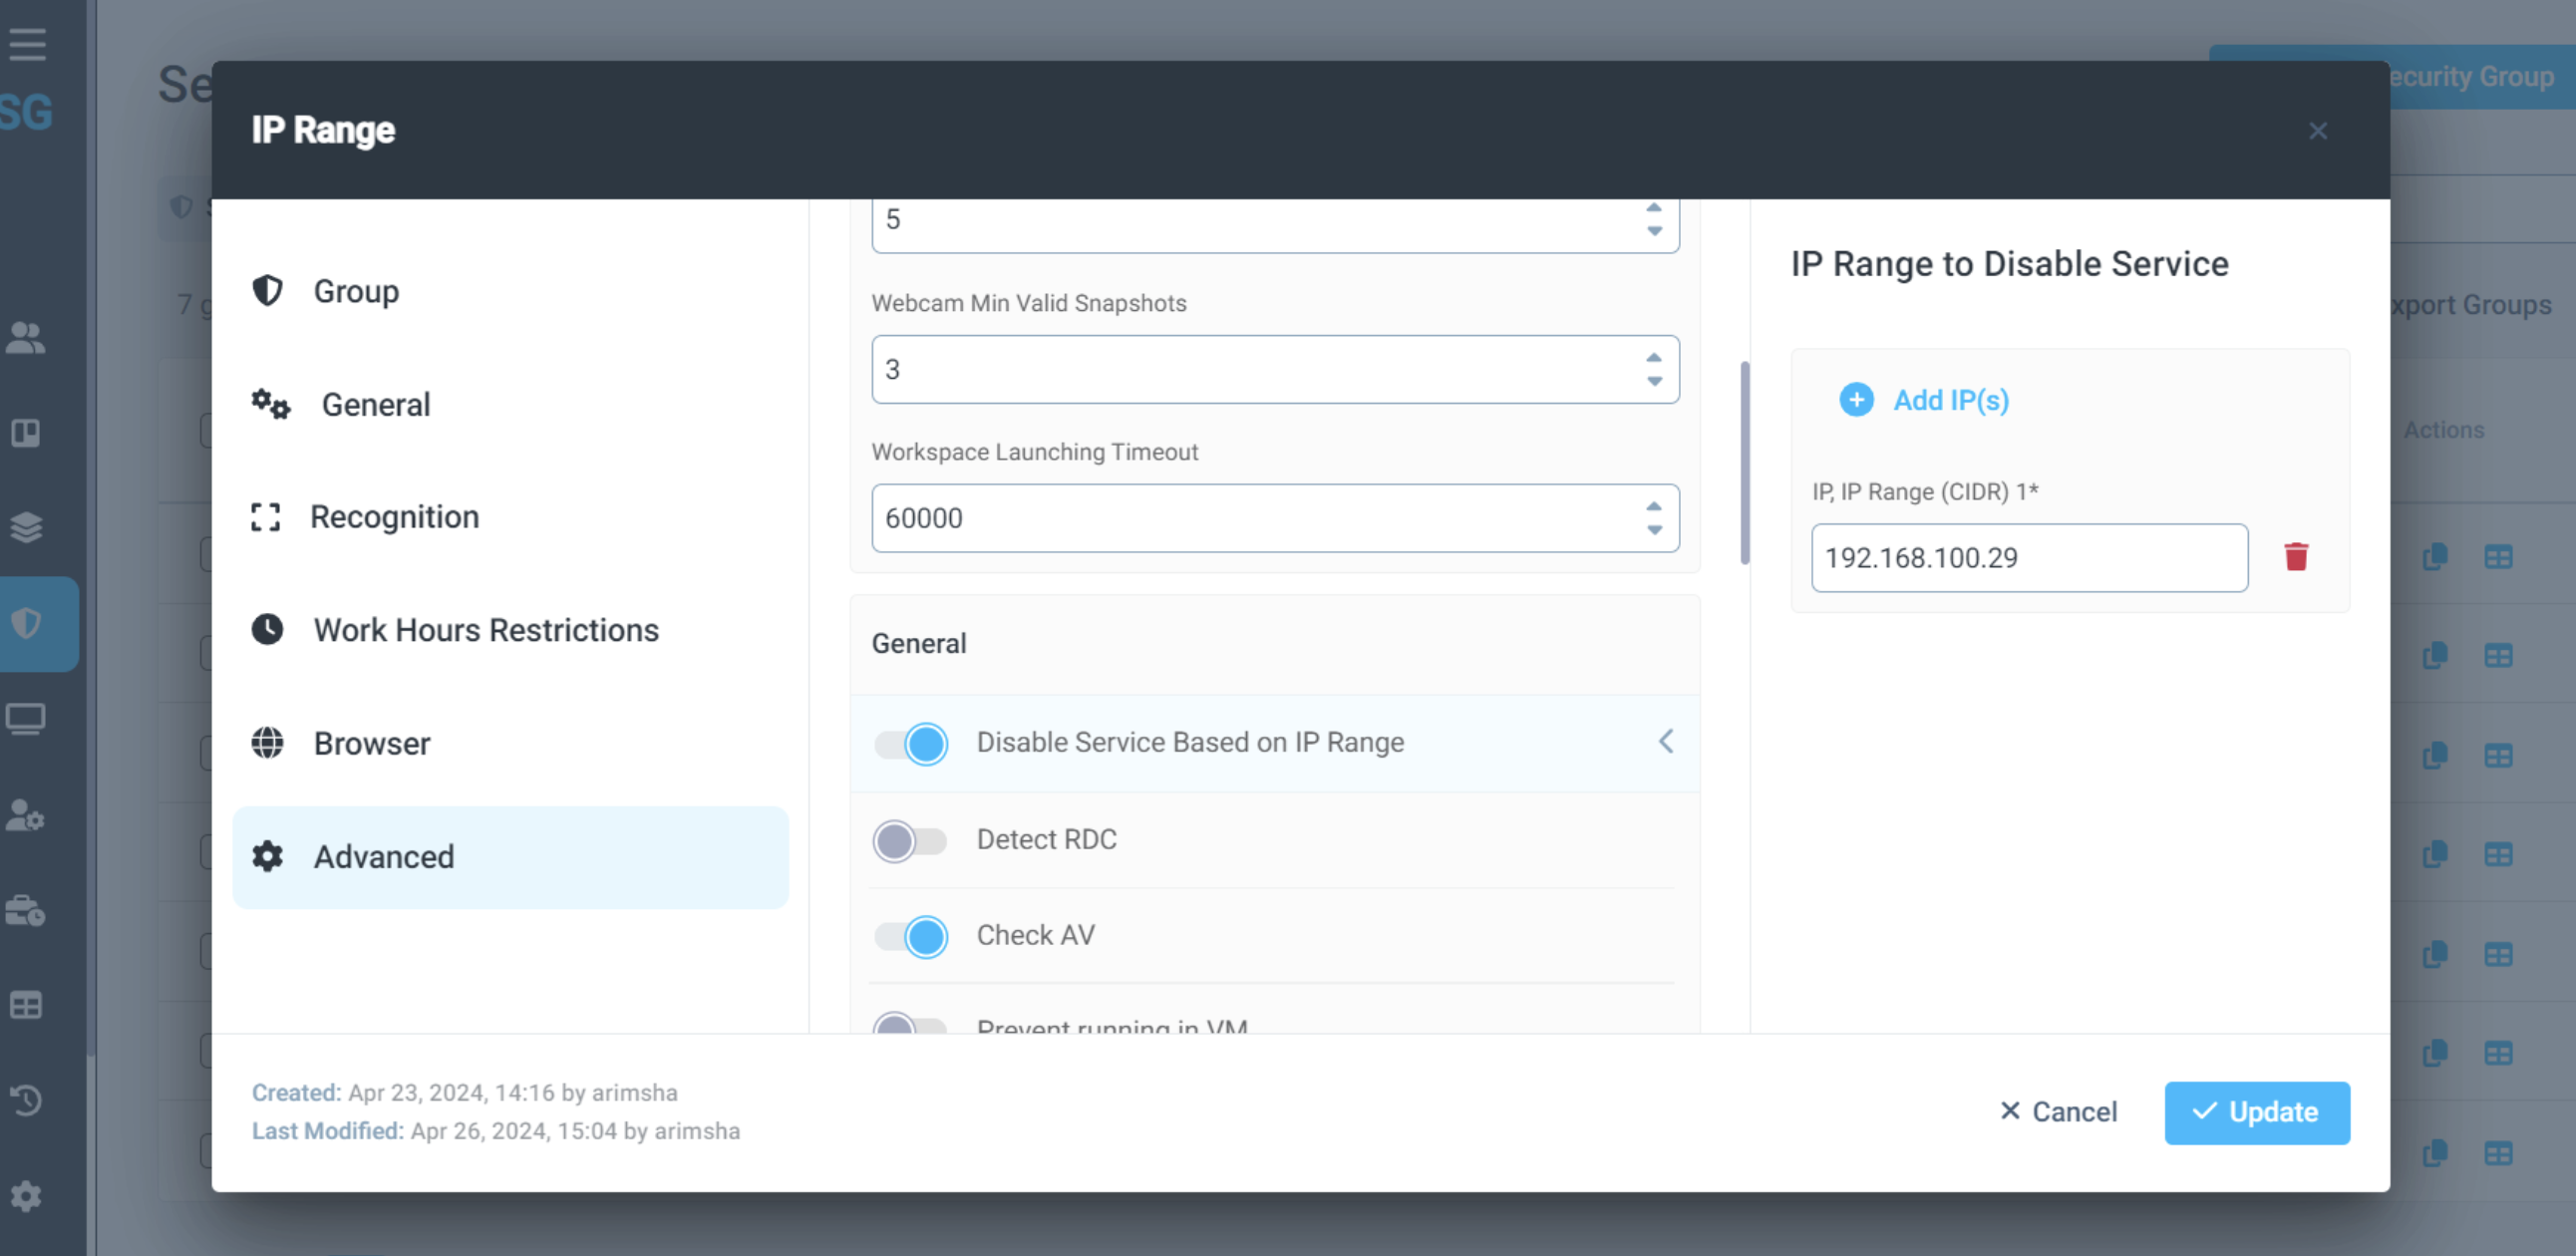
Disable enforcement and monitoring based on IP Address
One of the new features added to the SG Console is the ability to disable Security Checks once the end-users are working under certain IP addresses.
In SG Console go to Security Groups > Advanced > Scroll down to General section.
Find option “Disable Service Based on IP Range”.
Once you enable it, you’ll be able to add single IP Addresses or IP Ranges which are considered save so that when the end-users are in those IP Ranges, the SG Desktop Service will pause it work. That means that no security checks will be forced, no violations will be tracked, no alerts will be sent.
 |
 |
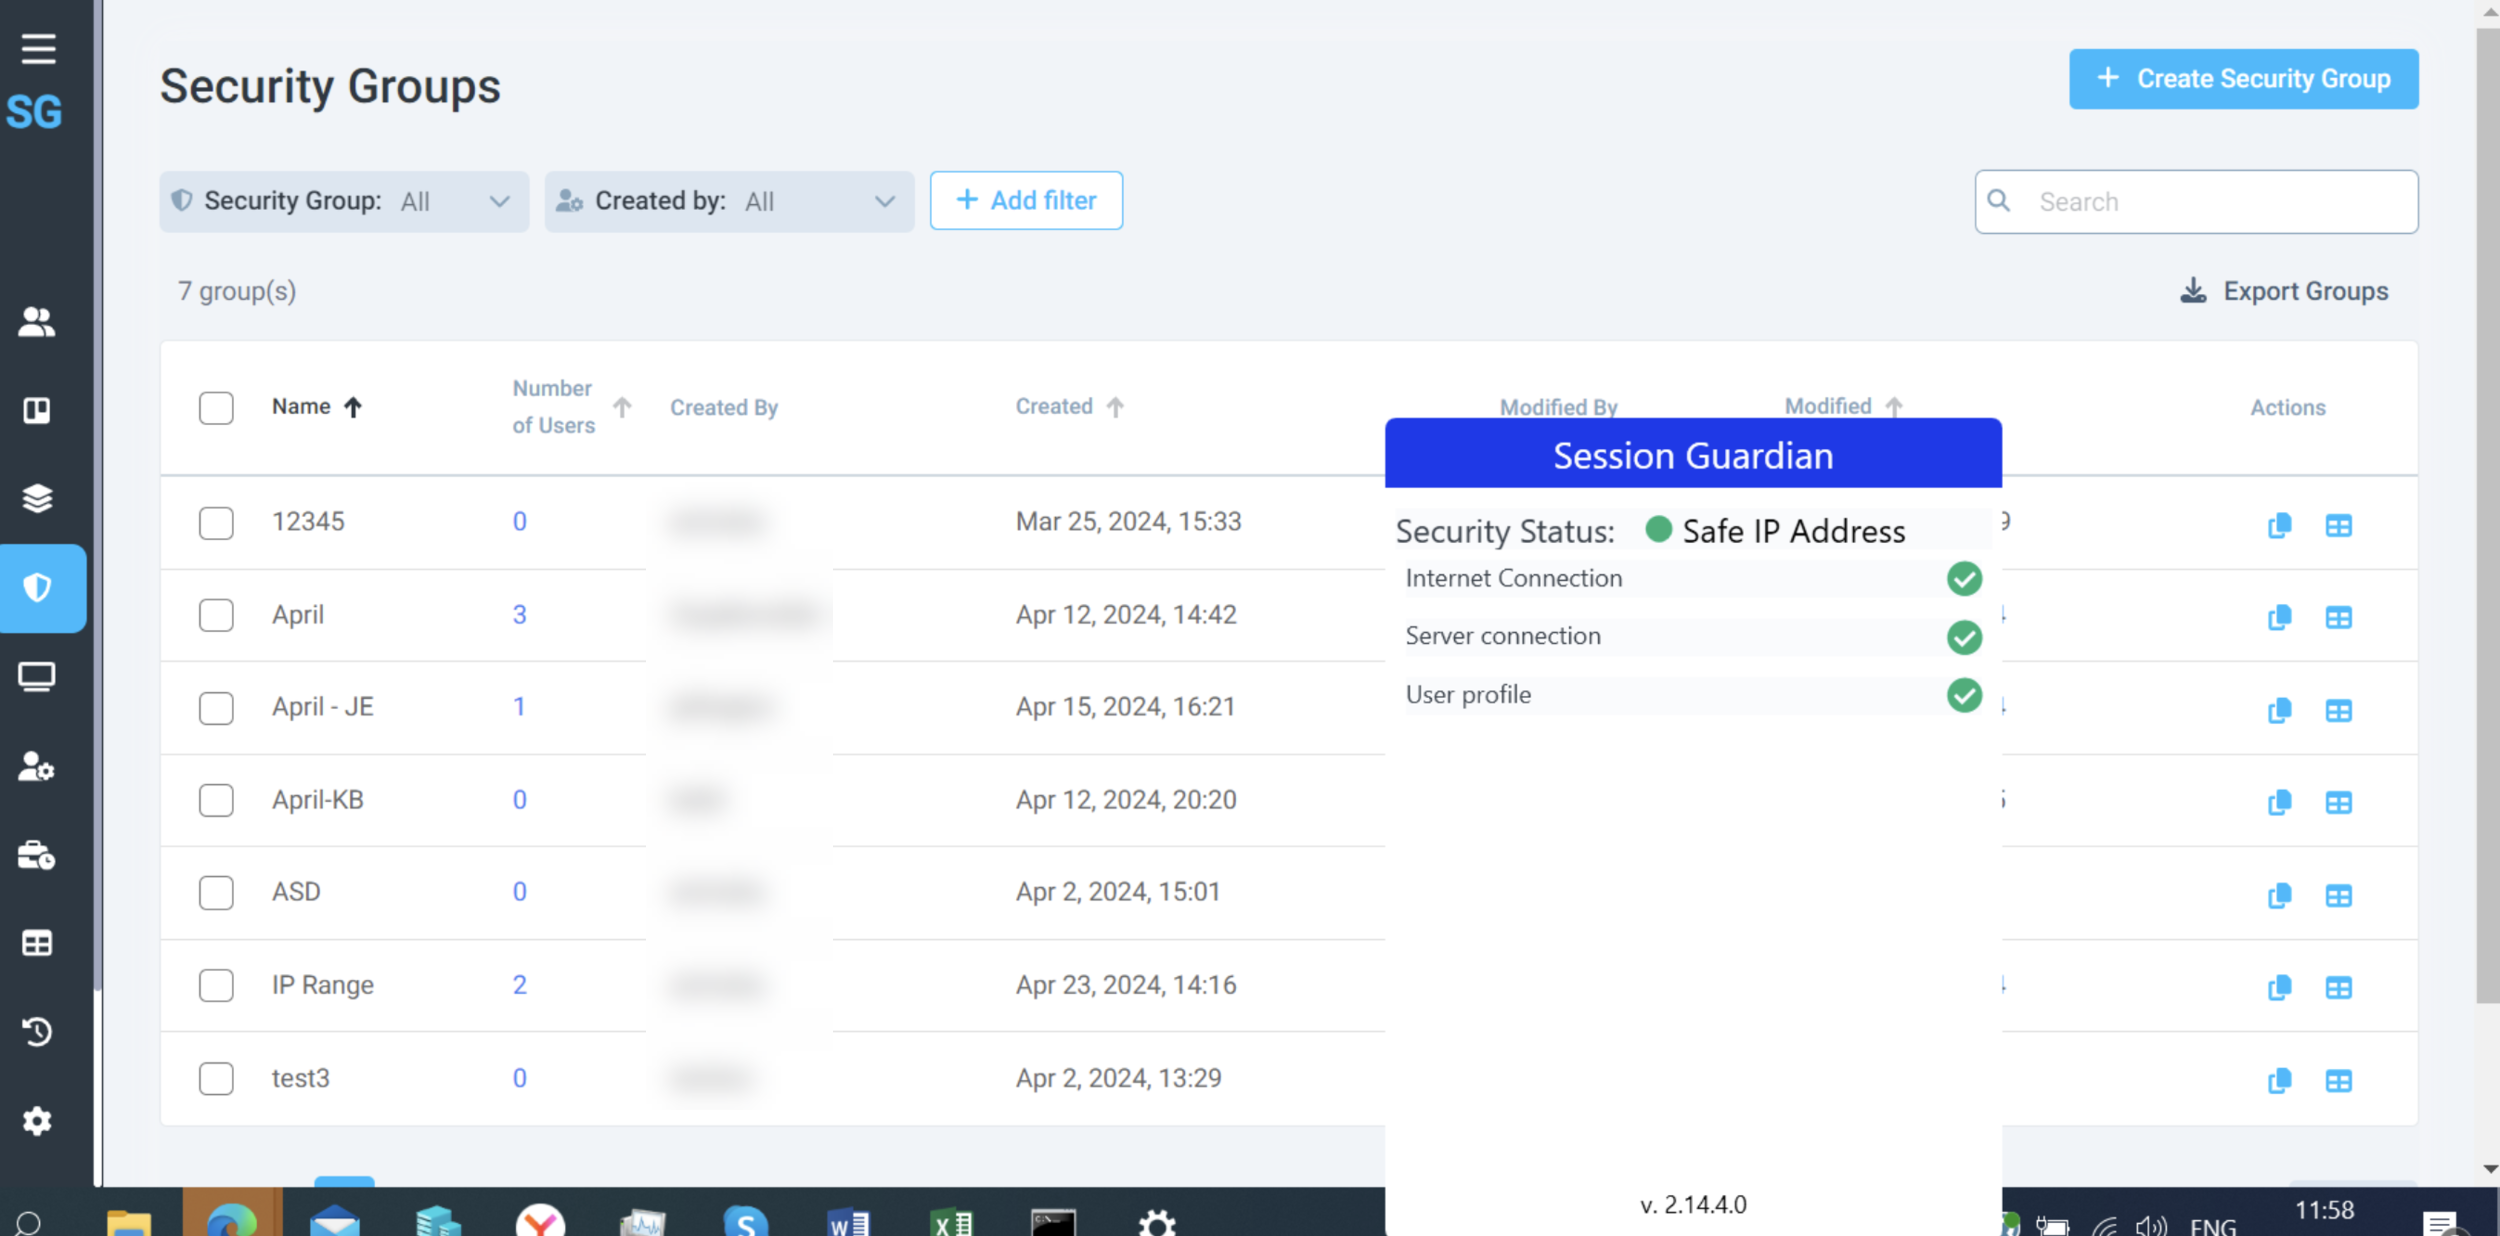
The only checks that remain in place are
Internet Connection
Server Connection
User profile
 |
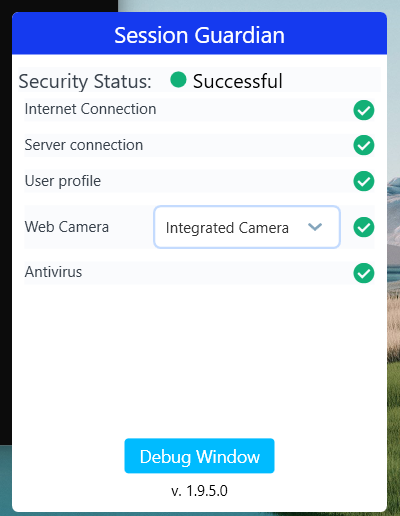
Web Camera selection
To cover cases when users have both a USB camera and an integrated camera on their PC, there is an option to switch the default camera for SG Desktop Service. This will allow redundancy should the default camera cease working.
When the SG Desktop Service is running, go to the System tray > open Hidden Apps > find the SessionGuardian icon. Click on it.
Once you click on it, you’ll see a list of all checks.
Next to Web Camera you’ll see a dropdown. It shows which web camera device, if there is more than one available, is selected by default.
If you’d like to switch to a different camera, simply click on the dropdown and select the option you prefer.
 |
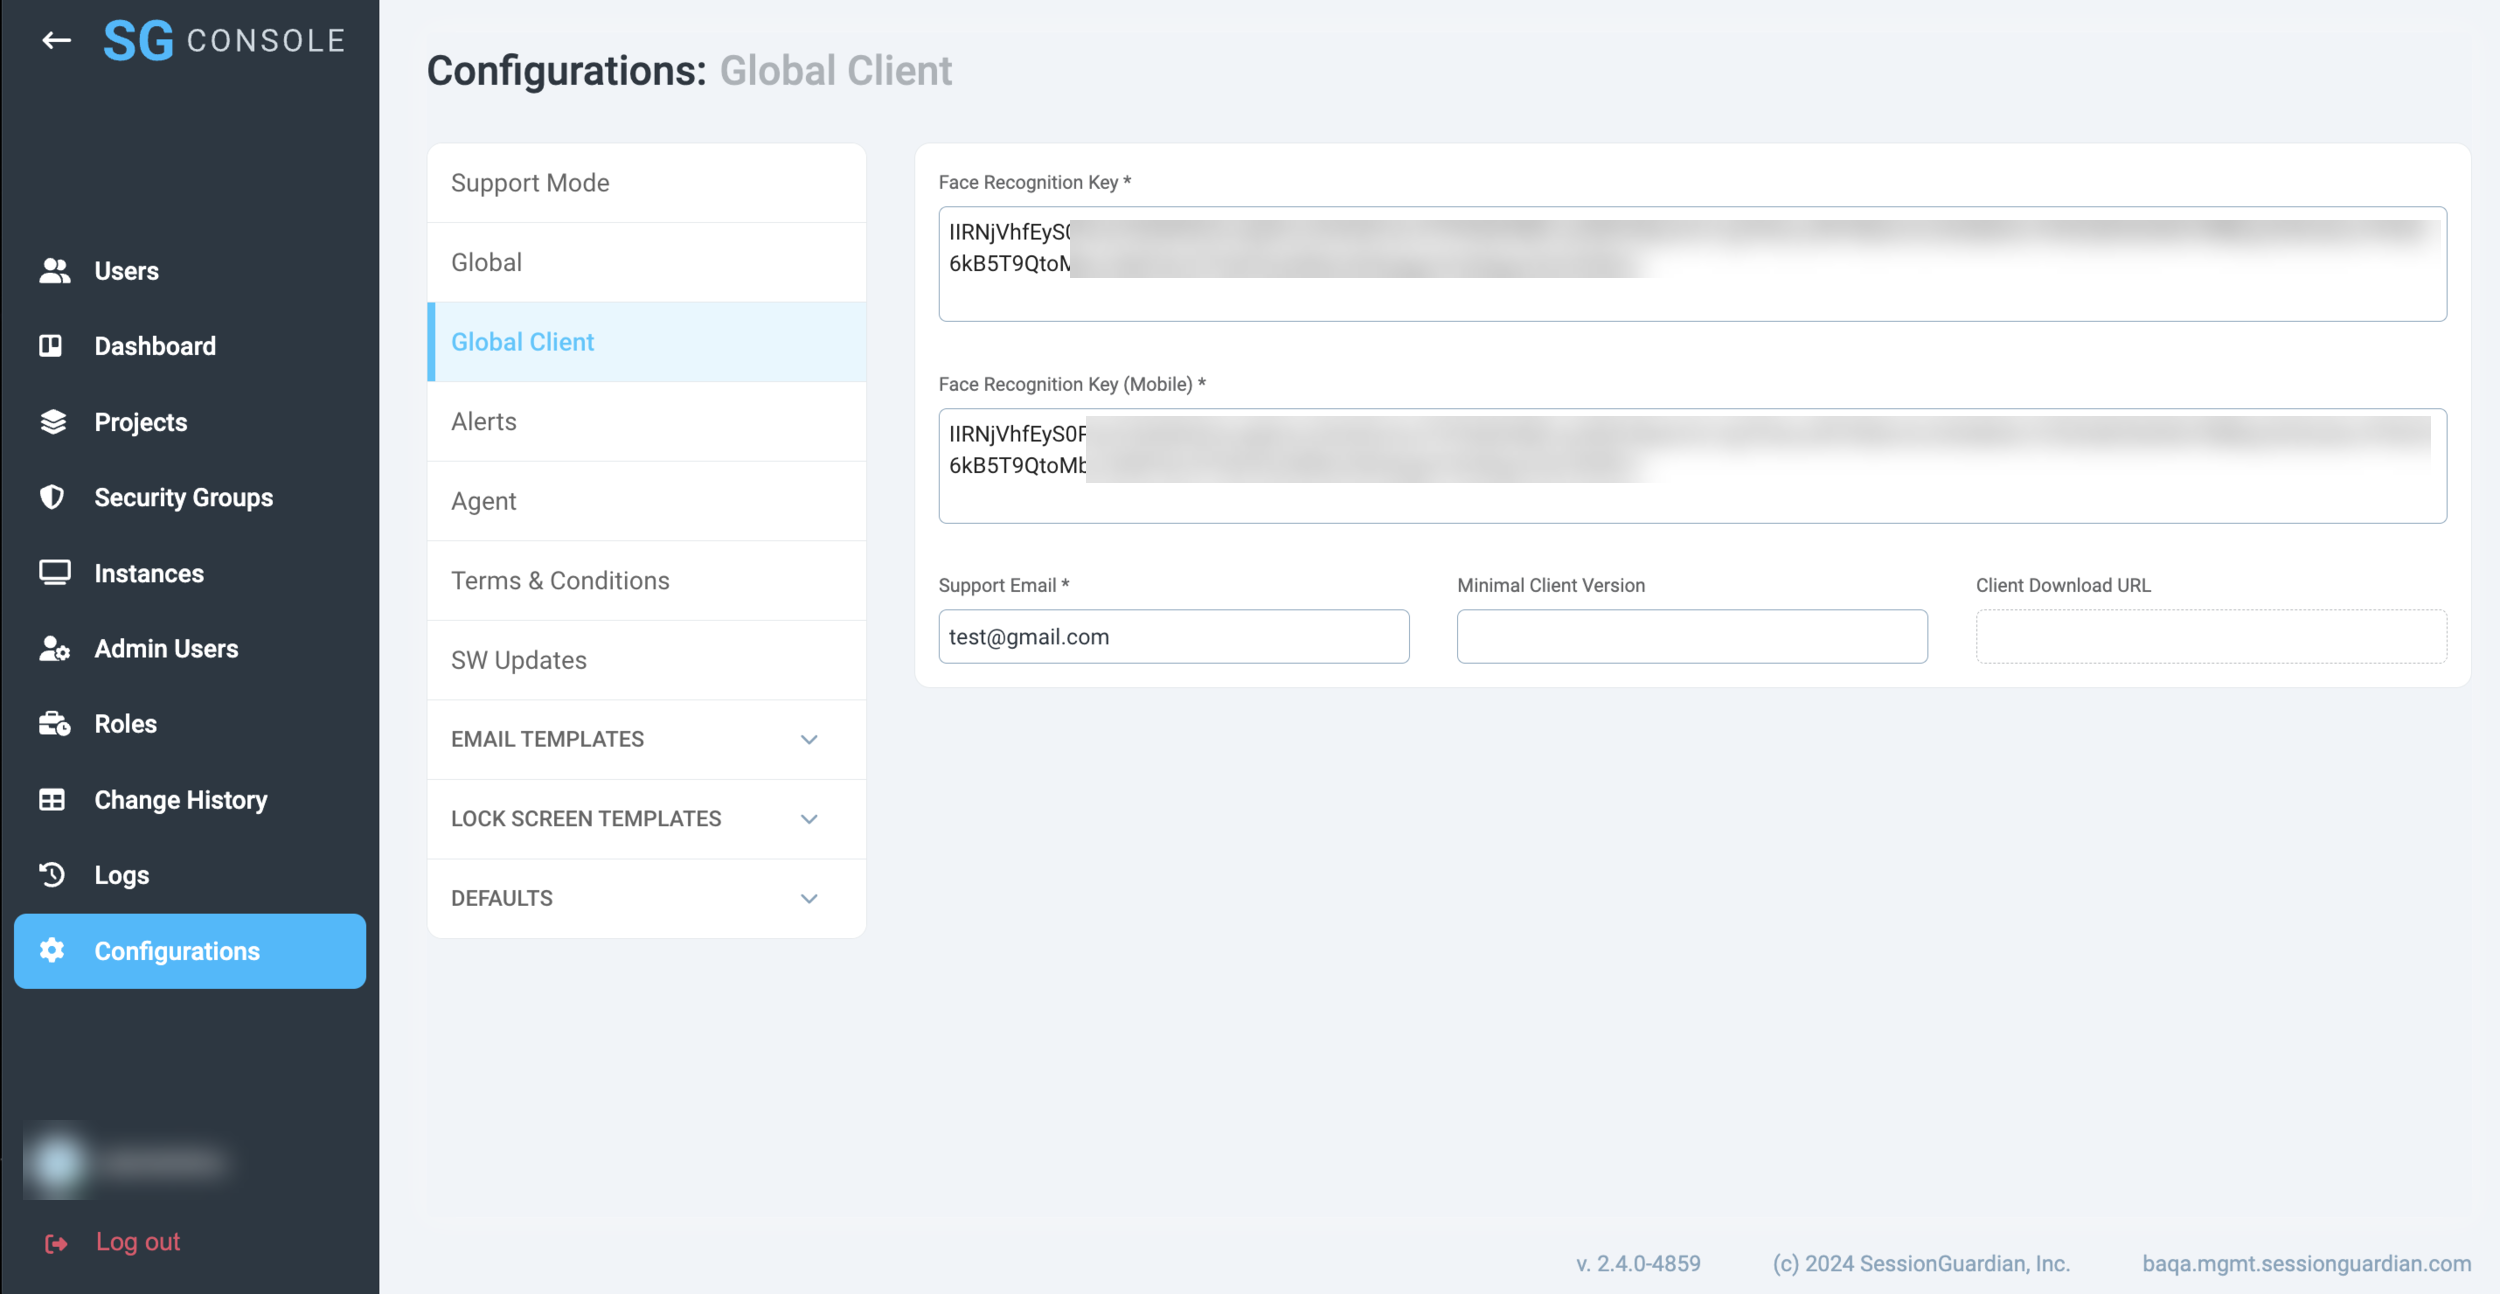
Face Recognition Key configuration
One of most important updates we have in SG Console is the ability to configure the Face Detection Key.
This Key is responsible for proper connection to the software that is responsible for face detection, recognition, and monitoring.
Please ensure you copy the key into both fields, Face Detection Key and Face Detection Key (Mobile).
 |
This also means that you can remove the Face Detection Key from the following places:
Secret Manager
Task Definition
CodeBuild (credential initializer)
Auto-update functionality
Auto-update feature is now available in the new version of SG Desktop Service.
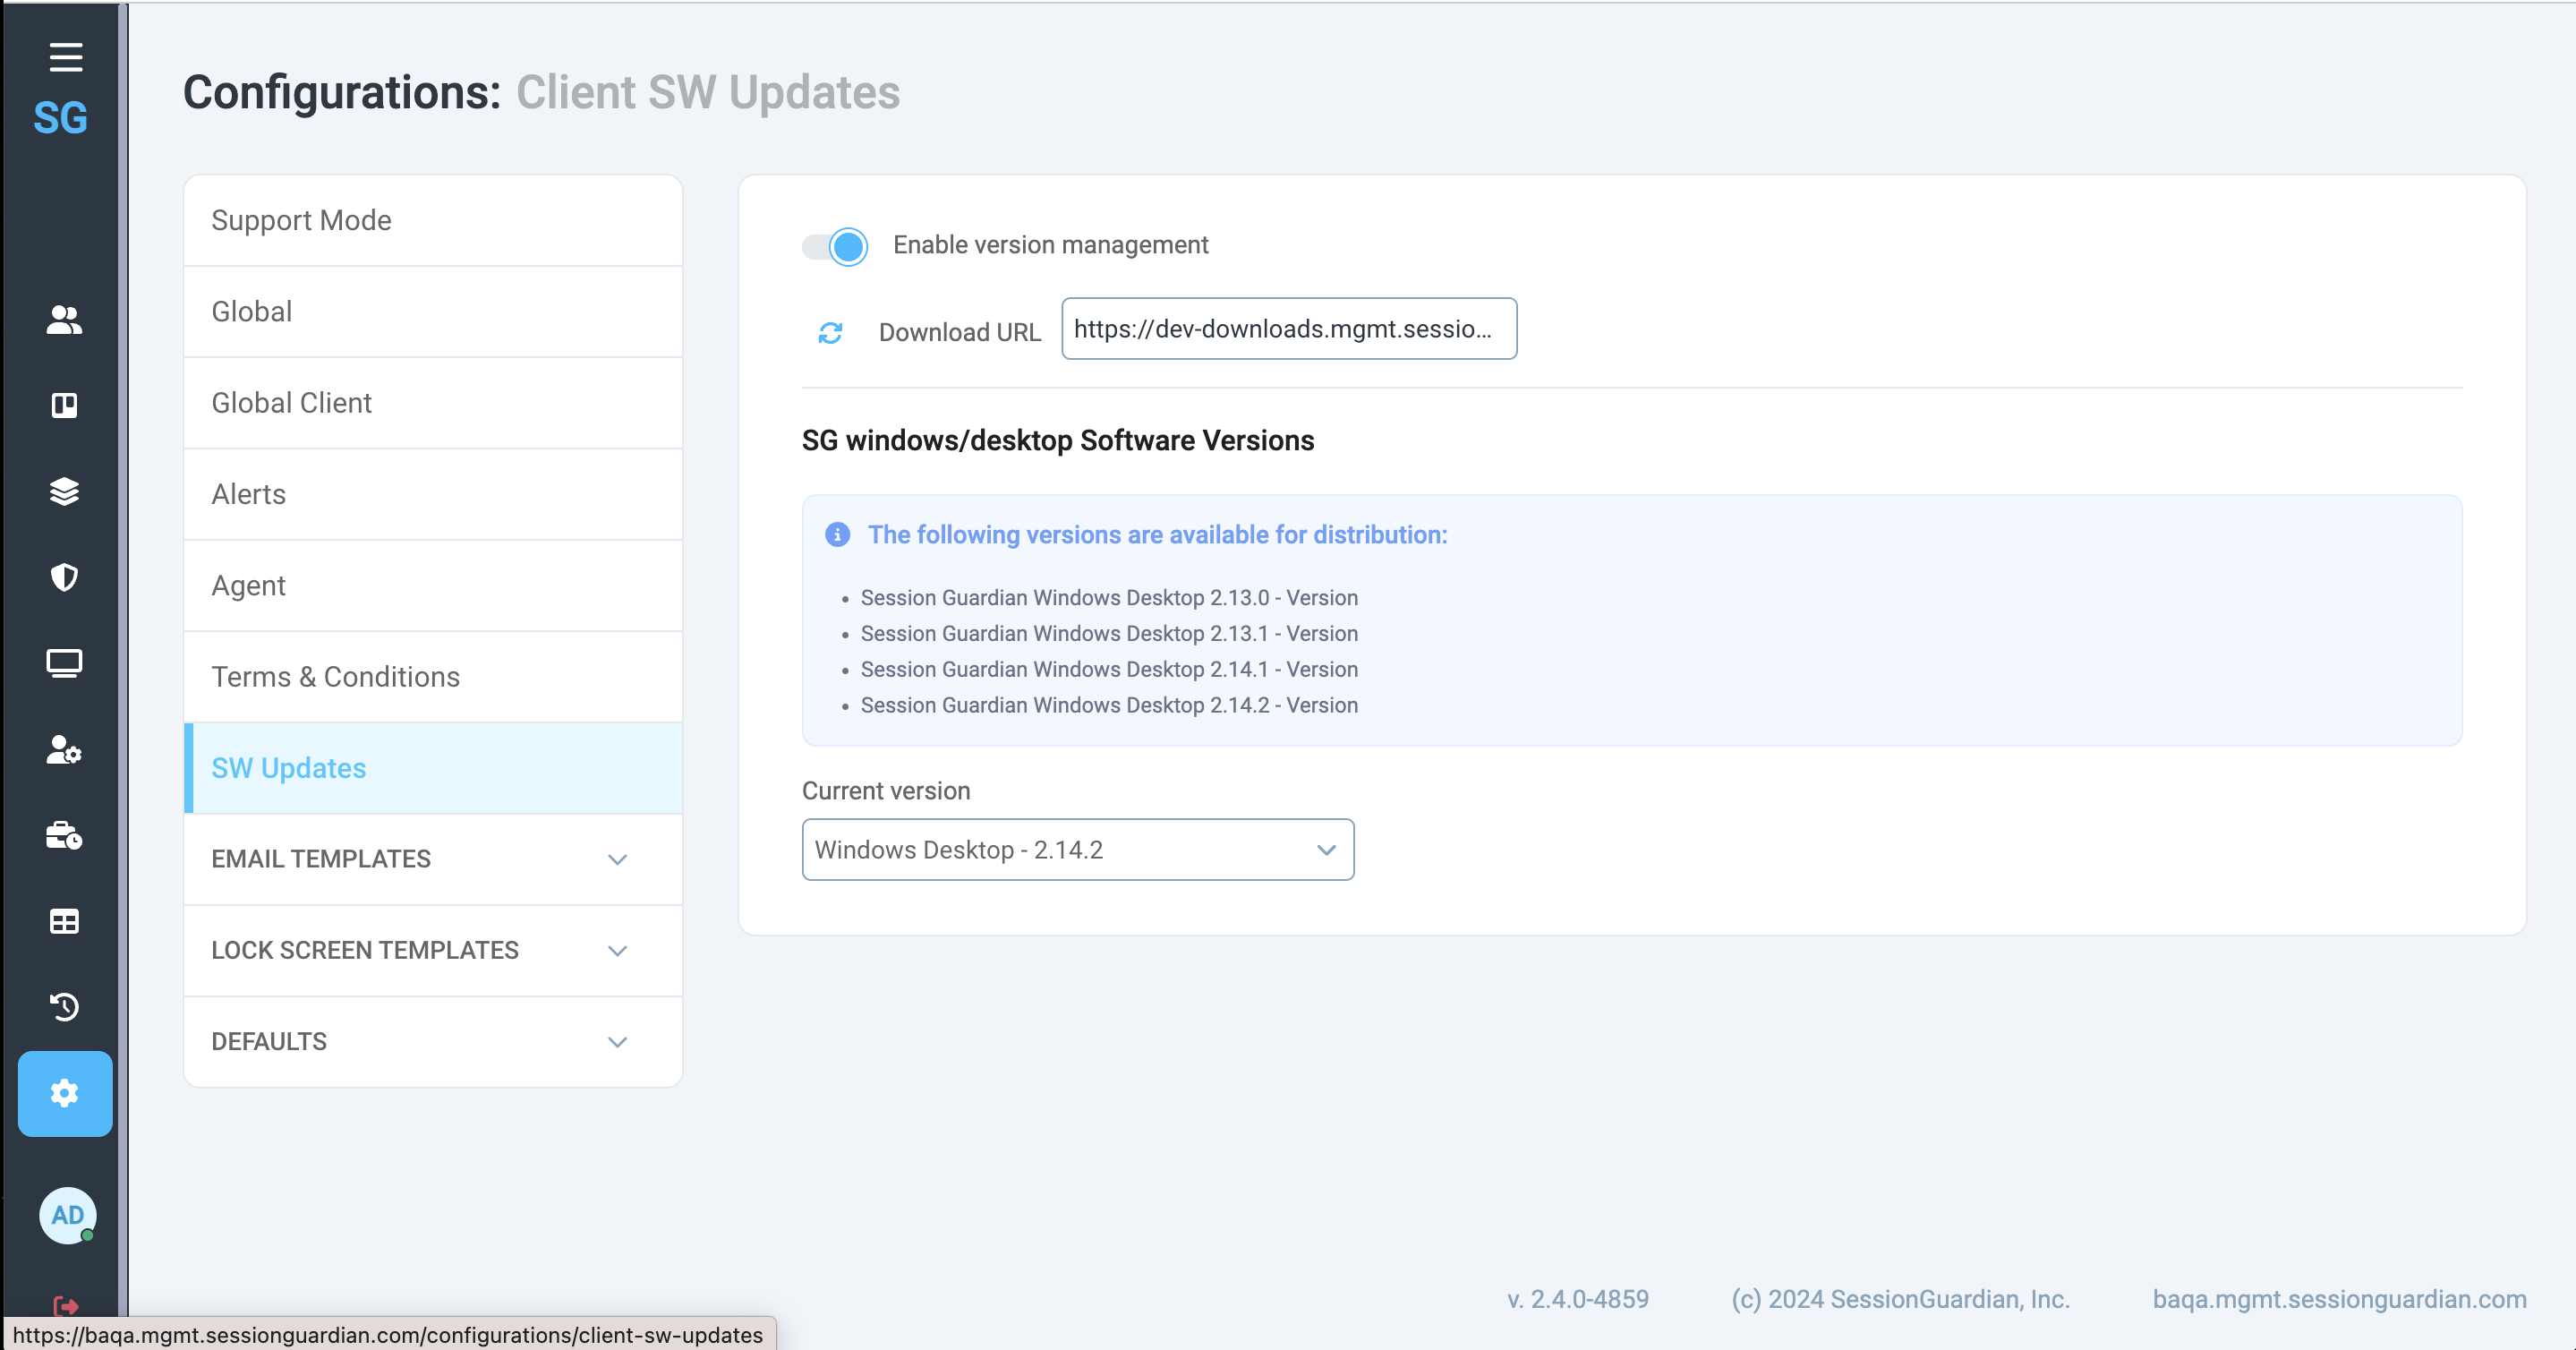
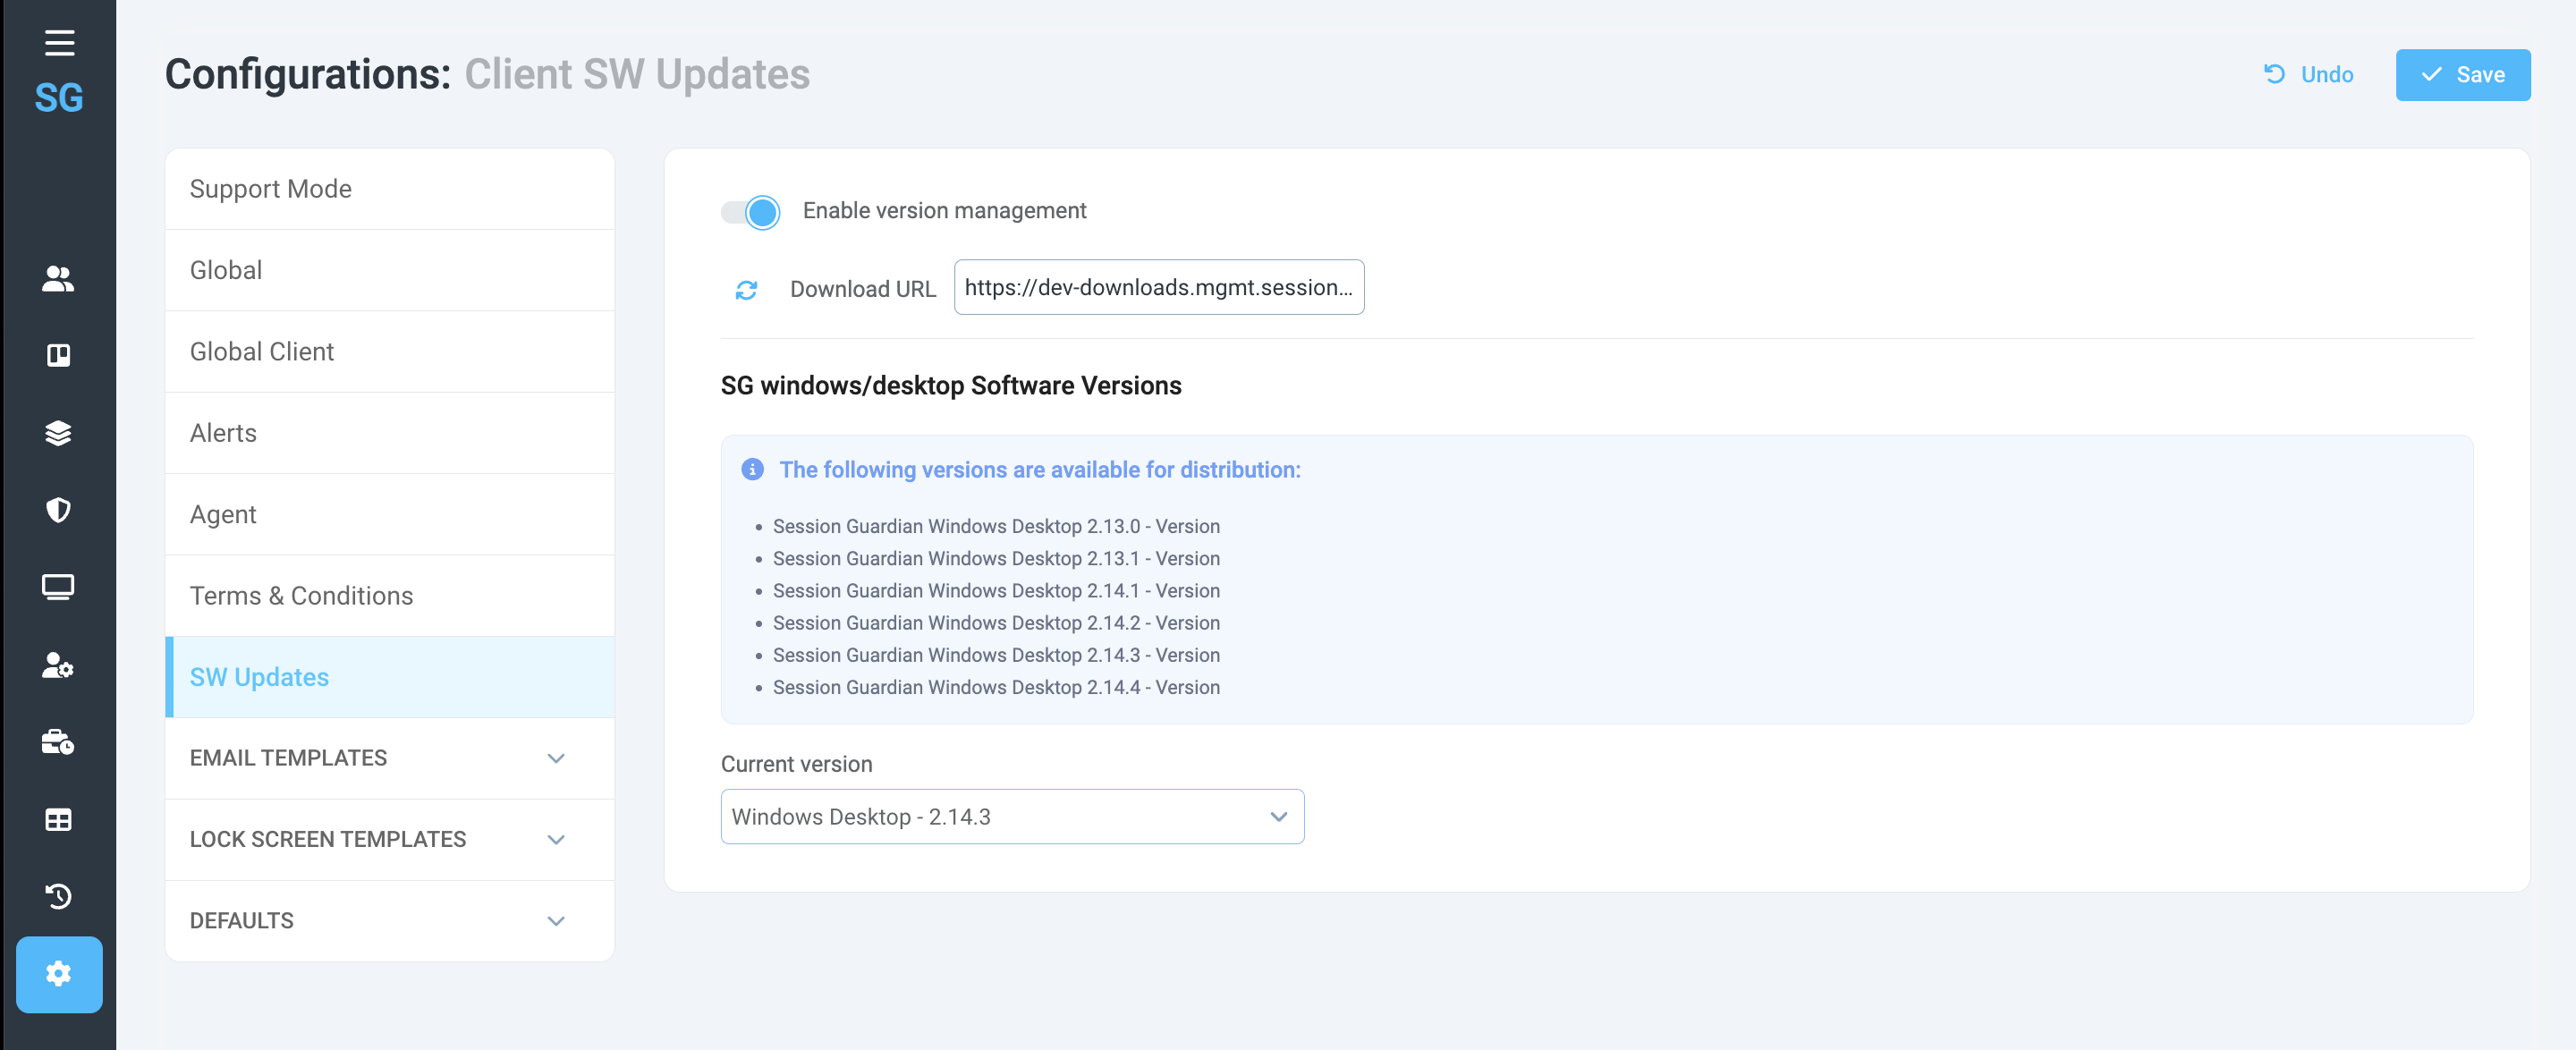
Please go to SG Console > Configurations > SW Updates
Enable version management (switch the toggle).
Once enabled, the auto-update is forced across all end-users and it is a global configuration.
In the Download URL link paste the path where production builds of the SG Desktop Service are located.
Example of Download URL from SessionGuardian’s development environment
Once the link is added, click the refresh icon to pull all available production versions.
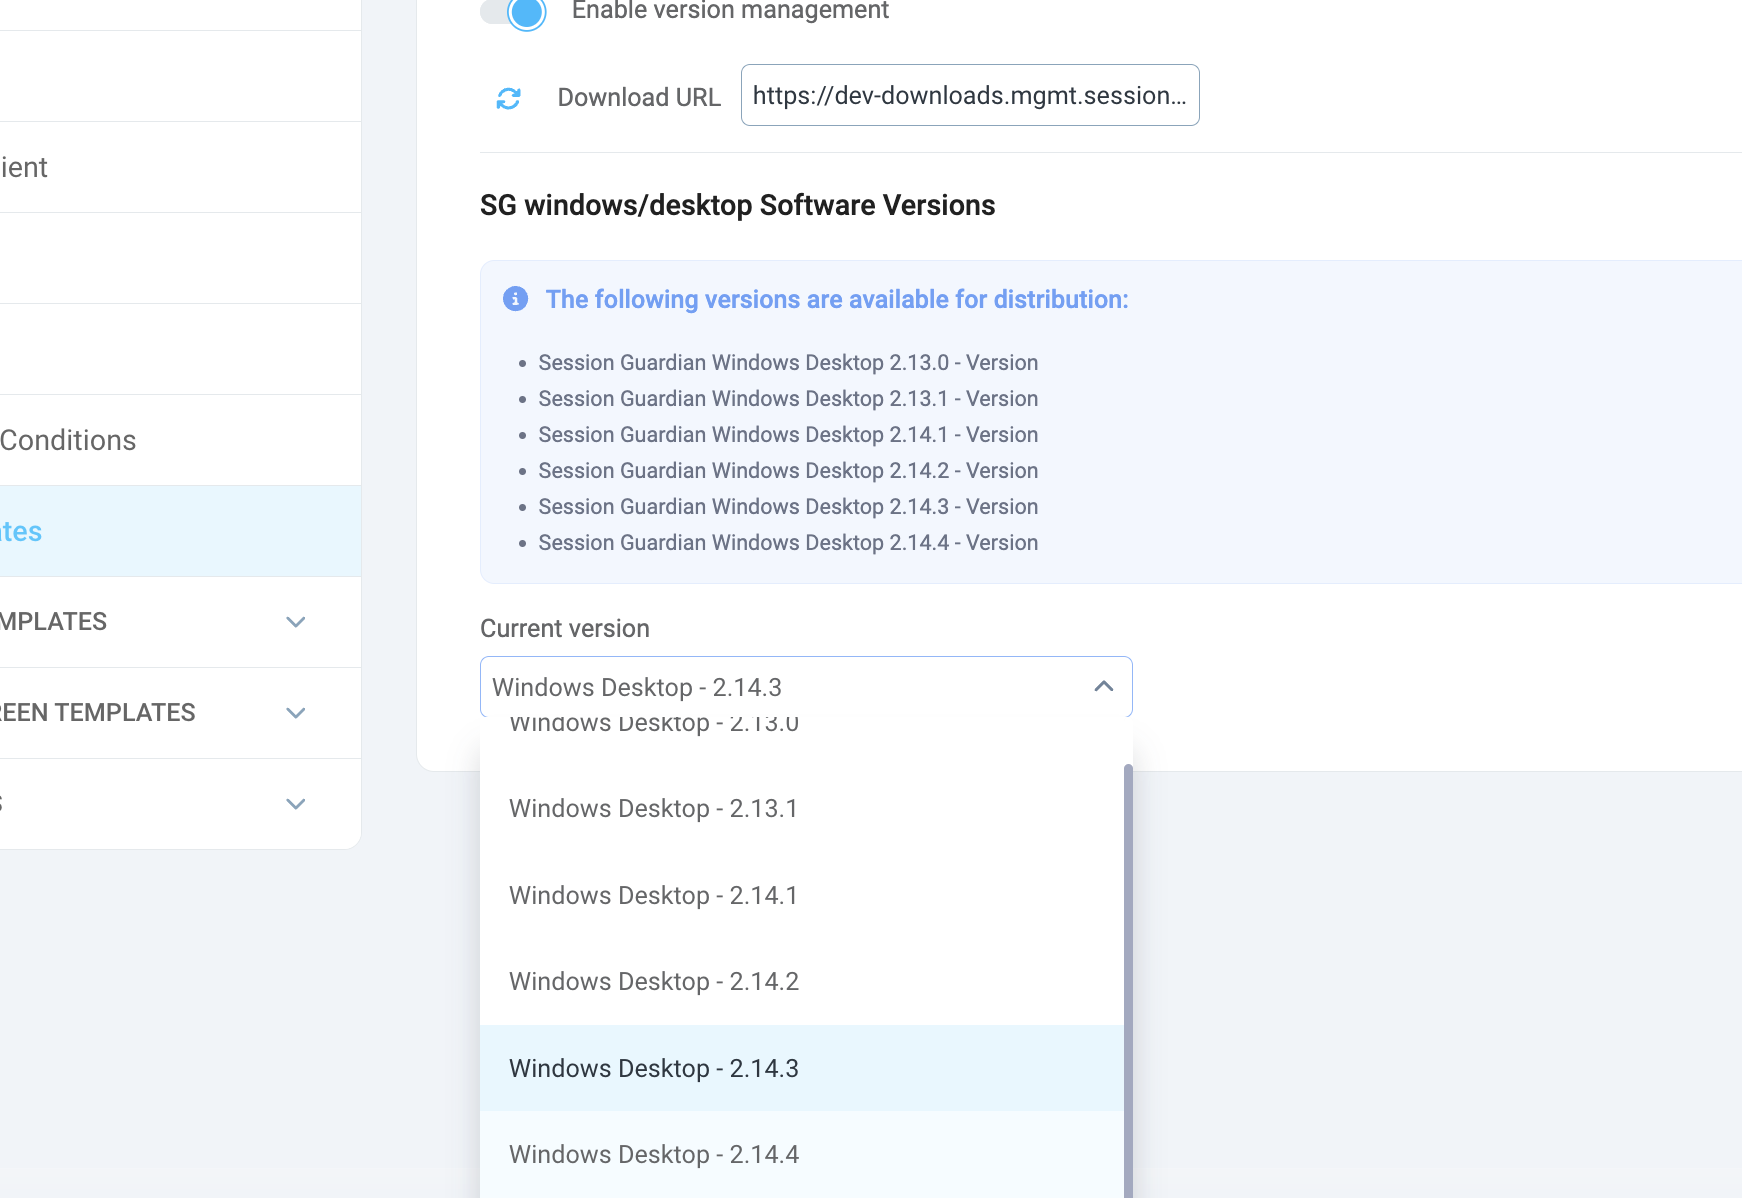
Example of SessionGuardian’s development build available for Auto-update
In the Current version field select the version which should be downloaded to and installed on each of the end-users’ PCs on their next session launch.
Save the changes made on the page by clicking ‘Save’.
Please note: once a newer version is selected, the end-users won’t have the ability to stop, pause or intervene with the upgrade process. The new version will be downloaded and installed.
From the end-user’s perspective, the process will be seamless.
They will receive a notification that a new version is available and will be downloaded.
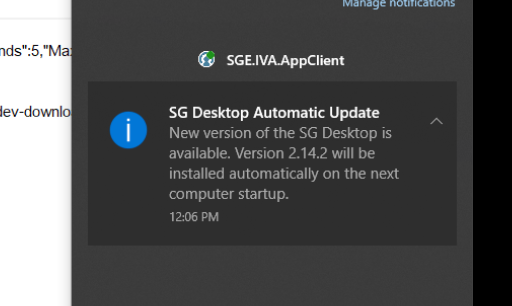 |
When the users lock and unlock their Windows after receiving the notification, that is when the application will start to install.