Add SAML service provider
Add a SAML service provider (SP) application to enable single sign-on for enterprise applications.
When you add a SAML application, SecureAuth creates a client that defines how authentication and access policies apply to that application. After a user signs in, SecureAuth checks their identity and any assigned user policy before sending a SAML assertion to the application.
Use cases
Use SAML service providers to connect enterprise applications that require SAML-based single sign-on:
Internal business systems
Protect HR platforms, finance tools, or organizational applications. Control access by role, group, or department.
Partner-facing portals
Secure applications used by engineers, field service teams, or external partners. Pass relevant identity information through SAML attribute mappings.
Clinical and administrative systems
Protect Electronic Health Record (EHR) platforms, shift management tools, and internal portals. Authenticate doctors, nurses, and administrators with role-based access.
Before you begin
You'll need:
- The SAML metadata from the application (via URL, XML file, or manual settings)
- A list of SAML attributes the application expects (such as email or username)
- (Optional) A user policy if you want to restrict access to certain users or groups
📌 Example application
This guide uses Bluehawk as an example of a fictional SAML service provider application.
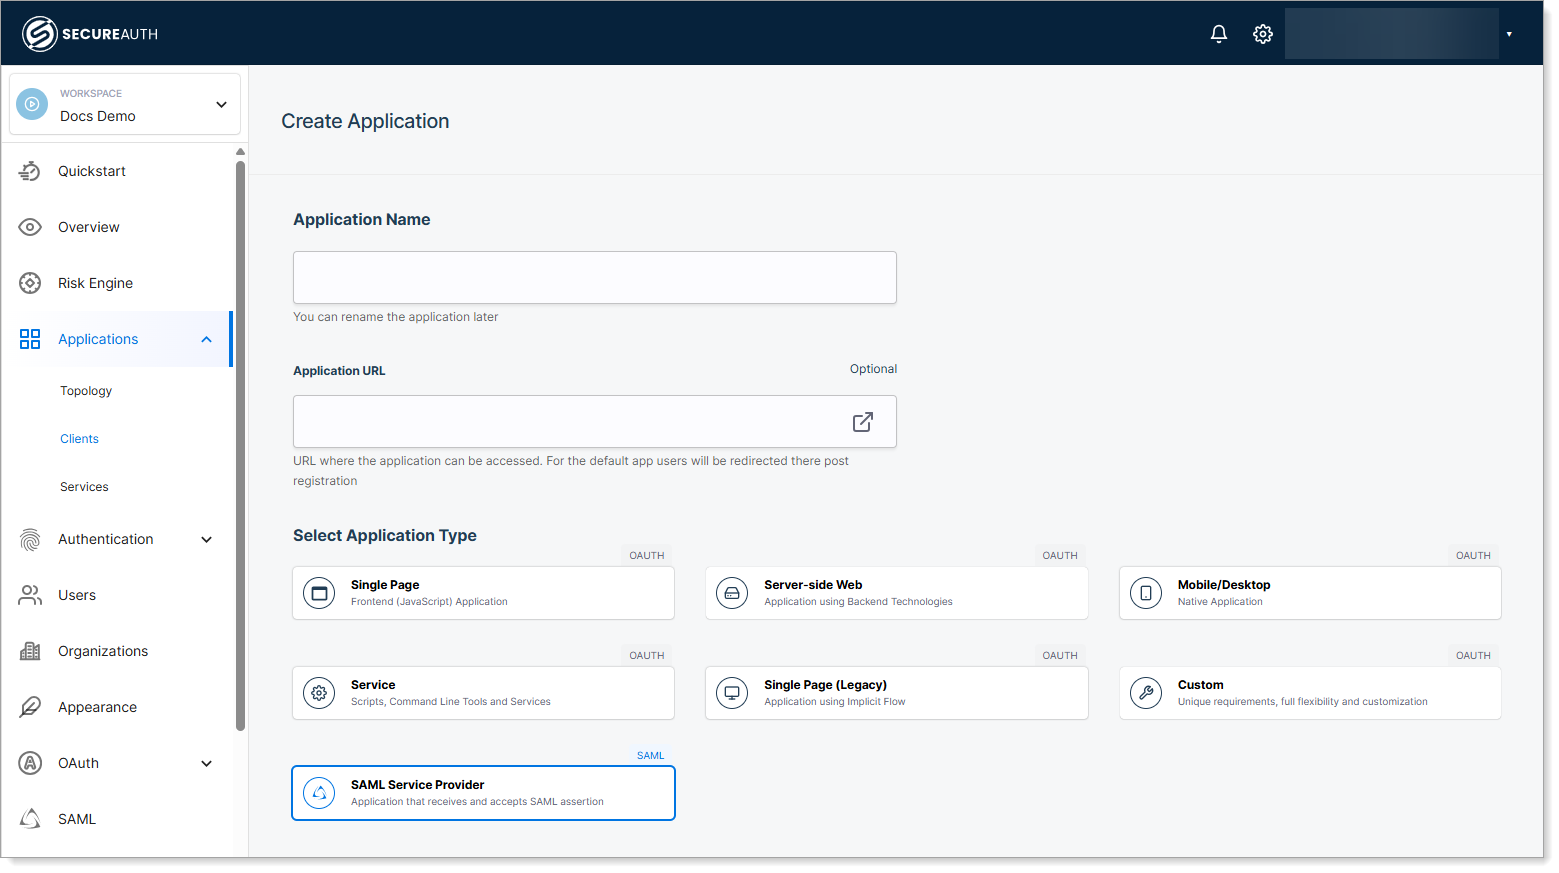
Step 1: Create the application
-
In your workspace, go to Applications > Clients > Create Client.
-
Enter a name for the application.
-
(Optional) Enter an application URL.
The application URL links to the application's login page. You can use this to launch the application directly from SecureAuth.
For example, enter
https://outlook.microsoft.comto enable direct access to Outlook through SecureAuth.noteLeaving the Application URL field blank does not affect SAML authentication. Users can still go directly to the application, which will redirect to SecureAuth for login.
-
Select SAML Service Provider as the application type.
-
Click Create.
Step 2: Configure application details
On the Overview tab, review and configure the application settings.
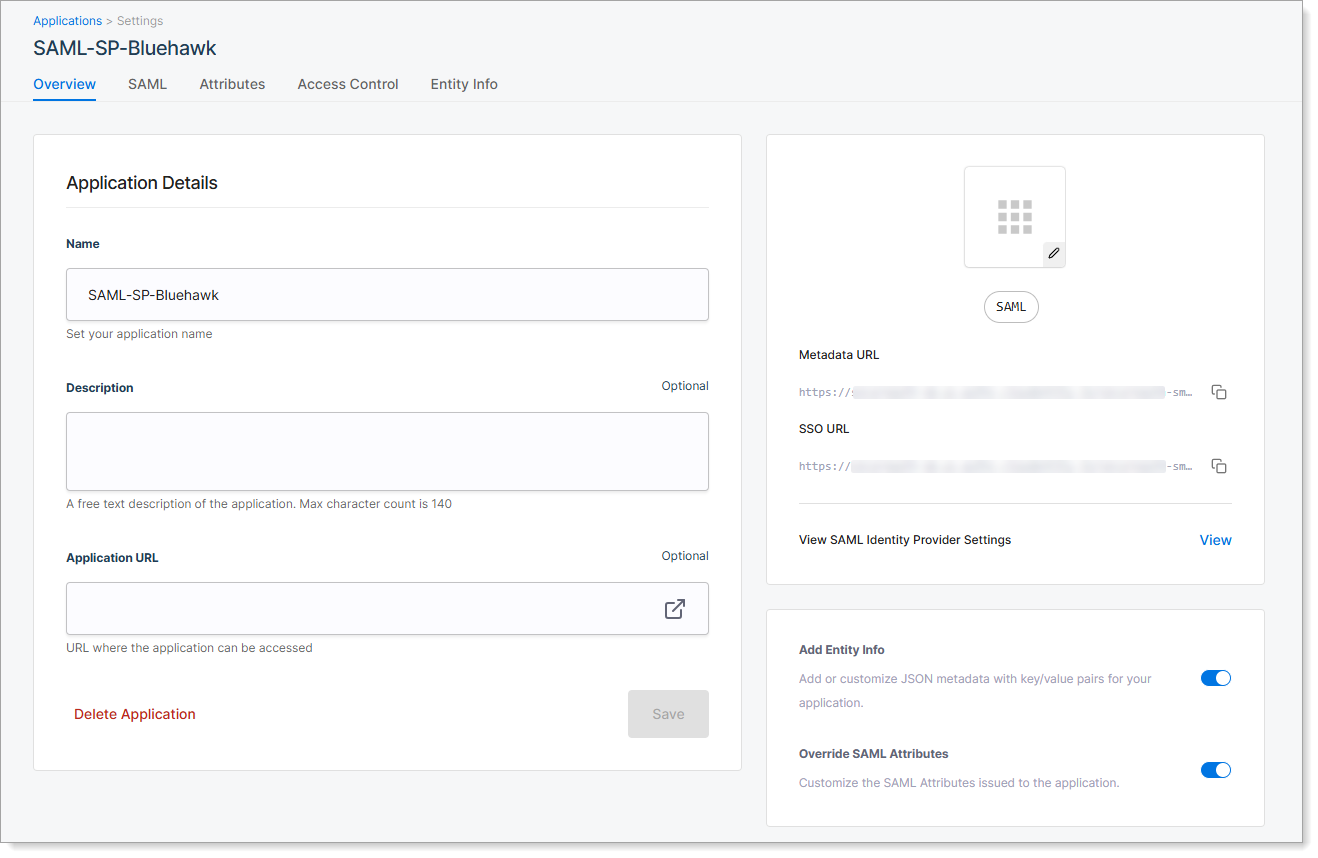
| Setting | Description |
|---|---|
| Application Name | Name shown in SecureAuth for this application. |
| Description | Optional summary to help identify the application. |
| Application URL | Optional URL of the application's login page. Used for launching the application from SecureAuth. |
| Add Entity Info | Turn on to define custom metadata for the application. Enables the Entity Info tab. |
| Override SAML Attributes | Turn on to define custom SAML attributes for the application. Enables the Attributes tab. |
Step 3: Add service provider metadata
Go to the SAML tab to define how SecureAuth connects to the service provider application.
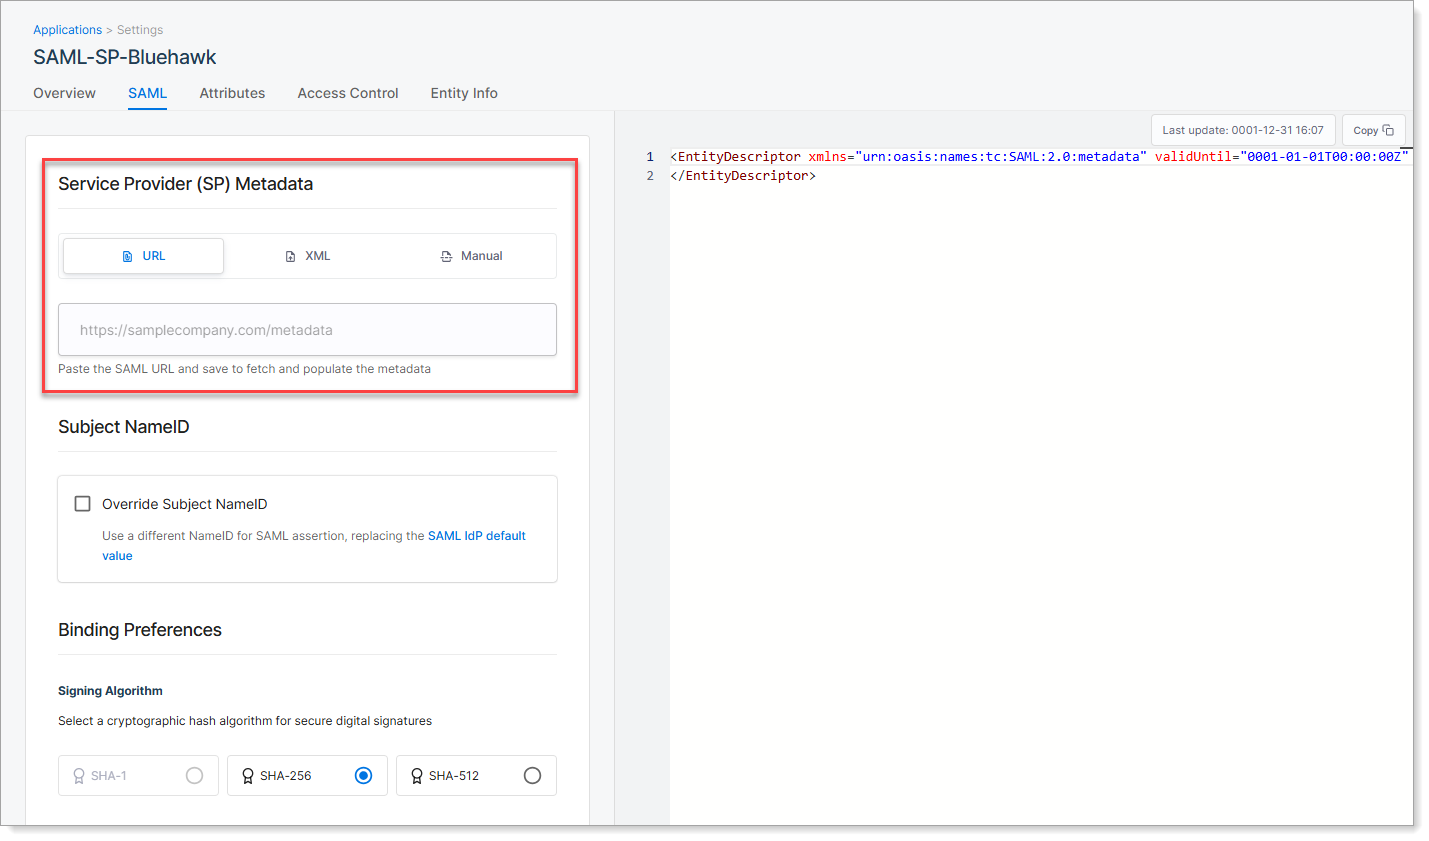
You can provide the service provider metadata in one of three ways:
URL Method (Recommended)
Enter the metadata URL provided by the service provider. SecureAuth automatically imports the required connection settings, such as Entity ID and ACS URL.
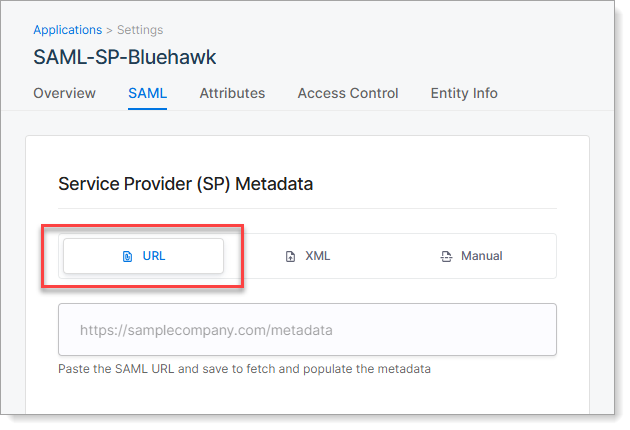
When to use: Your service provider provides a metadata URL endpoint.
XML Method
Upload the metadata XML file provided by the service provider.
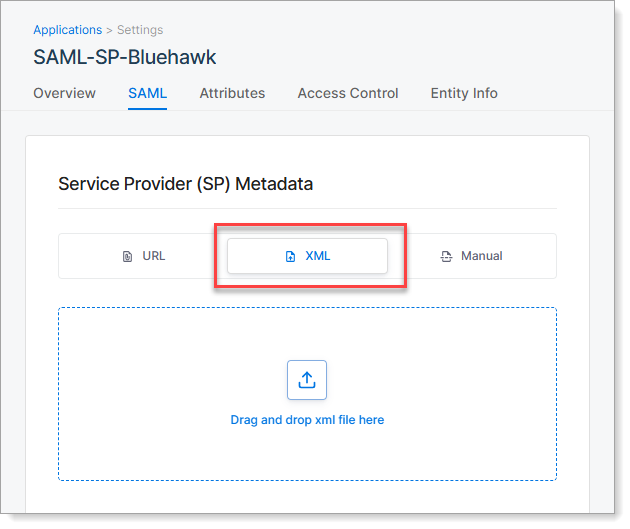
When to use: Your service provider provides a downloadable metadata file but no URL.
Manual Method
Enter connection details manually if no metadata is available.
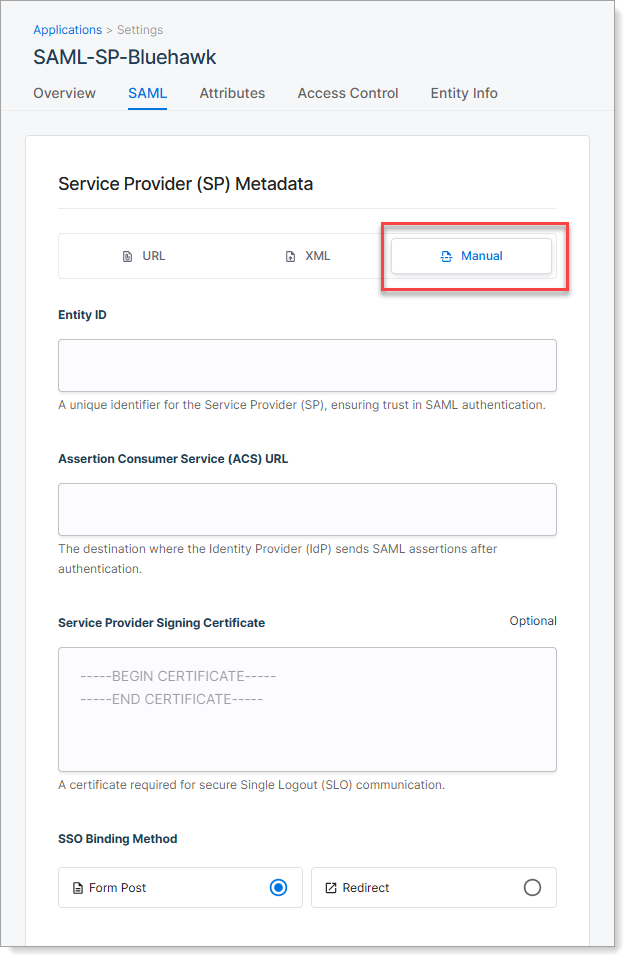
Required settings:
| Setting | Description |
|---|---|
| Entity ID | Unique identifier for the service provider application. Provided by the service provider. |
| ACS URL | Assertion Consumer Service endpoint where SecureAuth sends the SAML assertion after login. |
| Signing Certificate | (Optional) Certificate used by the service provider to validate logout requests or responses. Upload only if required. |
| SSO Binding Method | Choose how the service provider receives SAML messages: - Form Post: Secure and widely supported - Redirect: Uses URL parameters; required by some service providers |
When to use: No metadata URL or file is available from your service provider.
After adding service provider metadata, copy the SAML IdP metadata from SecureAuth and provide it to your service provider administrator. This allows the service provider to trust SecureAuth as the identity provider.
Step 4: Set Subject NameID
The Subject NameID tells the application which identifier to use for user login, such as email or username.
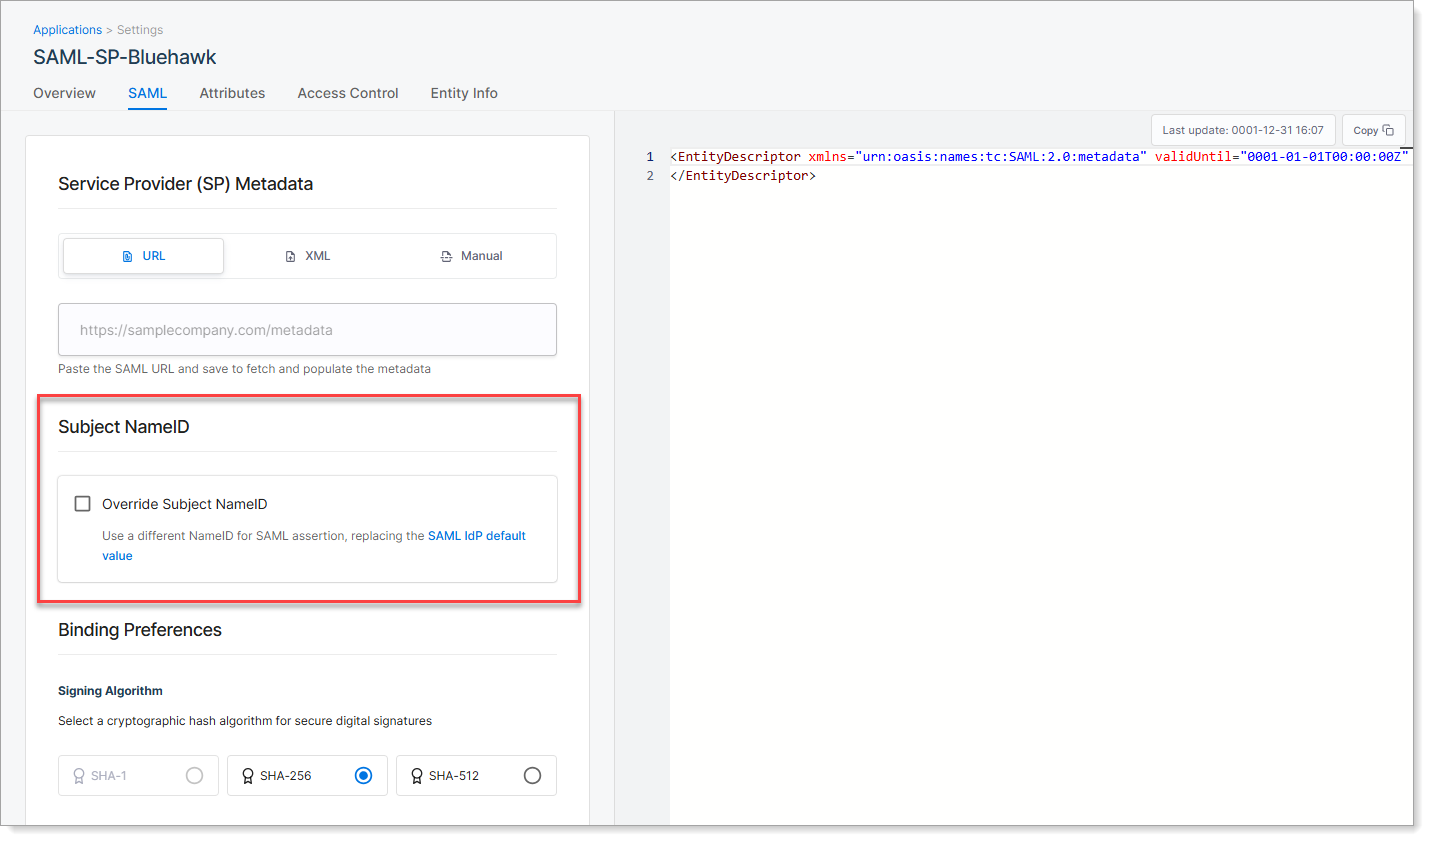
SecureAuth sends this value in the SAML assertion to help the service provider recognize the user.
You can use the default setting from your global SAML configuration, or override it for this specific application.
| Option | Description |
|---|---|
| Use default (leave check box cleared) | SecureAuth uses the NameID value defined in your global SAML IdP Settings. |
| Override Subject NameID | Select this check box to define a different identifier for this application. Choose a NameID format and the attribute that supplies the value (such as email or userID). |
Some service providers require a specific NameID format or attribute. Check the service provider documentation or contact the vendor if unsure.
Step 5: Choose signing algorithm
On the SAML tab, scroll to the Binding Preferences section.
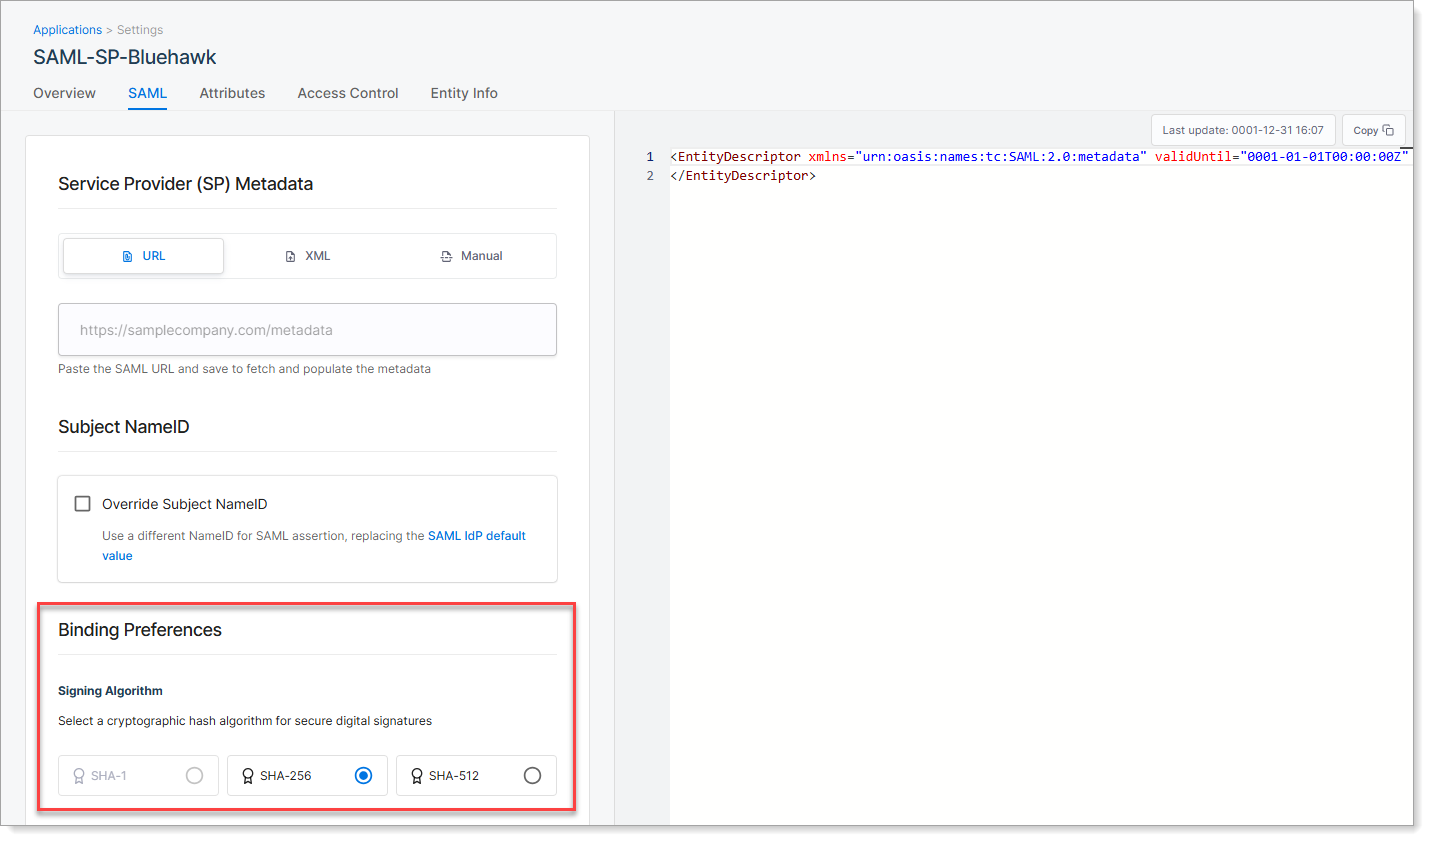
Select the signing algorithm SecureAuth uses to sign the SAML assertion. This digital signature ensures the message is trusted and has not been altered.
| Algorithm | Description |
|---|---|
| SHA-1 | Not recommended. Considered insecure and deprecated. |
| SHA-256 | Recommended. Provides strong security and is widely supported. |
| SHA-512 | Stronger than SHA-256. Use only if the service provider explicitly supports it. |
Step 6: Set access control
Go to the Access Control tab to control which users can access the application through SecureAuth.
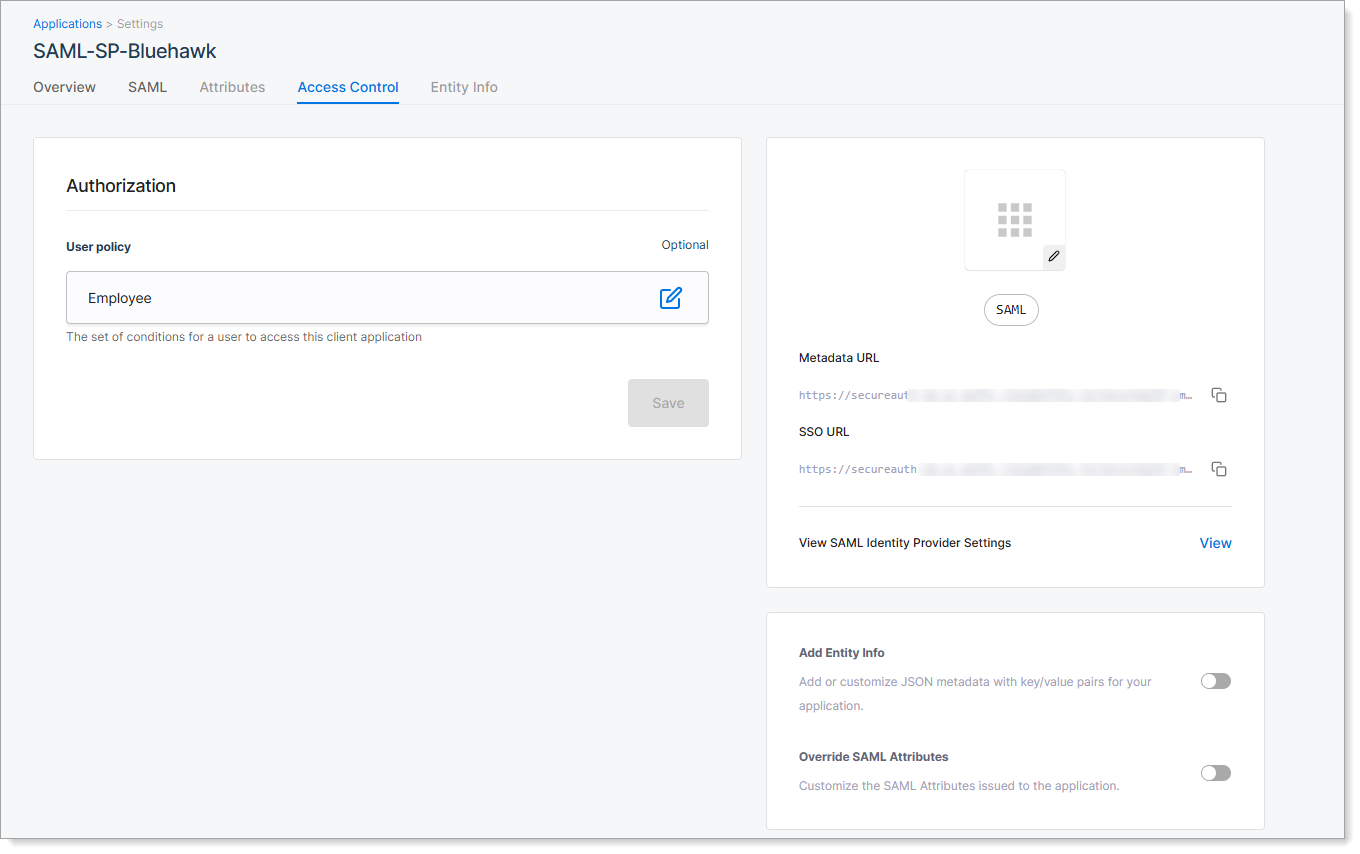
By default, access is unrestricted. You can assign a user policy to apply rules based on user groups, attributes, or other conditions.
| Option | Description |
|---|---|
| Unrestricted | All users who authenticate through SecureAuth can access the application. |
| Select a User Policy | Choose a predefined user policy to restrict access. Only users who meet the policy criteria can use the application. |
User policies are managed separately in SecureAuth. To create or edit policies, go to Authorization > Policies in your workspace.
Step 7: Save and test
-
Click Save to create the SAML service provider application.
-
Copy the SAML IdP metadata from the SAML tab and provide it to your service provider administrator.
-
Test the integration:
- Navigate to your service provider application.
- Attempt to log in.
- Verify you're redirected to SecureAuth for authentication.
- Confirm successful login and access to the application.
Troubleshooting
Common issues
| Issue | Symptom | Solution |
|---|---|---|
| Metadata import fails | Error when adding service provider metadata URL | Verify the URL is accessible and returns valid SAML metadata. |
| Authentication loop | User redirected repeatedly between application and SecureAuth | Check that Entity ID and ACS URL match between service provider and SecureAuth configurations. |
| Access denied | User successfully authenticates but cannot access application | Review user policy settings and ensure the user meets policy criteria. |