Group-based application access in user portal
SecureAuth CIAM lets you control which applications users see in the User Portal based on their group membership. Use group-based access to secure sensitive apps and simplify the user experience. For example, IT Admins can access admin tools, while Employees see only business apps. This targeted visibility helps protect resources and simplifies application visibility management in the portal.
Before you begin
-
Make sure you have an Identity Pool set up with defined groups
-
When creating an authorization policy, you must select an Identity Pool and a group within that pool
-
Set up your applications in the Applications section of SecureAuth CIAM
Create an authorization policy
Authorization policies define who can access which applications. These policies control application visibility in the User Portal based on group membership.
For example, if you have two groups "” IT Admins and Employees "” you can create group-specific policies to control which organization applications are visible to users in each group.
To create a group-specific policy:
-
Select a Workspace.
-
Go to Authorization > Policies, then click + CREATE POLICY.
-
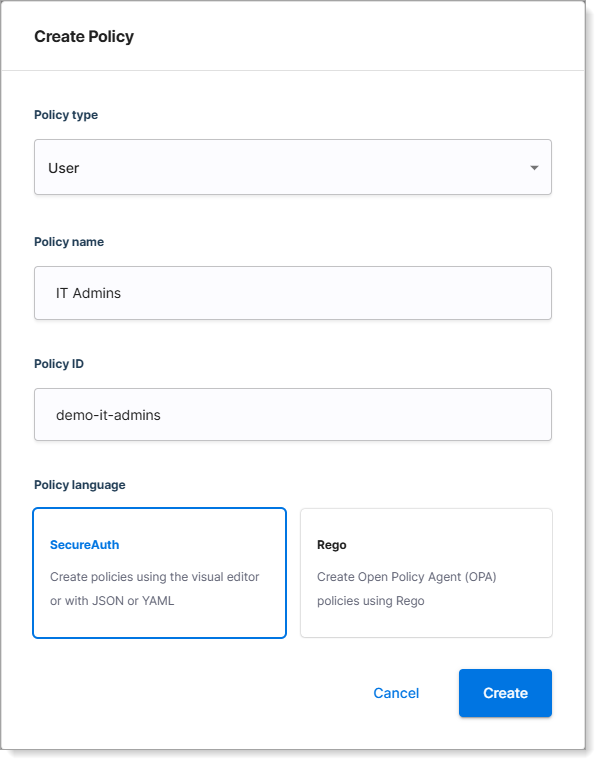
On the Create Policy form, configure the following fields:
-
Policy Type – Set to User.
This applies the policy based on user identity and group membership. -
Policy Name – Enter a name that identifies the group.
For example, IT Admins or Employees -
Policy ID – Automatically generated.
Edit if needed to follow your naming conventions. -
Policy Language – Select SecureAuthto use the visual editor or JSON/YAML format.
-
-
Click Create.
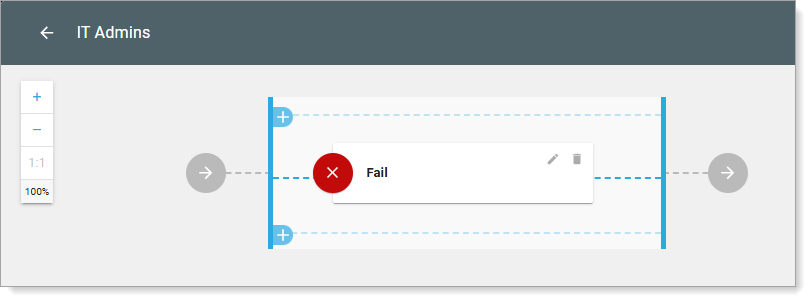
Result: The policy flow page displays.
Build the policy flow
-
Delete the default Fail validator.

-
Select + ADD VALIDATOR, then choose Conditional. |
 |
| 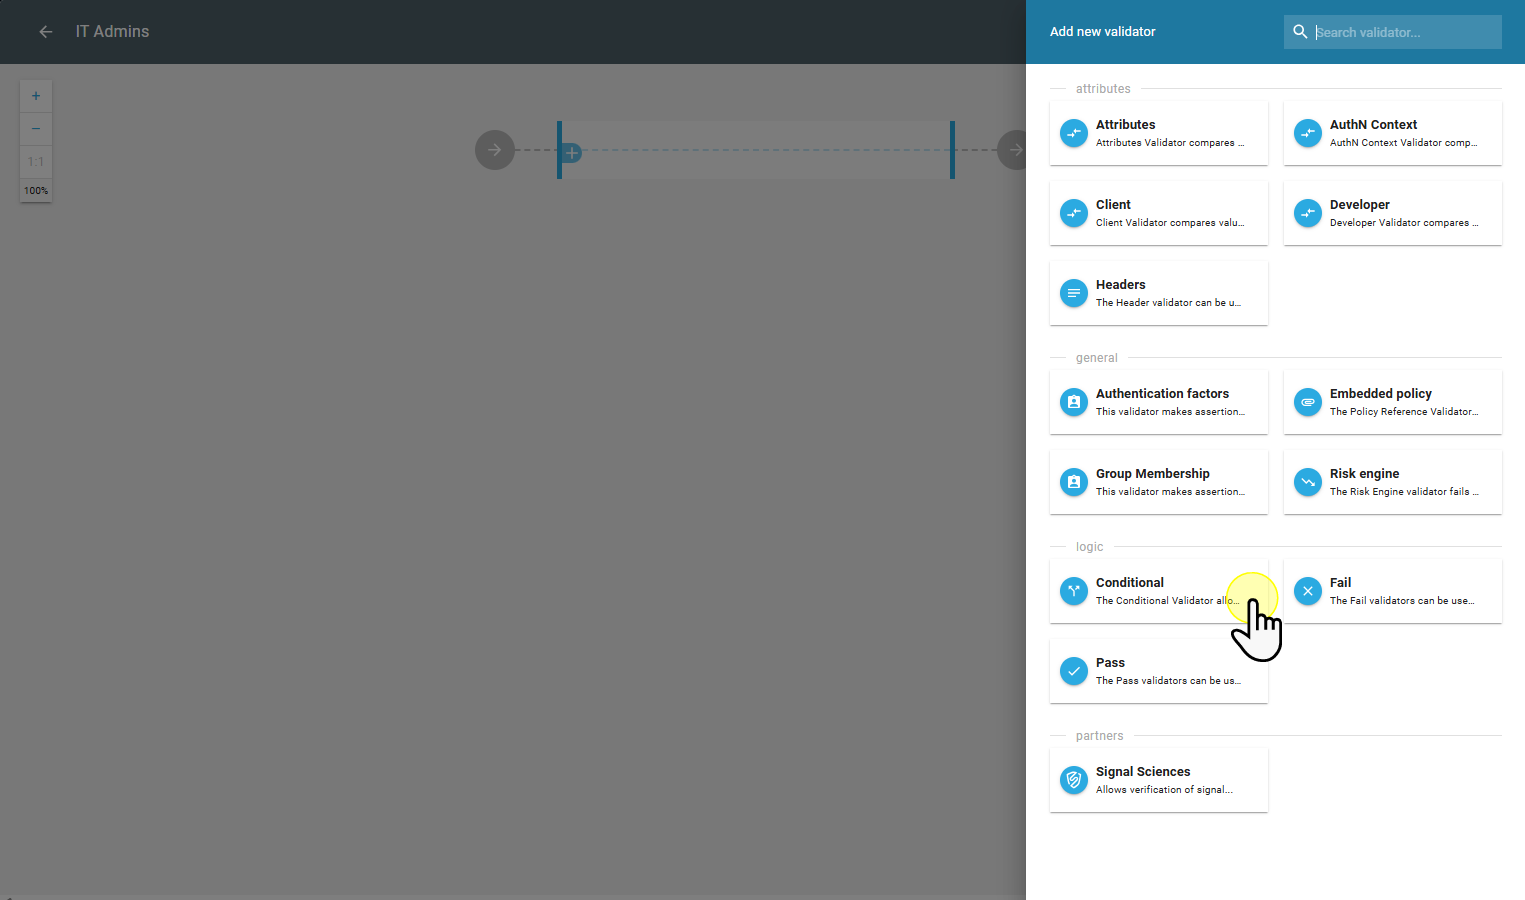 |
| Select +ADD VALIDATOR | Choose Conditional
|
| Select +ADD VALIDATOR | Choose Conditional -
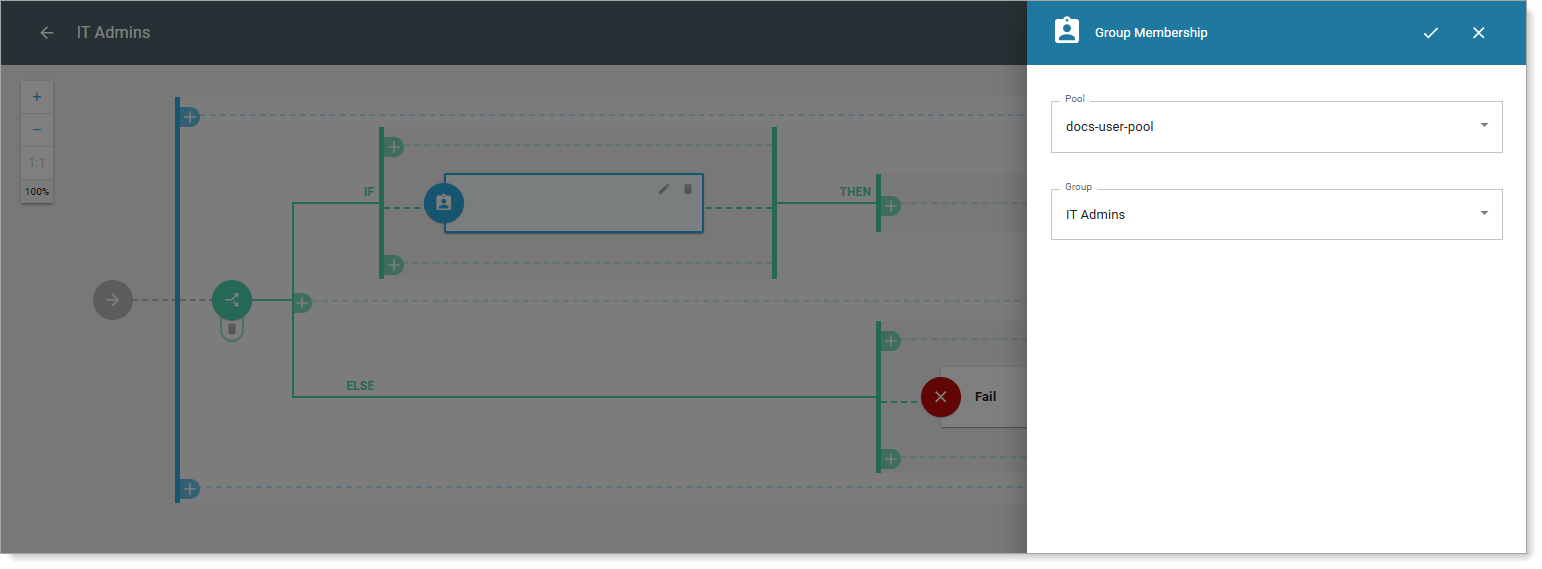
In the IF branch:
-
Select + ADD VALIDATOR and and choose Group Membership.
-
Select the identity pool and the group (for example, IT Admins)
-
-
In the THEN branch, add a Pass validator.

-
Verify that the ELSE branch contains a Fail validator.
-
Save your changes.
Repeat the process to create a policy for each group you want to target.
Assign policies to applications
-
Go to Applications > Clients.
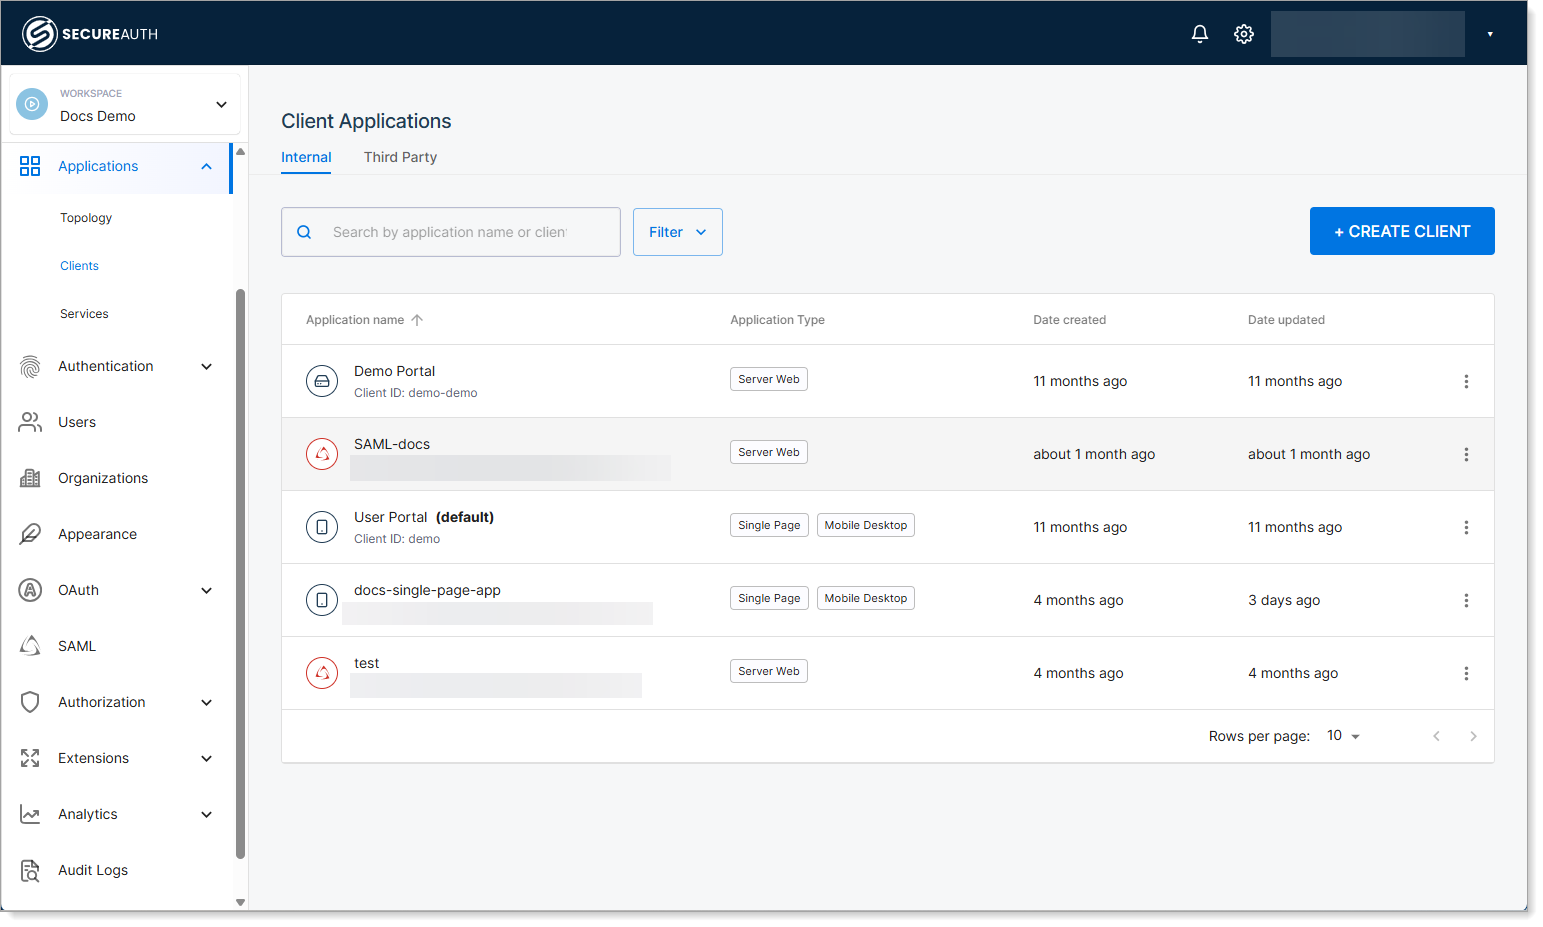
-
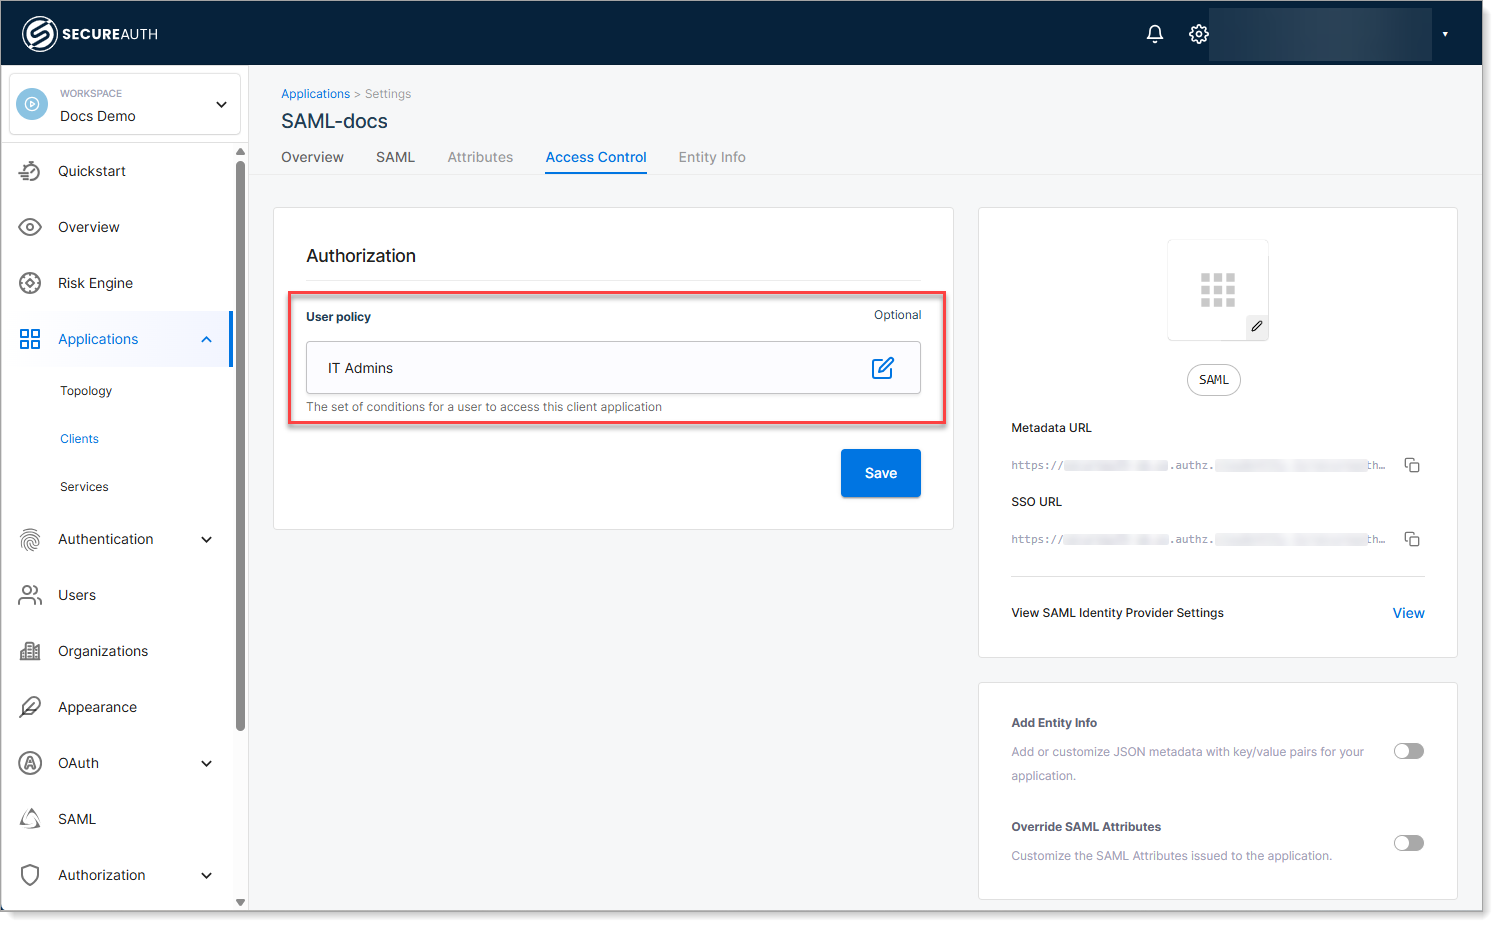
Select an application, then select the Access Control tab.
-
In User policy, select the policy that defines which group of users can access the application.
Repeat the process for each application you want to restrict to a specific user group policy like the following examples for IT Admins and Employees.
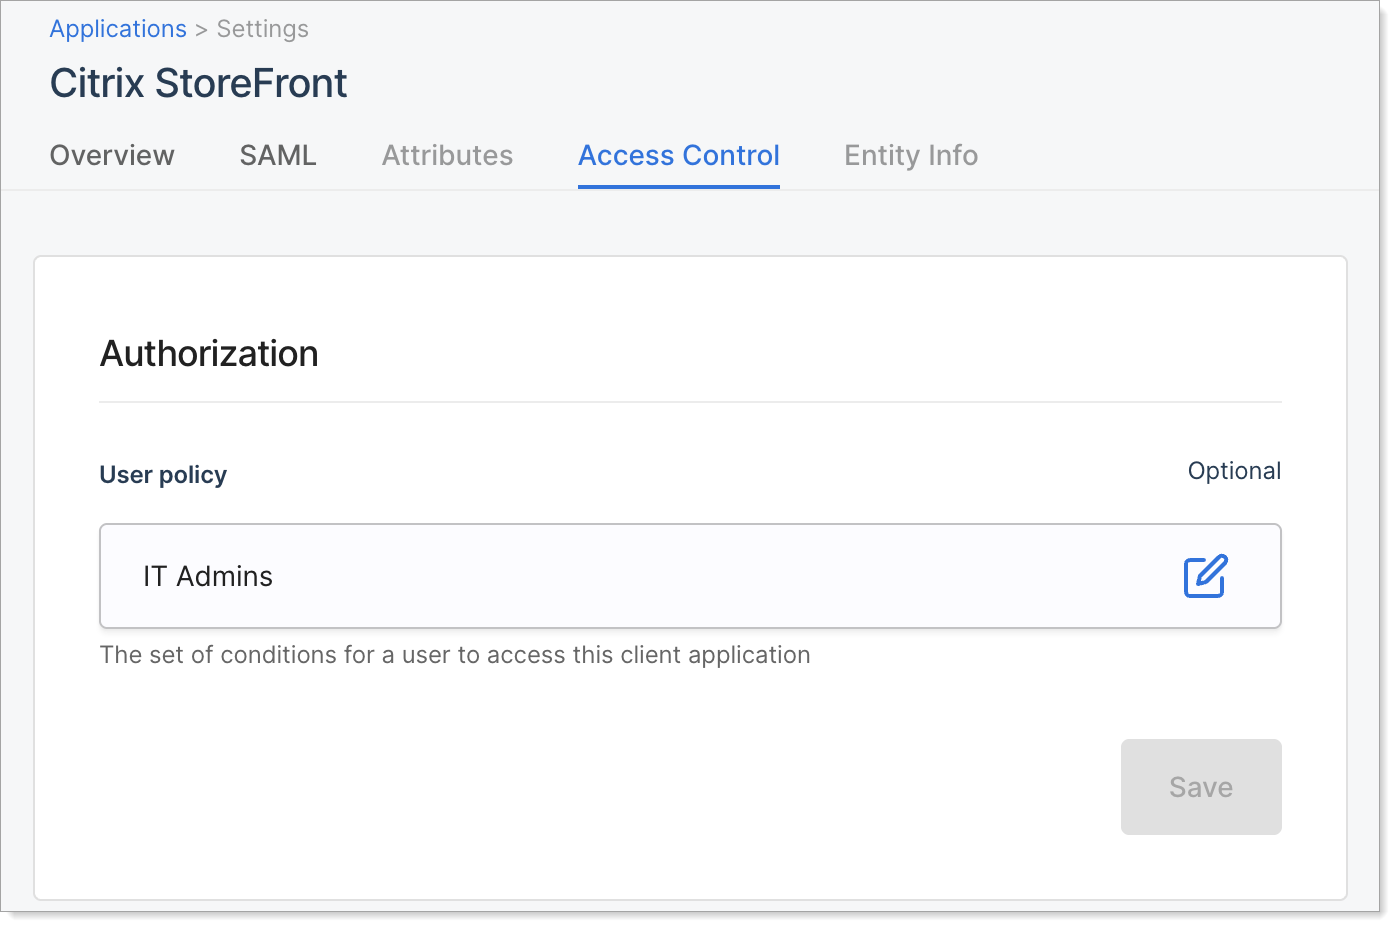
Application with user policy for IT Admins
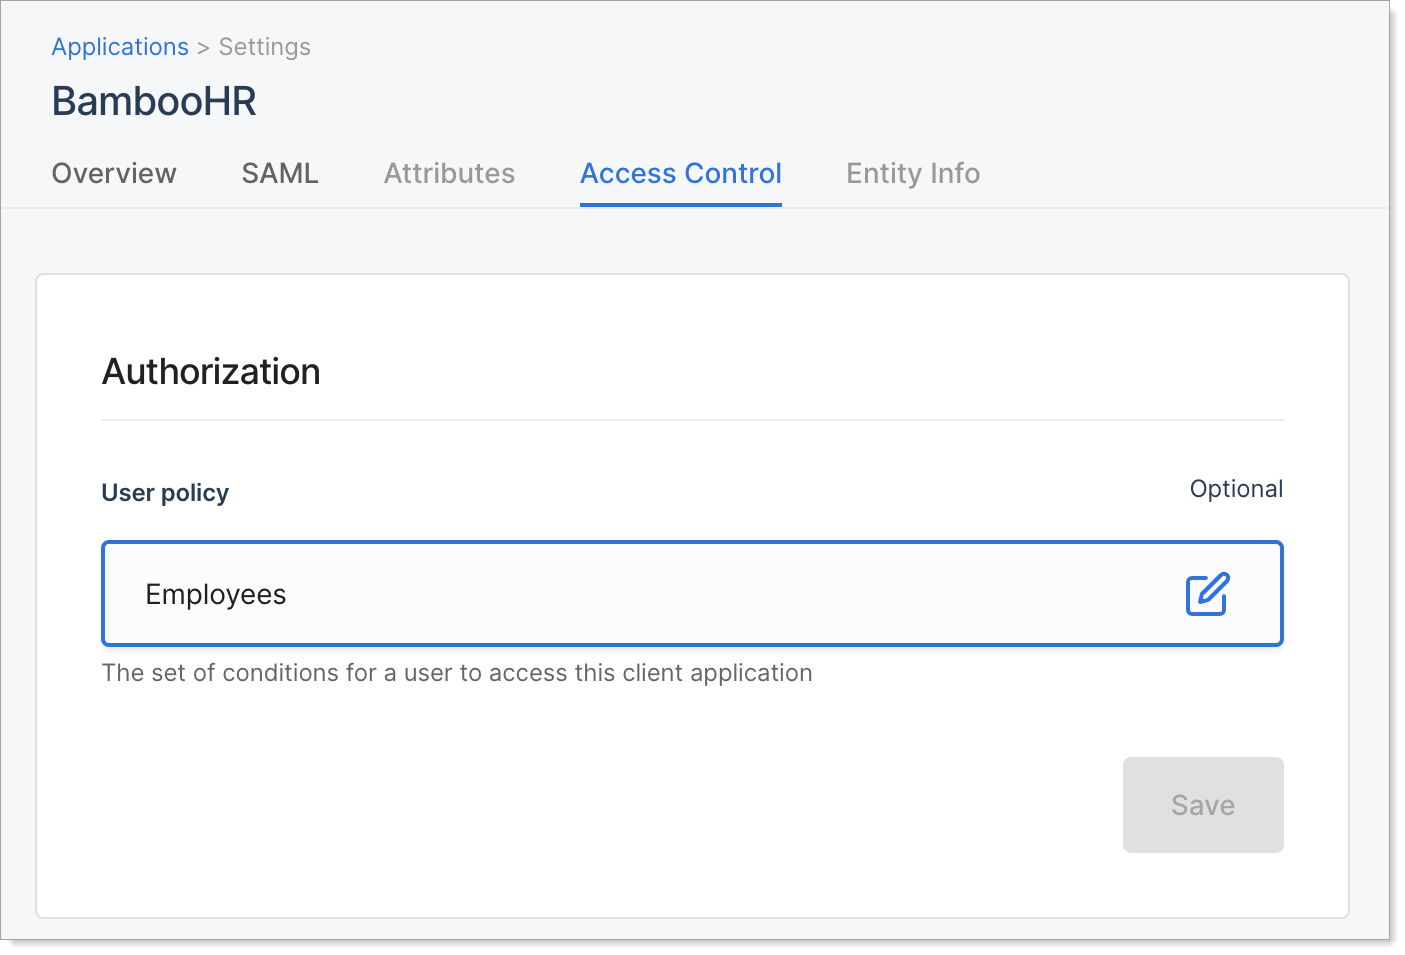
Application with user policy for Employees
Group-based views in the user portal
Once assigned, policies control what applications users see in the User Portal. Employees won't see IT tools. Admins won't see apps they don't need. This setup:
-
Reduces clutter in the User Portal
-
Prevents unauthorized access
-
Makes navigation faster for users
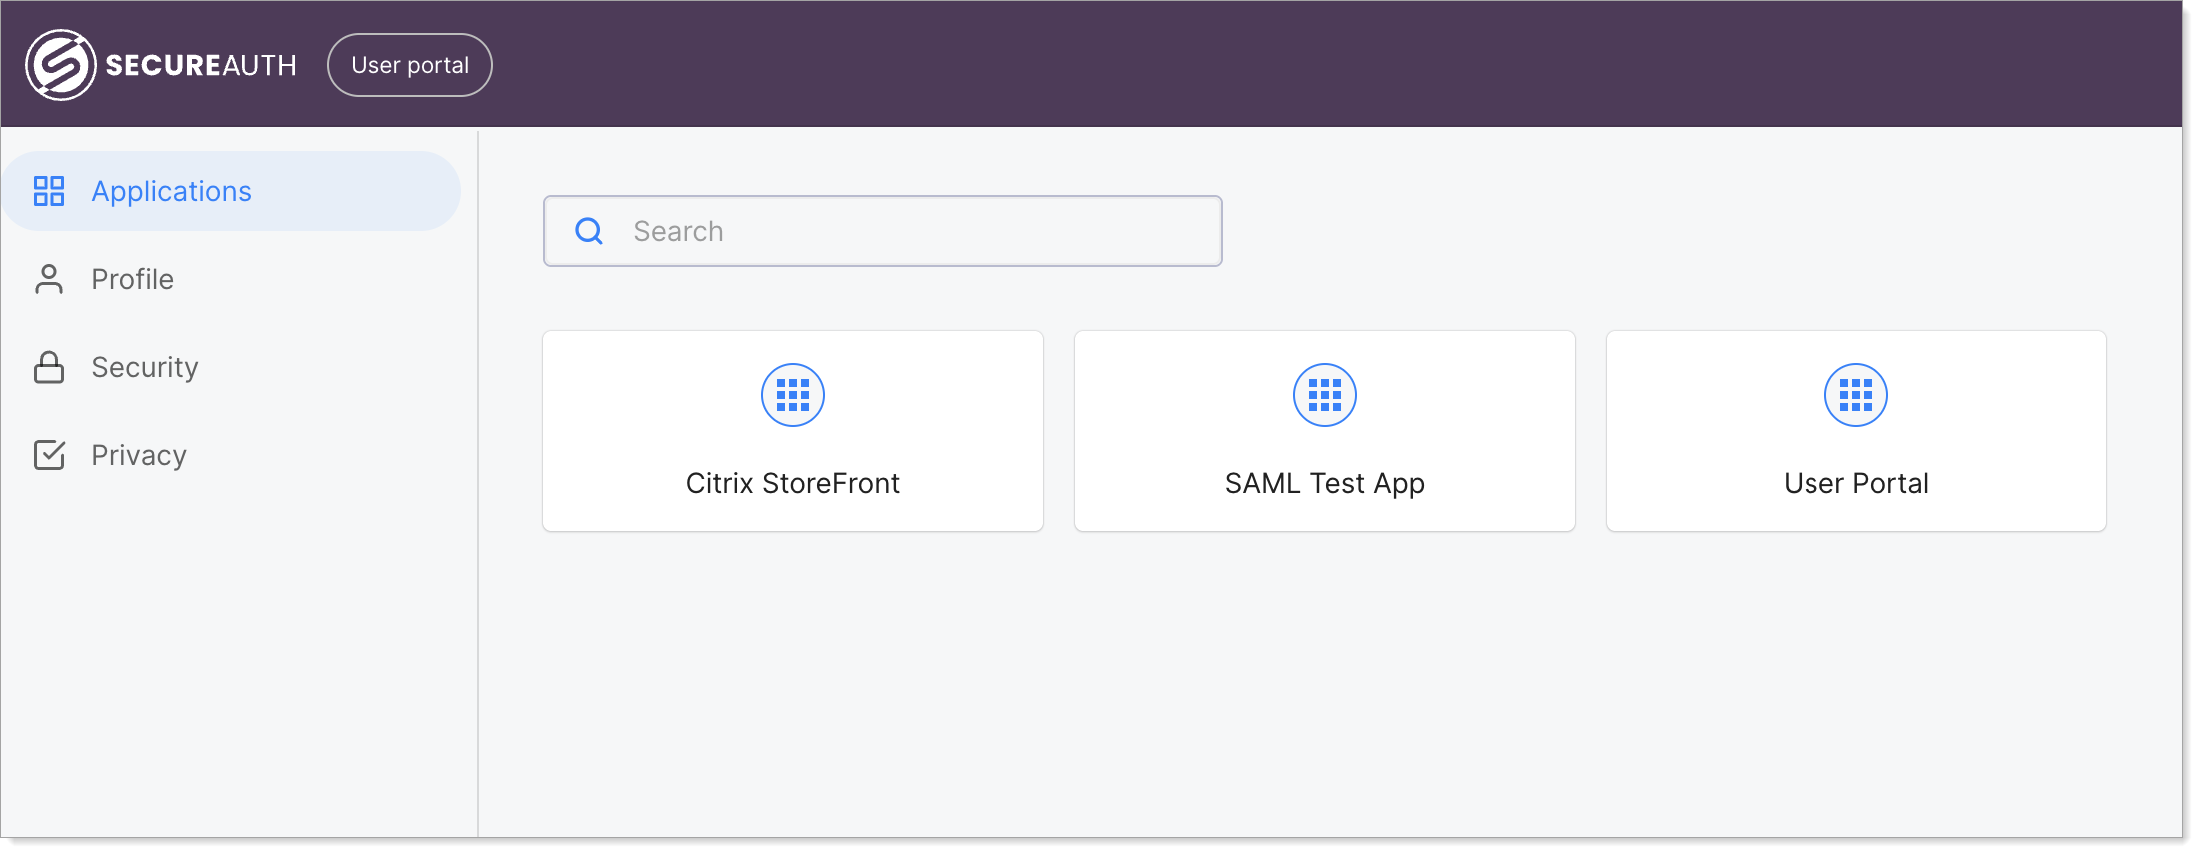
User portal access for IT Admins
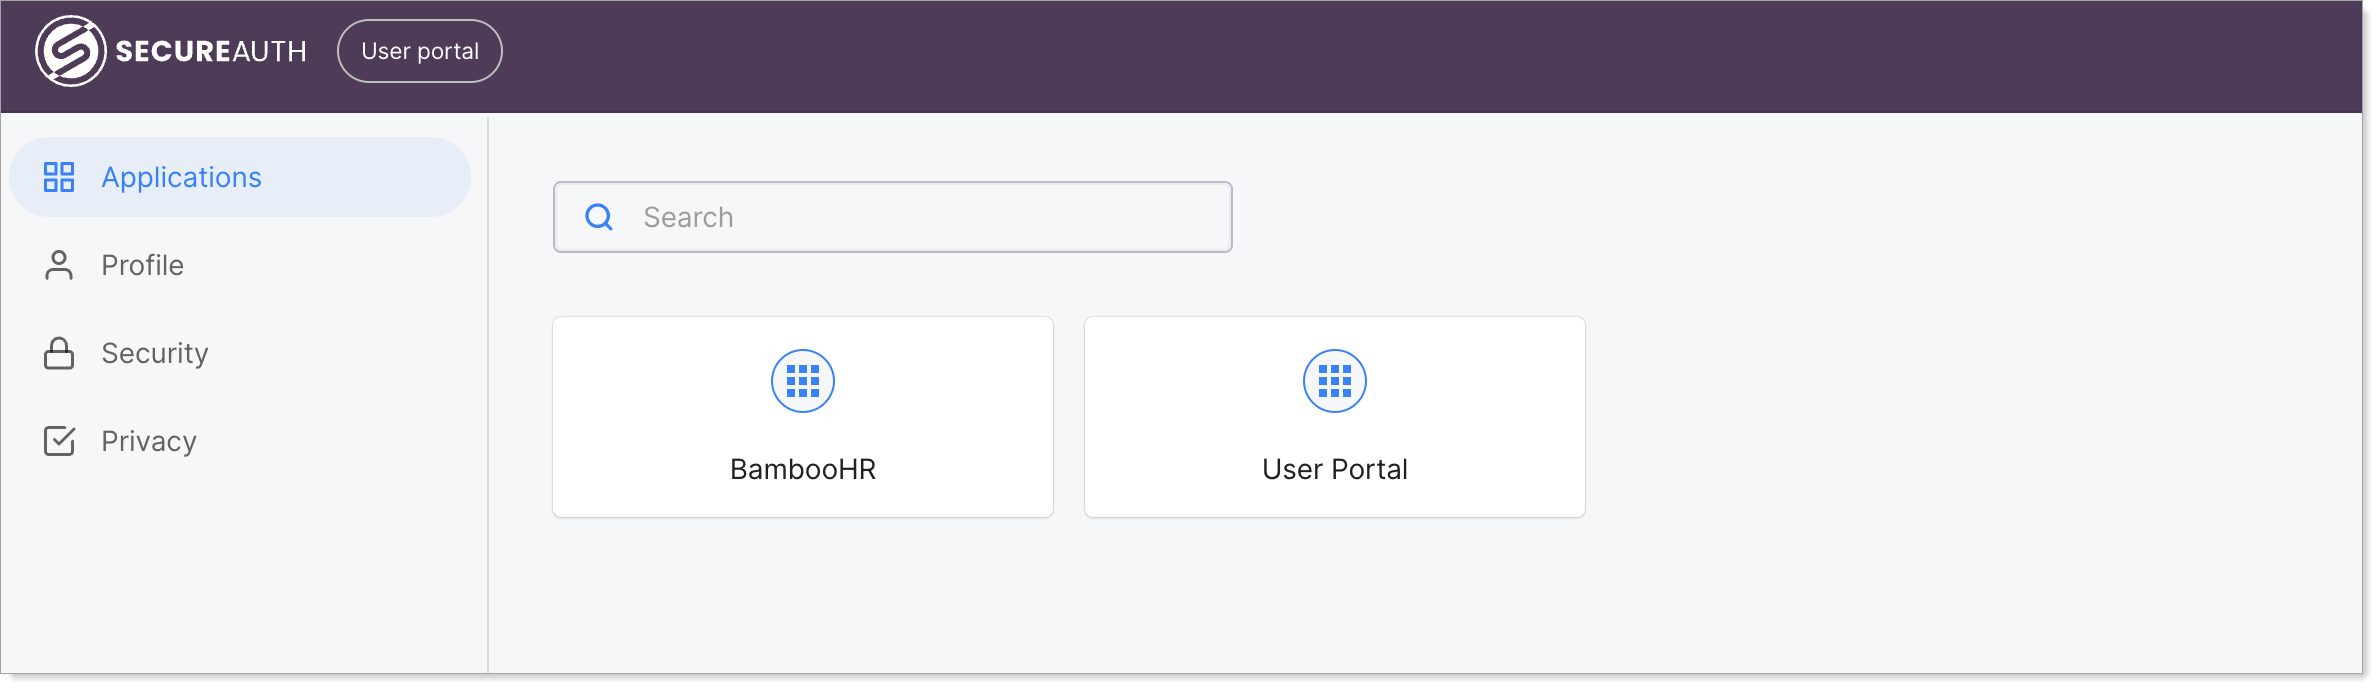
User portal access for Employees