Configure SSO for administrators
The SecureAuth CIAM platform, lets you set up and connect different authentication methods to make user access secure and easy for modern SaaS applications.
Choose from built-in options like passwords, verification codes, and passwordless methods, or connect to external services like Google Workspace, GitHub, and Microsoft Entra ID to match your security needs.
Set up authentication methods
Before configuring authentication methods and SSO for administrators, you need to set up an Identity Pool in the SecureAuth platform.
In the target workspace, in the left sidebar, go to Authentication > Providers.
On the Identity Providers page, click Create Connection.
On the Create Connection page, select Identity Pool and click Next.
On the Connect Identity Provider page, click Create Pool. Complete the fields for Name, Description, and Tag Color.
Expand the Sign-in section and set the following configurations:
First-Factor Authentication Methods
Set the preferred authentication method for the user login to SecureAuth platform. Options are:
Password – Login with a password.
Verification Code – Send a one-time verification code by email or SMS to the user.
Authenticator app – Send a time-based one-time passcode (TOTP) to the user's mobile authenticator app.
Passkey – A secure, passwordless option for user convenience. Users can authenticate with FIDO2 devices like YubiKey or Touch ID, using physical or biometric keys instead of traditional passwords.
Second-Factor Authentication Methods
Optionally, set another authentication method.
Reduce 2FA verification on same device
Remember the device for a set time, avoiding repeated 2FA prompts. You can adjust the time or disable it by setting it to 0 seconds.
Sign-in identifier Settings
Select this check box to ignore case sensitivity in email and username during user login.
Expand the Sign-up section and set the Registration mode:
Self Registration – Allow users to self-register and manage their profile details.
Admin Initiated Registration – Administrator creates user account and sends an invitation email to the user.
Enable SSO
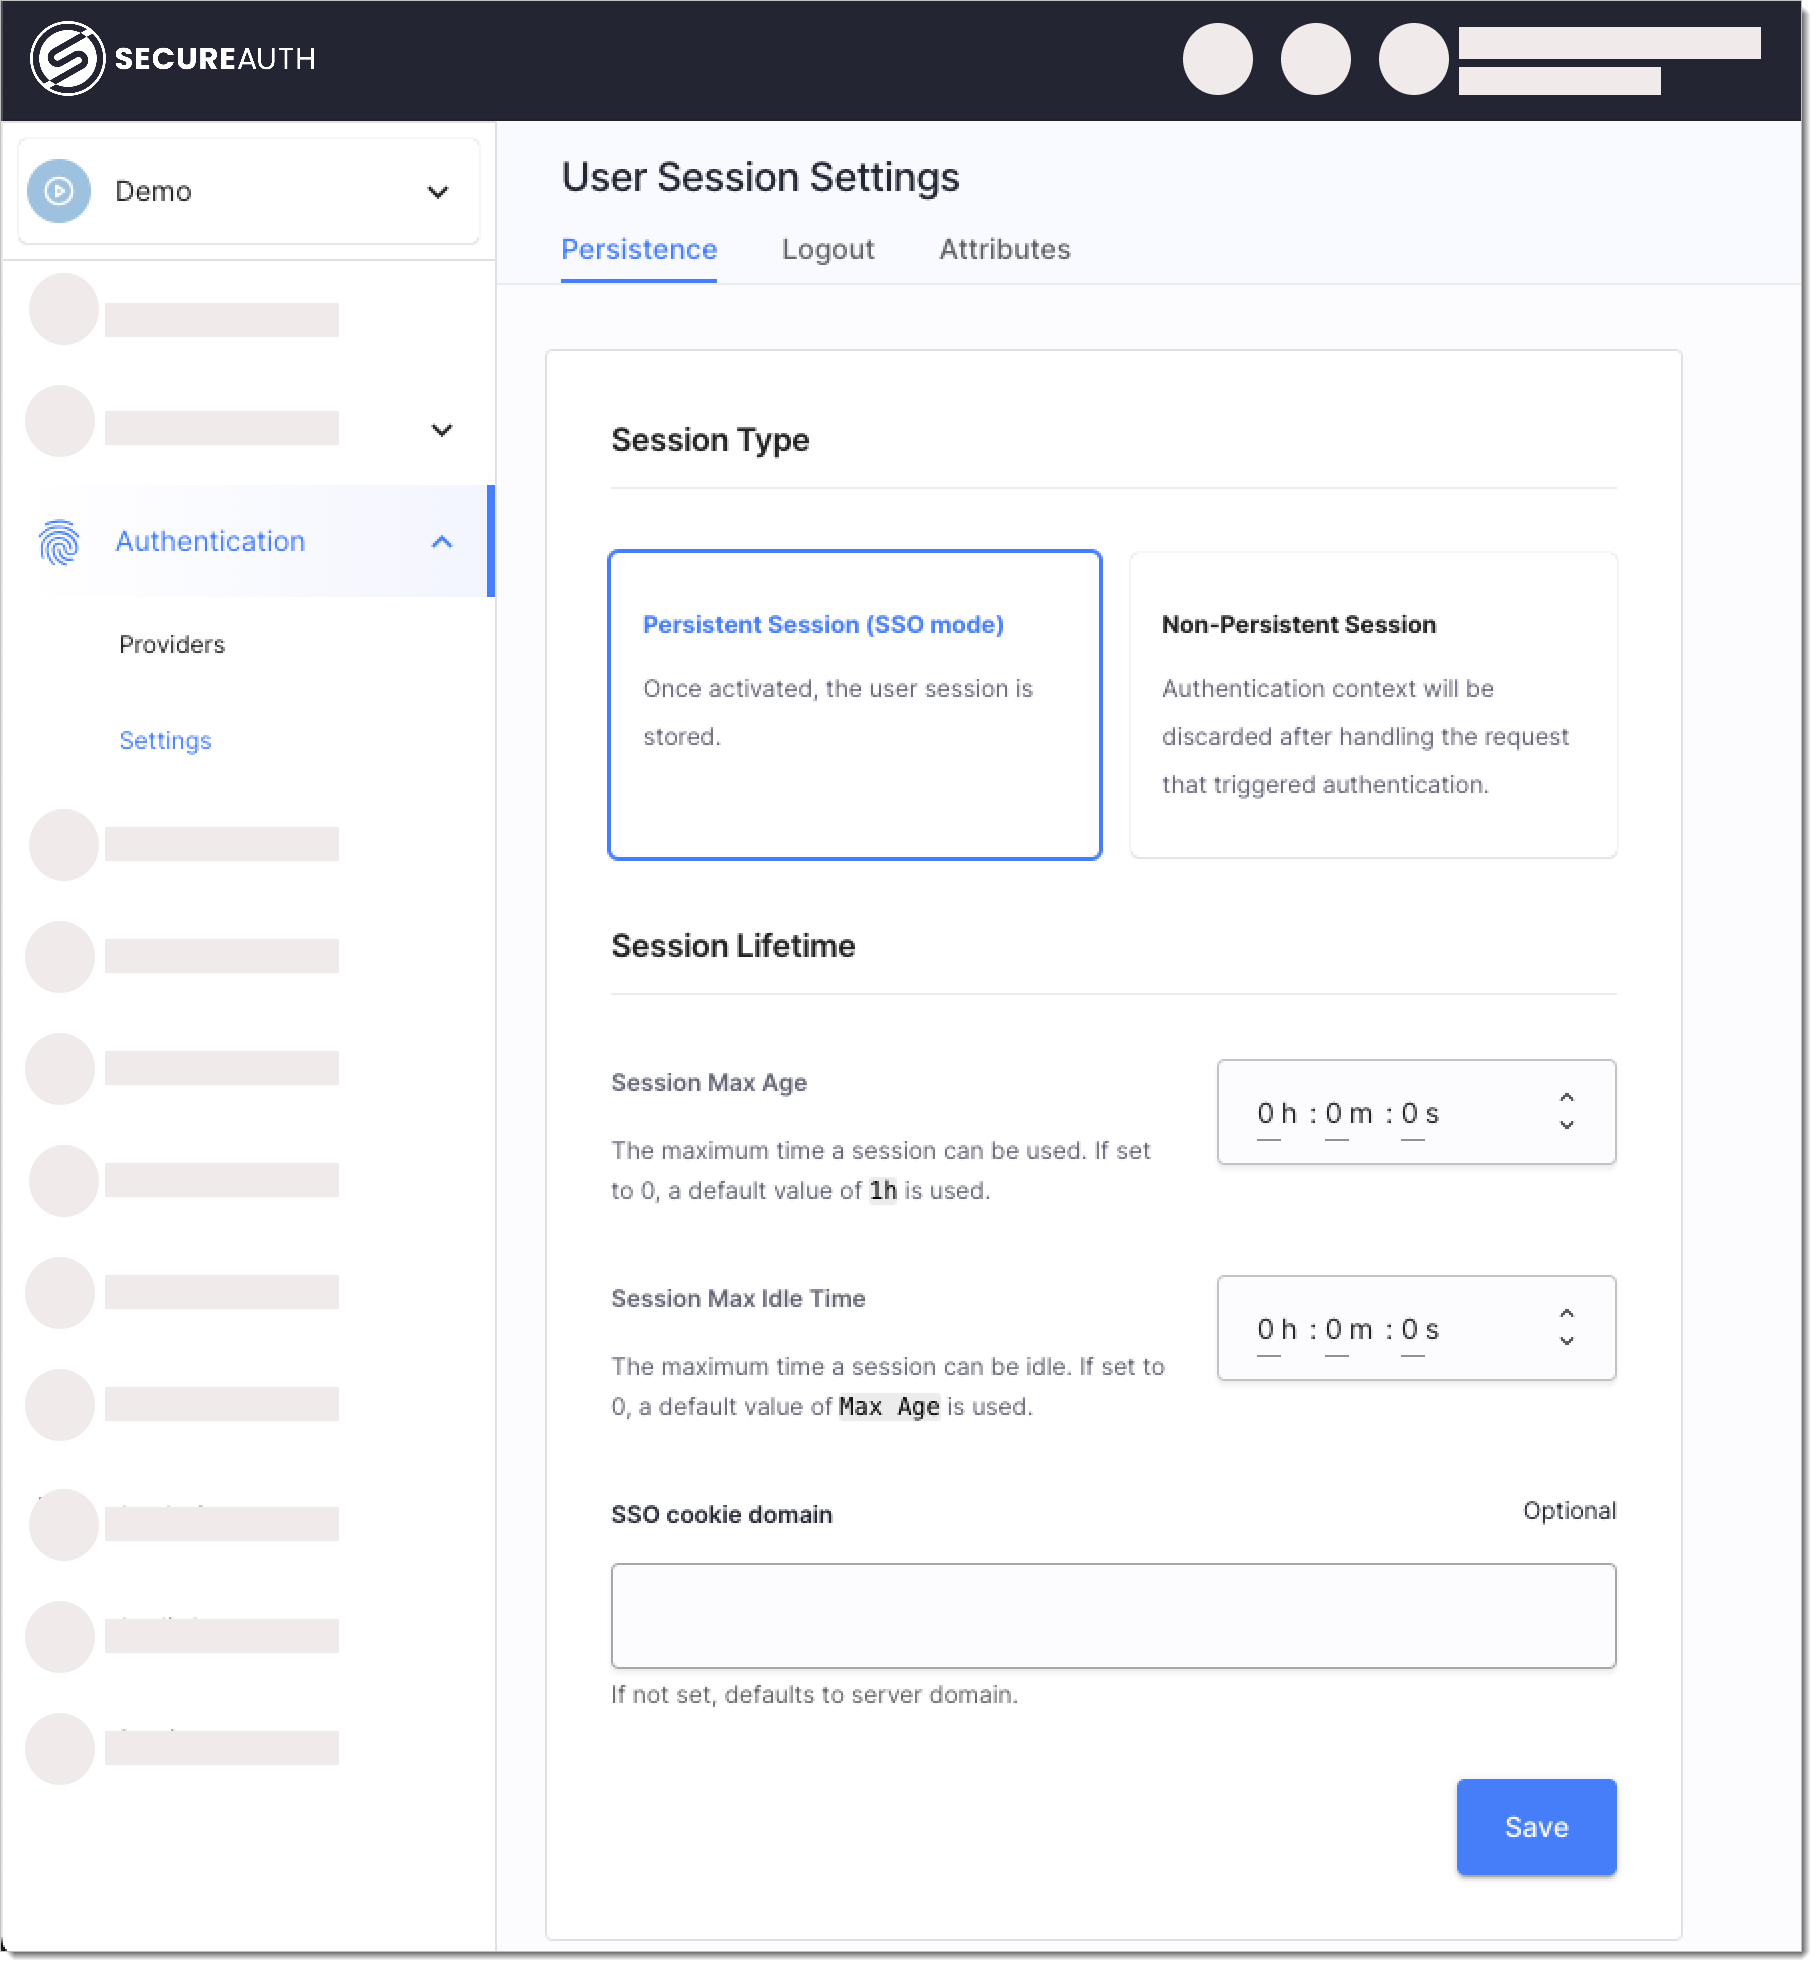
In the target workspace, from the left sidebar, go to Authentication > Settings > Persistence.
Select the Persistent Session (SSO mode) option.

In the Session Lifetime section, use the following settings to manage session behavior:
Setting
Description
Session Max Age
Set the time after which a user's session expires, requiring reauthentication.
Session Max Idle Time
Dfine the time after which an inactive session expires, requiring reauthentication.
SSO cookie domain
Define the domain for the SSO cookie of logged-in users. If empty, it adopts the authorization server's domain. When set, this domain is also allowed for logout redirects.
Allowed Logout Redirect Domains
List domains where applications can redirect users after logout. These domains are valid only if the
redirect_toparameter is included in a request to the/authorizeendpoint.Post-Logout Redirect URL
Set a default URL to redirect users after logout if the application request doesn’t include a
redirect_toparameter.
Result: After logging into an application through SecureAuth, users can access all workspace applications without reauthenticating, as long as the session remains valid.