Set up Okta for Authentication with SAML
Learn how to configure Okta and SecureAuth to enable your users to sign in using Okta IDP and SAML
Note
Okta is natively supported by SecureAuth as an OIDC Identity Provider, which means that it has a dedicated connection template in SecureAuth for your convenience. Okta applications implement the OIDC protocol, providing the proof of user authentication to SecureAuth within an ID Token and Access Token.
Prerequisites
You have an Okta developer account.
Connect Okta SAML IDP
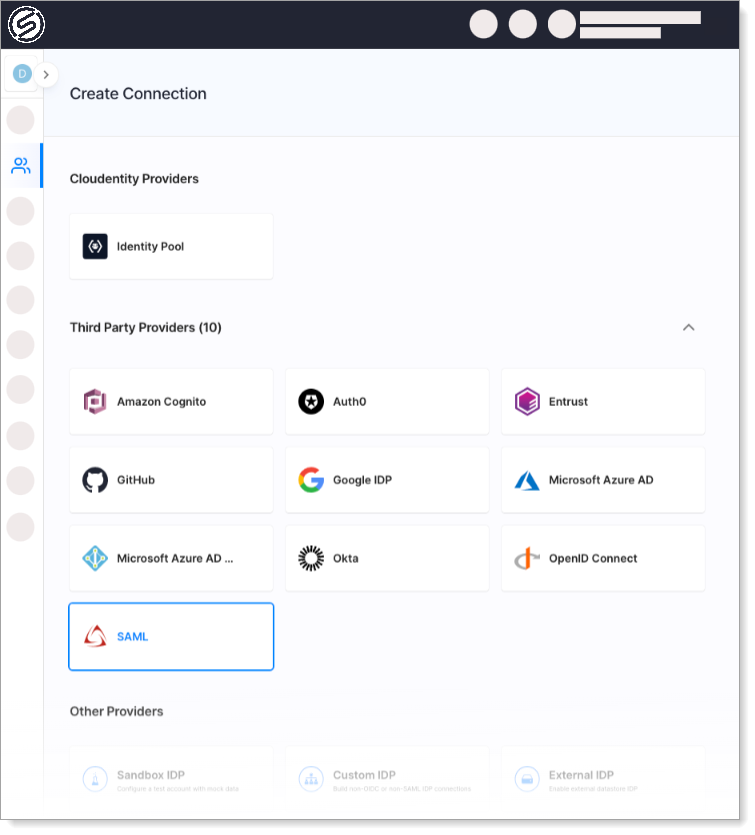
Go to Authentication > Providers > Create Connection.
Select the SAML template in Third-Party Providers section and click Next.

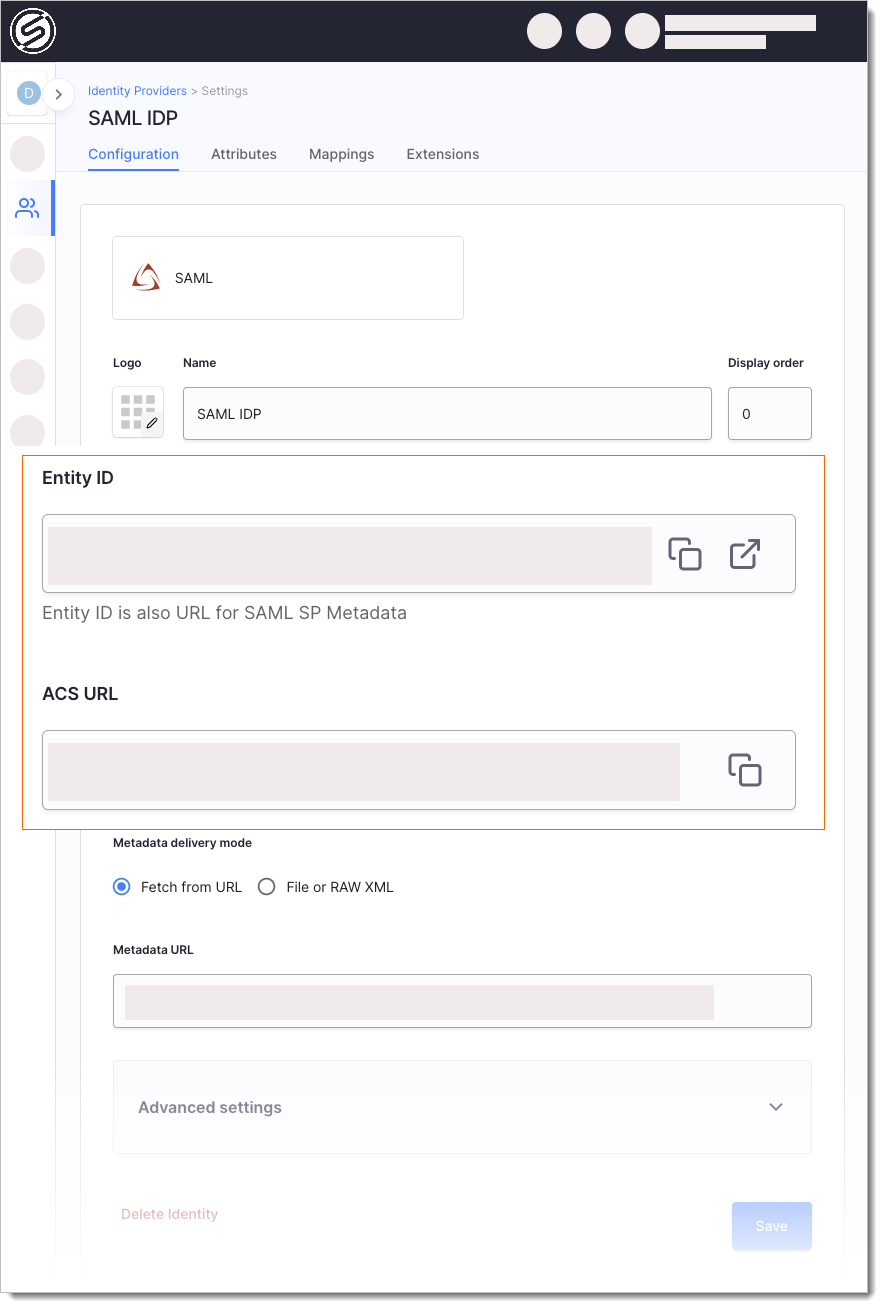
Provide a name for your SAML IDP -- it is used to create the Entity ID.
Use the Entity ID (also a SAML SP Metadata URL) and ACS URL (Assertion Consumer Service URL) values to register SecureAuth as a Service Provider at your IDP.

For most up-to-date instructions, follow Okta's documentation to create a SAML application in Okta.
In Okta, select Applications >> Applications > Create App Integration >> SAML 2.0.
In the Configure SAML menu:
Provide the ACS URL from SecureAuth as the value of the Single sign-on URL.
Provide the Entity ID from SecureAuth as the value of the Audience URI (SP Entity ID) field.
Preview the SAML Assertion if needed.
Configure the rest of the fields as needed and select Next
In Okta application integration you added, go to Sign On tab and copy the Metadata URL.
Back in SecureAuth, paste the Metadata URL from Okta as the value of the Metadata URL field and save.
Next Steps
In Okta, assign users to SAML Application you integrated with Okta.
Map SAML IDP Attributes to Authentication Context Attributes.
Define Outgoing SAML Assertion Attributes Sent to Service Providers.
If the Okta SAML IDP you connected enables users to sign into OAuth-based client applications, be sure to map the authentication context parameters (mapped from SAML IDP Assertion Schema Attributes) to Token Claims as well.