Enabling Custom Consent Pages in SecureAuth
Instructions on how to enable the custom consent page in the SecureAuth portal.
By default, SecureAuth offers the OAuth consent page, which does not require any configuration. Alternatively, SecureAuth allows you to use the custom consent page designed for an administrator who needs to integrate other-than-OAuth consent page, for example, for Open Banking purposes.
In the Open Banking consent page, the end user is usually requested to allow specific actions (for example, a bank transfer) or access to specific data or entities (for example, a user account).
The Open Banking consent page is normally produced by the bank. Since the bank has the access to sensitive data (such as users accounts), this is the bank that needs to implement the custom consent page.
Prerequisites
You can log in to the SecureAuth portal as an administrator.
You have a workspace configured in SecureAuth.
Configure the Consent Screen
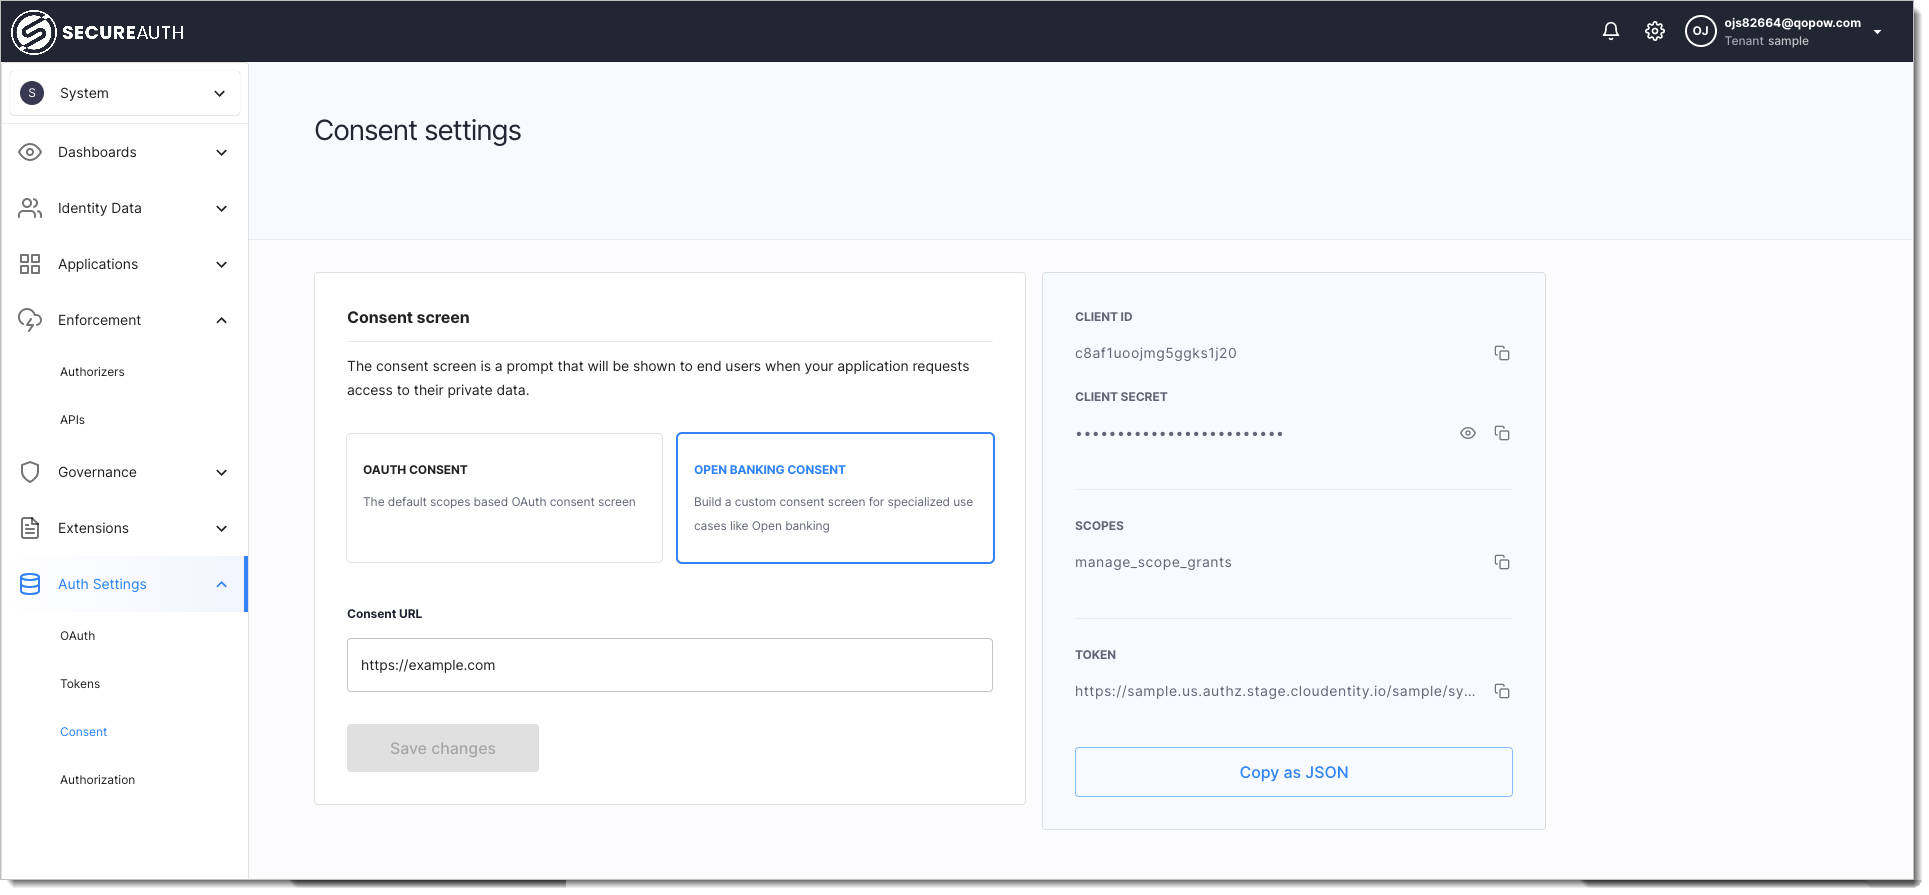
The consent screen is a prompt displayed to the end user when your application requests access to the user's private data.
Go to OAuth > Authorization Server.
In the Consent view
Select OPEN BANKING CONSENT to enable a custom consent screen for Open Banking purposes.
In the Consent URL field, provide the web address of your custom consent to be integrated.
Select Save changes to proceed.
When you save your changes, a client is created automatically and its metadata gets displayed in the right-side pane.

Follow-up
The automatically-created client is to be used for invoking API that is to accept or reject the consent.
The automatically-generated metadata of the client are for developers or integrators of the custom consent page. The metadata includes the client ID, the client secret, scopes, and the token URL.
You have configured your workspace so that it uses the custom consent page for Open Banking purposes. Also, you have the client and its metadata generated. Now you can proceed to: