Manage policies
In addition to using a default authentication policy, you can add a custom policy with different rules for your resources.
Each policy must have at least two authentication rules at any given time. Before you can delete a custom policy, you must reassign any attached resources to another policy.
On the left side of the Identity Platform page, click Policies.
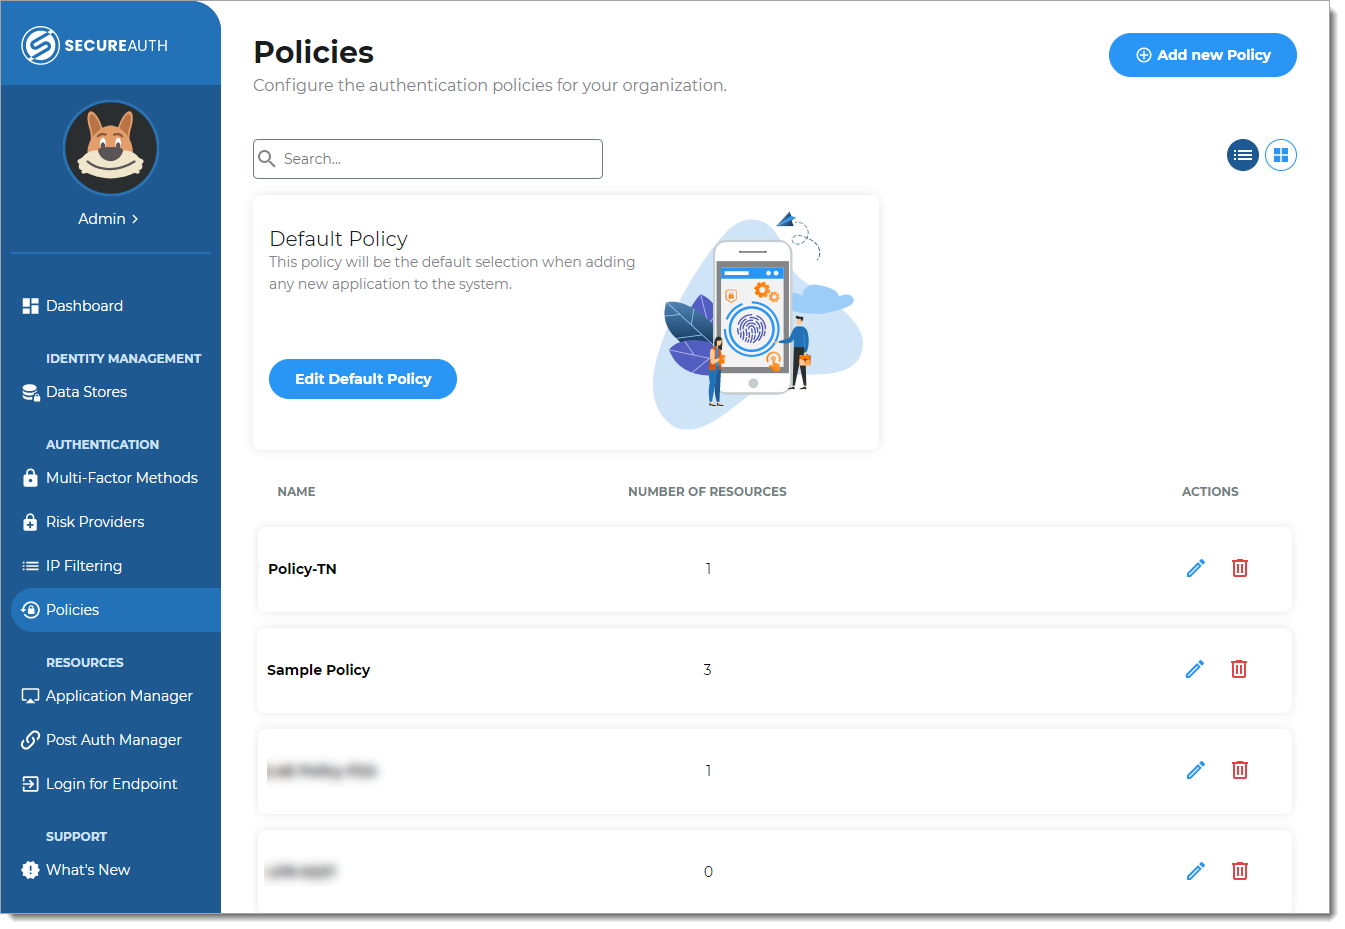
Do one of the following:
To configure the rules in a policy, click Edit Default Policy or the Edit icon for a custom policy.
To add a new policy, click Add new Policy and give it a new name.
Note
When you edit the policy name, make sure you save your changes before changing any of the policy rules, like on the Authentication Rules tab.
And vice versa, if you change a policy rule on the Authentication Rules tab, you must save your changes before changing the policy name.
Make sure to save the new name before making any changes to policy rules.
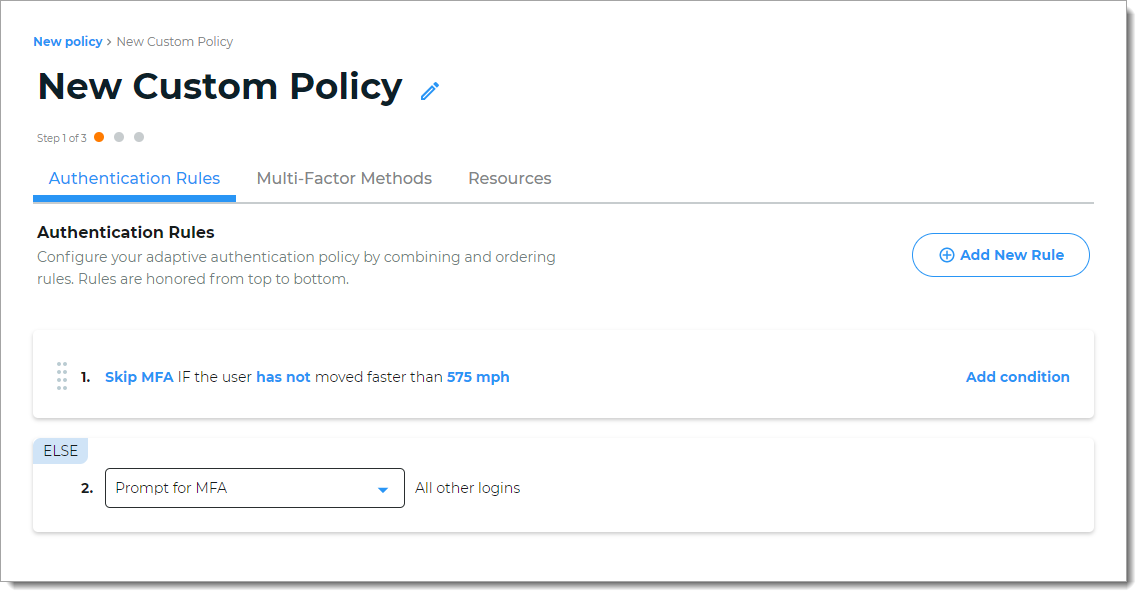
Configure the Authentication Rules tab (Step 1 of 3 in the wizard workflow for a new custom policy.)
These are the adaptive authentication rules like blocking logins from a certain country, allowing logins within a dynamic perimeter, and geo-velocity to determine speed of travel from login point A to login point B.
Configure the Multi-Factor Methods tab. (Step 2 of 3 in the wizard workflow for a new custom policy.)
Choose the login experience and MFA methods for your end users to authenticate, like FIDO2 security keys or timed passcode from an authentication app.
Configure the Resources tab. (Step 3 of 3 in the wizard workflow for a new custom policy.)
Attach resources like Office 365 and Salesforce to this authentication policy.