Secure Portal single sign-on configuration
Use the Secure Portal to provide a main page for end user single sign-on (SSO) access to applications.
You can add many applications to the Secure Portal and give end users easy access to applications in your organization, using SSO.
 |
Prerequisites
SecureAuth® Identity Platform release 21.04
Data store added to the Identity Platform
Configured user authentication policy
Configured application integrations, like Office 365 and Salesforce
Step A: Add and configure Secure Portal internal application
Use the Internal Application Manager to add and configure the Secure Portal page.
On the left side of the Identity Platform, click Internal Application Manager.
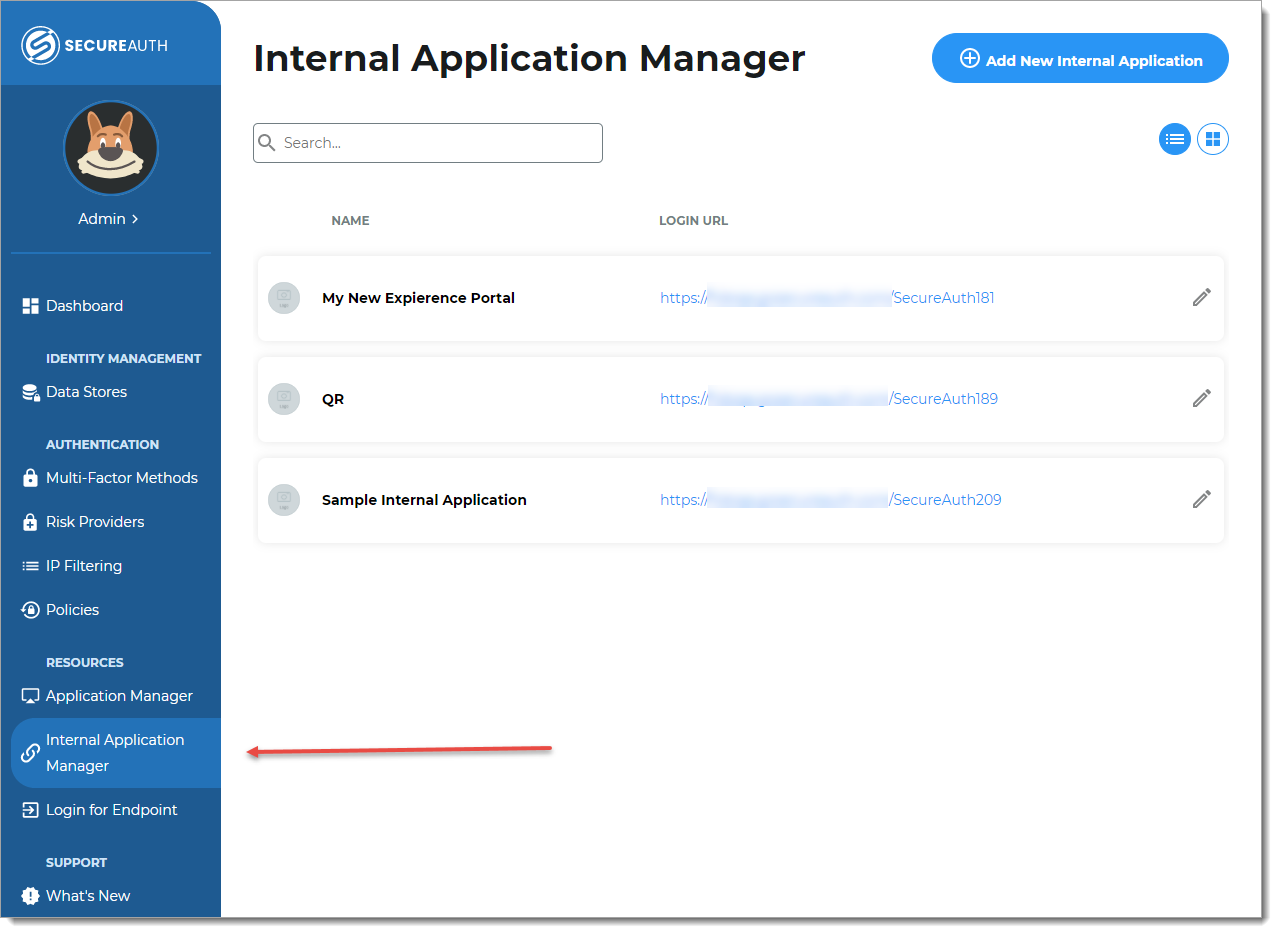
Click Add New Internal Application.
The New Internal Application page displays.
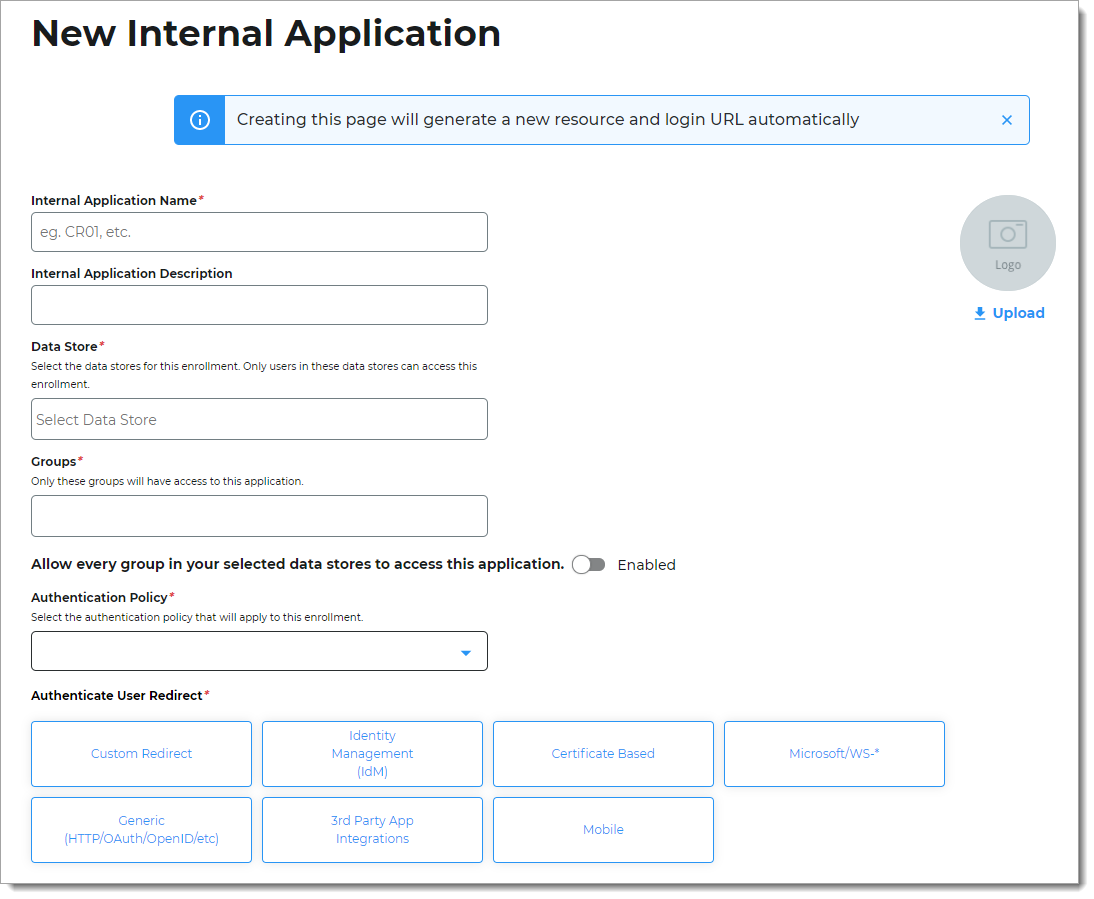
Set the following configurations:
Internal Application Name
Set the name of the Secure Portal page.
This name is shown on the page header and document title of the end user login pages.
Note
If you change this name, it will overwrite any value that is set on the Overview tab in Advanced Settings.
Internal Application Description
This is an internal description not shown to end users.
Identity Source
Enter the data store to authenticate and allow user access to the Secure Portal.
Groups
Use one of the following options:
Slider in the On position (enabled): Allow users from every group in your selected data stores access to the Secure Portal.
Slider in the Off position (disabled): Enter the specific groups who are allowed access to the Secure Portal.
Authentication Policy
Select the user authentication policy for the Secure Portal.
Authenticate User Redirect
Select the Identity Management (IdM) category.
Identity Management (IdM)
Select Secure Portal.
Redirect To
This field is automatically populated by the selection of Secure Portal as an internal application.
This is the page the end user lands on after login.
Click Create Connection.
This creates a new internal application with an attached user authentication policy from the New Experience.
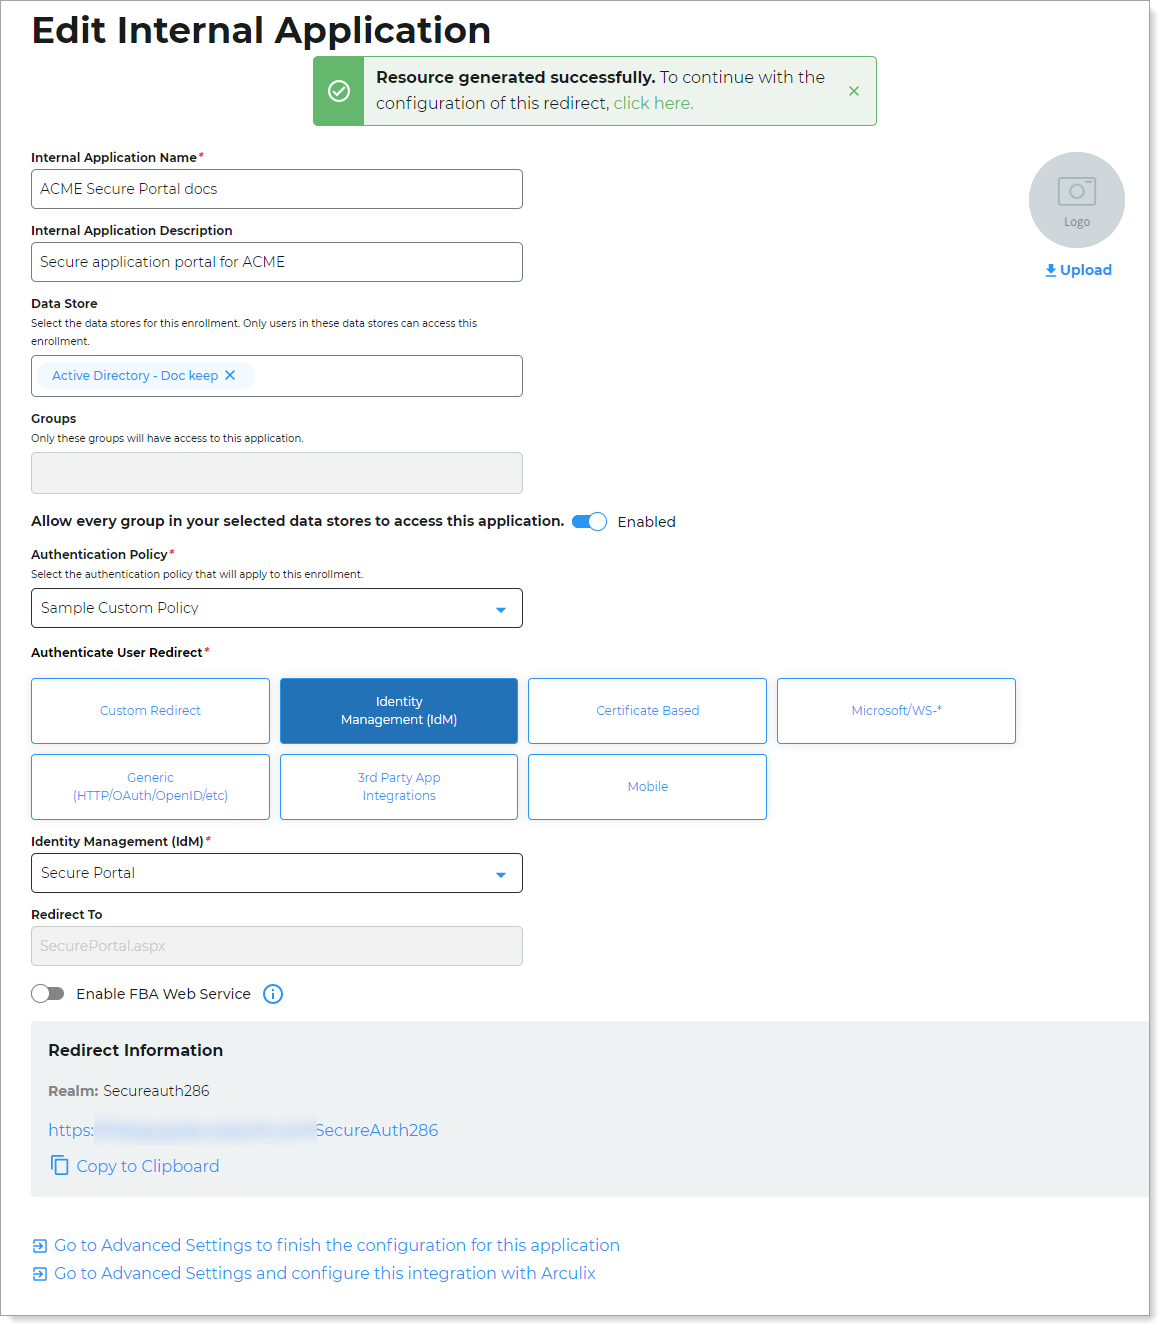
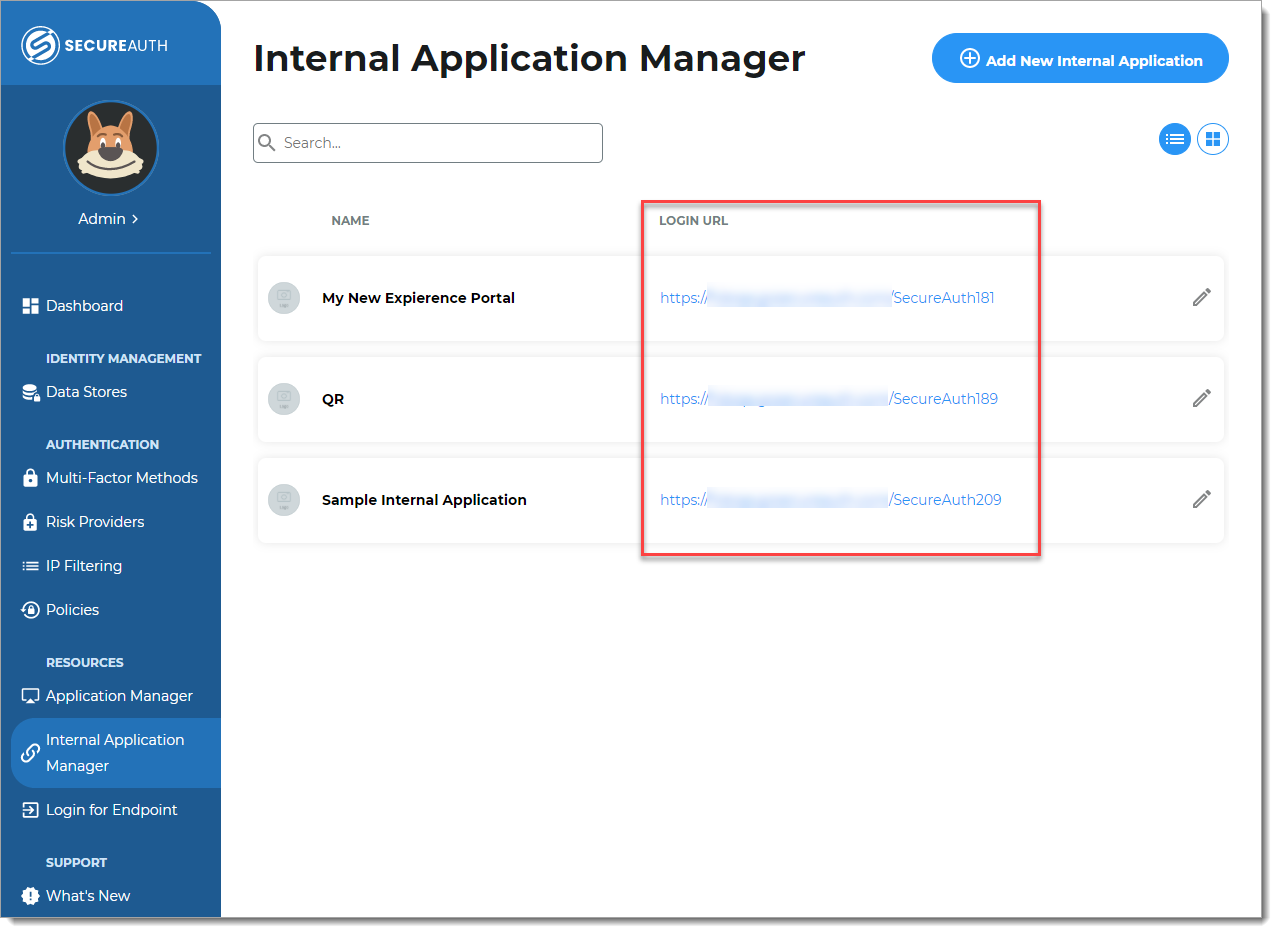
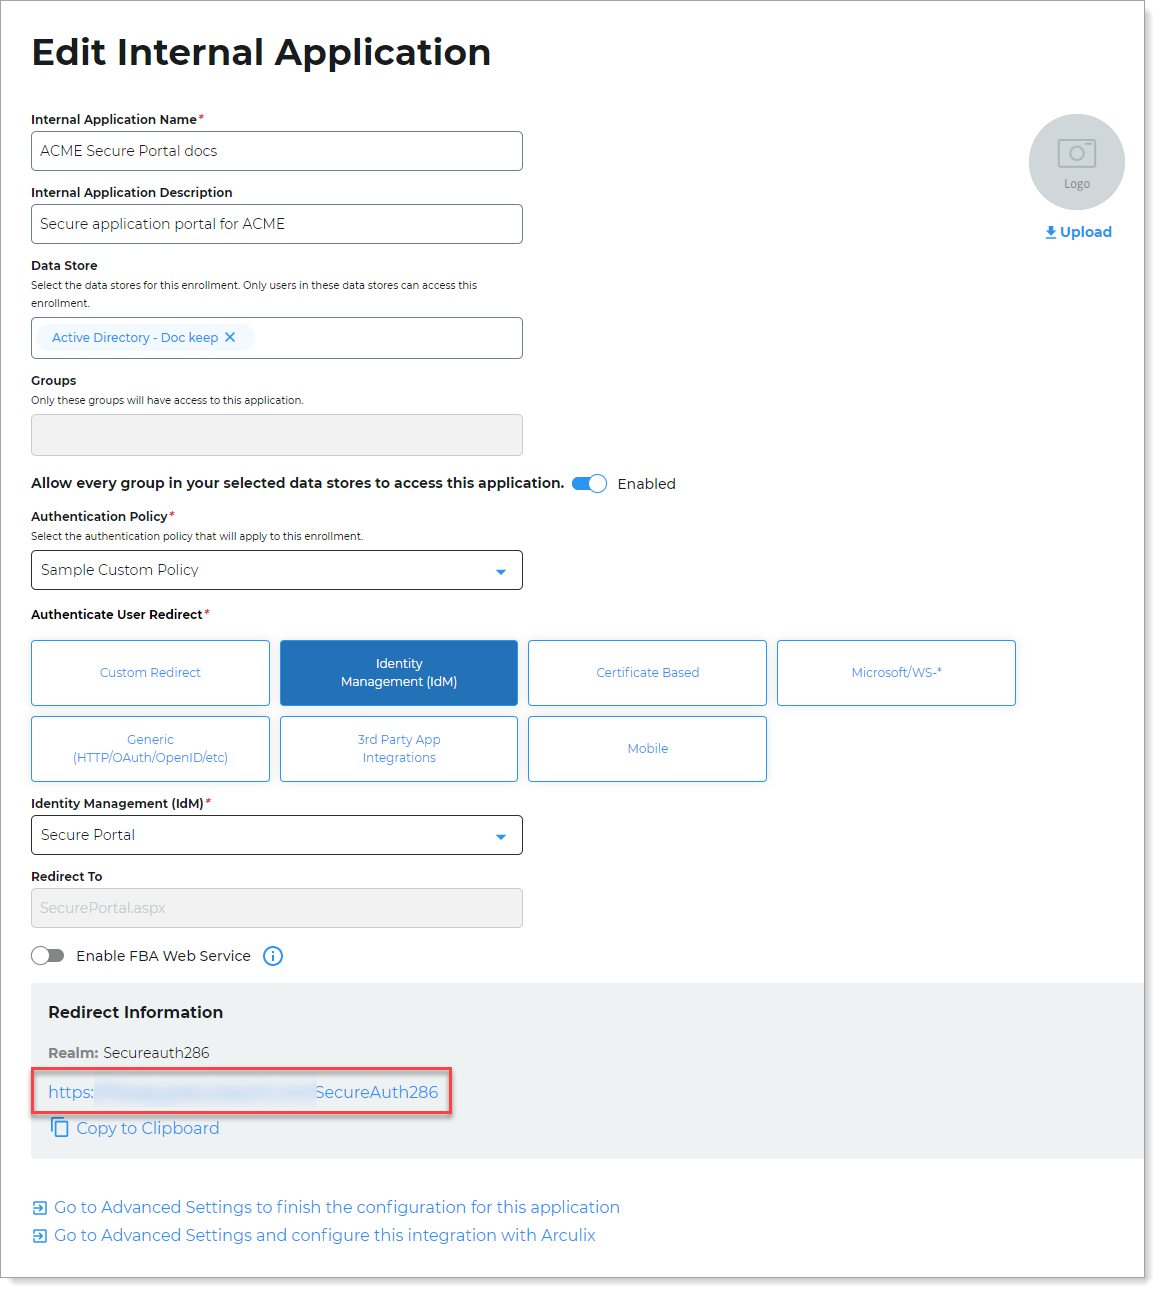
Copy the login URL for your end users to access Secure Portal page.
You'll need this information to share with your end users.
You can find this on the main Internal Application Manager page or when you edit the Secure Portal configuration in the Redirect Information section.
Step B: Finish configuration in Advanced Settings
Continue to Advanced Settings (formerly Classic Experience) to finish the Secure Portal page configurations.
To complete the Secure Portal configuration in Advanced Settings, do one of the following:
At the top of the page, click the link in the green confirmation message.
At the bottom of the page, click Go to Advanced Settings... link.
The link takes you to the Post Authentication tab in Advanced Settings.
On the Post Authentication tab, in the Portal Page section, click View and Configure the portal page link.

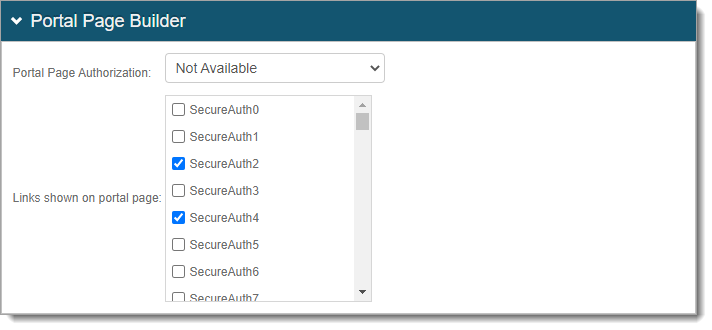
In the Portal Page Builder section, set the following:
Portal Page Authorization
Use one of the following options:
Not Available – Disable access to the Secure Portal.
Token Required – User login access is defined by the authentication policy. This is the authentication policy defined in the New Experience.
NO Token – User can access the Secure Portal without authentication. User login access to applications in the Secure Portal are defined by the authentication policy applied to each application.
GAE – Allow access with a token from Google Apps Engine (GAE) Identity Platform instance.
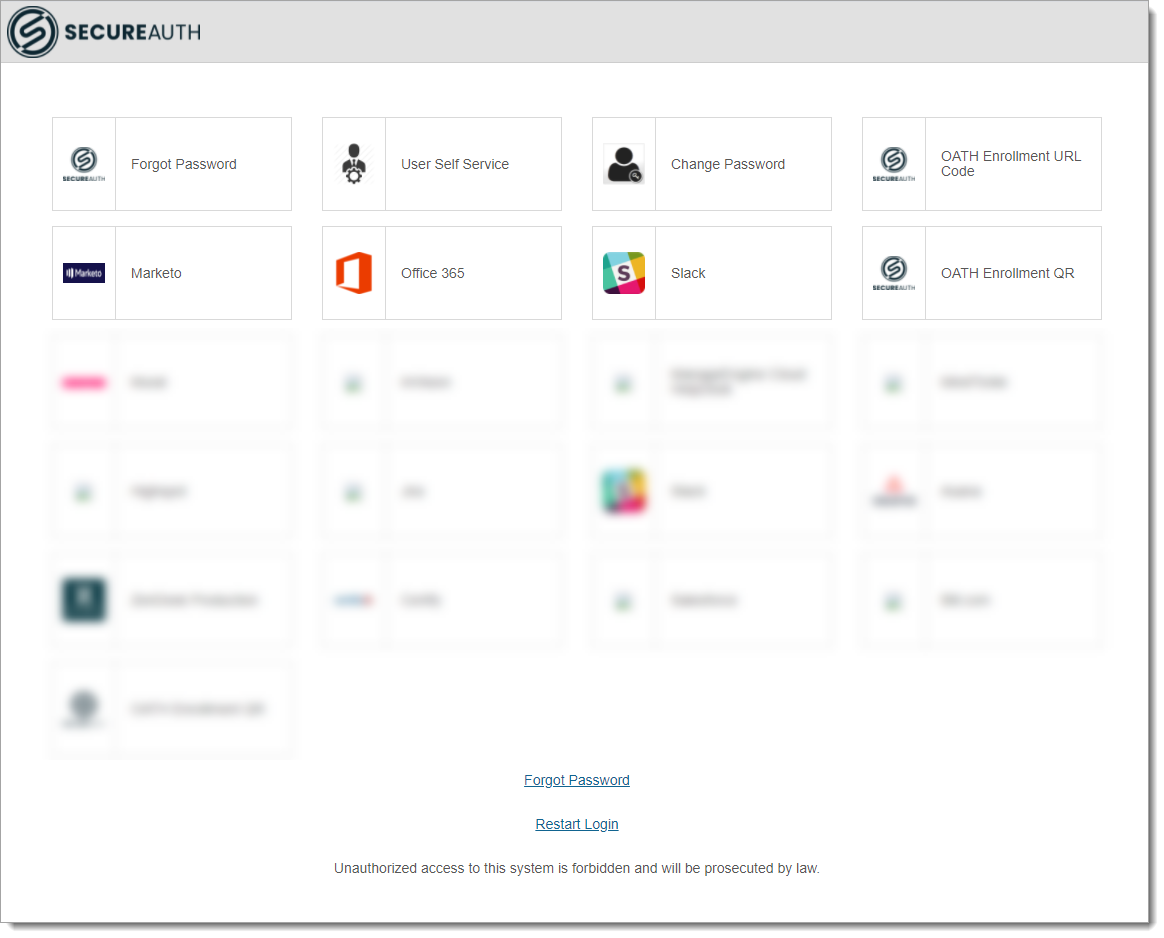
Links shown on portal page
Select the applications to display on the Secure Portal page for user SSO access.
For example, SecureAuth2 realm is the Office365 application and SecureAuth4 realm is the Salesforce application.
Save your changes.
On the Post Authentication tab, in the Forms Auth / SSO Token section, click the View and Configure FormsAuth keys/SSO token link.
If configured for pseudo SSO, SecureAuth Identity Platform checks the user account to ensure it was not disabled. If the user account is disabled, the Identity Platform denies the user account access to the resource, even if a cookie is in place and the session timeout has not expired.

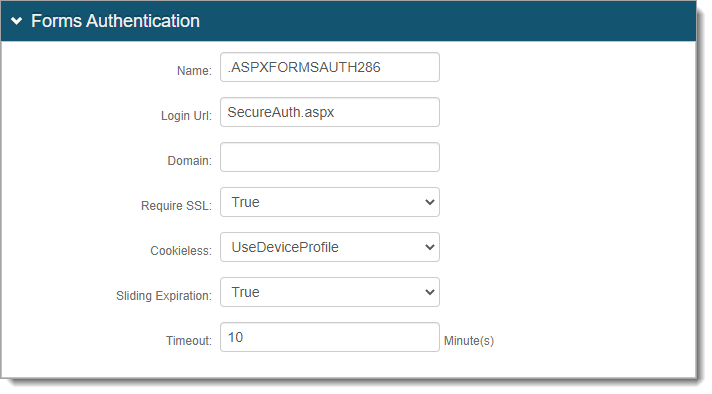
In the Forms Authentication section, set the following configurations.
Name
This is the forms based authentication (FBA) token name; it must match in each SSO-enabled realm.
Note
Make sure that it matches the SSO-enabled realms selected in the Portal Page Builder section.
By default, the name is set to
.ASPXFORMSAUTH[realm#]. You can change this to another name.If you have another SSO-enabled realm already set up, you can use that realm name here.
Login URL
By default, this field populates with
SecureAuth.aspx.Domain
This is the common domain name; it must match in each realm that has SSO enabled.
Note
Make sure that it matches the SSO-enabled realms selected in the Portal Page Builder section.
By default, this field is empty and the Identity Platform uses the domain of the deployment instance.
If you have another SSO-enabled realm already set up, you can use that domain name here.
Require SSL *
Indicate whether to require SSL to view the token – True or False.
Cookieless *
Choose how the Identity Platform sends the token in a cookie to the user's browser or device:
UseCookies – Always send a cookie.
UseUri – Do not send a cookie. Instead, send the token in a query string.
AutoDetect – Send a cookie if the user settings allow it.
UseDeviceProfile – Deliver a cookie if the browser settings allow it, regardless of the user settings.
Sliding Expiration *
Set the expiration of the cookie:
True – Cookie remains valid as long as the user is interacting with the page.
False – Allow cookie to expire and user must reauthenticate.
Timeout *
Set time in minutes, how long a cookie is valid.
Note
* The FBA token settings must be the same on each SSO-enabled realm selected in the Portal Page Builder section. The timeout value can be distinct.
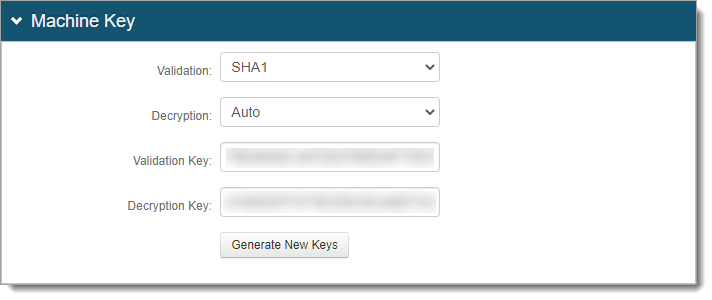
In the Machine Key section, set the following configurations.
Note
Make sure that it matches the SSO-enabled realms selected in the Portal Page Builder section.
Validation | Decryption
Settings in these two fields must be the same in all integrated SSO realms.
Validation Key | Decryption Key
If a realm is already set up for SSO, these are the validation and decryption keys. Do not click Generate New Keys.
If a realm is not set up for SSO, click Generate New Keys.
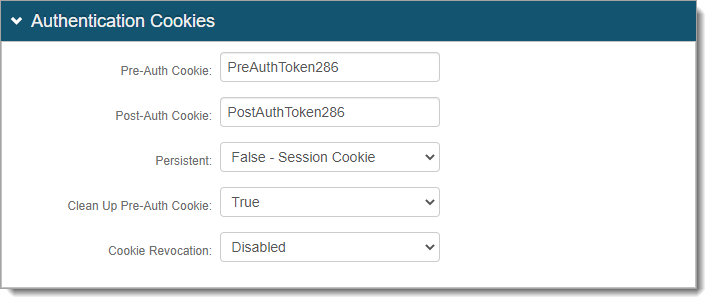
In the Authentication Cookies section, set the following configurations.
Pre-Auth Cookie | Post-Auth Cookie
These are the pre and post authentication cookie names; it must match in each SSO-enabled realm.
Note
Make sure that it matches the SSO-enabled realms selected in the Portal Page Builder section.
By default, the name is set to
PreAuthToken[realm#]andPostAuthToken[realm#].If you have another SSO-enabled realm already set up, use those pre and post authentication cookie names here.
Persistent
Indicate whether to use persistent authentication cookies:
False - Session Cookie – Set as a session cookie to remain valid until the browser closes or the session expires.
True - Expires after Timeout – Set as a persistent cookie stored in the browser to remember session information and login credentials.
Clean Up Pre-Auth Cookie
Indicate whether to remove pre-authentication cookie:
False – Do not remove the pre-authentication cookie. This allows persistent access within the timeout period.
True – Remove the pre-authentication cookie. This requires re-authentication for subsequent logins.
Cookie Revocation
Indicate whether to revoke cookies:
Disabled – Do not revoke authentication cookie after browser closes or session expires. This is the default setting in hybrid deployments.
Enabled – Revoke authentication cookie after browser closes or session expires. This is the default setting in cloud deployments. In hybrid deployments, if you want to use this setting, make sure you map an attribute to the Cookie Revocation Keys profile property in the data store.