OIDC (FIDO2) configuration on RADIUS
Configure OIDC (FIDO2) authentication on SecureAuth RADIUS Server to let VPN users authenticate with FIDO2.
RADIUS cannot perform FIDO2 authentication on its own. The RADIUS protocol exchanges short, text-based challenges, while FIDO2 needs a browser and a passkey or security key. To bridge this gap, RADIUS hands the authentication off to a SecureAuth IdP realm through an OIDC flow: the user completes FIDO2 authentication in a browser against the IdP, and RADIUS accepts the result. A local handler service builds the authentication URLs and reports the result back to RADIUS.
Prerequisites
SecureAuth RADIUS Server 26.00.03 or later.
An OIDC/OAuth2 application in SecureAuth IdP. Creating the application generates a client ID. You enter this value in RADIUS as the OIDC Client ID, which identifies the RADIUS integration to the IdP during the OIDC flow. You configure the application in SecureAuth IdP, not in RADIUS.
Network configuration
OIDC (FIDO2) uses a service that handles the OIDC requests, so your users must be able to reach it. The service holds no sensitive information. It builds the encoded URLs that work around the RADIUS challenge limits and checks the status of the authentication.
The service installs automatically with RADIUS under the name SecureAuth OIDC Handler.
 |
The service runs on port 8099 on the same machine as SecureAuth RADIUS Server. To use the feature, your users must be able to reach this machine on this port. Enable the port on TCP.
How you route traffic to the service depends on your network rules. This example uses an inbound rule that redirects calls to the /radius URL to the handler service at http://localhost:8099/{R:1}. You can configure this rule in Internet Information Services (IIS) on Windows Server, which is outside the scope of RADIUS. In the example flow, a request to https://server.url.com/radius/... reaches this service.
 |
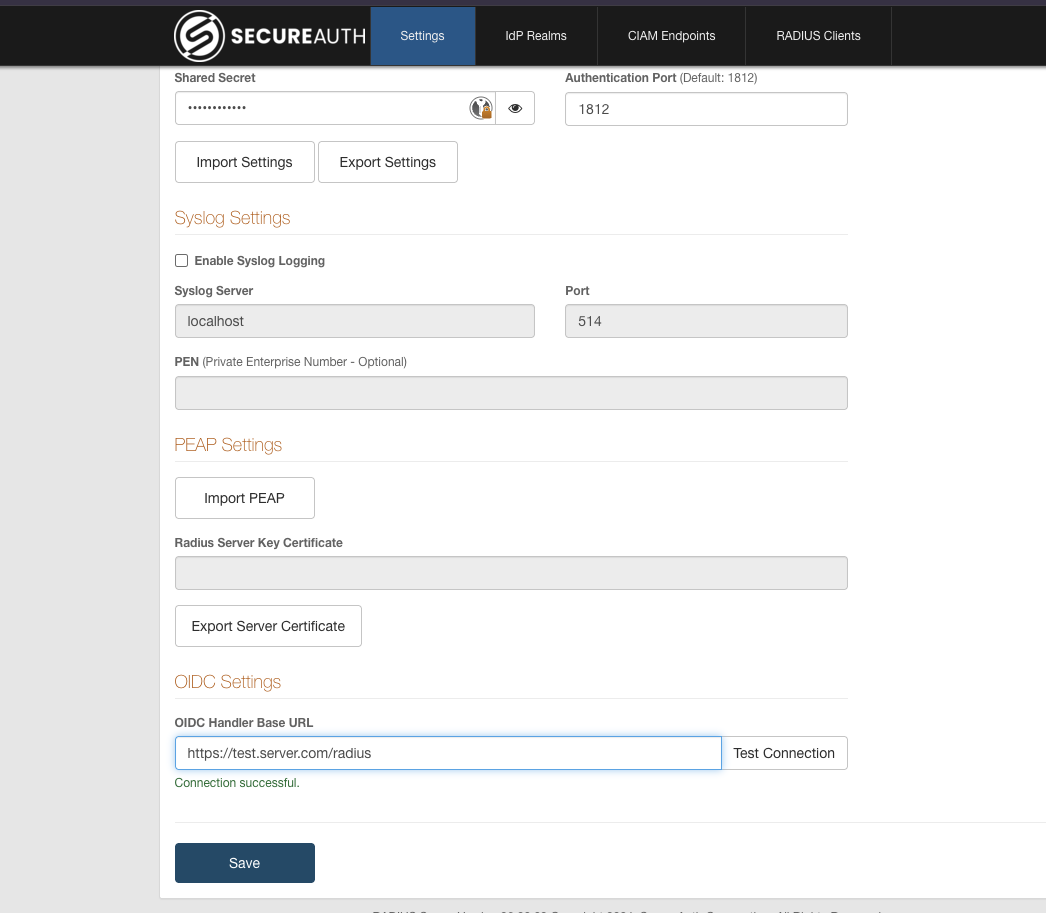
After you have the URL that your users will access, add it to SecureAuth RADIUS Server. Go to Settings > OIDC Settings and add the URL. To confirm that the service is reachable, click Test Connection. Save your changes.
 |
OIDC service advanced configuration
The service works with its default settings, so you do not need to change anything. To change a default, edit the config file at C:\Program Files\SecureAuth Corporation\SecureAuth IdP RADIUS Agent\bin.
The file contains the following defaults:
MEMORY_TIMEOUT=60
MEMORY_CLEANUP_INTERVAL=30
MAX_RECORDS=1000
PORT=8099
OIDC_AUTHORIZE_ENDPOINT=OidcToken.aspx
LOG_FILE=oidc-handler.log
OVERRIDE_HOST=
MEMORY_TIMEOUT – Time in seconds before an OIDC request times out and its record is deleted from memory. Increase this if your users take too long to authenticate with the IdP.
MEMORY_CLEANUP_INTERVAL – How often, in seconds, the service deletes timed-out records.
MAX_RECORDS – The number of records the service holds in memory before it starts deleting the oldest ones. This protects the machine from overload, such as during a distributed denial-of-service (DDoS) attack.
PORT – The port where the service is hosted.
OIDC_AUTHORIZE_ENDPOINT – The IdP endpoint that provides OIDC authentication.
LOG_FILE – The file where the service saves its logs
OVERRIDE_HOST – Set this to authenticate against a different IdP service than the one RADIUS uses. This is not recommended
After you change the config file, restart the service so it reads the change.
Configure SecureAuth RADIUS Server
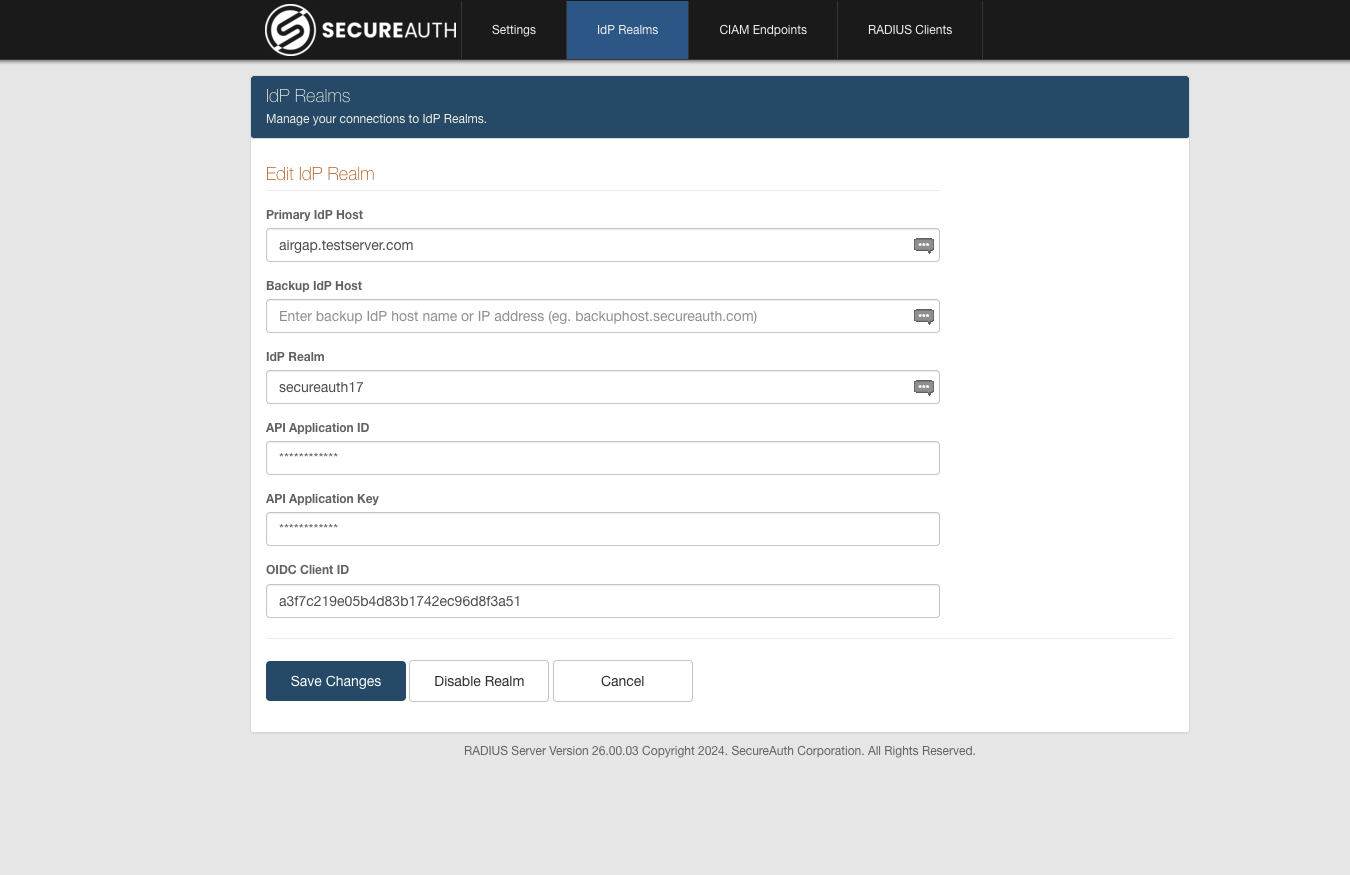
Configure the IdP realm. On the Realm edit page, enter the information for your IdP realm. Most of this is the same information you use for a standard IdP realm. The new field is OIDC Client ID, which comes from the OpenID Connect/OAuth2 configuration on the IdP.
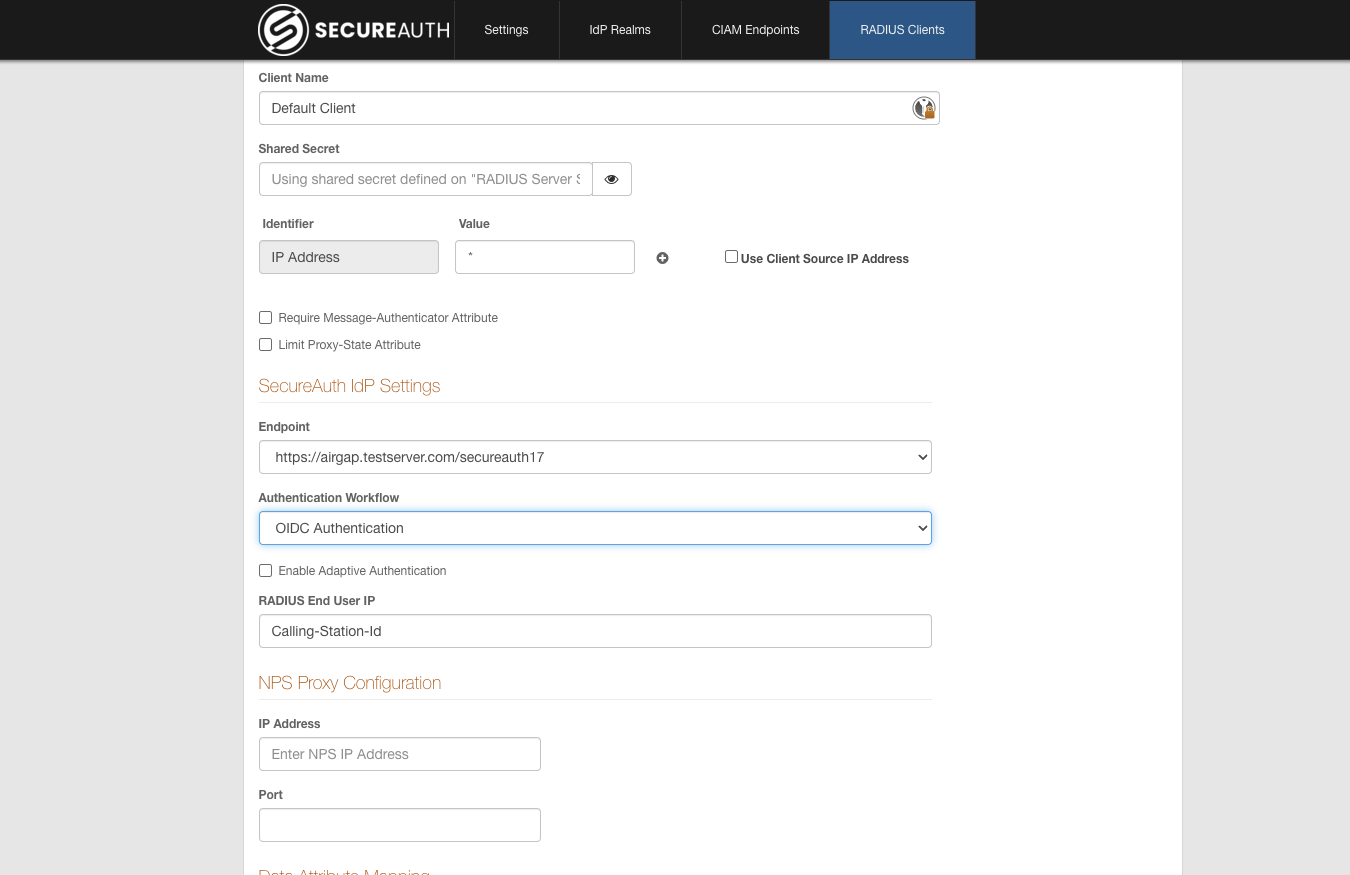
Configure the RADIUS client. On the RADIUS Clients tab, select the client you want to use, then click the pencil icon to edit it. Select the Endpoint you configured in step 1, and for Authentication Workflow, select OIDC Authentication. Save the client.
SecureAuth RADIUS Server is now configured, and you can authenticate users with OIDC.
Example authentication flow
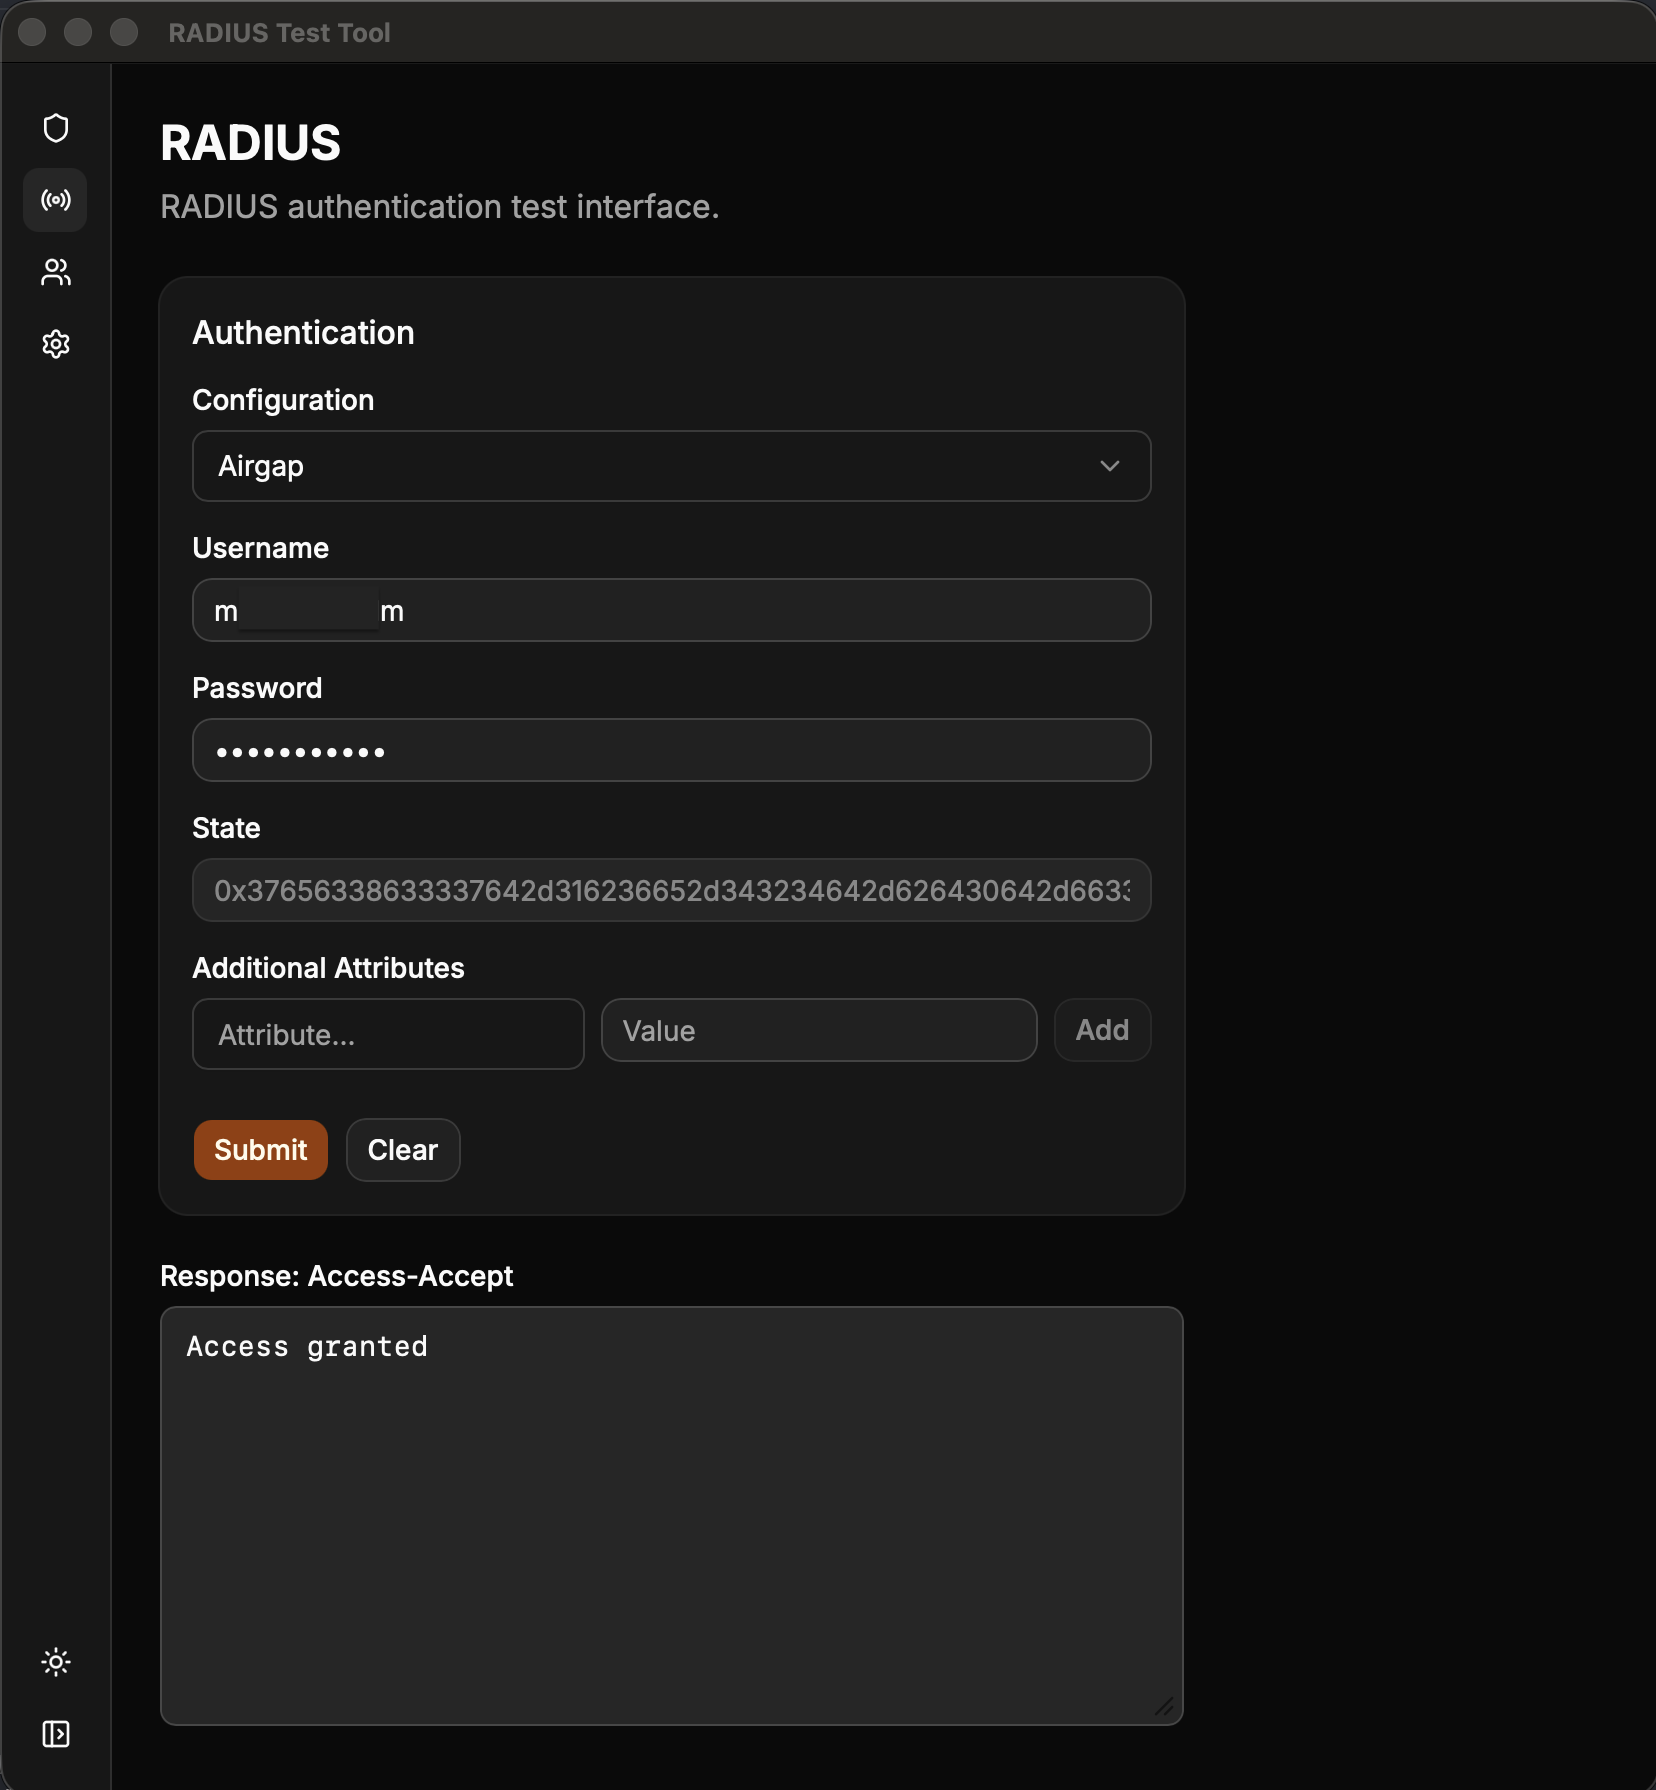
From a VPN client, make an authentication request. The challenge returns a link to authenticate.
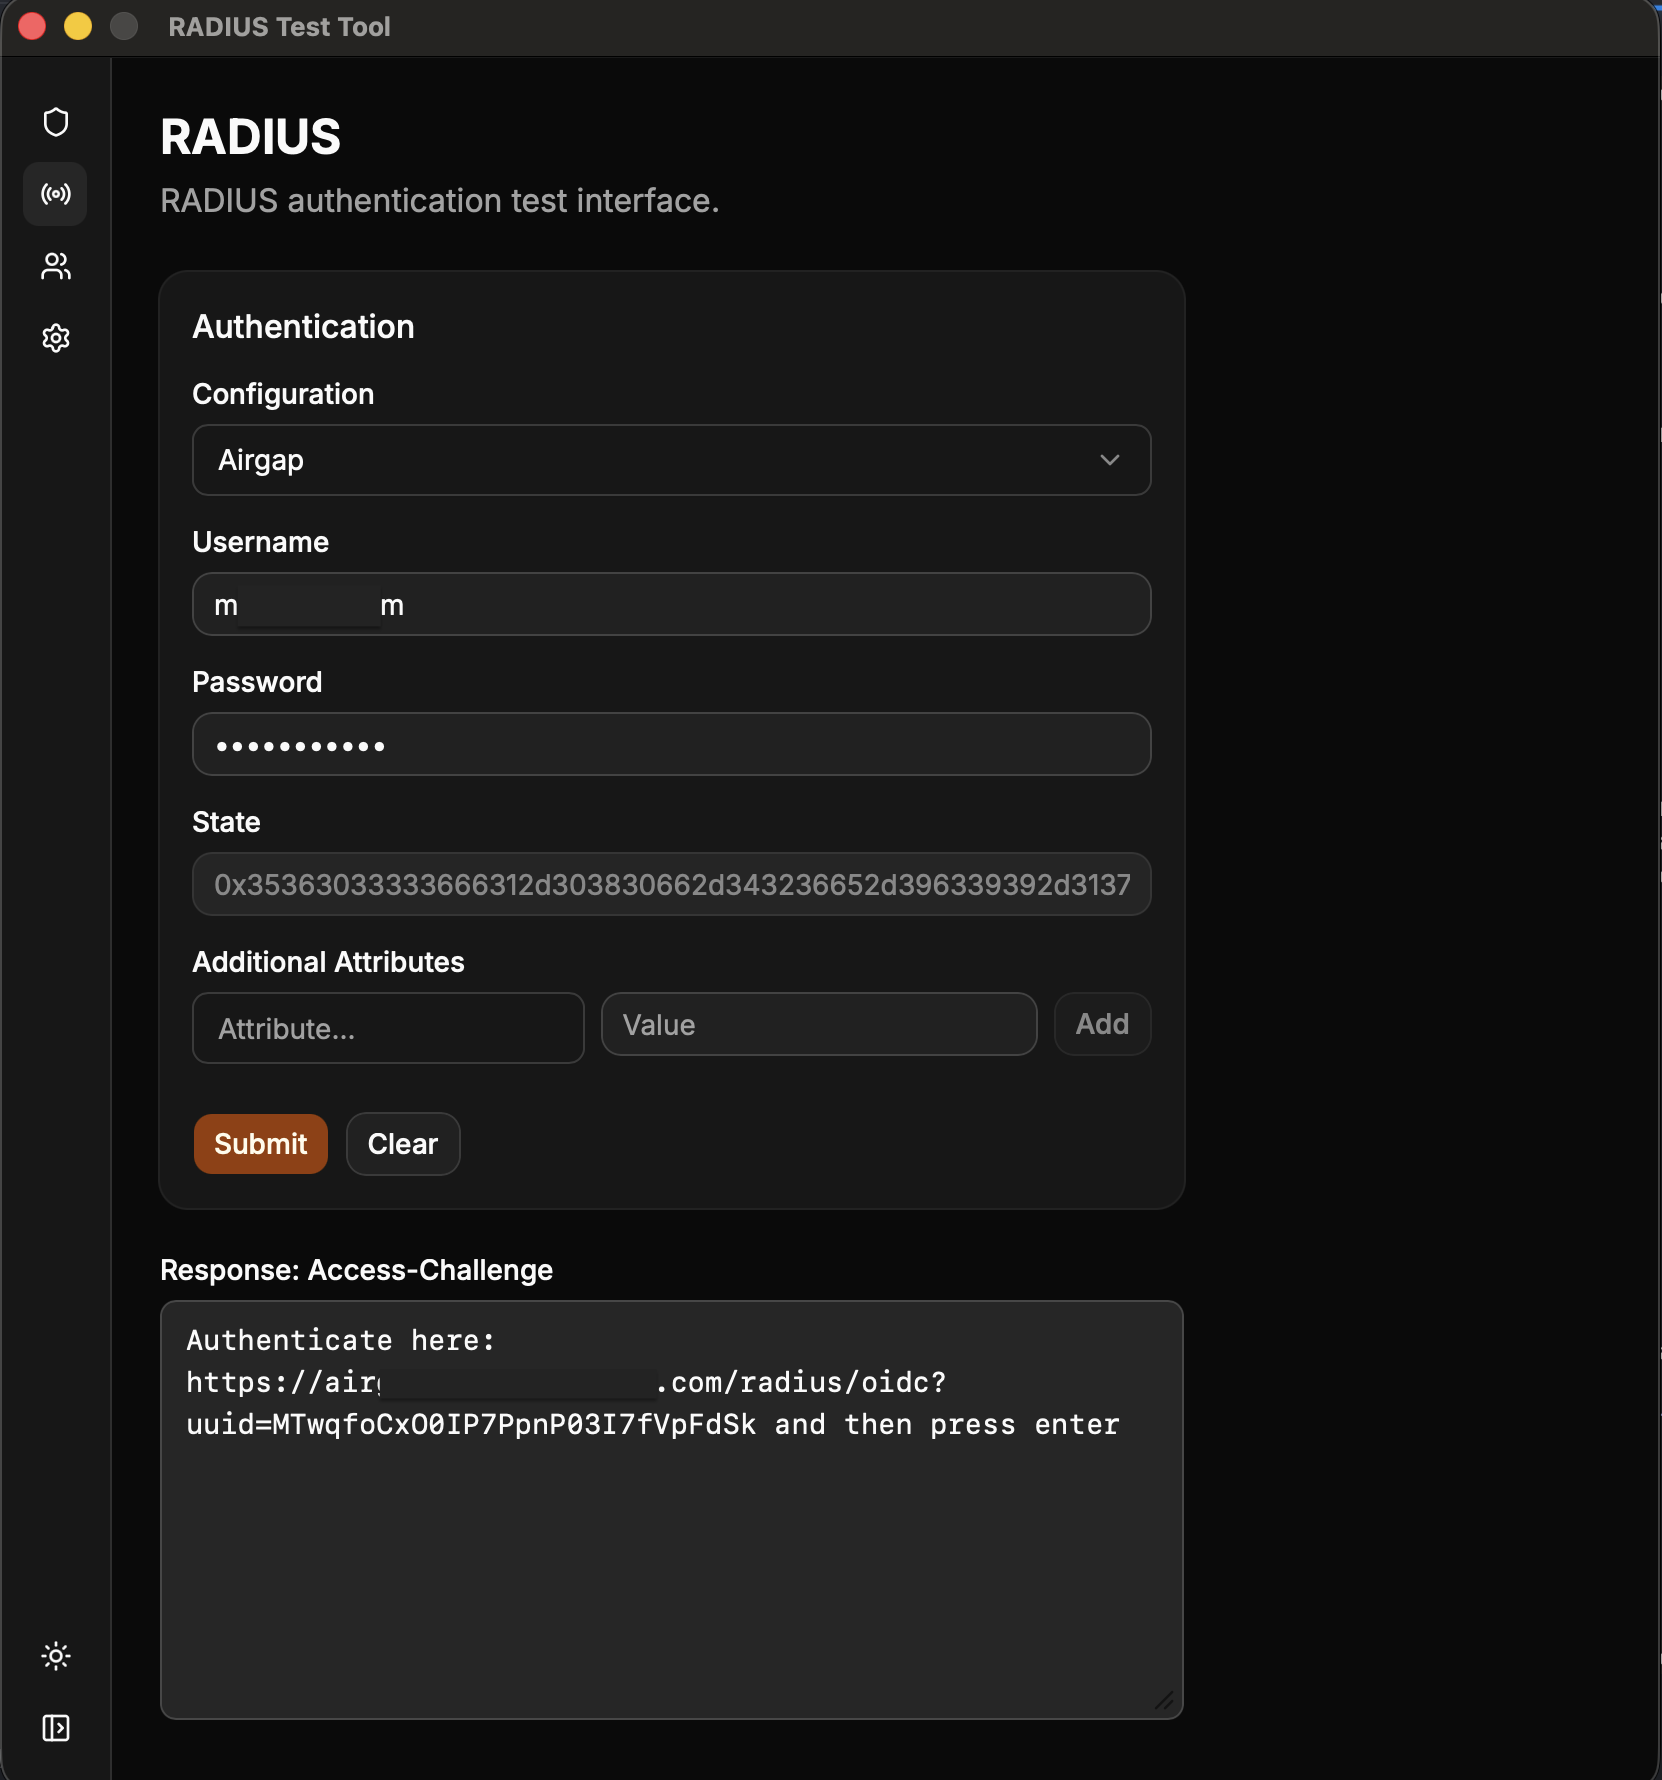
Open the link and authenticate with OIDC as usual.
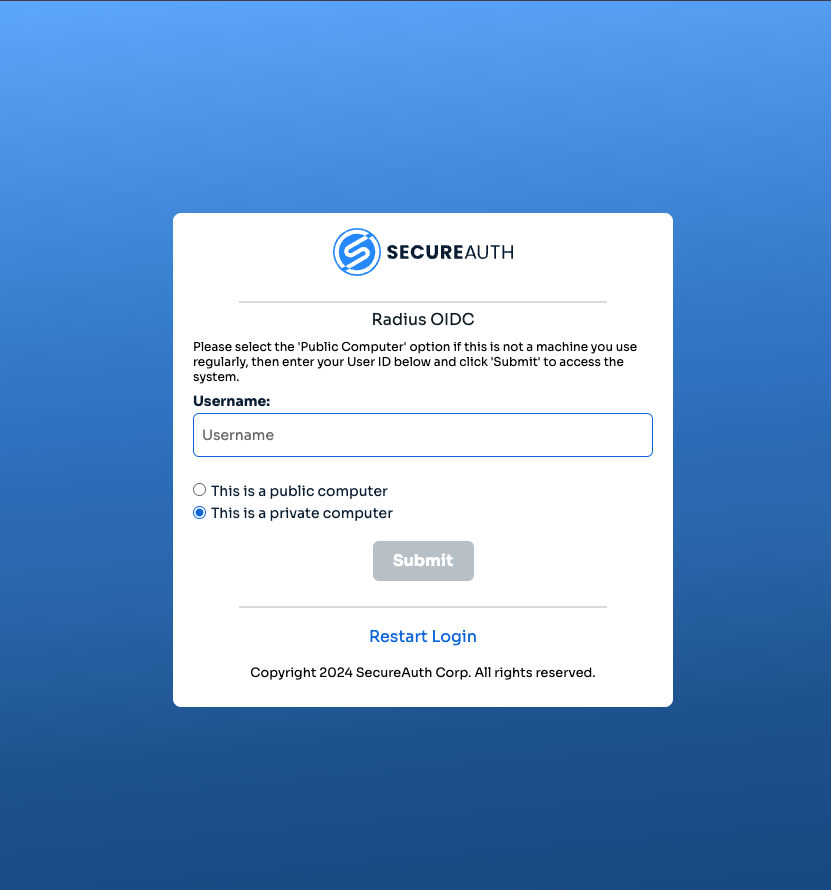
Authentication prompt
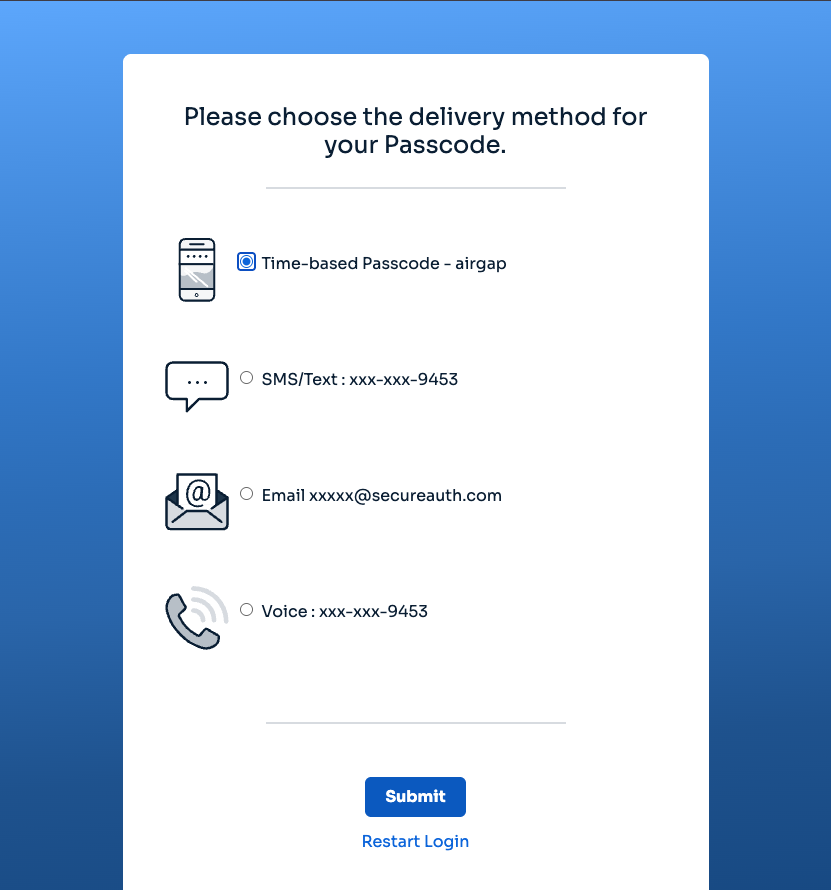
Select authentication method
After you authenticate, a page displays the message
Authenticated successfully, you can close this window.In your VPN client, press Enter to send the request back to RADIUS, as the challenge instructs. RADIUS verifies the authentication you completed in the browser and returns
Access-Accept, which confirms that the user is authenticated.