SecureAuth RADIUS Test Tool
Use the SecureAuth RADIUS Test Tool to run and diagnose your SecureAuth RADIUS Server. The tool helps you isolate where an authentication problem starts.
The tool supports three tasks:
Test a SecureAuth IdP endpoint – Test the endpoints that SecureAuth RADIUS uses. Use this to identify whether the problem is with the RADIUS Server or with the SecureAuth IdP realm that RADIUS accesses.
Test the SecureAuth Connect configuration – If you use SecureAuth RADIUS with SecureAuth Connect, validate that SecureAuth Connect is configured correctly to work with RADIUS.
Simulate a VPN client connection – Run a VPN authorization request against the SecureAuth RADIUS Server to check whether the problem is in the VPN server configuration.
Requirements
Microsoft Windows 10 version 1803 or later.
Microsoft Edge WebView2, which is usually already installed on Windows.
Download the SecureAuth RADIUS Test Tool
From the SecureAuth Product Downloads page, download the SecureAuth RADIUS Test Tool.
Run the SecureAuth RADIUS Test Tool
The tool creates a configuration file named configurations.json in the folder that contains the .exe file, and uses it to remember your settings. To move your settings to another machine, copy configurations.json.
To run the tool, open the .exe file. The tool opens to the following window.
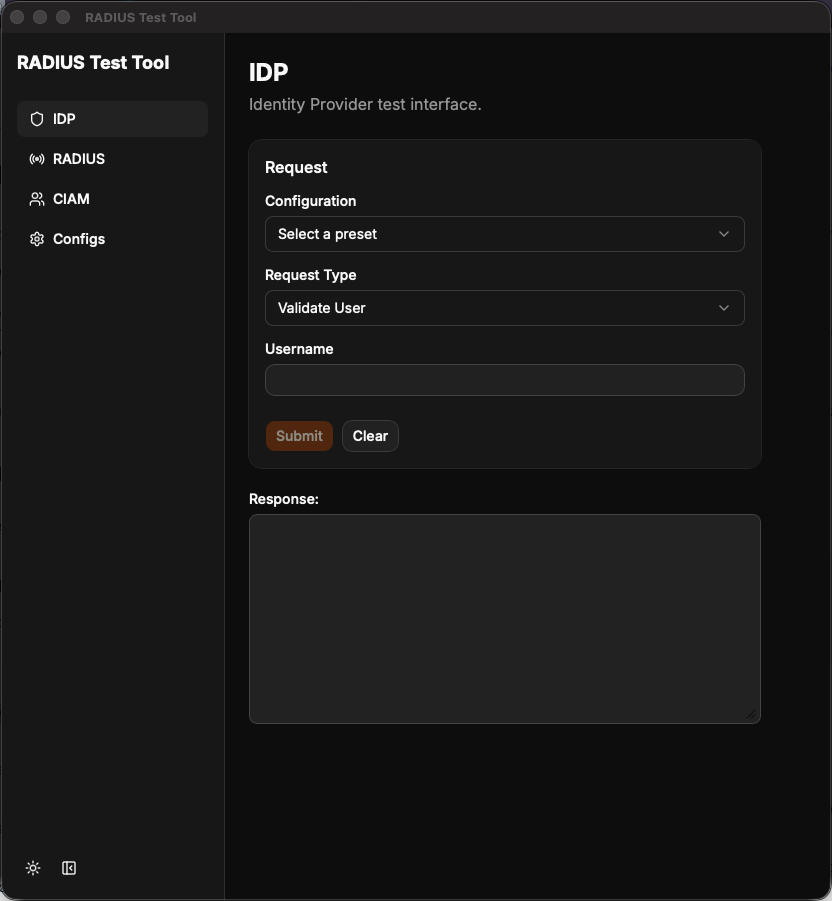 |
Test a SecureAuth IdP endpoint
In the sidebar, select Configs, then select the IDP tab.
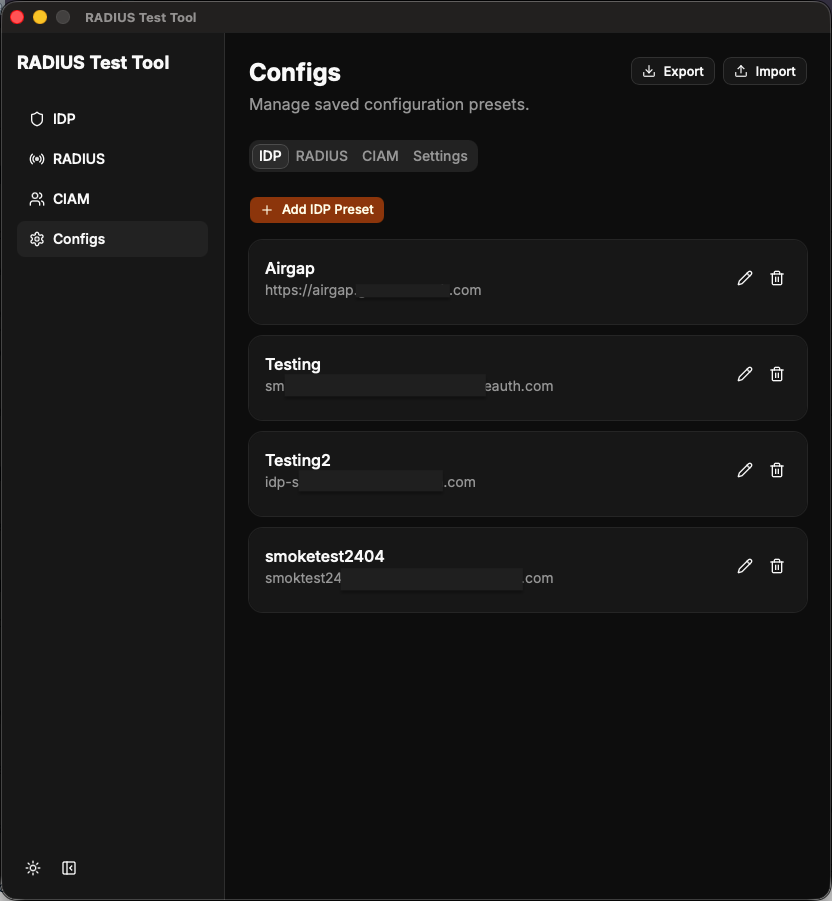
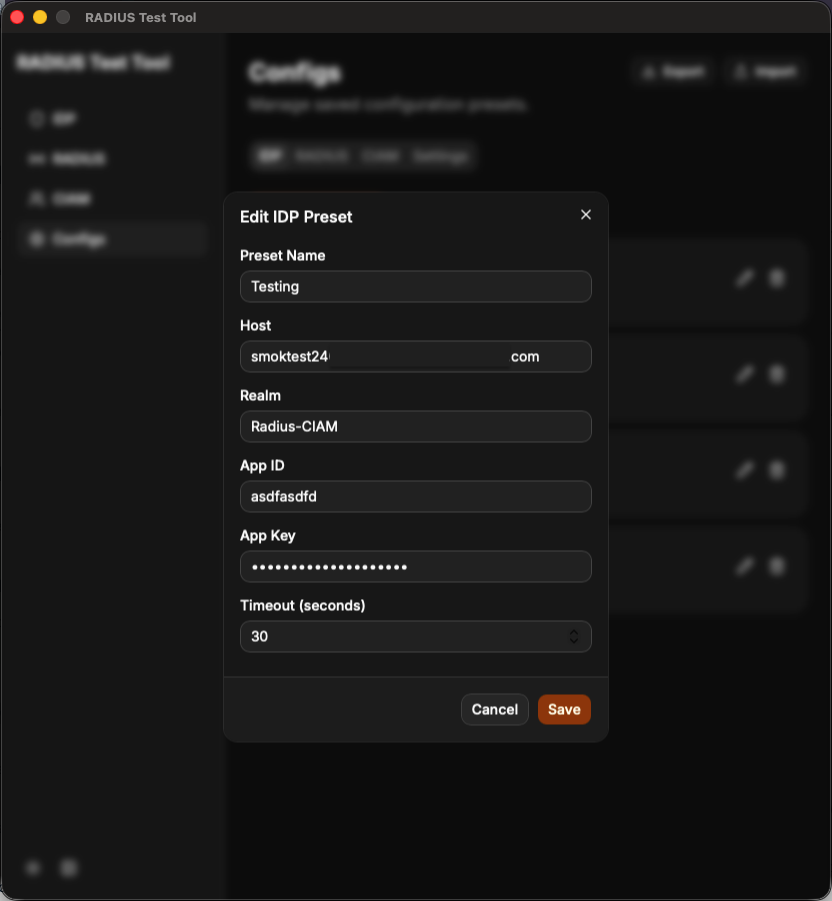
Click + Add IDP Preset, or click the pencil icon to edit an existing preset. Enter the information for your IdP realm. This is the same information you use in the RADIUS Server. The Preset Name is a label for your own reference and does not affect the request. Save the preset.
In the sidebar, select IDP, then select your preset from the Configuration list.
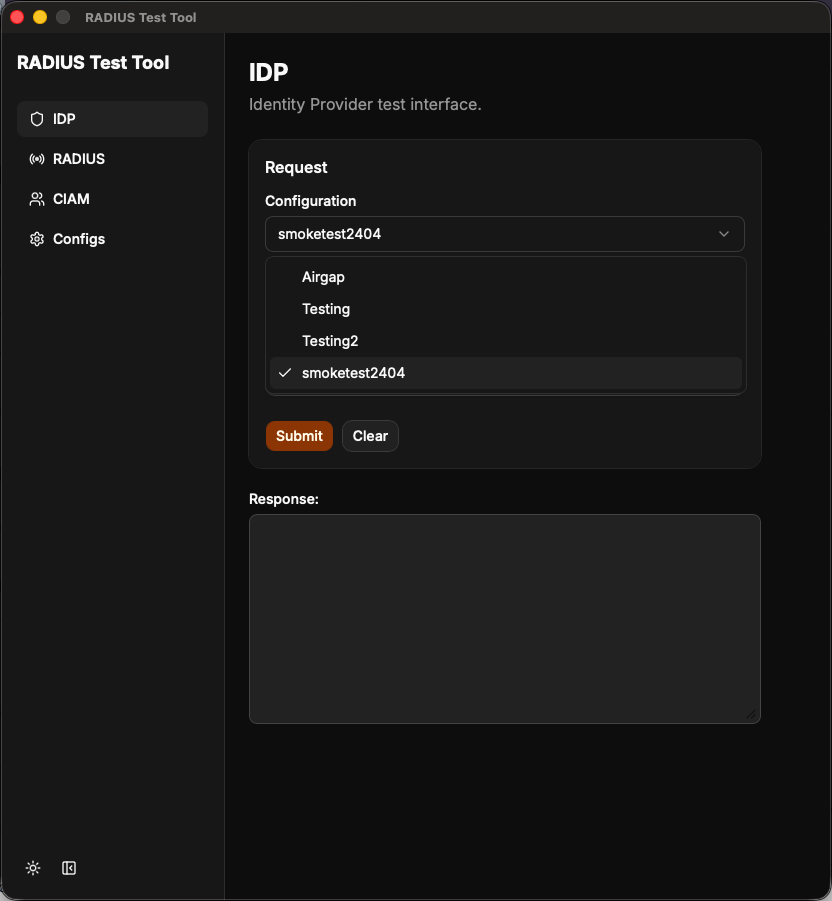
From the Request Type list, select the request to run. This example uses Get Factors.
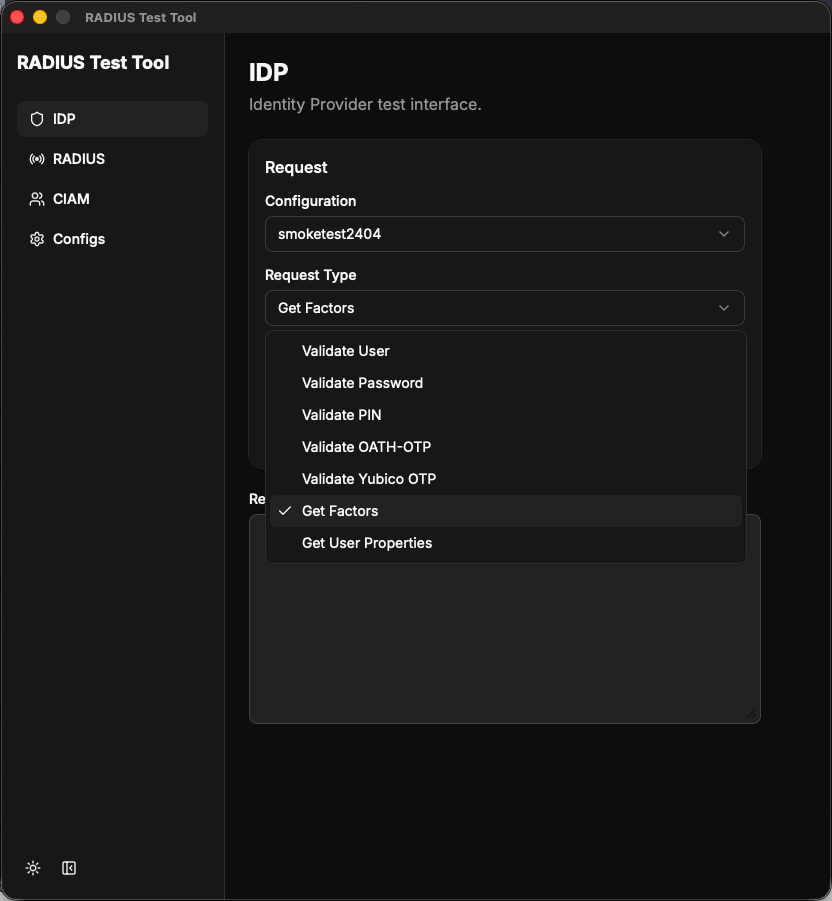
Enter the Username to test, then click Submit. The response lists the available factors for that user in the selected realm.
Test the SecureAuth RADIUS Server
In the sidebar, select Configs, then select the RADIUS tab.
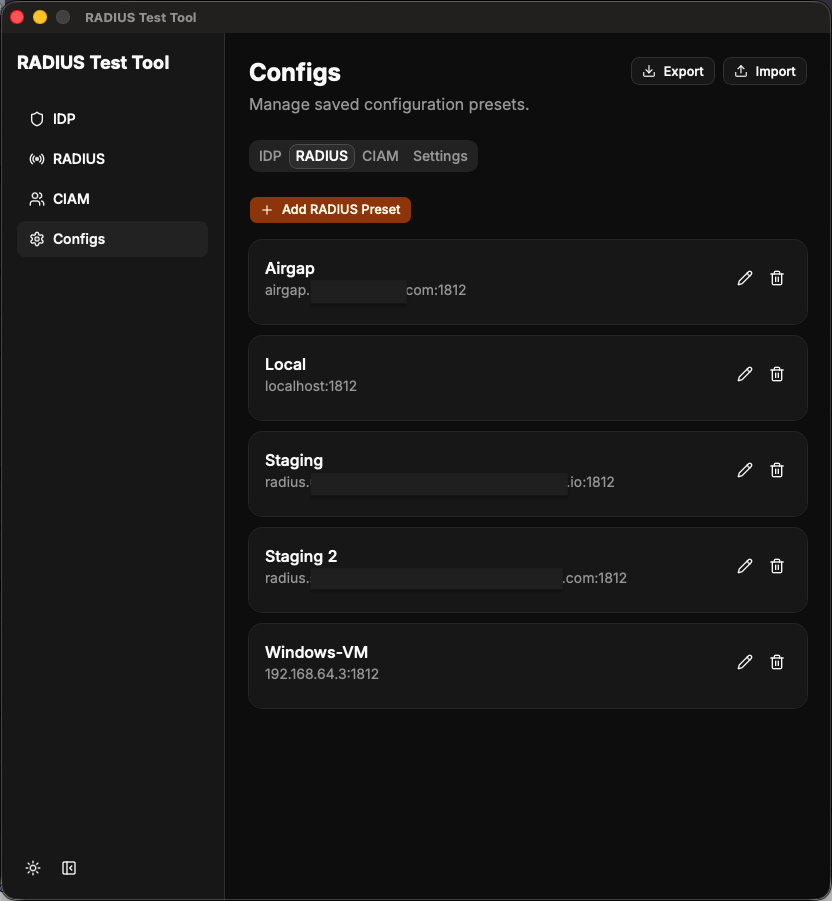
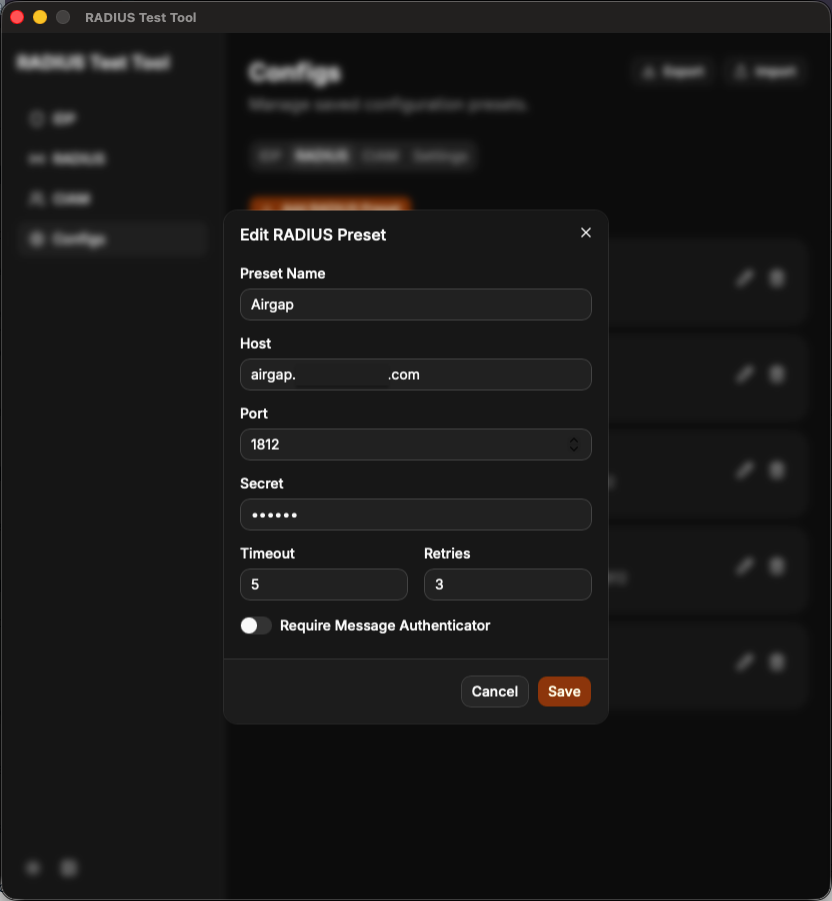
Click + Add RADIUS Preset, or click the pencil icon to edit an existing preset. Enter the information for your RADIUS Server. This is the same information you use in your VPN server. The Preset Name is a label for your own reference and does not affect the request. Save the preset.
In the sidebar, select RADIUS, then select your preset from the Configuration list.
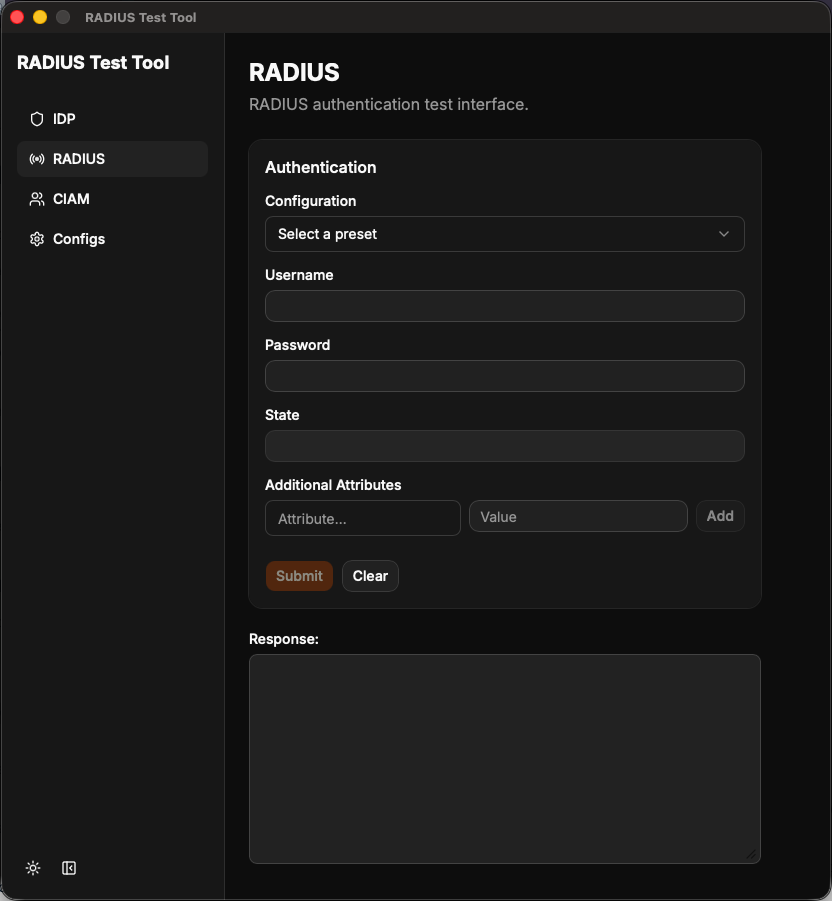
Enter a username and password, the same way you would in the VPN client, then click Submit. To test an advanced RADIUS configuration, add RADIUS attributes. This example sets
Calling-Station-Id, which is optional.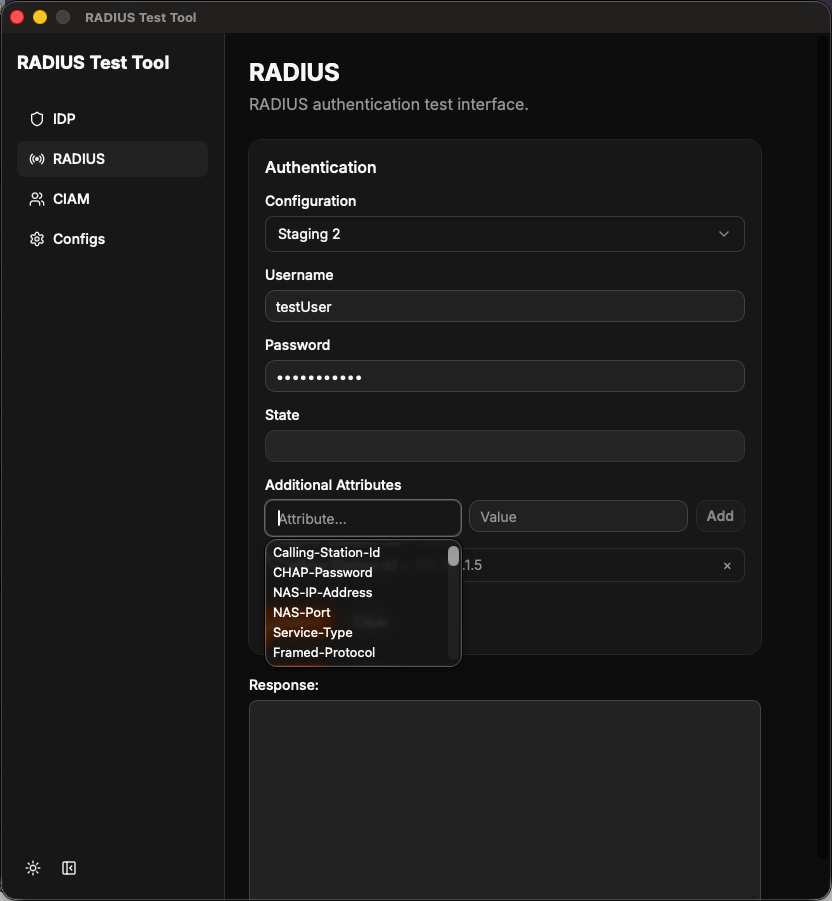
If you receive an
Access-Challenge, respond by entering your response in the password field, the same way your VPN client does.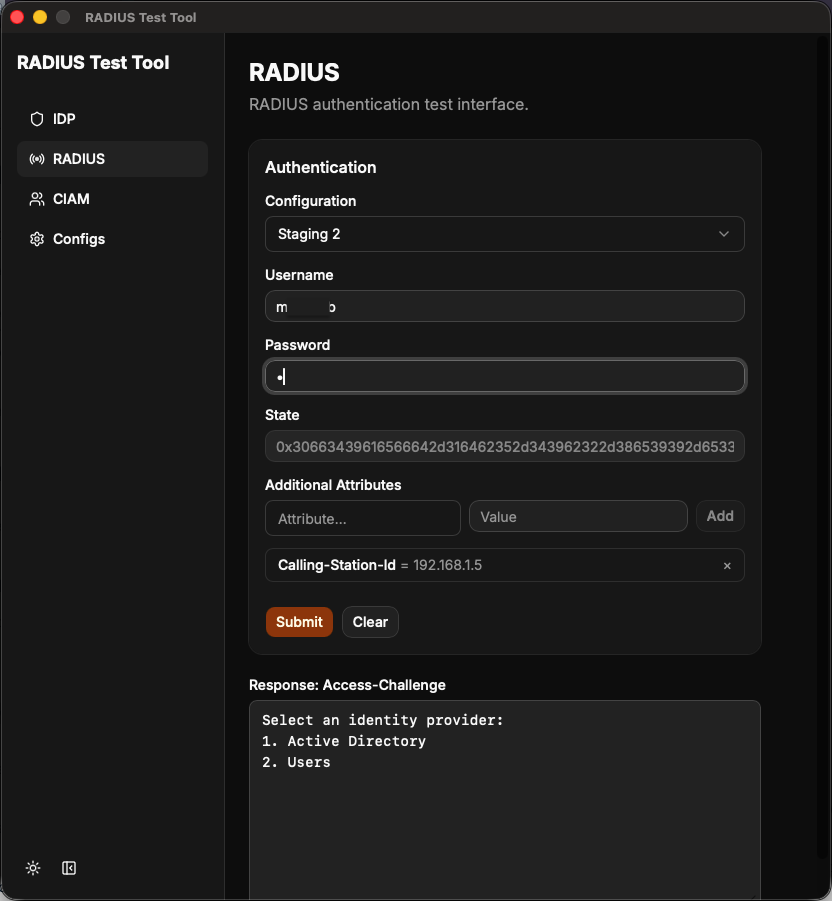
After you finish a test, click Clear to reset the request
State. This tells the RADIUS Server to start a new authentication request instead of answering a challenge.
Test the SecureAuth Connect configuration
In the sidebar, select Configs, then select the CIAM tab.
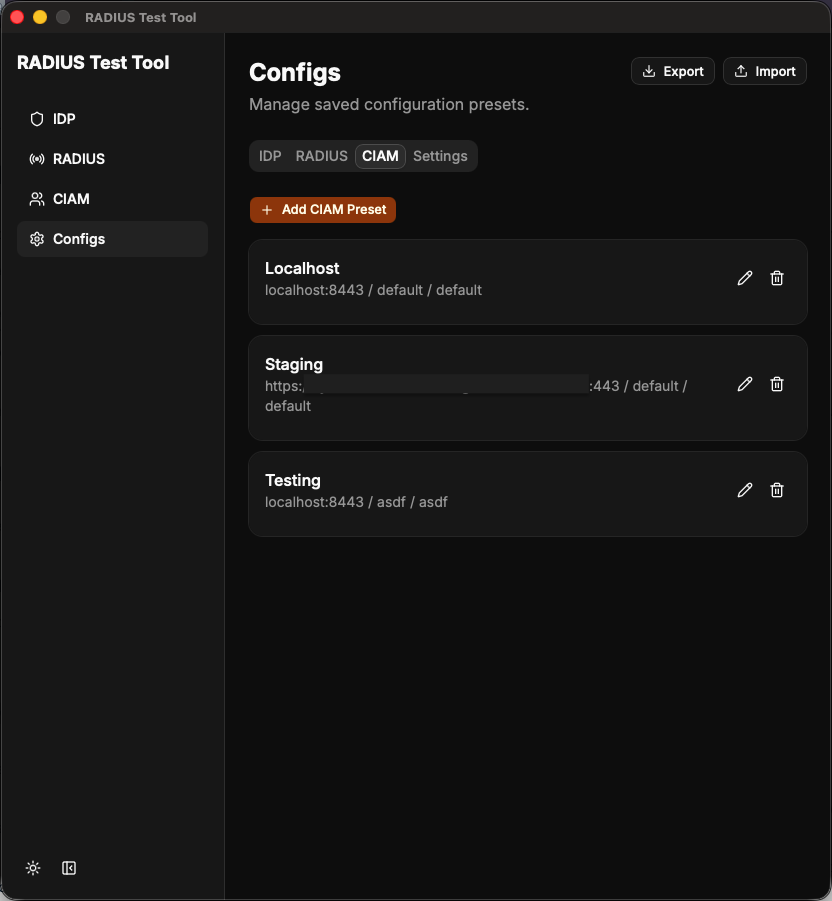
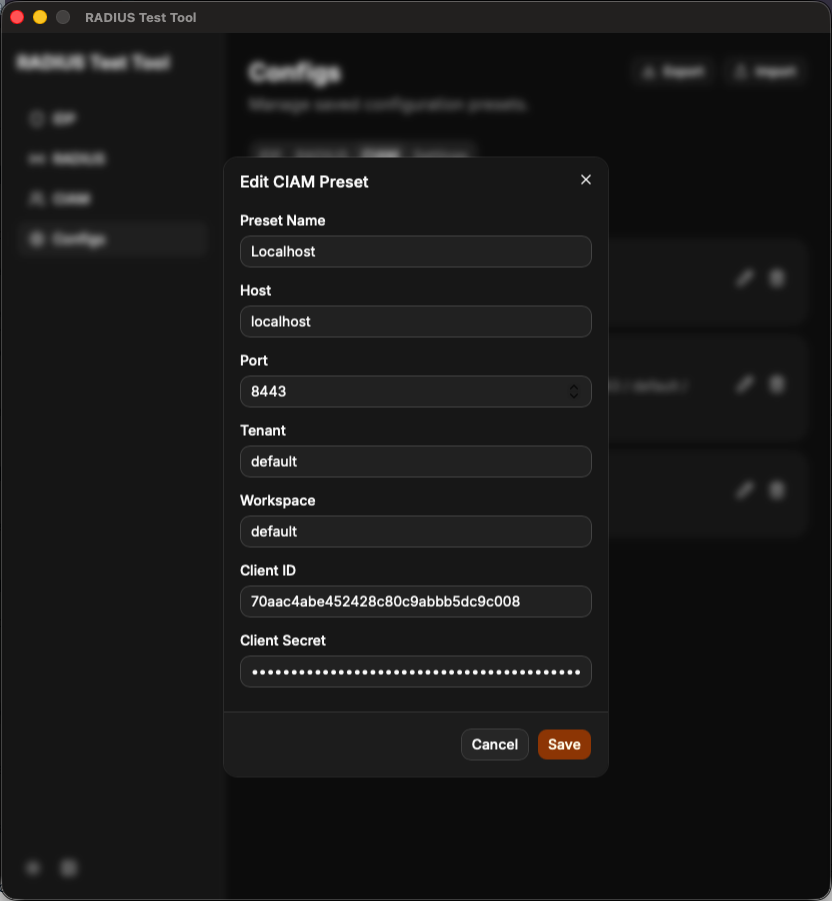
Click + Add CIAM Preset, or click the pencil icon to edit an existing preset. Enter the information for your SecureAuth Connect client. The Preset Name is a label for your own reference and does not affect the request. Save the preset.
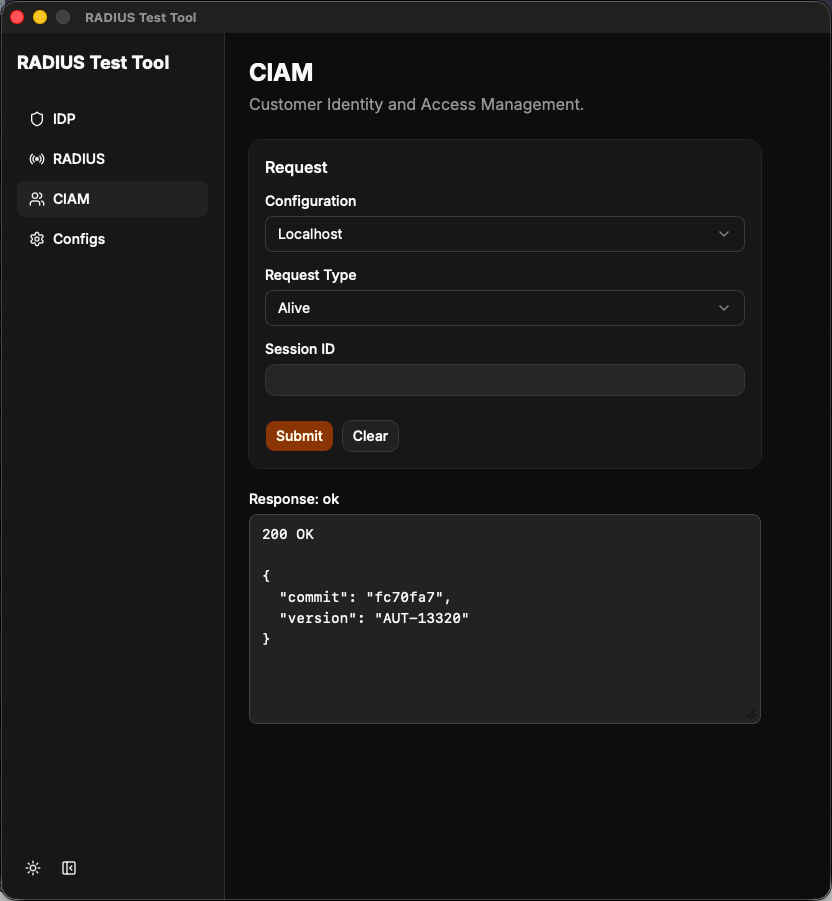
In the sidebar, select CIAM, then select your preset from the Configuration list.
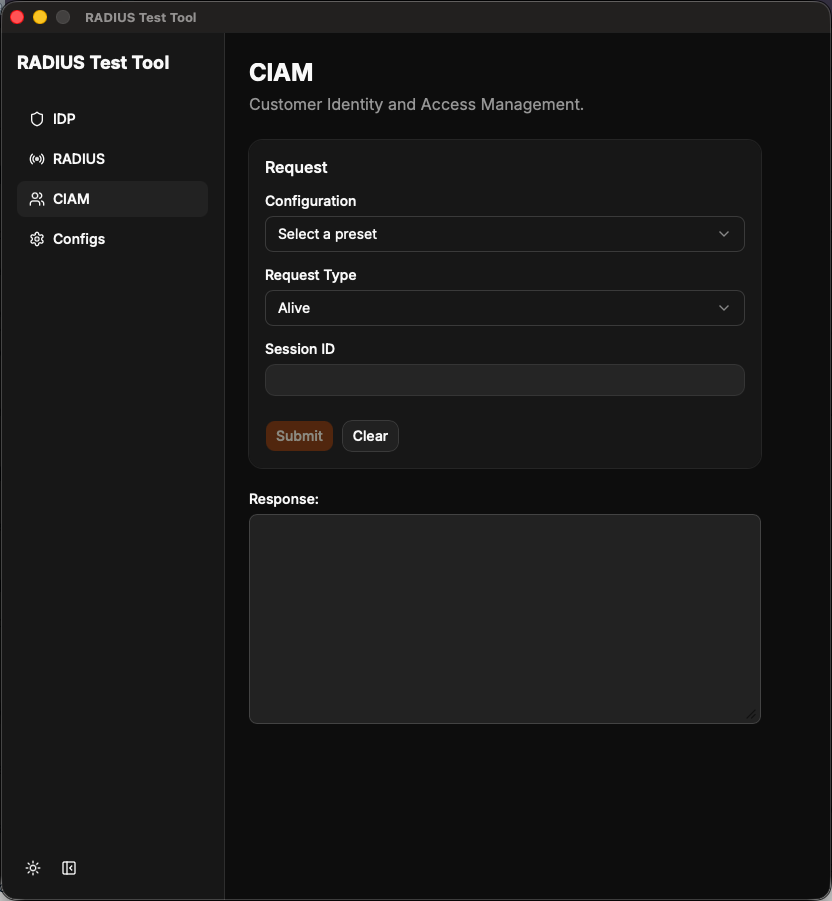
To check whether SecureAuth Connect is reachable from this machine, select the Alive request type.
To check the basic configuration, select Create Session and enter an identifier. A
201 Createdresponse means the configuration works.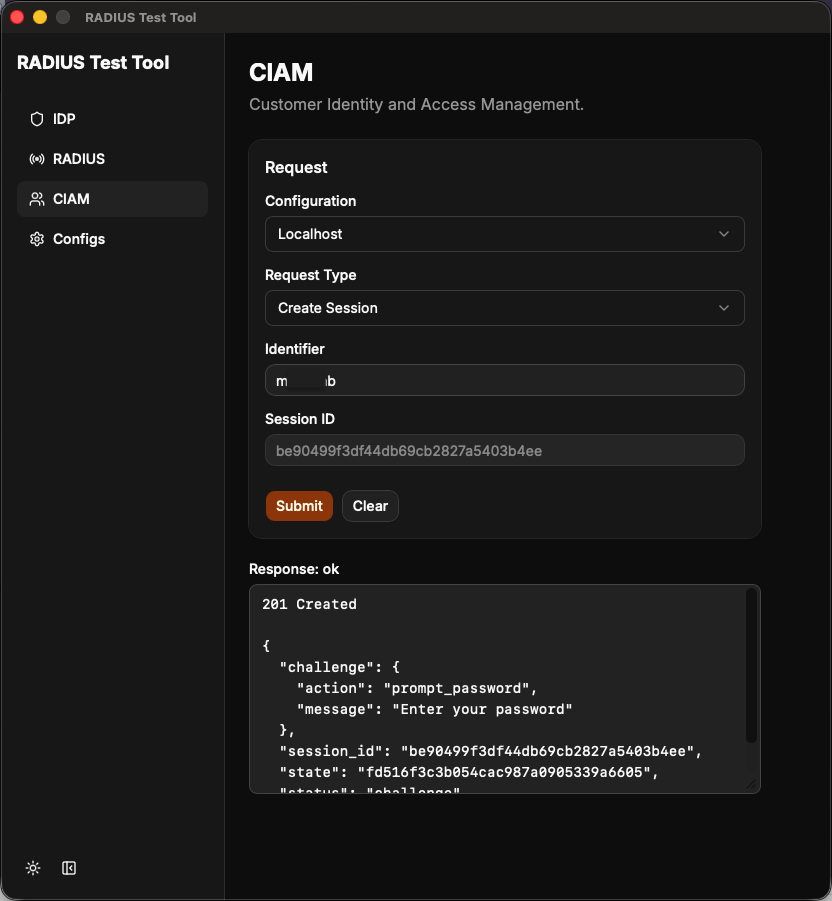
To check whether a test username and password authenticate, select Submit Password. A successful authentication returns
status: accept.
Display and save settings
To switch between light and dark mode, go to the bottom left and click the sun icon.
To collapse the side menu, go to the bottom left and click the button next to the sun icon.
To save the current window size, sidebar state, and light or dark mode, in the sidebar select Configs, then select the Settings tab, and save.
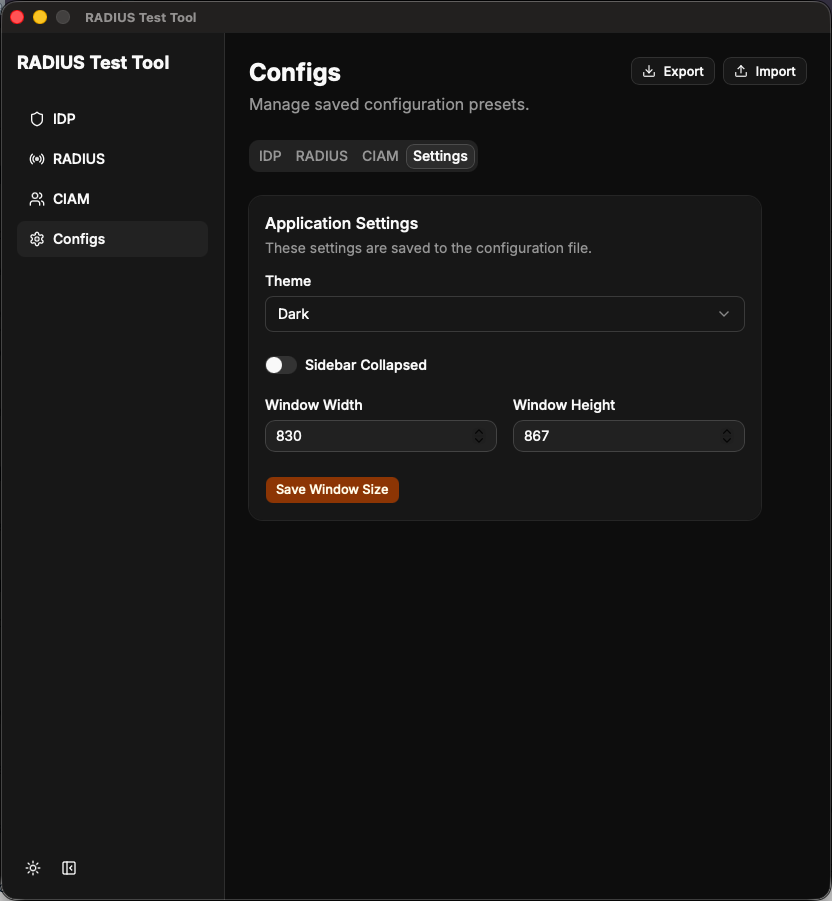 |
Dark mode
 |
Light mode