Add NetIQ eDirectory data store
In the SecureAuth® Identity Platform, you can add a NetIQ eDirectory data store to assert or manage user identity information.
Prerequisites
Identity Platform release 22.02 or later, cloud or hybrid deployment
SecureAuth Connector installed and connected for Identity Platform cloud deployment
NetIQ eDirectory data store
NetIQ eDirectory service account with read access (and optional write access) for the Identity Platform
Data store limitations
Note the following issues with eDirectory data stores:
Push notifications – Push notification login options are not available when Push Notification Token is in JSON data format
SSL connection – Depending on the type of eDirectory and the directory setup, the SSL connection might or might not work.
Data store support – Take note that all data format types might not work for all property and attribute mappings. Make sure to test the storage and usage before releasing to users.
Process
There are two parts to adding a data store in the Identity Platform — (1) adding the data store and (2) mapping the data store properties.
Step 1 of 2: Add NetIQ eDirectory data store
On the left side of the Identity Platform page, click Data Stores.
Click Add a Data Store.
Set the Data Store Name and select the Connection Type as NetIQ eDirectory.
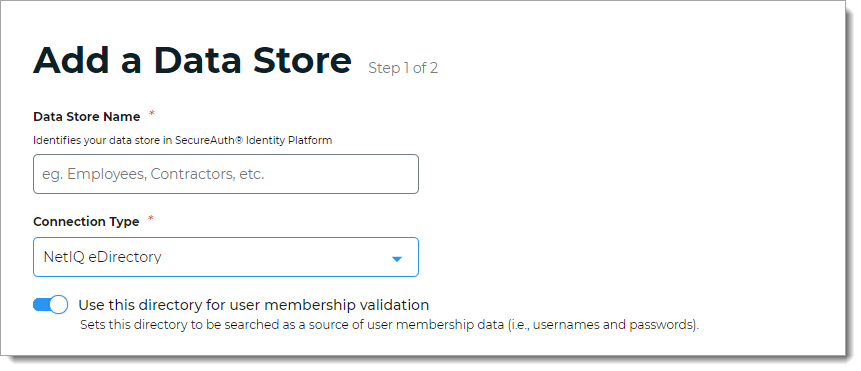
For the Use this directory for user membership validation slider, use one of the following options.
On
Enable membership validation; use the directory to search for the user's membership in a user group.
This means the directory is a Membership Store, containing the password to validate with the username.
Off
Disable membership validation; use the directory to search only for the user profile information.
This means the directory is only used to find the username and profile information (such as phone number, email address, device recognition profiles, OATH tokens, and so on).
After the data store is saved, this field is the Membership Store label shown on the View Summary.

A common use case for a Membership Store would be to have a directory with username and password information (and maybe some profile information), and then have a second directory or database used to store and access data that the Identity Platform writes to the directory (such as device recognition, device enrollment, push notification tokens, and so on).
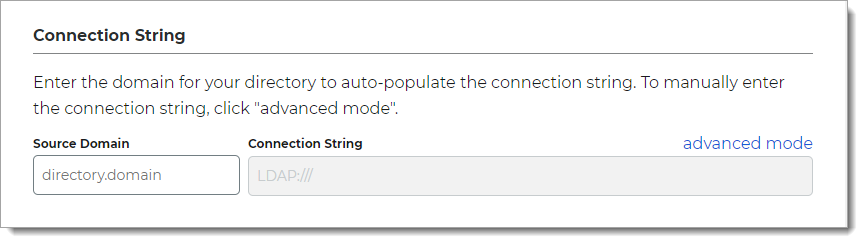
In the Connection String section, set the connection string for the domain to NetIQ eDirectory.
Note
For information about how to identify the corporate connection string, see the external article How can I figure out my LDAP connection string?
Source Domain
The domain for your directory to build the connection string in the next field.
For example: initech.local
For an IP address in the connection string, use the advanced mode link.
Connection String
The value in this field is the connection string auto-populated by the Source Domain field and contains domain and generic values for DC=directory, DC=domain (unless a custom connection string is manually entered).
For example, the result would be: LDAP://initech.local/DC=initech,DC=local
Note
This field does not auto-populate correctly for IP addresses. Use the advanced mode link.
advanced mode
To manually enter the connection string, click the advanced mode link.
For example, for an IP address the result would be: LDAP://198.51.100.02/o=users
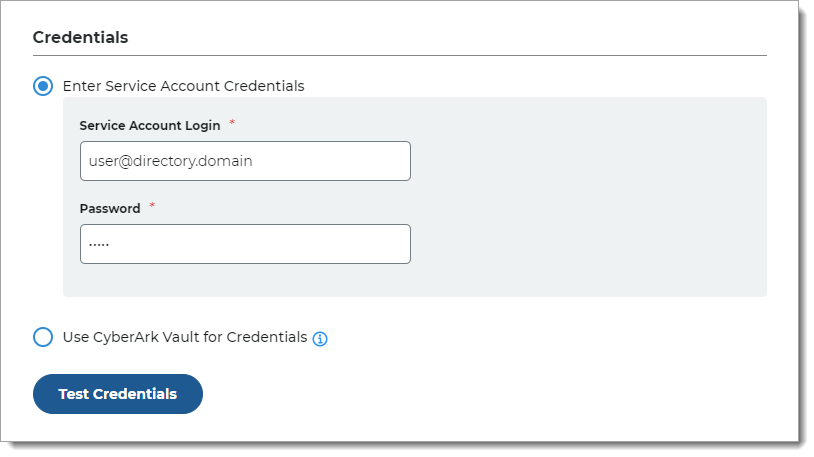
In the Credentials section, provide the log in credentials to access the NetIQ eDirectory data store.
Enter Service Account Credentials
With this option, enter the following fields:
Service Account Login – Email address for the service account login
Password – Password for the service account login
Test the data store connection by clicking Test Credentials. (This button is available only in hybrid deployments of Identity Platform 22.02 and 22.12.)
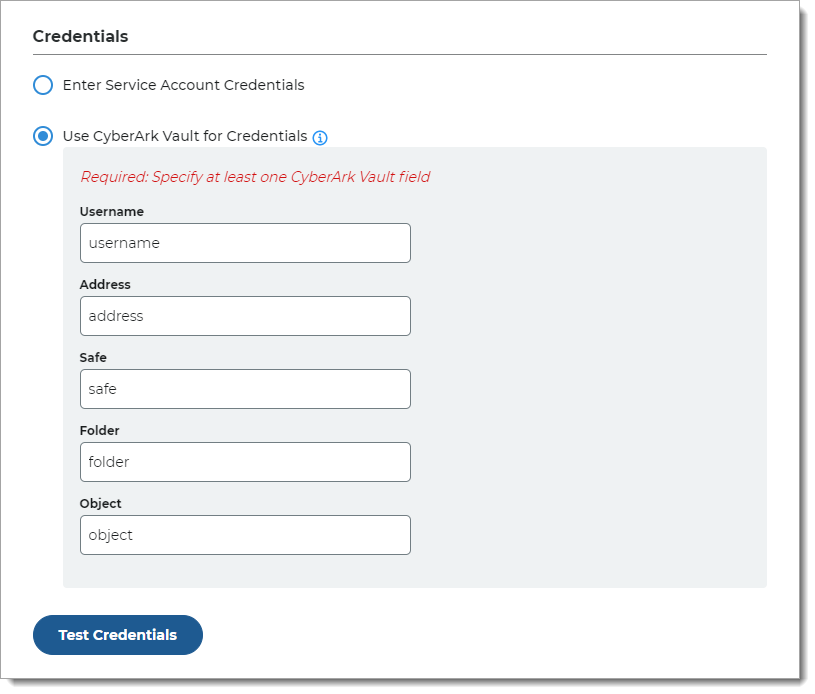
Use CyberArk Vault for Credentials
With this option, enter at least one field for the service account login:
Username – User name of machine to be scanned by CyberArk Application Identity Manger (AIM). This information appears on the Account Details page of the CyberArk Password Vault Web Access (PVWA) Admin Console
Address – Address of machine to be scanned by AIM
Safe – Name of Access Control Safe where credentials are stored
Folder – Name of folder where account resides (by default, it its the root folder)
Object – Unique identifier Object name for the account
Test the data store connection by clicking Test Credentials. (This button is available only in hybrid deployments of Identity Platform 22.02 and 22.12.)
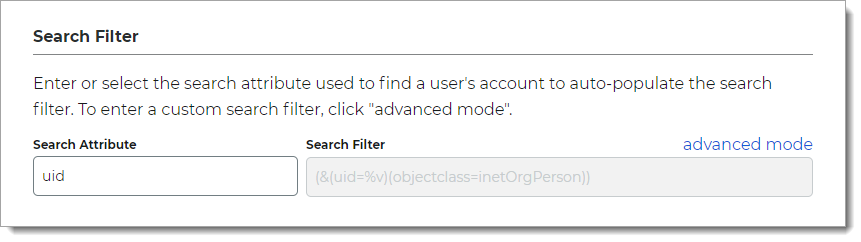
In the Search Filter section, define the search attribute to find a user account.
Search Attribute
Set the search attribute. For example, uid.
Search Filter
Value is auto-populated in this field.
Example search filter for uid:
(&(uid=%v)(objectclass=*))advanced mode
To enter a custom search filter, click the advanced mode link.
In the Advanced Settings section, define the attribute to encrypt user profile data.
Encryption Attribute
The unique directory value inherits the default value from the Username attribute field to encrypt user profile data.
For example: uid
Validate User Type
Choose how to validate usernames and passwords in NetIQ eDirectory:
Bind – Make a direct call to the directory to validate the username and password (faster search)
Search – Use the search function to find and validate a username and password (slower search)
Connection Mode
Select how the Identity Platform and the directory connect:
SSL – Use a secure connection on Port 636, but uses Secure Socket Layer technology, which relies on certificates
Standard – Use a standard LDAP connection on Port 389 that uses basic authentication (plain text)
Allow Anonymous Queries
Move the slider to indicate whether non-authenticated users should also be granted access to browse the protected resource.
In most cases, this setting should be off; unless using a generic LDAP directory.
Allow Advanced User Checks
Move the slider to indicate whether to allow the Identity Platform to search this directory for more user information. This is useful in a scenario in which a user account is locked.
Disable Nested Groups
Move this slider ON to indicate that the Identity Platform will only search main group memberships and ignore nested groups.
This will improve performance.

Click Continue.
The Map Data Store Properties page opens.
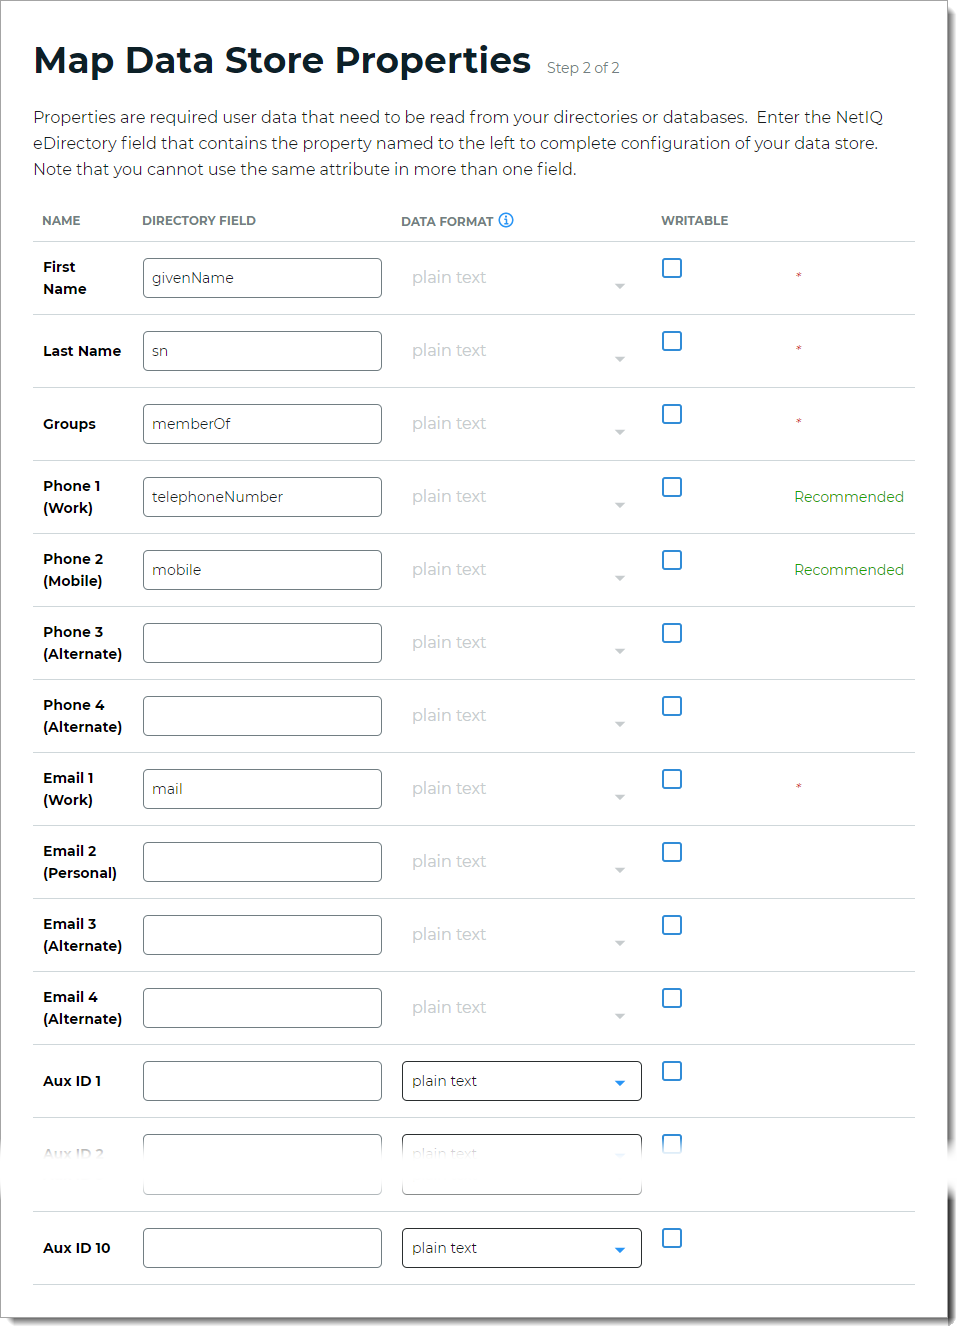
Step 2 of 2: Map the NetIQ eDirectory data store properties
The second part of adding a NetIQ eDirectory data store is mapping the directory properties.
Each user is uniquely identified by profile data that is read from or stored in your directories and databases.
The Identity Platform does not store user profiles, so your NetIQ eDirectory attributes must be mapped to Identity Platform profile properties to be read and updated in the directory by the Identity Platform. The directory attribute mapped to the property is retrieved only when required for authentication or assertion purposes.
For more information about how data store profile properties are stored for on-premises, hybrid, or cloud Identity Platform deployments, see List of stored profile field properties.
Note
Each mapped profile property should have its own directory attribute. It is not recommended to map the same directory attribute to more than one property.
For example, the mobile attribute is mapped to Phone 2, so you would use a different attribute for Phone 3.
On the Map Data Stores Properties page, define the required attributes in the directory field that corresponds to each NetIQ eDirectory property required by your environment and the Identity Platform. The required attributes are:
First Name
Last Name
Groups
Email 1 (Work)
Define the recommended attributes in the directory field that corresponds to eachNetIQ eDirectory property. The recommended attributes are:
Phone 1 (Work)
Phone 2 (Mobile)
In the Writable column, define whether a profile property can be writable (select check box) or not writable (cleared check box) according to your LDAP directory configuration.
For example, if you want to allow users to update their personal email address on the self-services page, select the Writable check box.
Some profile properties are disabled by default in the system; for example, biometric profile properties used by SecureAuth cloud services.
For mapped profile properties (for example, Push Notification Tokens, Behavioral Biometrics, and Device Profiles), specify the Data Format to define how data is encrypted and stored in the directory.
For cloud deployments, certain profile properties (for example, Push Notification Tokens, Behavioral Biometrics, and Device Profiles) are generated and used by SecureAuth, and stored in the SecureAuth cloud database.
The selection options are listed below (options vary depending on your Identity Platform deployment):
plain text – store data as regular, readable text (default)
standard encryption – store and encrypt data using RSA encryption
advanced encryption – store and encrypt data using AES encryption
standard hash – store and encrypt data using SHA-256 hash
plain binary – store data as a binary representation of the data (uses a .NET library to make it binary – may not be readable by all applications)
json – store data in a universal format, readable by all applications (similar to plain text)
encrypted json – stored as JSON, with values inside encrypted using AES encryption
Click Save Data Store.
The NetIQ eDirectory data store you just added appears in the User Data Stores list.