Create User page configuration
The Identity Management (IdM) tool contains the Create User function to add new users. As an administrator, you can add new users in the enterprise directory and in the Identity Platform environment.
Prerequisites
SecureAuth® Identity Platform release 22.02 or later
Data store added to the Identity Platform
Configured user authentication policy
Data store limitations
Note the following issues for certain data stores on the Create User page.
Microsoft Entra ID (formerly Azure AD) and Oracle DB: Create user with group is not supported (you can still create a user without groups)
LDAP: Create user is not supported
Step A: Add and configure Create User page
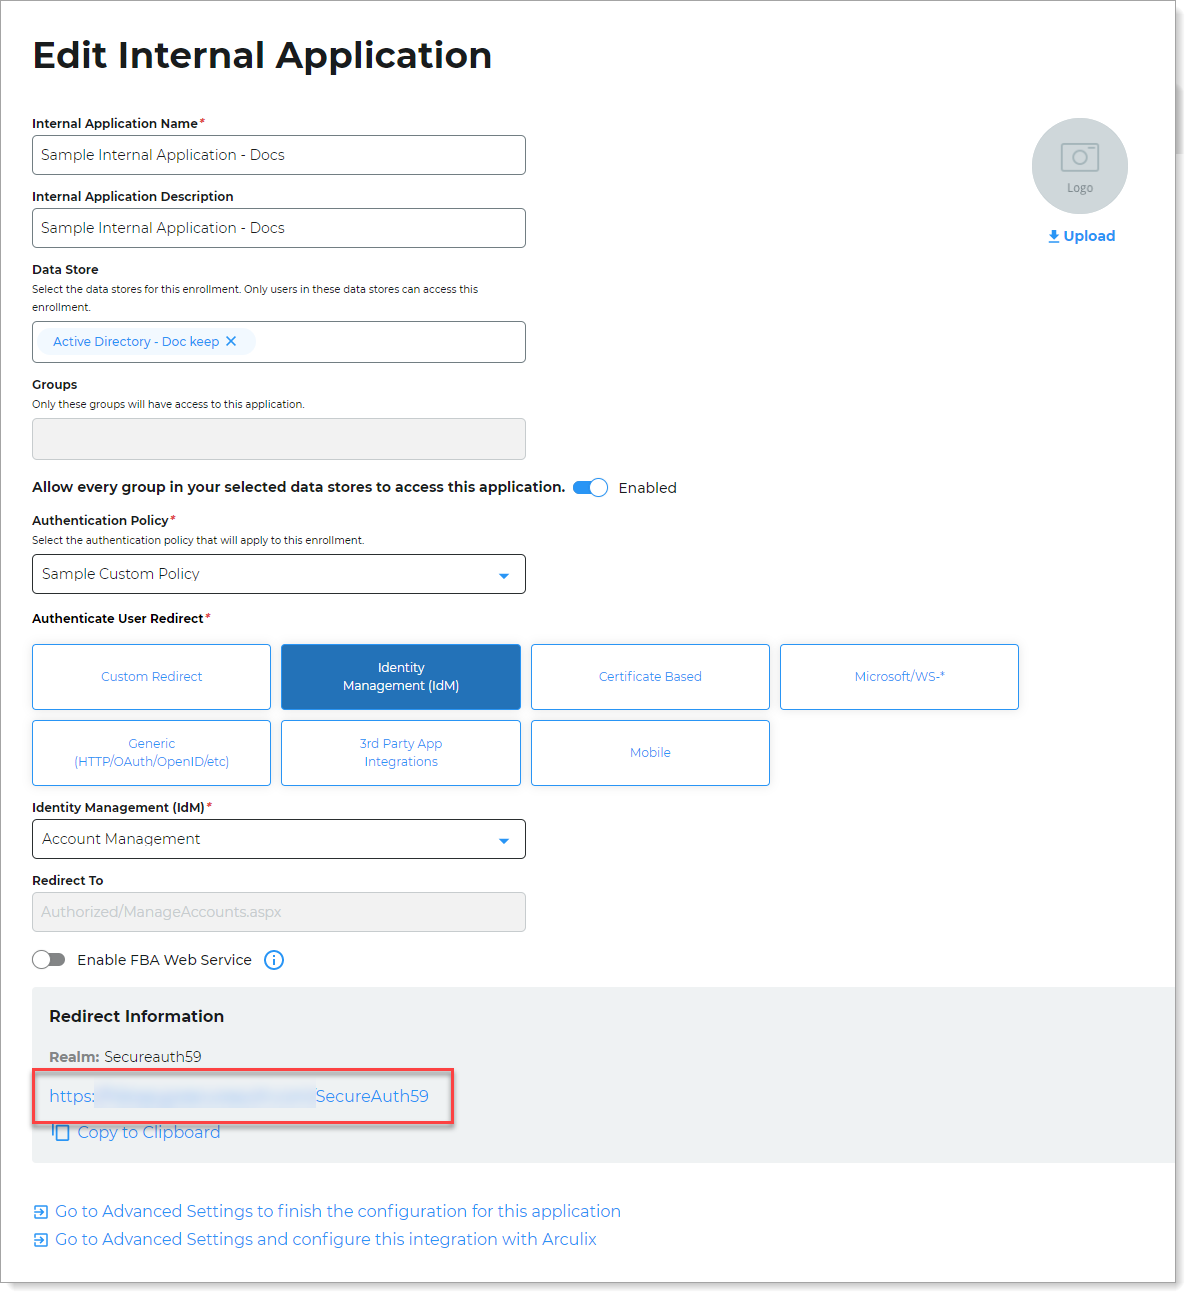
Use the Internal Application Manager to add and configure the Create User page.
On the left side of the Identity Platform, click Internal Application Manager.
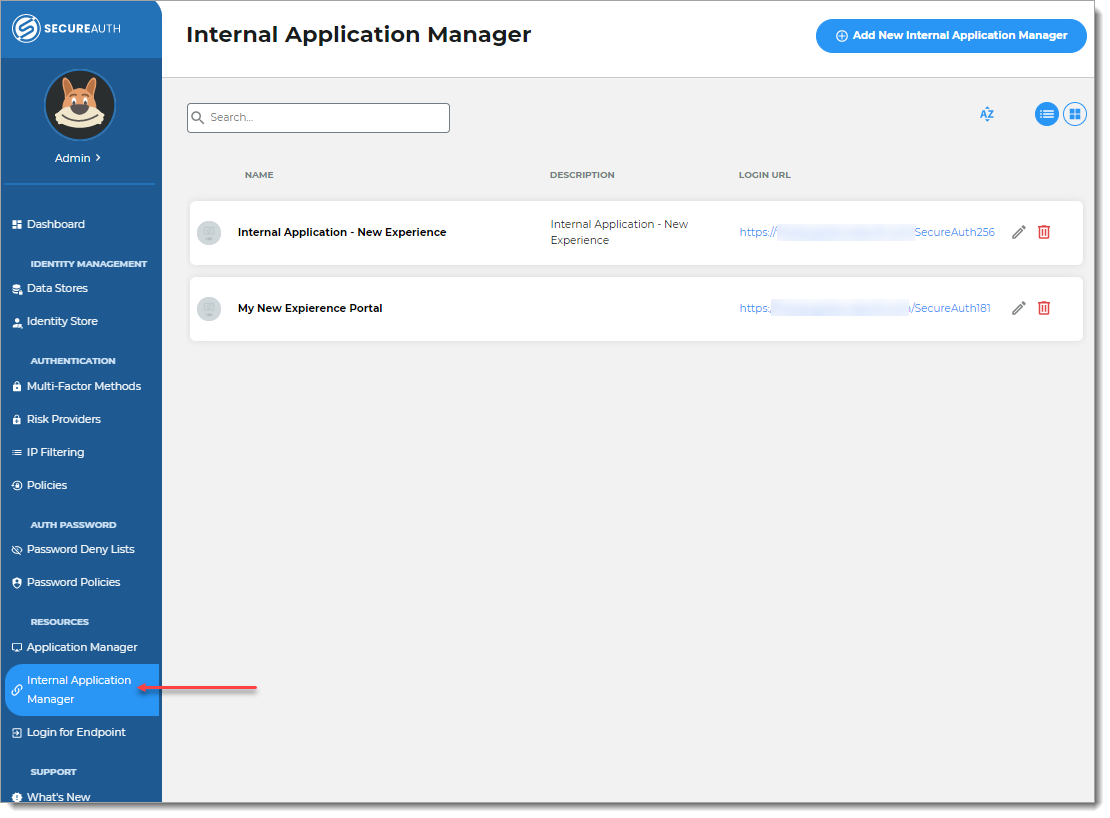
Click Add New Internal Application.
The New Internal Application page displays.
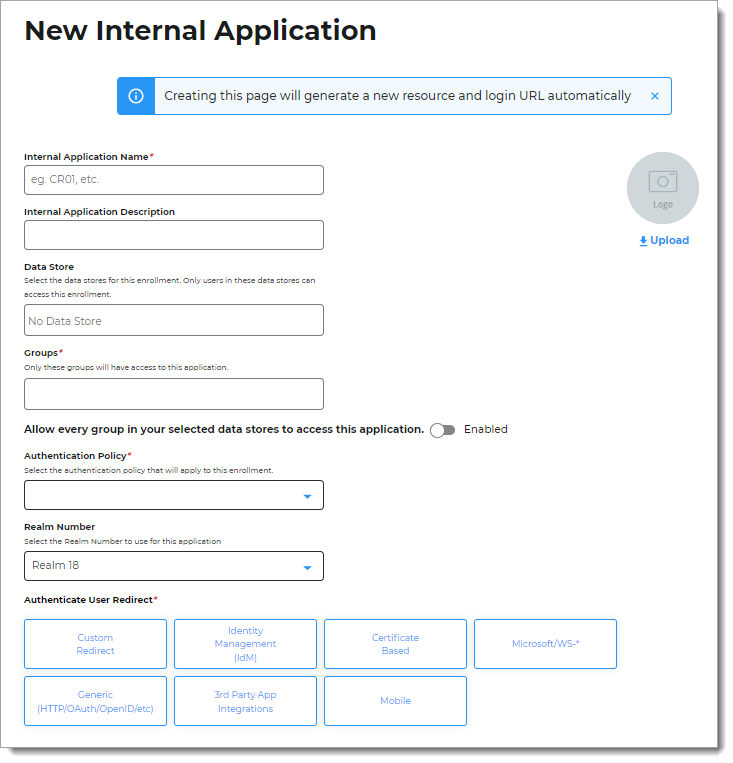
Set the following configurations:
Internal Application Name
Set the name of the Create User page.
This name is shown on the page header and document title of the end user login pages.
Note
If you change this name, it will overwrite any value that is set on the Overview tab in Advanced Settings.
Internal Application Description
This is an internal description not shown to end users.
Identity Source
Enter the data store to authenticate and allow user access to the Create User page.
Groups
Use one of the following options:
Slider in the On position (enabled): Allow users from every group in your selected data stores access to the Create User page.
Slider in the Off position (disabled): Enter the specific groups who are allowed access to the Create User page.
Authentication Policy
Select the user authentication policy for the Create User page.
Realm Number
Select the Realm Number to use for this application.
Authenticate User Redirect
Select the Identity Management (IdM) category.
Identity Management (IdM)
Select Create User.
Redirect To
This field is automatically populated by the selection of Create User as an internal application.
This is the page the end user lands on after login.
Click Create Connection.
This creates a new internal application with an attached user authentication policy from the New Experience.
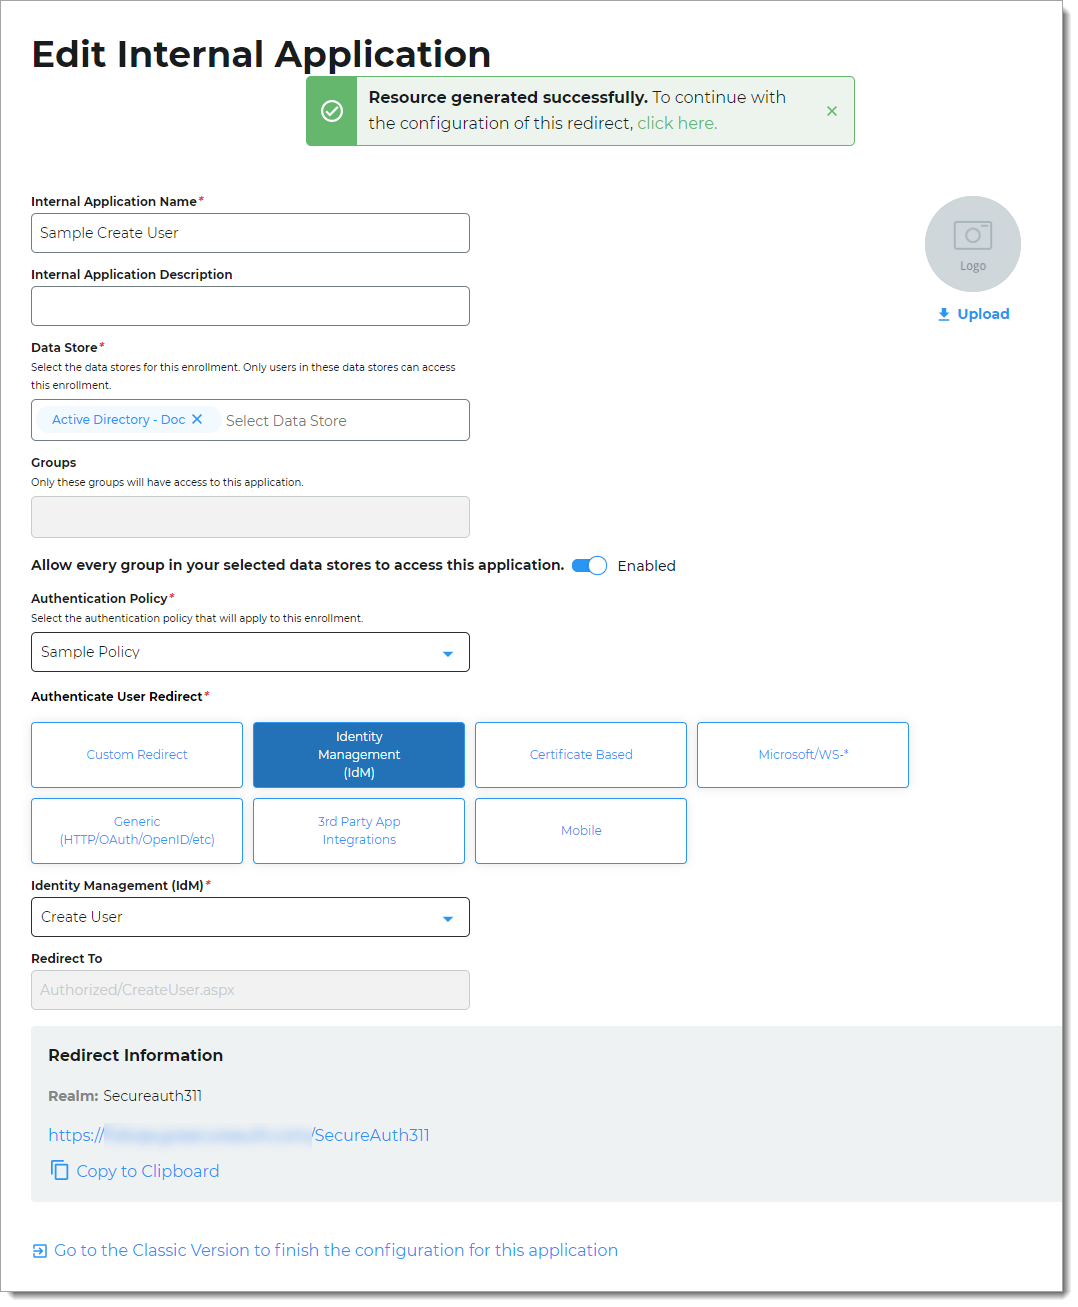
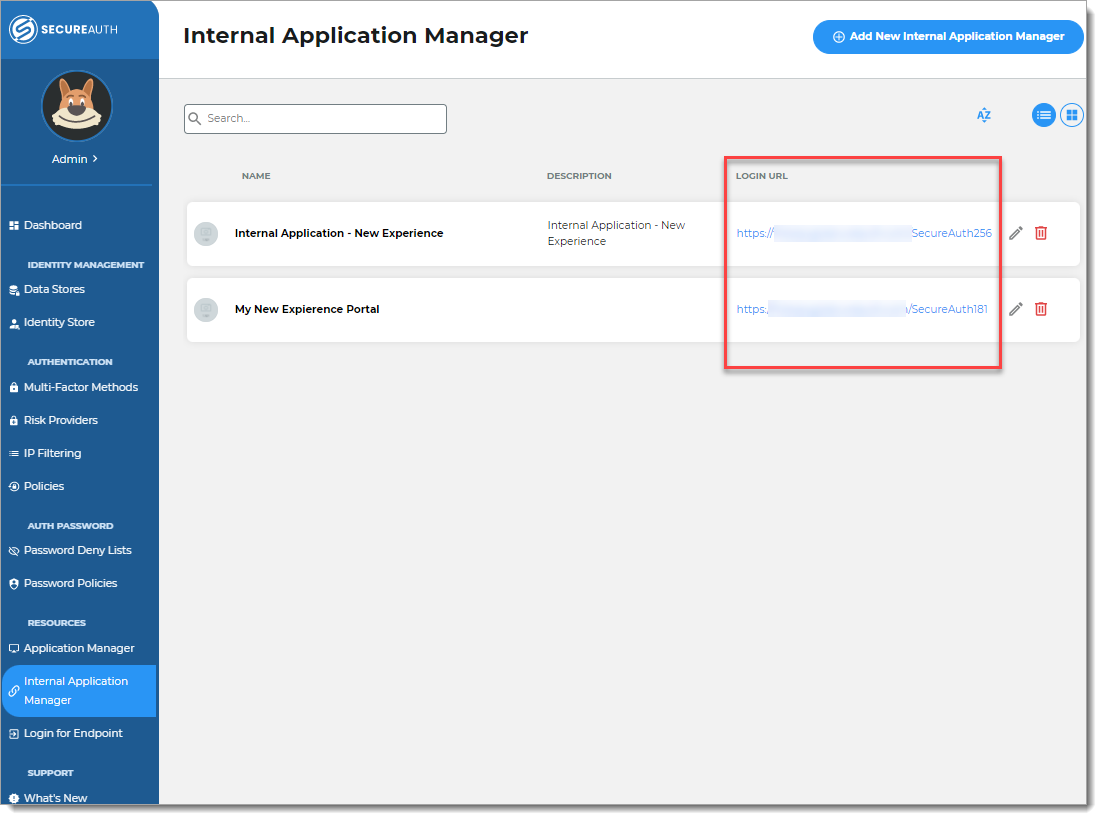
Copy the login URL for your end users to access the Create User page.
You'll need this information to share with your end users.
You can find this on the main Internal Application Manager page or when you edit the Create User configuration in the Redirect Information section.
Step B: Finish configuration in Advanced Settings
Continue to Advanced Settings (formerly Classic Experience) to finish the Create User page configurations.
To complete the Create User page configuration in Advanced Settings, do one of the following:
At the top of the page, click the link in the green confirmation message.
At the bottom of the page, click Go to the Advanced Settings... link.
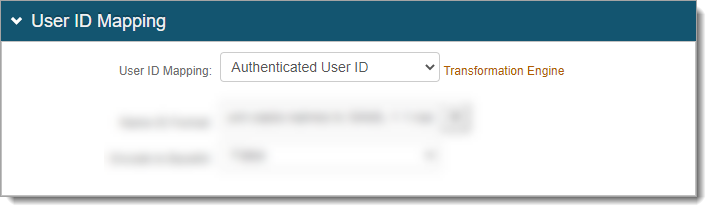
The link takes you to the Post Authentication tab in Advanced Settings.
In the User ID Mapping section, set the type of User ID to assert on the Create User page. This usually the Authenticated User ID.
In the Create User section, set the user field (and its settings) you want to appear on the Create User page.
The SecureAuth Field corresponds to the name of the data store property. in the data store. For most field settings, use the one of the following Display Types, while others are self-explanatory:
Hide – Do not show this field on the Create User page.
Show – Show this field on Create User page. End users can edit this field.
Require – Show and require edits in this field on Create User page.
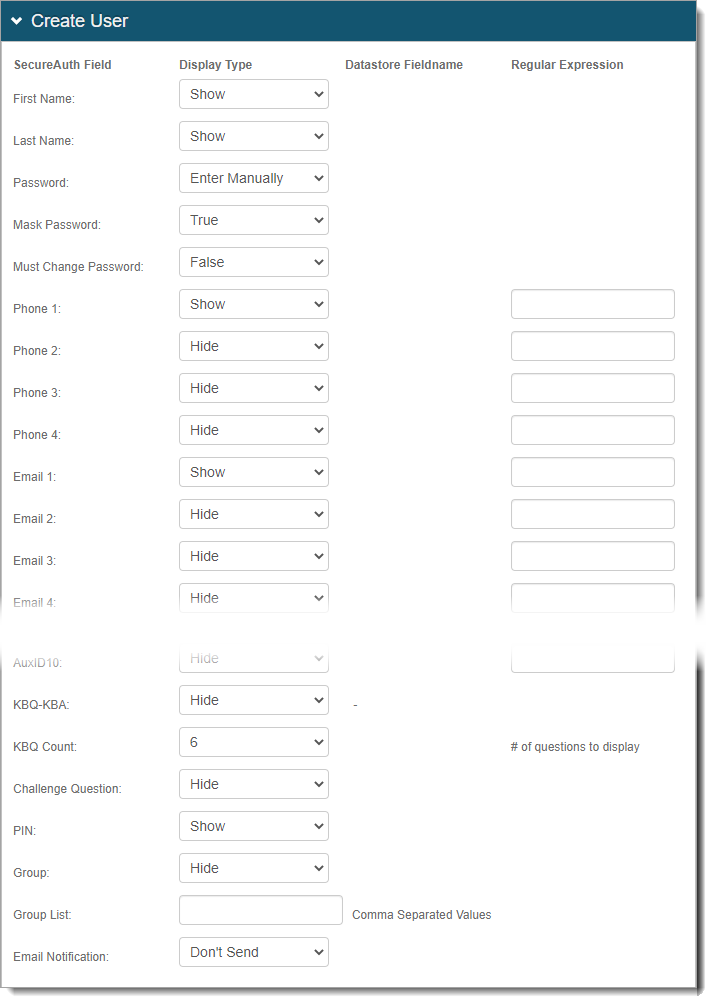
Save your changes.