Overview tab configuration
Use this guide to configure the Overview tab in Advanced Settings (formerly Classic Experience) for each SecureAuth IdP realm.
The Overview tab includes the following sections to configure:
Details – Configurations affect the Web Admin and end user pages
Look and Feel – Configurations affect the Web Admin and end user pages
Page Content – Configurations affect end user pages
Advanced Settings – Configurations include SMTP email settings for sending emails to end users, login page customizations, and more
Details section
When you create a new application realm in Advanced Settings, set the following details about the realm.
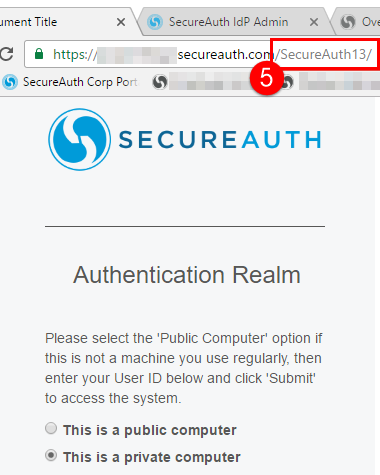
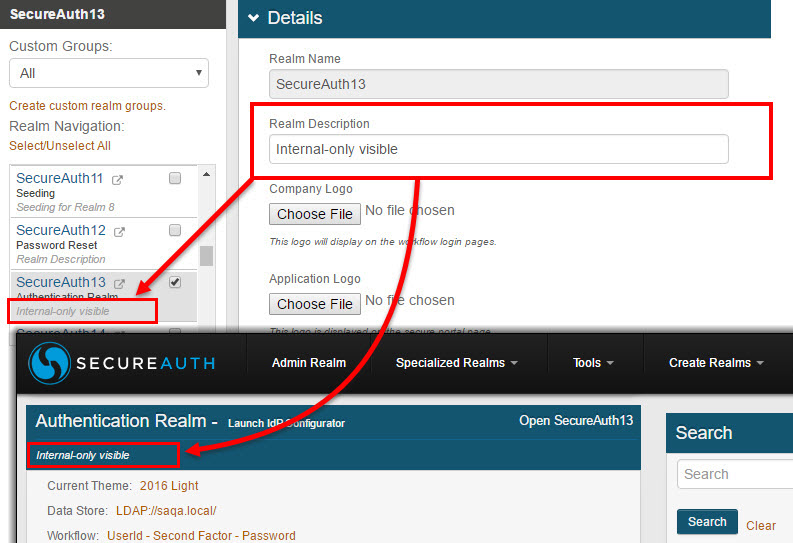
Realm Name | This name is auto-populated when you create a new realm; you cannot change this name. For example, SecureAuth3. The Realm Name appears in the following locations:
| ||||
Realm Description | Provide an internal description about this realm. This appears only in Advanced Settings in the left navigation.
| ||||
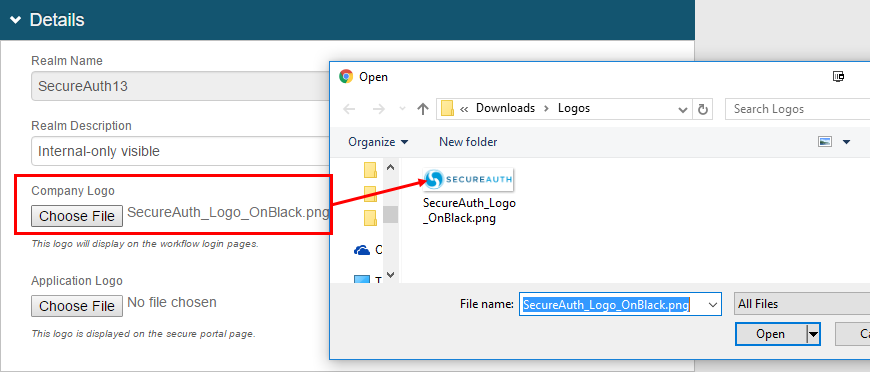
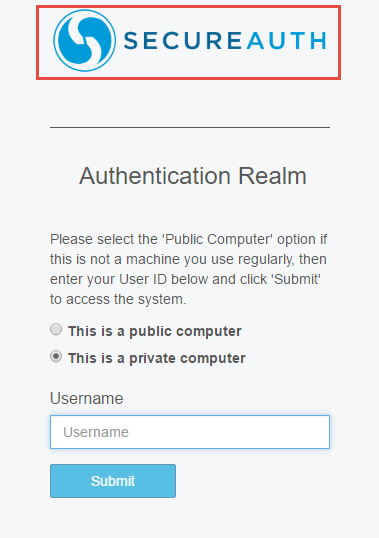
Company Logo | Optional. Upload a logo for your organization to display on the login pages.
If you do not upload a logo, it will display the SecureAuth logo. The Company Logo appears on the login page and post authentication end user page, including Identity Management (IdM) tools.
| ||||
Application Logo | Upload an application logo for the target realm that will be part of the Secure Portal. NoteSet this application logo in the application realm, not the Secure Portal realm.
The logo will appear on the Secure Portal for single sign-on (SSO) access to applications.
|

Look and Feel section
For the look and feel of the end user login pages, set the following configurations.
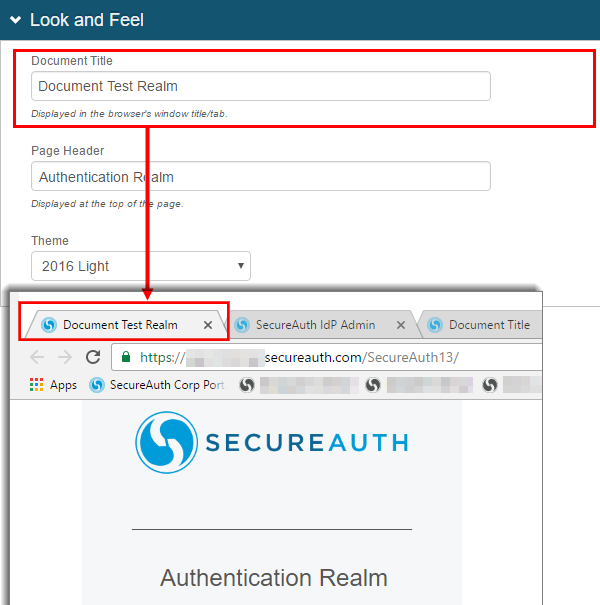
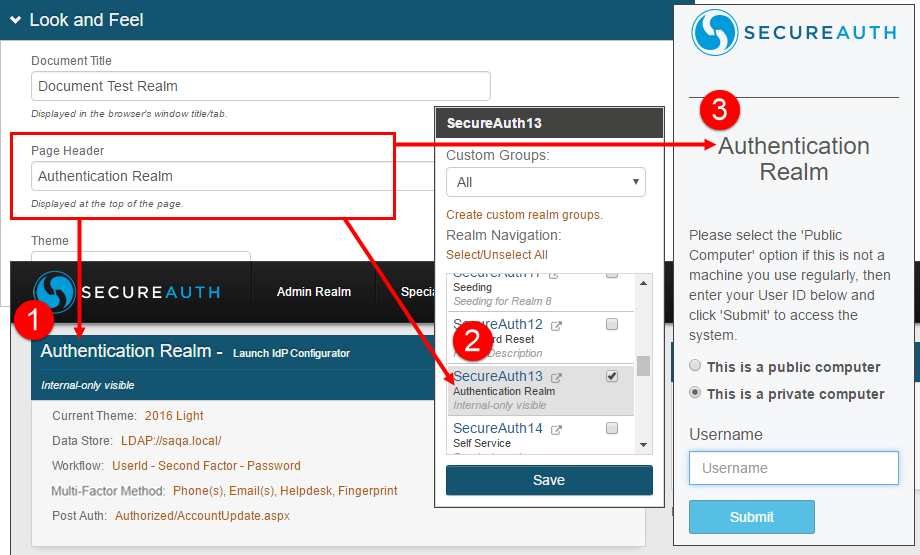
Document Title | Provide the name of the application which appears in the browser title tab and in the realm navigation on the left. For example, Salesforce Login.
| |
Page Header | Provide the name of the application to display in the realm navigation menu and on the page header. Typically, the Document Title and Page Header are the same. For example, Salesforce Login.
| |
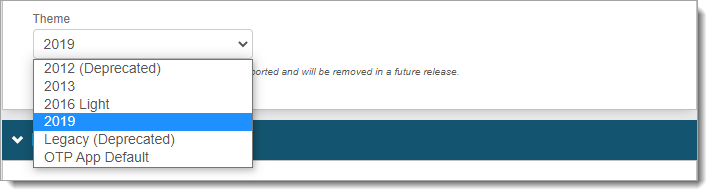
Theme | Select the theme for the end user login pages.
By default, this is set to Theme 2019. WarningIn SecureAuth IdP version 9.2:
|
Page Content section
To display the username, copyright information and other links, set the following configurations.
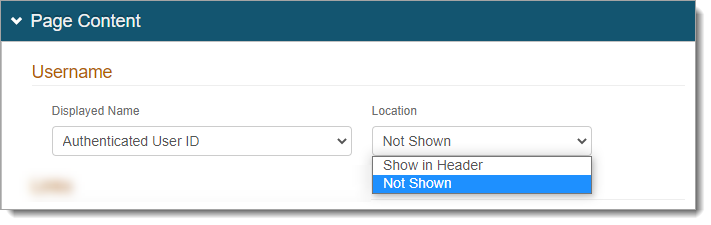
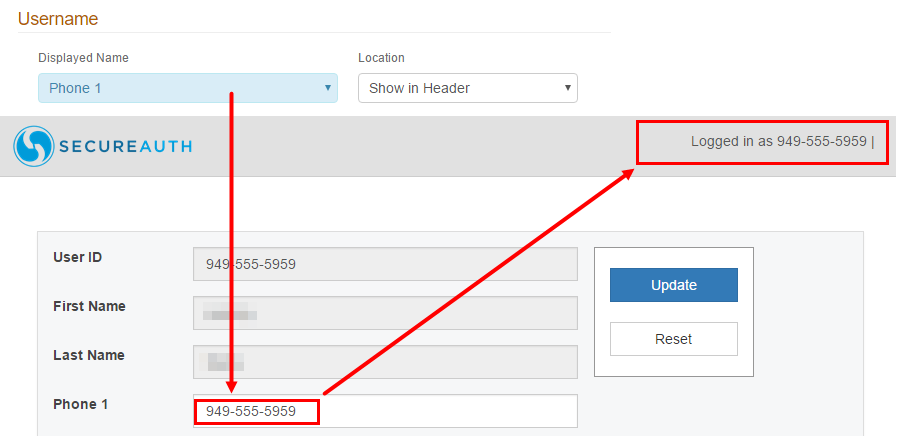
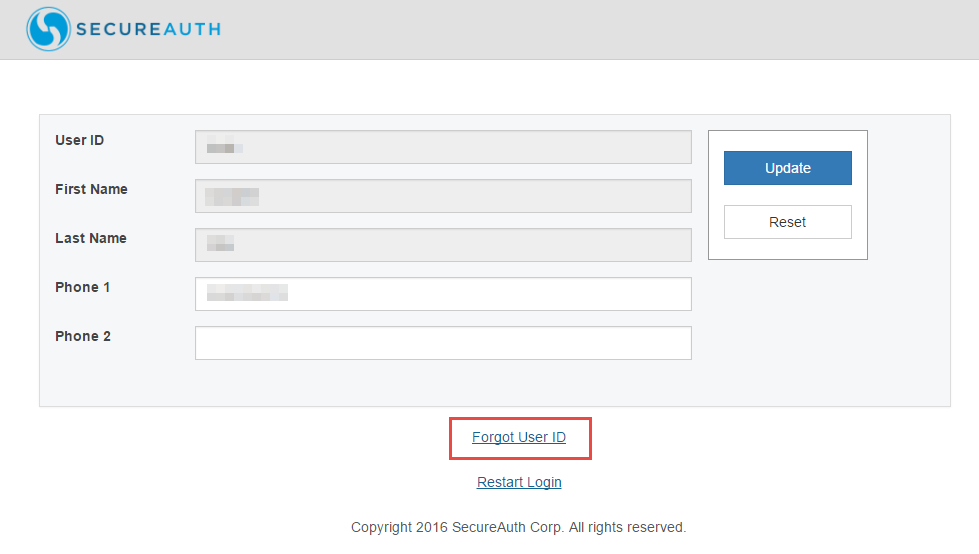
Displayed Name | Select the name (profile property) to display after the user successfully authenticates, and where to display this on the page. This is usually the Authenticated User ID. The values for the display location are:
The following are examples of the displayed name as shown or not shown in the header of a page.
| ||||
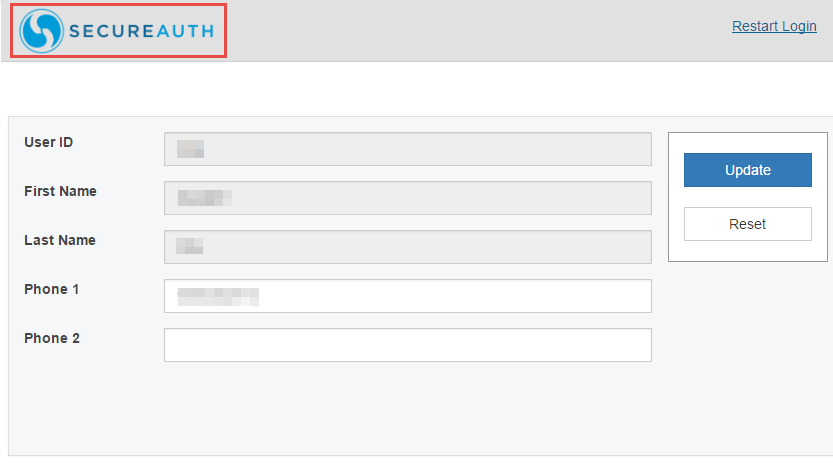
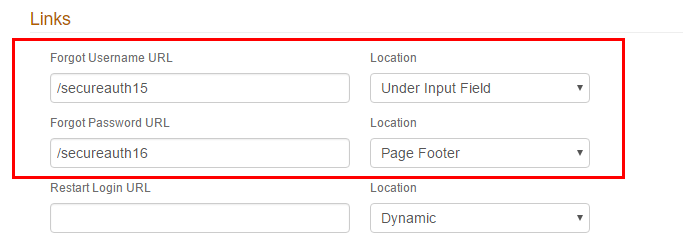
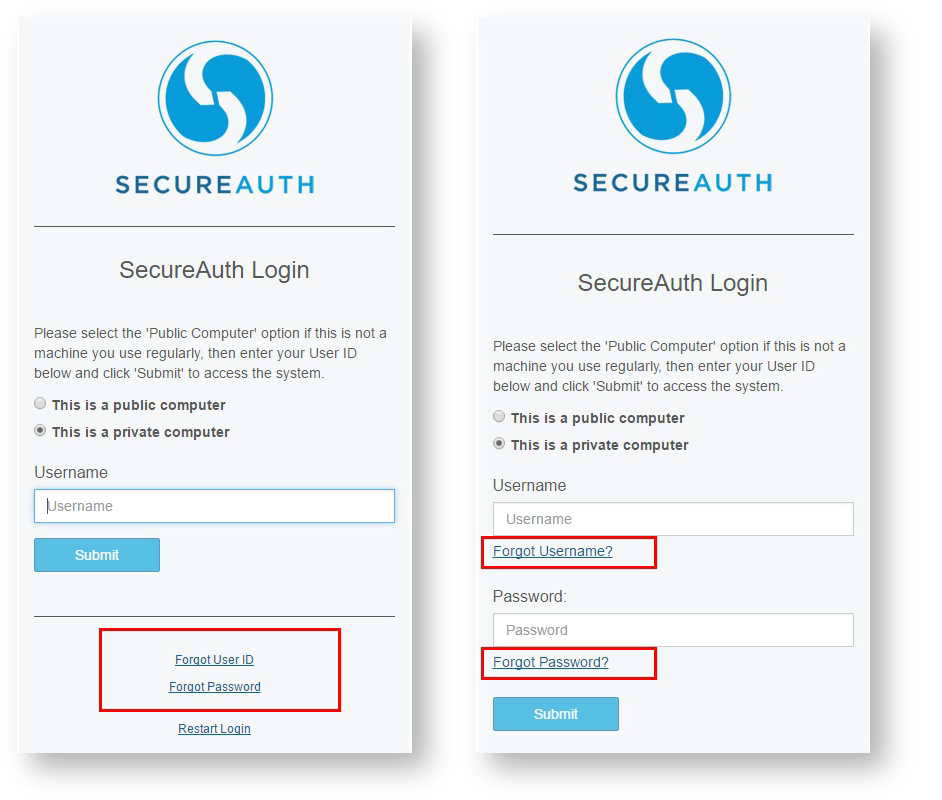
Forgot Username URL Forgot Password URL | Optional. Provide the URLs for the forgot username, forgot password, and restart login pages, which would be other Identity Platform realms. If a field is left blank, it will not display the link.
If these realms are on the same domain, then the format could be: /secureauth<realm#>. Otherwise, use the full URL. For more information about these pages, see the configuration guides relating to Identity Management tools. For the Location of the link, you can select Under Input Field or Page Footer. See the following page examples.
| ||||
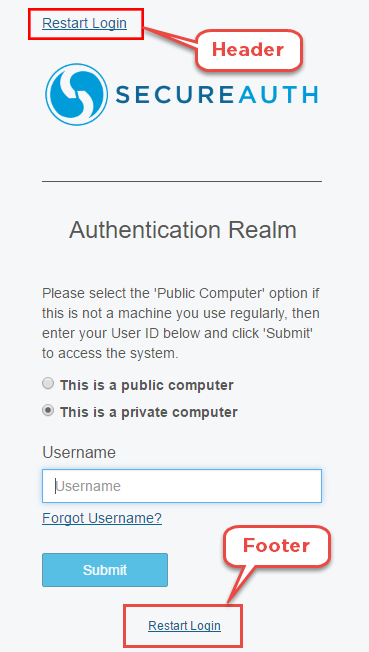
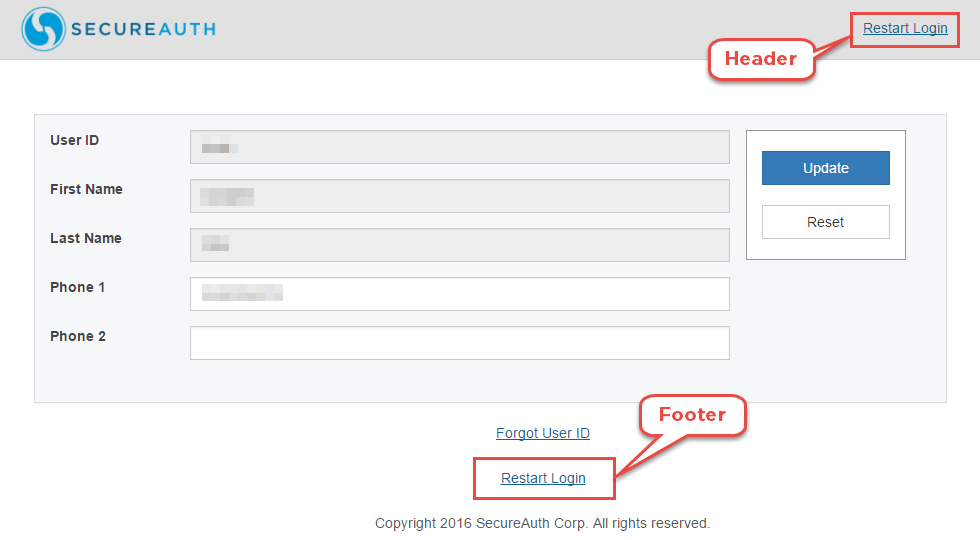
Restart Login URL | By default this field is left blank. However, the URL is automatically set to the current realm name and appended with "restart. aspx".
For example, the restart login URL is: https//company.com/SecureAuth13/restart.aspx If you want end users to restart from another URL, enter the URL in this field. For the Location of the restart login URL on login and post authentication pages, set to any of the following options:
See the following page examples.
| ||||
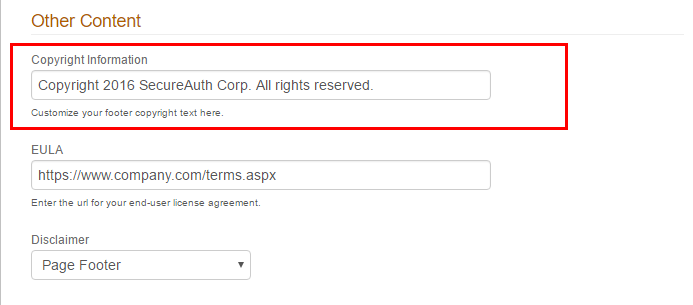
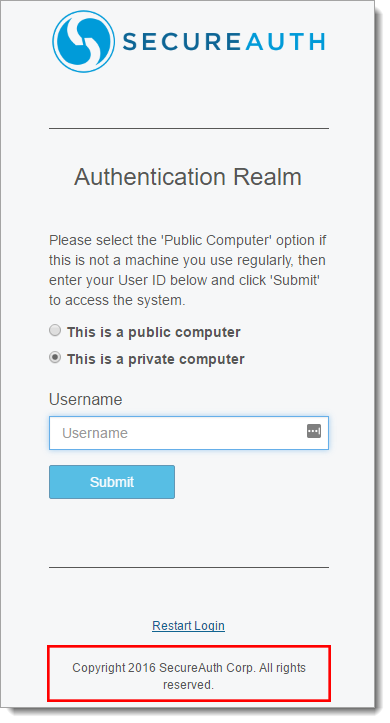
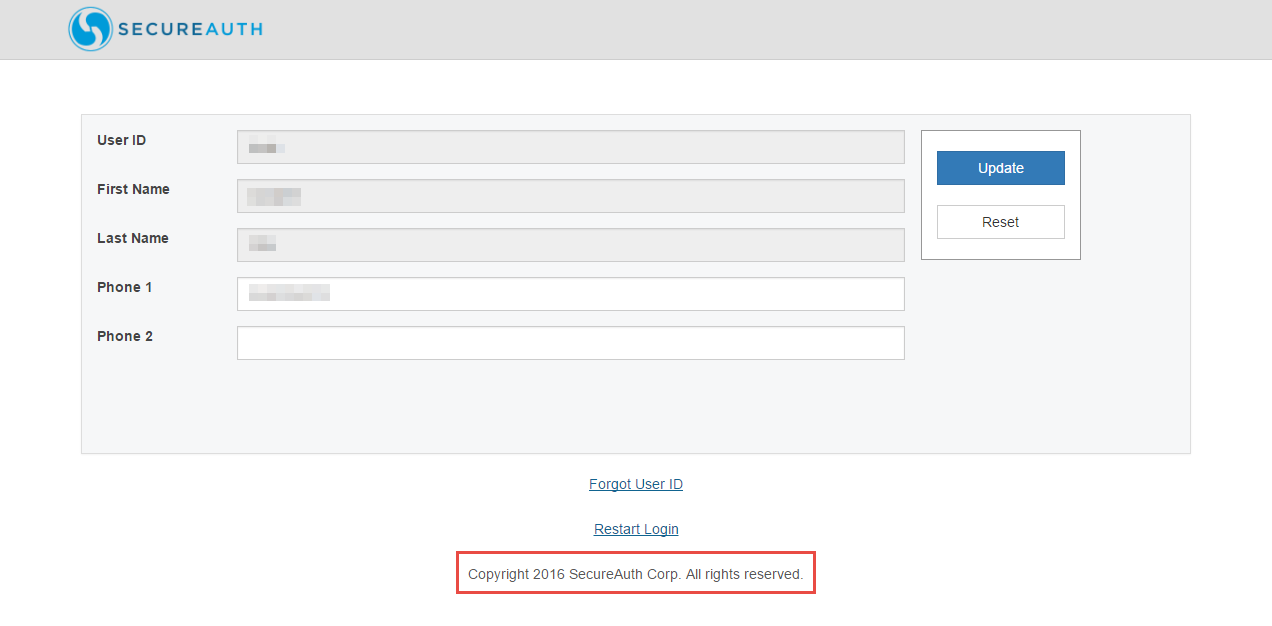
Copyright Information | Add or change the copyright information.
Copyright information appears in the login and post authentication pages like the following examples.
| ||||
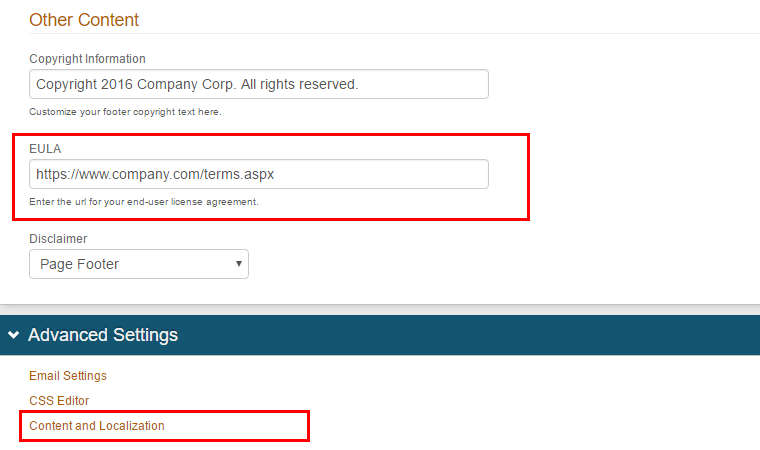
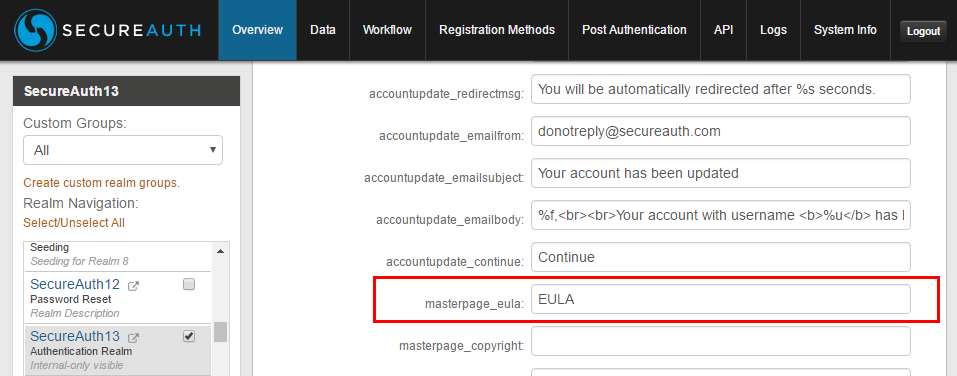
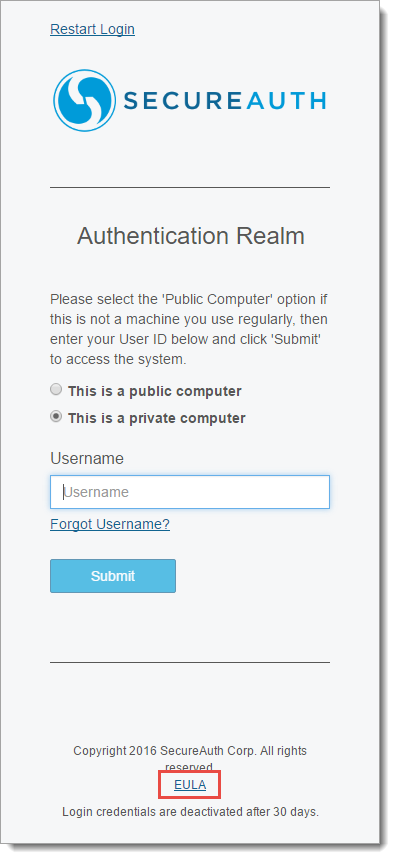
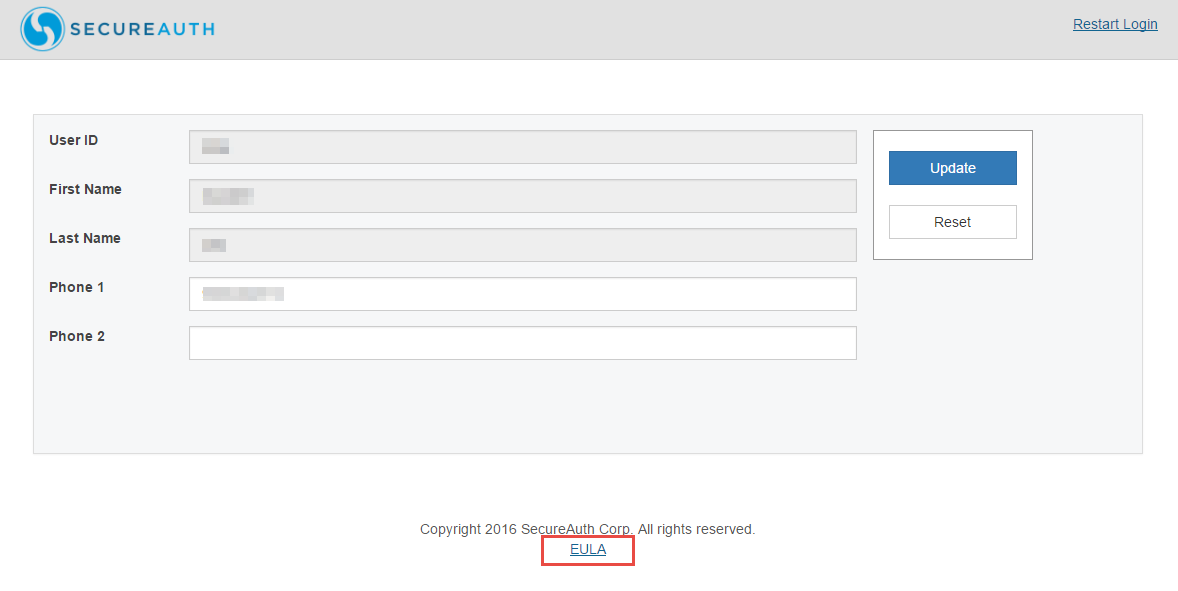
EULA | To display the end user license agreement (EULA) for your organization, provide a URL. For example, https://www.company.com/terms.aspx
Save your changes. Then, in the Advanced Settings section, click Content and Localization. In the Verbiage Editor, enter the link text in the masterpage_eula field.
The EULA link appears in the footer of the login and post authentication pages like the following examples.
| ||||
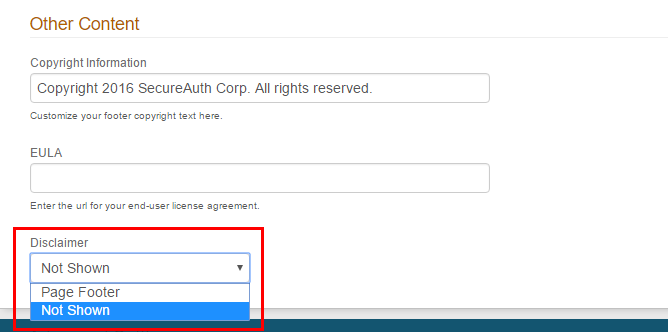
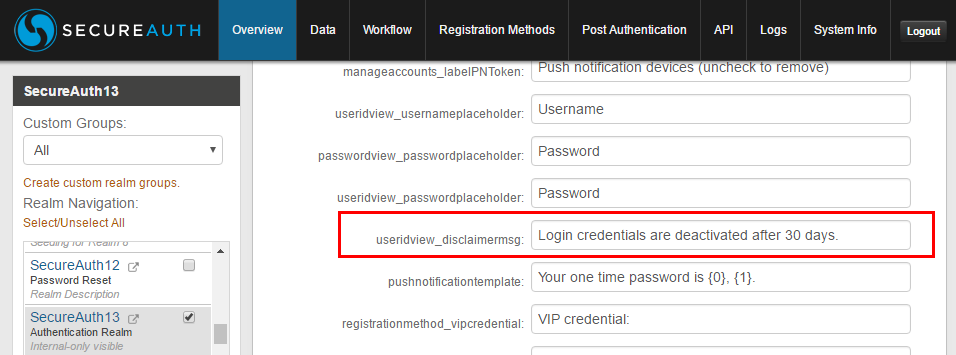
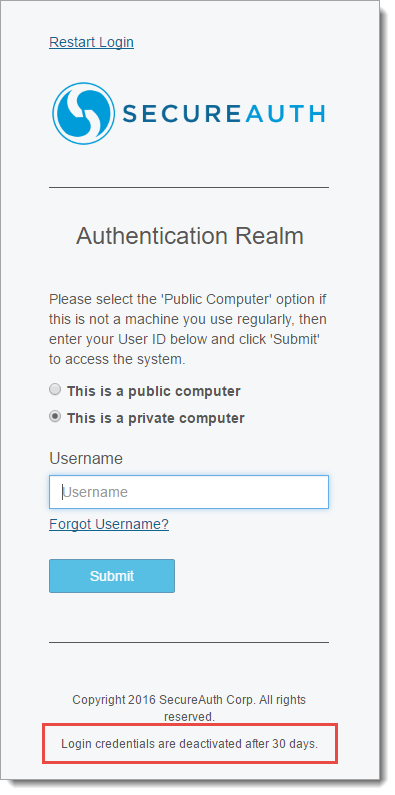
Disclaimer | Indicate whether or not to display a disclaimer on the page.
Save your changes. Then, in the Advanced Settings section, click Content and Localization. In the Verbiage Editor, enter the disclaimer text in the useridview_disclaimermsg field.
The disclaimer text appears in the footer of the login pages like the following example.
|


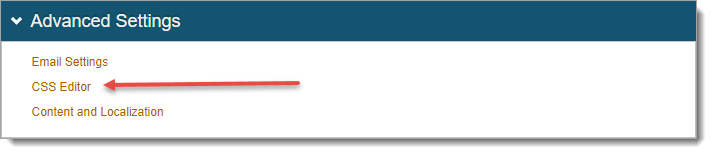
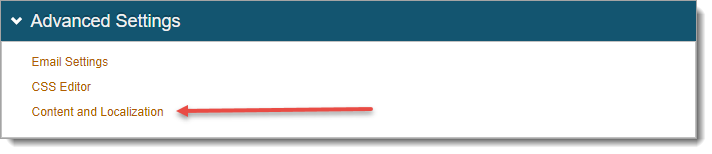
Advanced Settings section
In the Advanced Settings section, you can configure the email SMTP, make CSS changes for the login pages, and set language settings for localization.
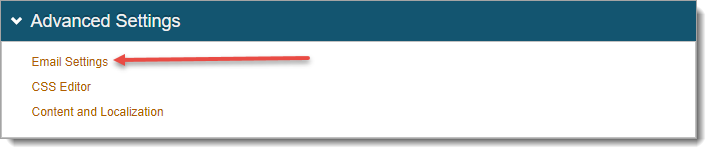
Email Settings
To configure the SMTP settings for sending emails from the Identity Platform, click the Email Settings link.
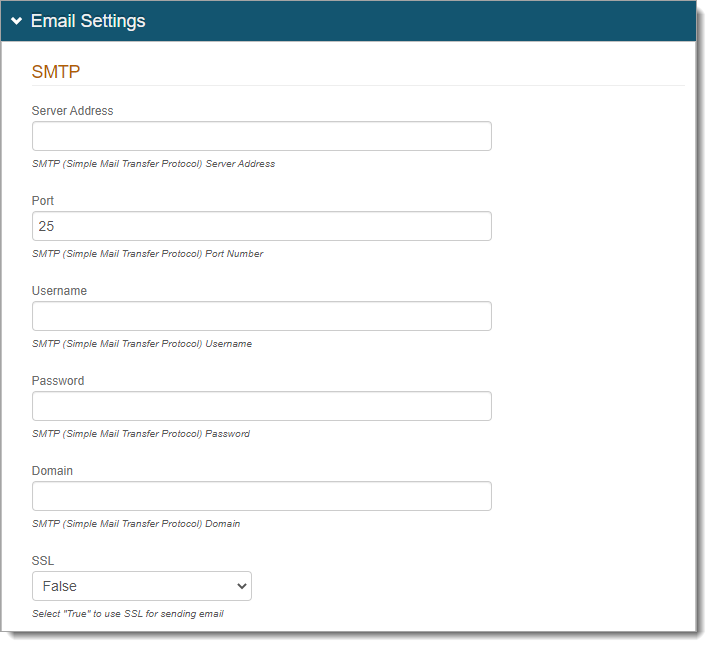
In the SMTP section, set the following configurations.
Server Address
Set the Simple Mail Transfer Protocol (SMTP) server address through which the Identity Platform will send emails.
Port
By default this value is 25.
If the SMTP uses a different value, you can change this port number.
Username
Password
Domain
If required by the SMTP relay server, provide the username, password, and domain values.
Note
If these fields are not required by the SMTP server, then only the Server Address and Port number must be set.
SSL
Set whether to use a Secure Socket Layer (SSL) for sending email as True or False.
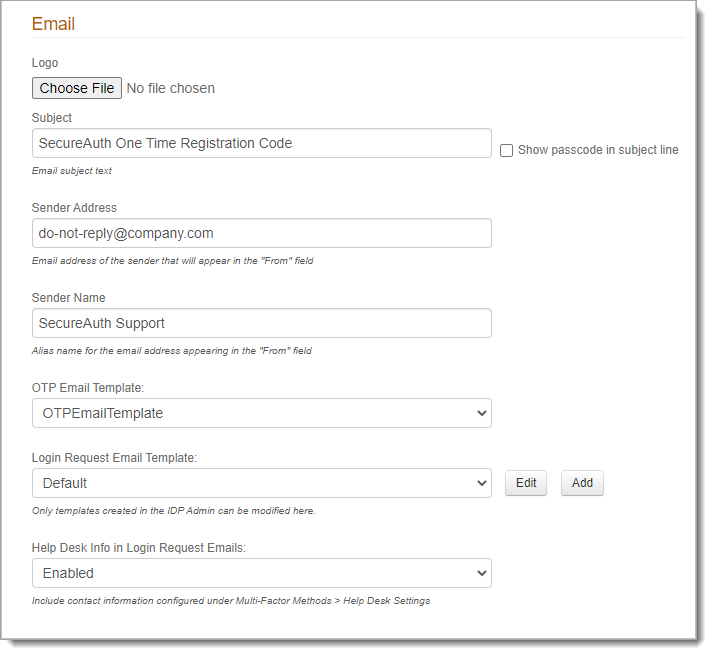
In the Email section, set the following configurations.
Logo
Optional. Upload a logo to use in email messages sent from the Identity Platform.
Subject
Provide the subject line of the email.
Show passcode in subject line
Indicate whether to include the passcode in the subject line if the email will send one-time passcodes to users.
With this feature enabled, users will see the passcode in the subject line, and do not need to open the email to retrieve their passcode.
Sender Address
Provide the sender email address in the "From" field for emails sent from the Identity Platform.
Sender Name
Provide the sender name in the "From" field for emails sent from the Identity Platform.
OTP Email Template
Select the email template for emails sent from the Identity Platform.
Login Request Email Template
If you want to send login requests to end users, you can use the Default template, or select another email template.
To modify the selected template, click Edit.
To add a new template, click Add. This new template will be available in other realms.
Help Desk Info in Login Request Emails
If the email will send login requests to end users, select Enabled.
This will include help desk contact information in the email footer.
Save your changes.
CSS Editor
To configure the CSS layout for the end user login pages, click the CSS Editor link.
In the Theme section, keep the default setting, or select another theme.

Warning
In SecureAuth IdP version 9.2:
The 2012 and Legacy themes are deprecated
For appliances upgraded to SecureAuth IdP 9.2, if either the 2012 or Legacy theme was implemented prior to the upgrade, that theme will be converted to the 2016 Light theme.
The 2016 Dark theme is not available on new appliances
For appliances upgraded to SecureAuth IdP 9.2, the 2016 Dark theme still appears as a menu option.
In the CSS Editor section, you can view and edit the CSS code to make any changes to the appearance of the login pages.
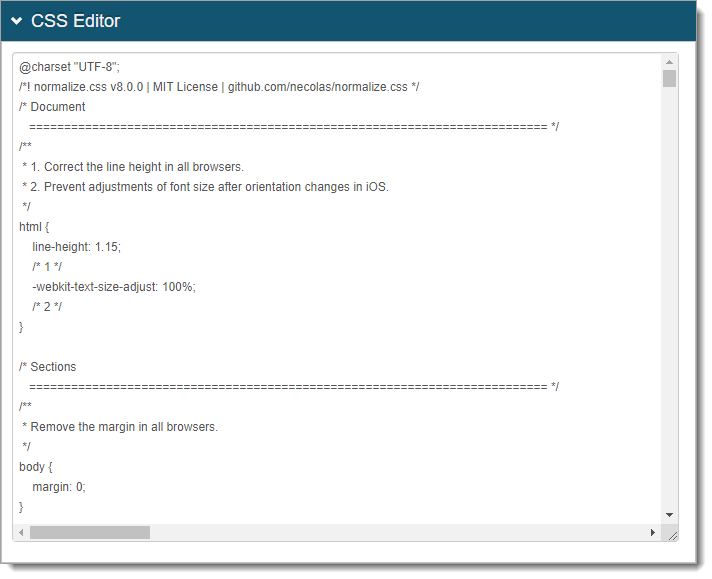
Save your changes.
Content and Localization
To localize the end user login workflows and authentication through the Identity Platform, click Content and Localization.
In the Languages section, make the following configurations.
Supported Languages
Select the languages you want the Identity Platform to support and localize on the end user login pages.
When the browser language setting for the end user login pages matches a supported language enabled in the Identity Platform, then it delivers all content in that language.
Default Language
Leave the default language as English to set it to a different language.
The end user login pages will default to this language even if their browser is set to another language.
When the browser language setting for the end user login pages contain a language not selected or supported in the Identity Platform, then it delivers all content in the default language. The default language is English, unless otherwise changed by an administrator.

For more information, see Language localization support.
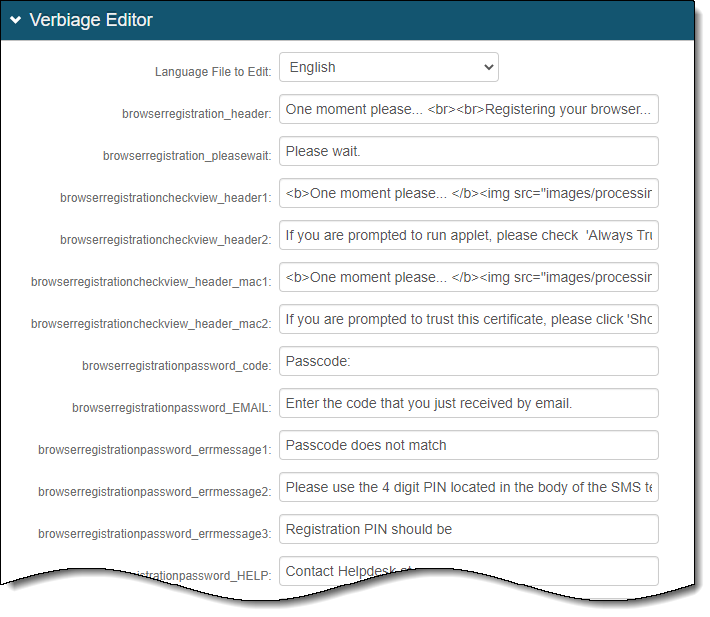
In the Verbiage Editor section, you can configure the text that appears on designated pages.
Select the Language File to Edit and edit any of the fields for the content that appears on the designated pages.