Connecting a legacy internal application
Use this procedure if you have a legacy internal application created in Advanced Settings (formerly Classic Experience) and you want to implement a user authentication policy from the New Experience. You'll still be able to use the legacy login URL for your end users.
For example, you have a legacy internal application set up for the Self-Service Account Update page. In the following steps, you'll create a new internal application for the Self-Service Account Update page with an attached user authentication policy. Then, you set up an IIS redirect for the URL from Self-Service Account Update legacy realm to the new internal Self-Service Account Update realm.
Your end users can continue to use the login URL as before, but now they'll get the login experience set by the new user authentication policy.
Before you begin, make note of the legacy realm settings in Advanced Settings like data store connections (Data tab) and authenticated user redirect page settings (Post Authentication tab). You'll need to duplicate these settings from the legacy realm in the new internal application.
Prerequisites
SecureAuth® Identity Platform release 22.02 or later
Information for a legacy internal application realm (created in Advanced Settings) you want to duplicate using the Internal Application Manager
Data store added to the Identity Platform
Configured user authentication policy
Procedure
On the left side of the Identity Platform, click Internal Application Manager.
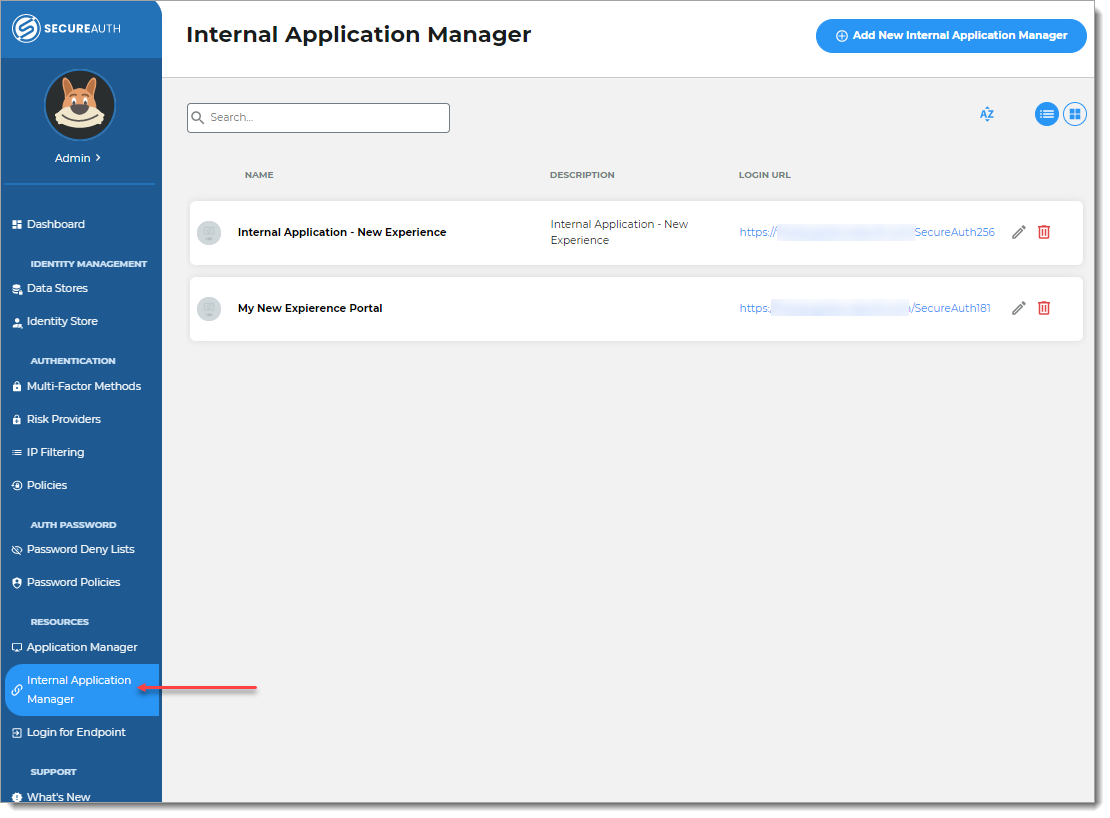
Click Add New Internal Application.
The New Internal Application page displays.
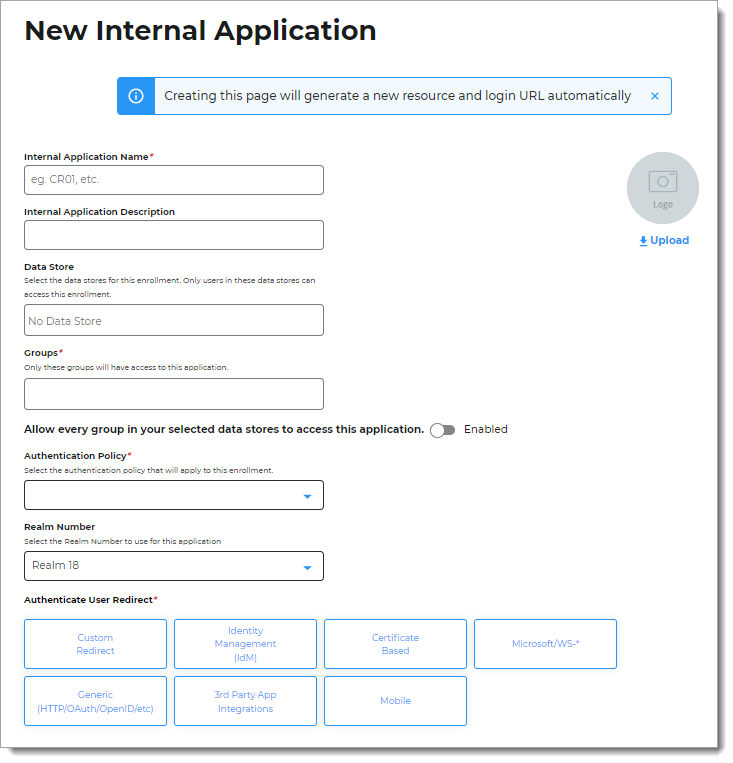
Set the following configurations:
Internal Application Name
Set the name of the internal application page.
This name is shown on the page header and document title of the end user login pages.
Note
If you change this name, it will overwrite any value that is set on the Overview tab in Advanced Settings.
Internal Application Description
This is an internal description not shown to end users.
Identity Source
Enter the data store to authenticate and allow access for the target application.
Tip
Use the same data store from the existing legacy realm.
Groups
Use one of the following options:
Slider in the On position (enabled): Allow users from every group in your selected data stores access to the target application.
Slider in the Off position (disabled): Enter the specific groups who are allowed access to the target application.
Authentication Policy
Select the login authentication policy for the target application.
Realm Number
Select the Realm Number to use for this application.
Authenticate User Redirect
Select the target internal application category and then from the list, select the application page you want to set up.
Tip
Use the same setting from the existing legacy realm in the Post Authentication tab.
The available internal application options are:
Custom Redirect
Custom Redirect
Identity Management (IdM)
Account Management
Forgot Username
Password Reset
Secure Portal
Self-Service Account Update
Create User
Certificate Based
Create PFX (iPhone + VM)
Create PFX Link (ASA)
Create PFX Auto Link (Citrix Receiver)
Native Mode Cert Landing Page
Microsoft/WS-*
Create OWA 2010 Token
Create SharePoint 2010 Claim
Create Windows Live@Edu Token
Microsoft Forms Based Authentication Token
Generic (HTTP / OAuth / OpenID / etc)
Basic Authentication
Submit Form Post
Multi-factor App Enrollment - QR
Multi-factor App Enrollment - URL
OpenID Connect / OAuth2
User Handler Web Service
3rd Party Application Integrations
F5 BigIP
PDP Configuration
Siteminder Session Token
WebSphere via Post
YubiKey Provisioning
Mobile
Mobile Native App Launch
Android Transition
iOS Google Apps Provision
iOS Exchange Provision
Redirect To
This field is automatically populated by the selection of the redirect page. If this is a Custom Redirect, then enter the redirect URL.
This is the page the end user lands on after login.
Click Create Connection.
This creates a new internal application with an attached user authentication policy from the New Experience.
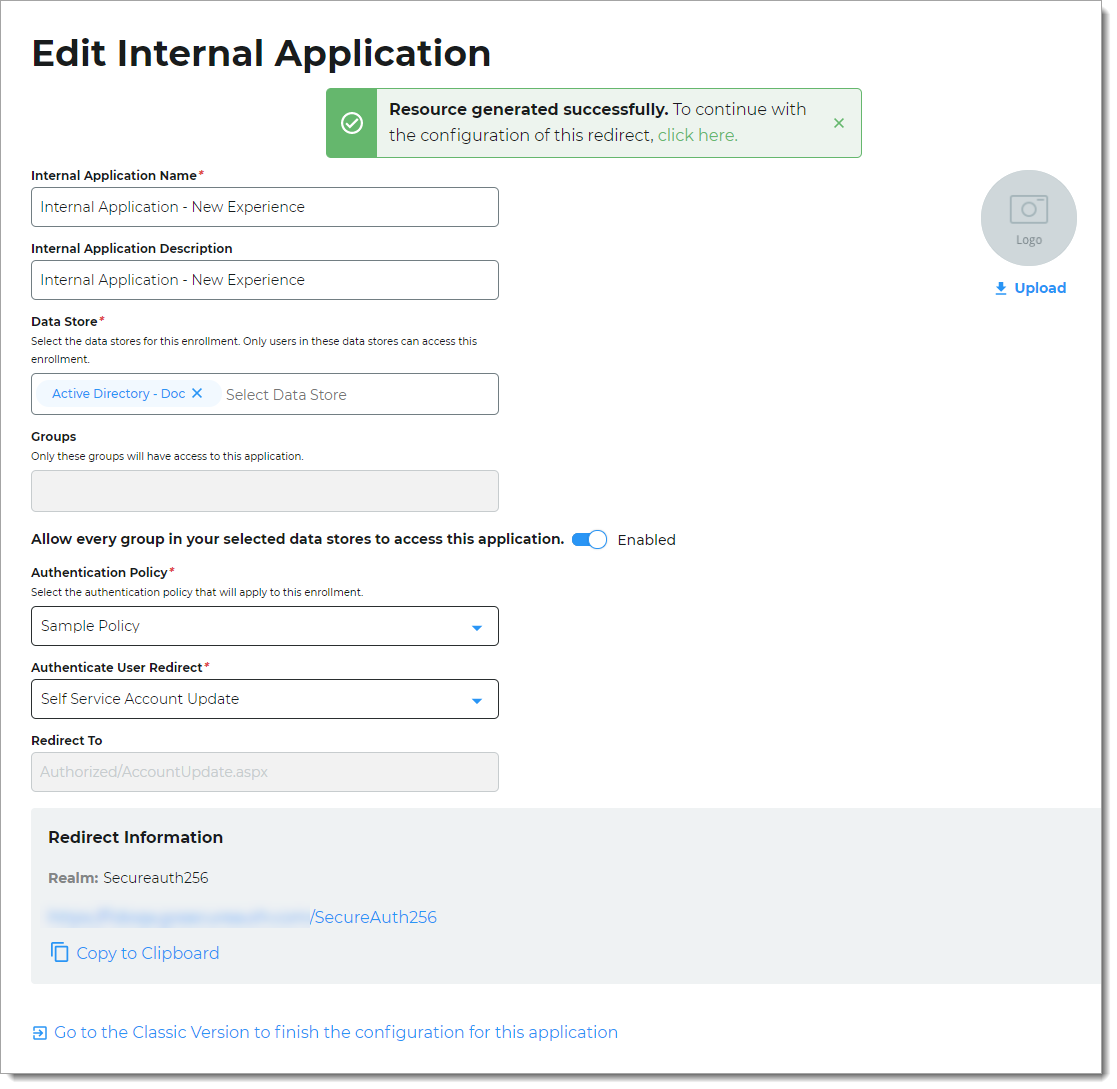
In the Redirect Information section, copy the new realm name, like
Secureauth256.You will need this realm name to redirect your legacy realm URL in Redirect legacy realm URL for internal applications.
To complete the configuration in Advanced Settings, do one of the following:
At the top of the page, click the link in the green confirmation message.
At the bottom of the page, click the Go to Advanced Settings... link.
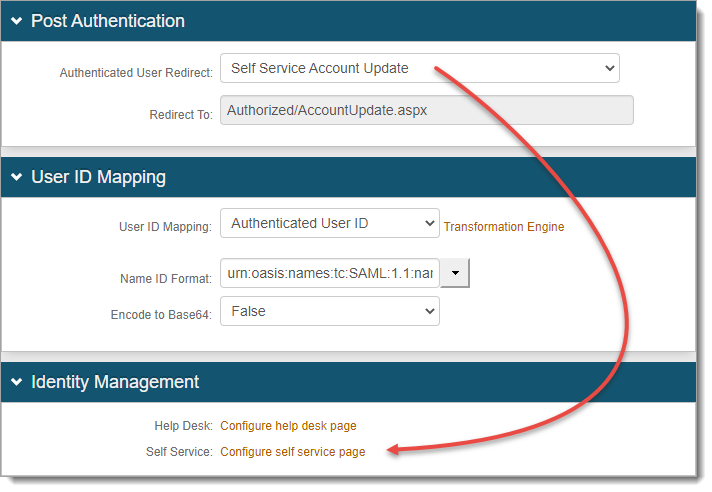
The link takes you to the Post Authentication tab in Advanced Settings.
On the Post Authentication tab, configure the settings for the internal application in Advanced Settings.
For example, if the Authenticate User Redirect field is set to Self-Service Account Update, then you'll need to go to the Identity Management section and configure the page settings.
Save your changes.
Next steps
If you want your end users to continue using the legacy URL, then go to: Redirect legacy realm URL for internal applications.