Configure RADIUS Clients settings
In this task, you'll add information for the RADIUS client to enable use with SecureAuth RADIUS. For example, Cisco VPN. This completes the process to set up the communication between SecureAuth RADIUS Server and the RADIUS client.
Add RADIUS Client
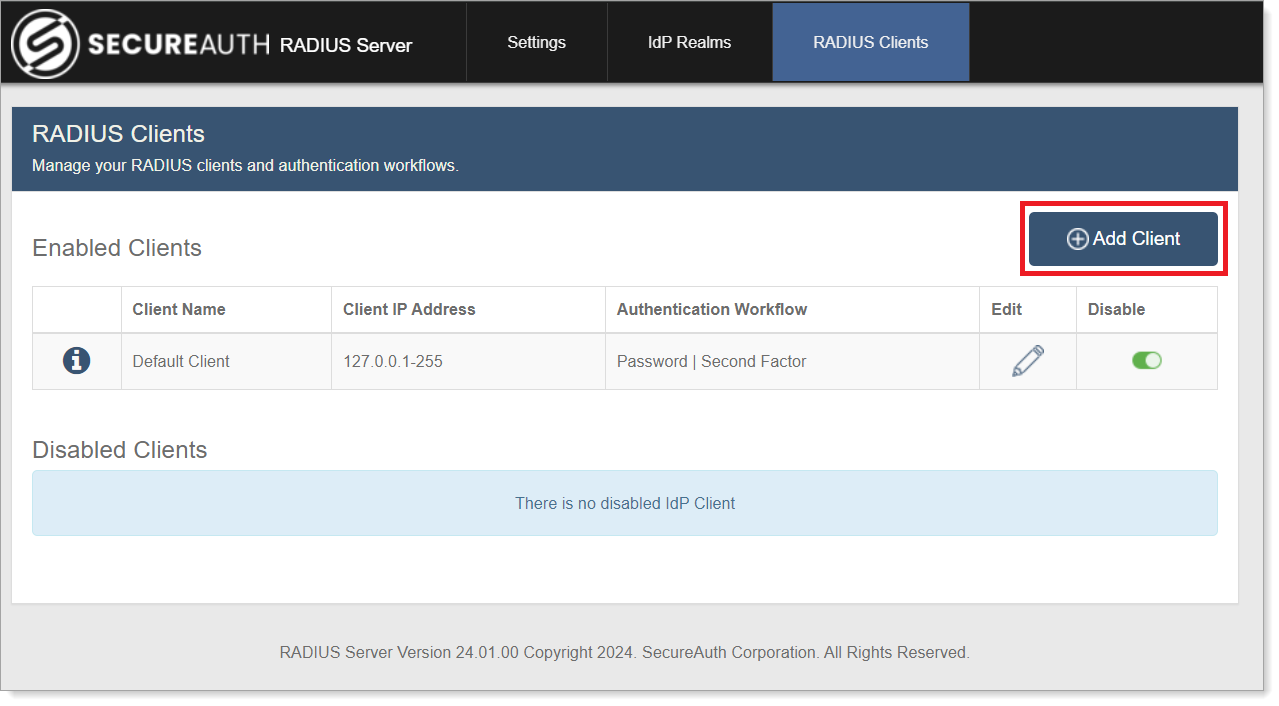
In the SecureAuth RADIUS admin console, select the RADIUS Clients tab and click Add Client.
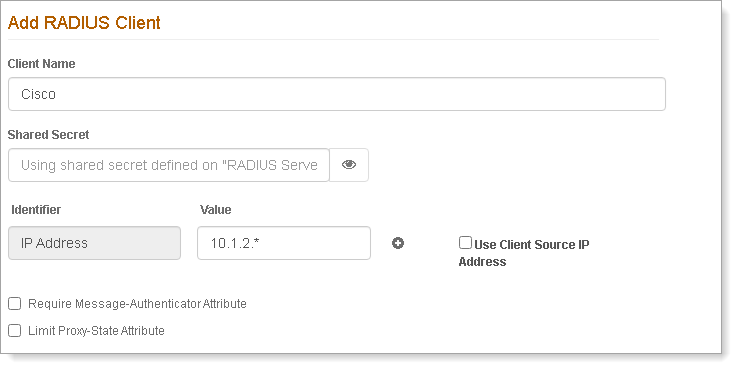
In the Add RADIUS Client section, set the following:
Client Name
Enter a name for the RADIUS client.
For example, Cisco.
Identifier
By default, the first identifier is IP Address. Add or remove identifiers and their values by clicking the + or – icons to the right of each field.
Identifiers are useful for restricting access, which enables additional control over the client configuration. For example, NAS-Port or Framed-IP-Address.
For a complete list of identifiers available for you to add, see page 23 of RADIUS RFC.
Value
Enter the value that corresponds to the set Identifier.
For the default IP Address Identifier, enter the IP Address to filter the RADIUS client. Typically, this is the NAS-IP address.
You can use a wildcard to allow machines from only a specified subnet to connect. For example, 10.1.2.*.
Learn more about How the SecureAuth RADIUS server processes rules when users attempt to connect via the RADIUS server.
To filter the RADIUS client by the client IP address, and not the NAS-IP address, select the Use Client Source IP Address check box.
Require Message-Authenticator Attribute
Select this check box to require all PAP/CHAP access requests for this client to contain the Message-Authenticator attribute.
Legacy RADIUS clients that don't include this attribute will be silently discarded.
Limit Proxy-State Attribute
Select this check box to require all PAP/CHAP access requests containing the Proxy-State to include the Message-Authenticator attribute. If the request contains the Proxy-State attribute and not the Message-Attribute, it will be silently discarded.
If the request contains both the Proxy-State and Message-Authenticator, it will not be discarded.
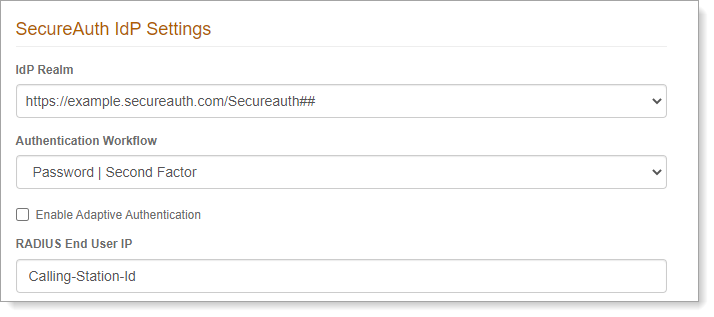
In the SecureAuth IdP Settings section, set the following:
IdP Realm
Select the Identity Platform realm to connect with SecureAuth RADIUS.
Selections only include Authentication API realms added on the IdP Realms page of the SecureAuth RADIUS admin console.
Authentication Workflow
Select the same Login Workflow that you enabled on the realm to connect with SecureAuth RADIUS.
The default workflow selection is Password | Second Factor.
NOTE: Not all login workflows are supported by all RADIUS clients due to RADIUS client configuration limitations.
Enable Adaptive Authentication
Optional. Select this check box if you are using Adaptive Authentication.
RADIUS End User IP
This attribute is used to verify the end user's IP address. By default, Calling-Station-Id appears.
If the RADIUS Client is Palo Alto Networks or Juniper Networks, edit the value of the field to one of the following:
For Palo Alto Networks, enter PaloAlto-Client-Source-IP.
For Juniper Networks, enter Tunnel-Client-Endpoint.
NOTE: IP verification is only supported on Cisco, NetScaler, and Palo Alto Networks platforms.
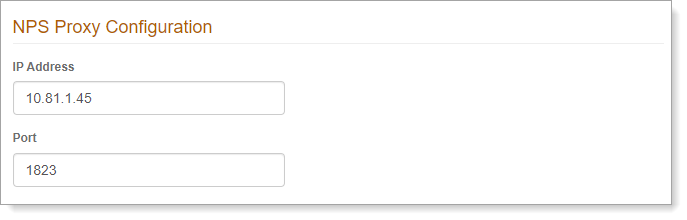
Optional. The (Network Policy Server) NPS Proxy Configuration section is for organizations using MS-CHAPv2 with Cisco or NetScaler. To configure SecureAuth RADIUS as a proxy, set the following:
IP Address
Set to the IP of the NPS.
For example, 10.81.1.45.
Port
Set to the port where the NPS will be listening.
For example, 1823.
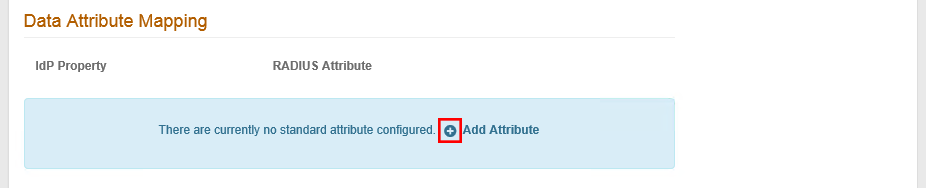
In the Data Attribute Mapping section, do the following:
Click the + icon next to Add Attribute to map an attribute from the configured Identity Platform data store to the RADIUS client. This feature is often used with a VPN for making policy decisions.
Value entry boxes appear.
Set the following:
Note
Only string values are supported for data attribute mapping.
IdP Property
By default auxId1 appears. Modify this entry to map a field or a User Group to a supported SecureAuth Identity property.
This entry is case-sensitive.
RADIUS Attribute
Enter the name of the RADIUS client attribute that is mapped to the specified IdP Property.
For example, Class.
This entry is case-sensitive.

Click the + icon to add more attribute mappings or the – icon to delete attribute mappings.
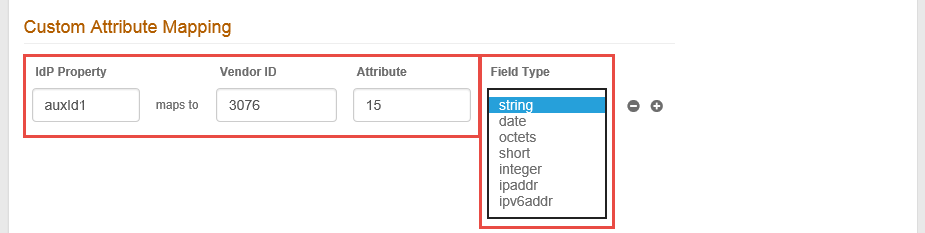
In the Custom Attribute Mapping section, do the following:
Click the + icon next to Add Attribute to map an attribute from the configured SecureAuth Identity Platform data store to a vendor specific attribute. This usually occurs in a scenario in which the VPN appliance is unable to perform an LDAP lookup.
Value entry boxes appear.
Set the following:
Note
The Attribute field is mandatory and must be set in this section or in the Static Value Mapping section.
IdP Property
By default auxId1 appears. Modify this entry to map a field or a User Group to a supported SecureAuth Identity Platform property.
This entry is case-sensitive.
Vendor ID
Enter the numeric Vendor ID.
Attribute
Enter the numeric vendor specific attribute that is mapped to the specified IdP Property.
Field Type
Select the RADIUS attribute type. The options are:
string – variable-length string field used for printable text strings.
date – UNIX timestamp in seconds, as of January 1, 1970 GMT.
octets – variable-length string field used for binary data.
short – two-byte integer.
integer – unsigned 32-bit integer.
ipaddr – IPv4 address.
ipv6addr – IPv6 address.
NOTE: The Field Type selection must be accurately defined in order to be accepted by the client.
Click the + icon to add more attribute mappings or the – icon to delete attribute mappings.
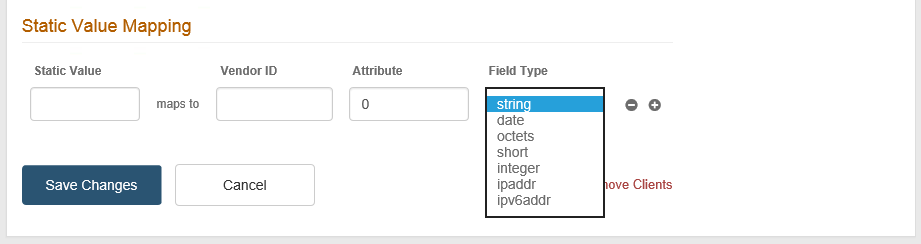
In the Static Value Mapping section, do the following:
Click the + icon next to Add Attribute to map data to the RADIUS Vendor-Specific Attribute (VSA) configuration.
Value entry boxes appear.
Set the following:
Note
The Attribute field is mandatory and must be set in this section or in the Custom Attribute Mapping section.
Static Value
Enter the Static Value to map to the RADIUS attribute.
Vendor ID
Enter the numeric Vendor ID.
Attribute
Enter the numeric vendor specific attribute that is mapped to the specified Static Value.
Field Type
Select the RADIUS attribute type. The options are:
string – variable-length string field used for printable text strings.
date – UNIX timestamp in seconds, as of January 1, 1970 GMT.
octets – variable-length string field used for binary data.
short – two-byte integer.
integer – unsigned 32-bit integer.
ipaddr – IPv4 address.
ipv6addr – IPv6 address.
NOTE: The Field Type selection must be accurately defined in order to be accepted by the client.
Click the + icon to add more attribute mappings or the – icon to delete attribute mappings.
Click Add Client after all client entries are made.
View RADIUS Client information
When you select the RADIUS Clients tab, the following information appears for each RADIUS client:
Client Name
IP Address – an asterisk ( * ) indicates the client IP will be mapped to all RADIUS client IPs configured.
Authentication Workflow
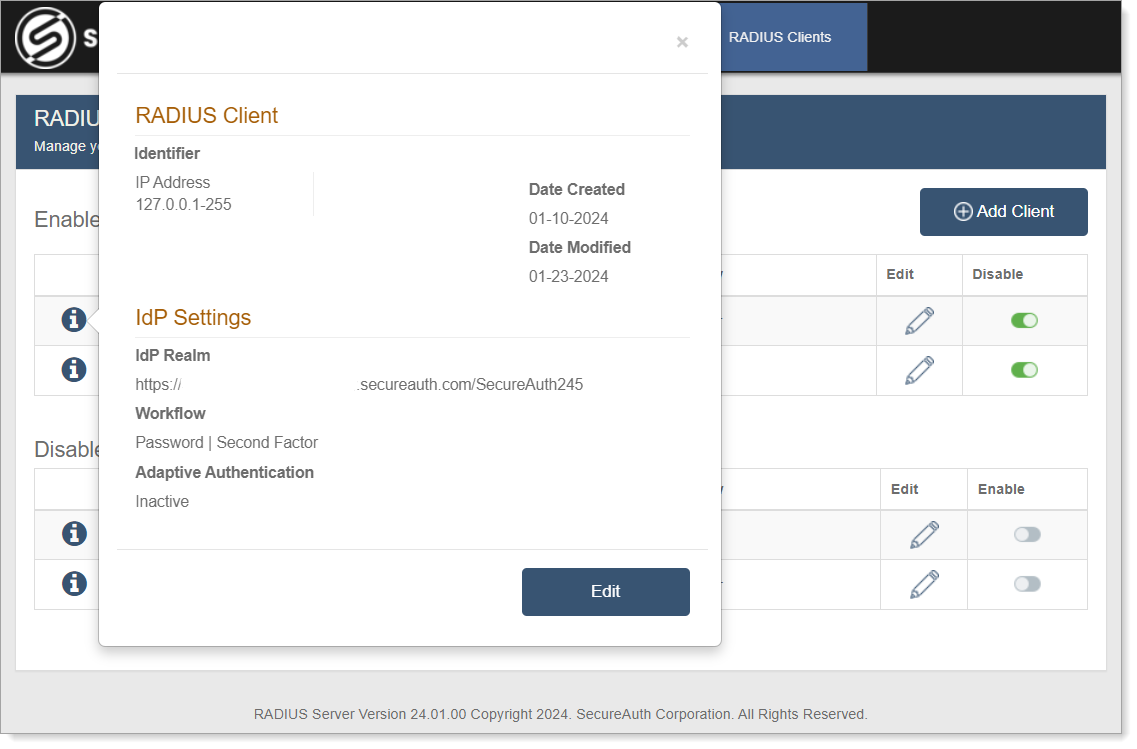
To view additional information, click the i icon next to the RADIUS client name. The following information appears:
Identifier – IP address or an asterisk ( * ) which indicates the client IP will be mapped to all RADIUS client IPs configured.
In the following image, NAS-Port, NAS-Identifier, NAS-Port-Id, and Framed-IP-Address are examples of identifiers you can configure. For a complete list of identifiers, see page 23 in RADIUS RFC.
Date Created – Client creation date using the MM-DD-YYYY format.
Date Modified – Most recent client modification date using the MM-DD-YYYY format.
IdP Realm – URL or realm number selected.
Workflow – one of eight selections made for this client (the default is Password | Second Factor).
Adaptive Authentication – "Active" or "Inactive" status depending on whether or not this feature is enabled.
Click Edit to update RADIUS Client information. See Edit or remove RADIUS Client for more information.
 |
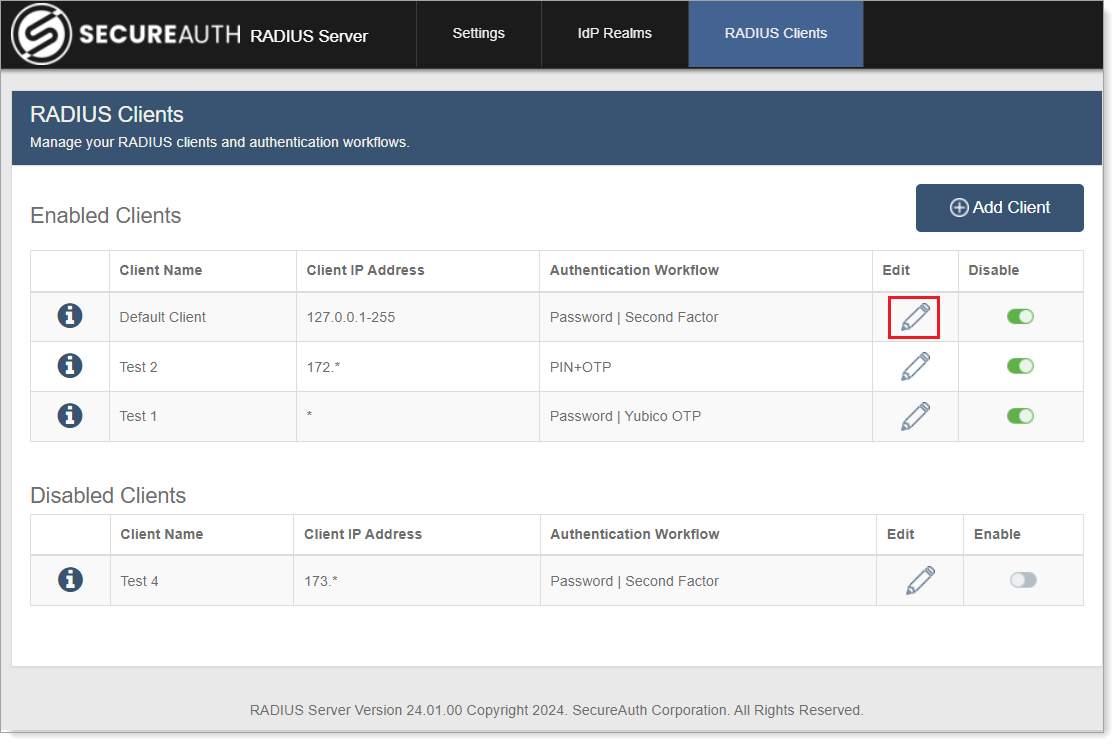
Edit or remove RADIUS Client
Select the RADIUS Clients tab.
To edit a RADIUS Client, click the pencil icon next to it. Update any information that has changed for the client and click Save Changes.
To disable a RADIUS Client, slide the toggle next to it to Off. Any request to the disabled client will be rejected and end users will not be able to log in.
This action moves the client to the Disabled Clients list.
Logs will show the message: RadiusSession: Radius client can't be found for IP: x.x.x.x.
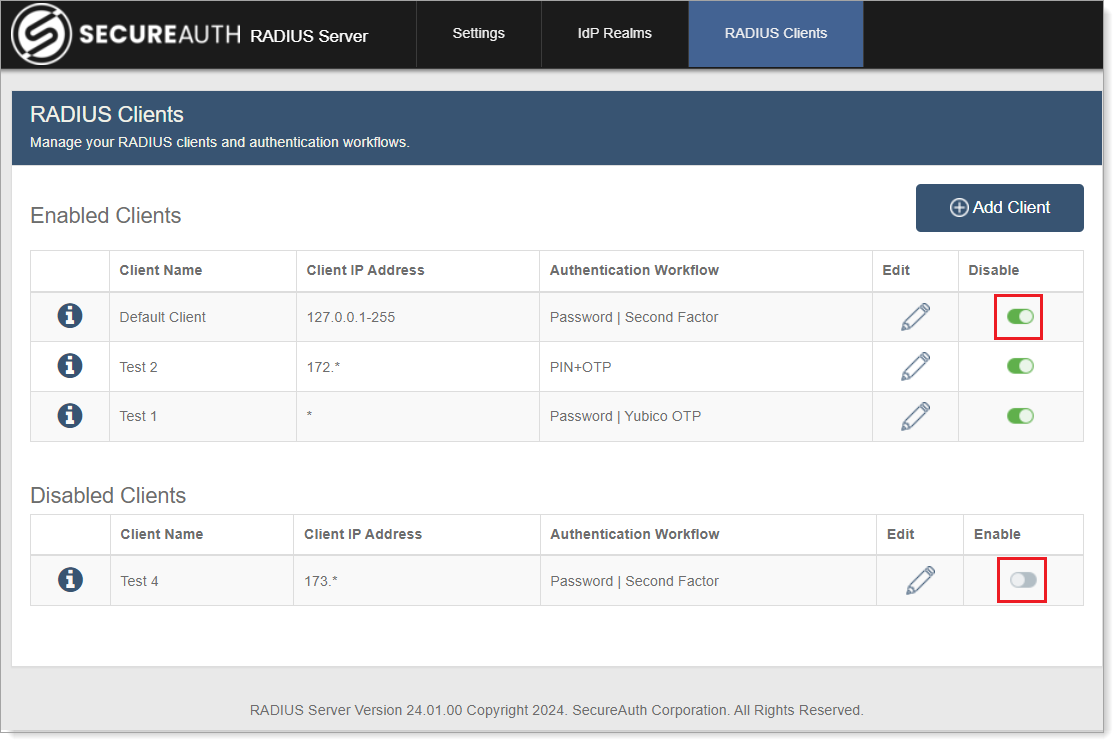
If the Client is disabled, the Remove Clients option becomes available. Do one of the following:
Slide the toggle to On to enable the client again for use with the realm and RADIUS server. This action removes the client from the Disabled Clients list and includes it in the Enabled Clients list.
To permanently remove the client from the Disabled Clients list and from the RADIUS server, click the pencil icon next to the Client. Click Remove Clients.
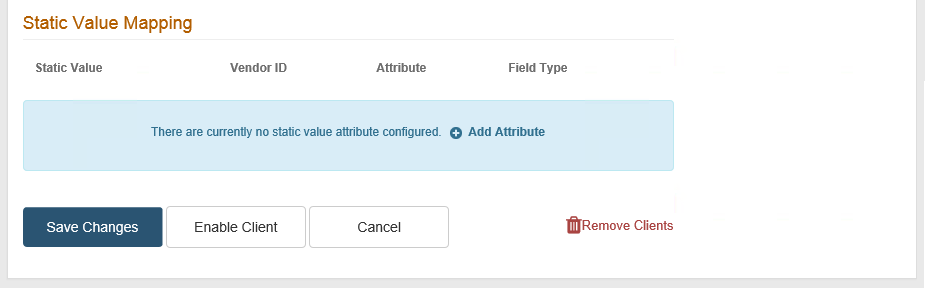
Click Save Changes.