Arculix MFA plugin for Linux
Multi-Factor Authentication (MFA) is an extra layer of security used when logging into websites or apps. Individuals are authenticated through more than one required security and validation procedure that only they know or have access to.
You can add MFA to Linux through the Arculix MFA plugin. It's easy to deploy, customizable, and secure.
Prerequisites
Configured Arculix instance and user account with administrative privileges for Arculix.
Supported Linux operating system:
CentOS / Red Hat Enterprise Linux (RHEL) 7.0+
Fedora 34+
Debian 10+
Ubuntu 20.4+
Add Linux application in Arculix
Add an application in Arculix for Linux.
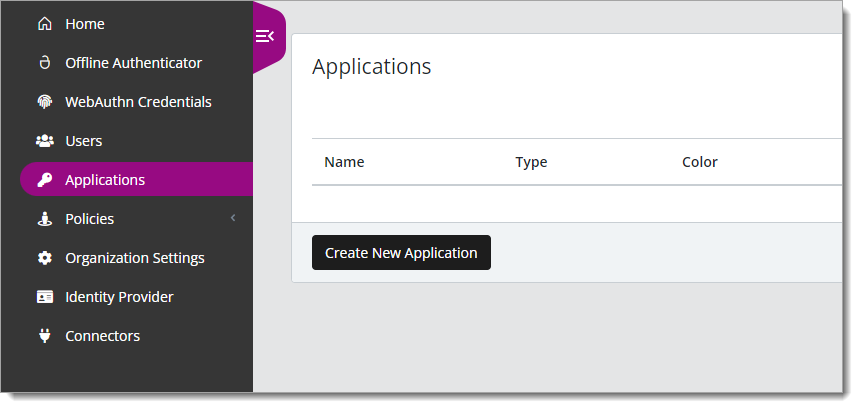
Log in to Arculix with an administrative account and go to Applications.
Click Create New Application.
In the New Application form, on the General tab, set the following configurations:
Name
Set the name of the application. This is the name to display for push notifications, in the Admin panel, Application portal, and audit logs.
For example, Linux-SSH.
Type
Set to SSH Plugin [ssh].
Out of Band Methods
Select the allowed methods end users can choose to approve MFA requests.
For example, Arculix Mobile app (push notifications), SMS, or Security Key.
Message for MFA Requests
Optional. Type a message displayed to end users when sending an MFA request via push notification, SMS, or email.
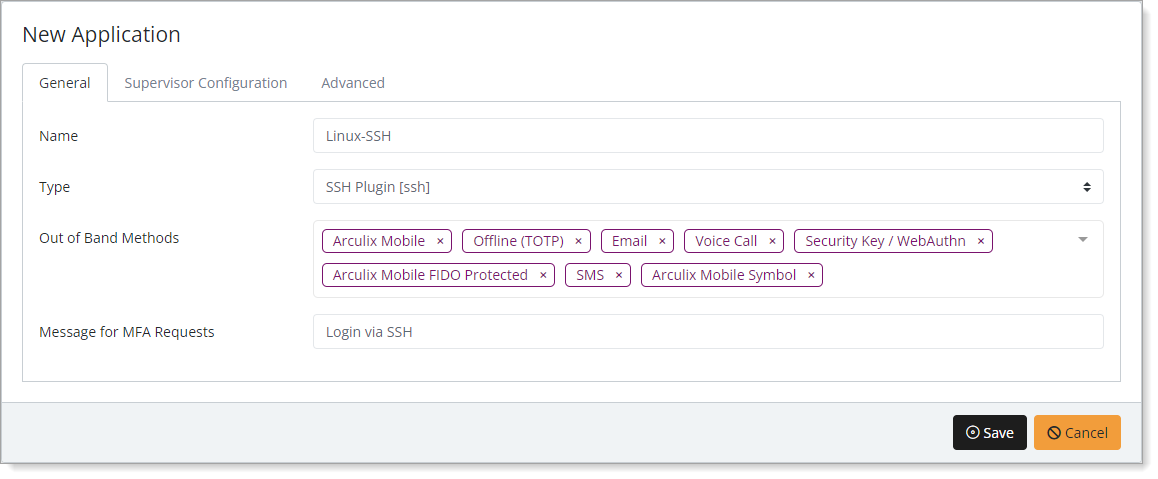
Save your changes.
Open the Linux application again and go to the Advanced tab.
Copy the UID and Secret.
You will need these values during the configuration section of the Arculix MFA plugin for Linux.
Important
Treat your UID and Secret code like any sensitive credential. Do not share this with unauthorized individuals or send it in an email.
Install Arculix MFA plugin for Linux
From the Arculix Download Center, download the Arculix MFA plugin for Linux.
Be sure to download the plugin specific to your Linux operating system.
Upload the plugin files to your Linux machine.
Install the package files specific to your Linux operating system.
Linux configuration
This section provides instructions on how to enable the Arculix MFA plugin on your Linux machine for ssh, su, sudo, and console authentications.
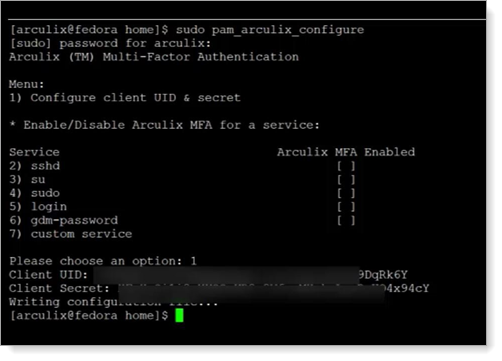
Run the Arculix configurator using the following command:
sudo pam_arculix_configure
Type 1 to insert the UID and Secret you obtained earlier when creating the Linux application in Arculix.
Re-run the Arculix configurator using the following command:
sudo pam_arculix_configure
Type the number of a service to which you want enable Arculix MFA. Repeat this for each service that you want to enable.
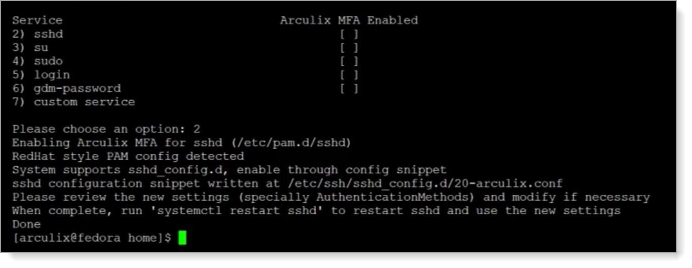
Type 2 to enable Arculix MFA for SSH
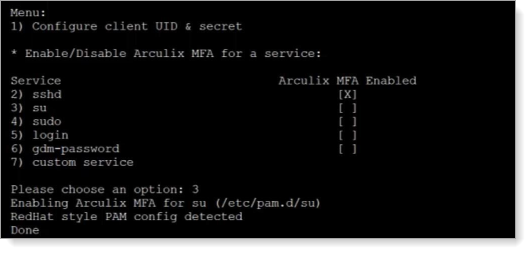
Type 3 to enable Arculix MFA for su

Type 4 to enable Arculix MFA for sudo
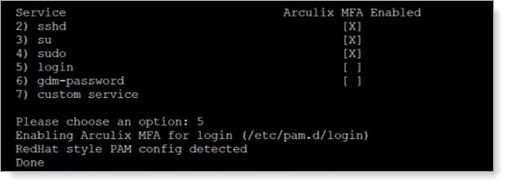
Type 5 to enable Arculix MFA for login
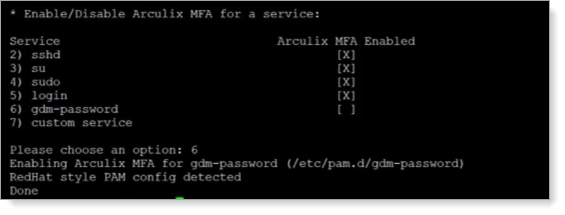
Type 6 to enable Arculix MFA for gdm-password
Note
The configurator does not automatically restart the SSH service to prevent any unwanted disconnections. You will need to apply the changes and restart the service in the next step.
Once you've made the changes, apply them to the SSH service using the following command:
sudo systemctl restart sshd
Test your setup
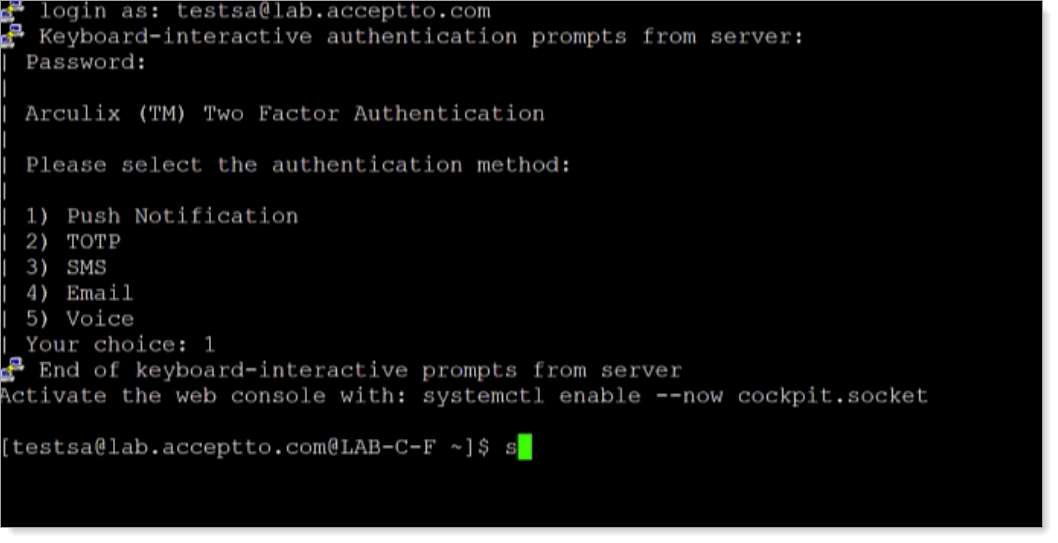
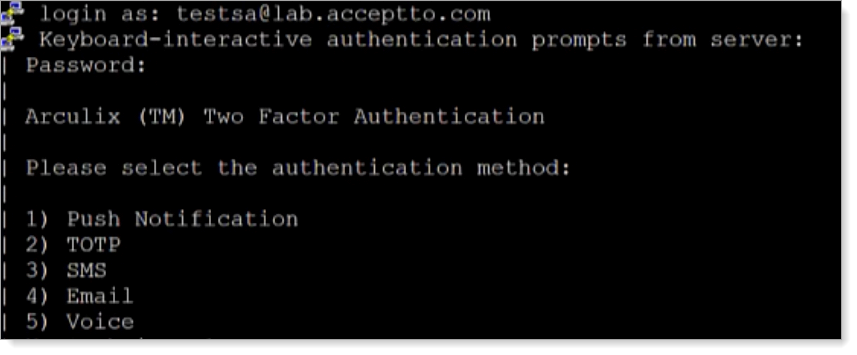
Connect to your Linux machine via the console or SSH, or try to use su or sudo commands on your Linux box.
After successful authentication, it prompts you to select your preferred Arculix MFA method.
Approve the authentication request in Arculix Mobile.
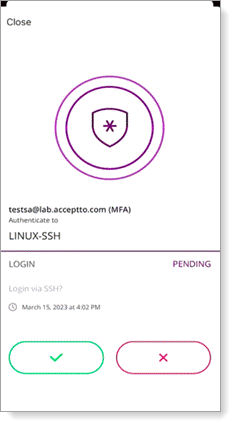
You are now authenticated in Linux.