F5 VPN RADIUS integration
Multi-Factor Authentication (MFA) is an extra layer of security used when logging into websites or apps. Individuals are authenticated through more than one required security and validation procedure that only they know or have access to.
Remote Authentication Dial-In User Service (RADIUS) is a protocol commonly used to authenticate, authorize, and account for user access and actions.
Arculix by SecureAuth offers a simple solution for adding MFA to F5 VPN via its RADIUS solution. Use this guide to configure VPN on F5 with the Arculix RADIUS MFA authentication solution.
Prerequisites
Arculix RADIUS Agent that is configured and connected to your user directory. For example, Microsoft Active Directory (AD).
For more information, see the Arculix RADIUS Agent deployment guide.
F5 VPN user account with administrative access.
Arculix RADIUS Agent configuration
Follow these steps to configure the Arculix RADIUS Agent.
Log in to the Arculix RADIUS Agent as an administrator.
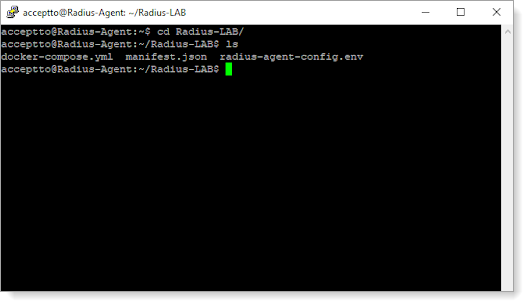
Open the radius-agent-config.env file with an editor.
The file is located in the installed directory of RADIUS Agent. RADIUS clients are configured in this setting.
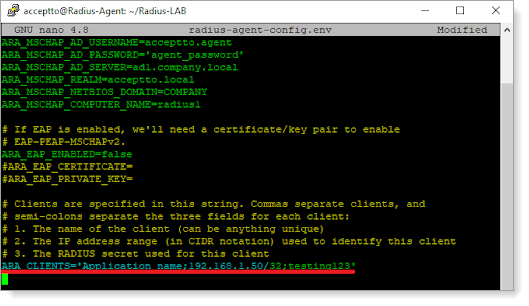
At the end of the radius-agent-config.env file, set the following configuration for the ARA_CLIENTS attribute:
Note
The values should be separated by semicolons (;).
ARA_CLIENTS=<An optional name for your F5 VPN>;<Internal IP address of your F5 VPN>;<a shared secret>
For example, set:
ARA_CLIENTS=F5 VPN;192.168.1.50/32;testing12345
Save the file.
Run the following command to apply the changes:
docker-compose down && docker-compose up -d
F5 VPN configuration
In this section, you will configure F5 VPN as a RADIUS client. See the following tasks.
Task A: Add Arculix as a RADIUS Server
Log in to the F5 VPN admin portal with an administrative account. Go to Access > Authentication > RADIUS and click Create.
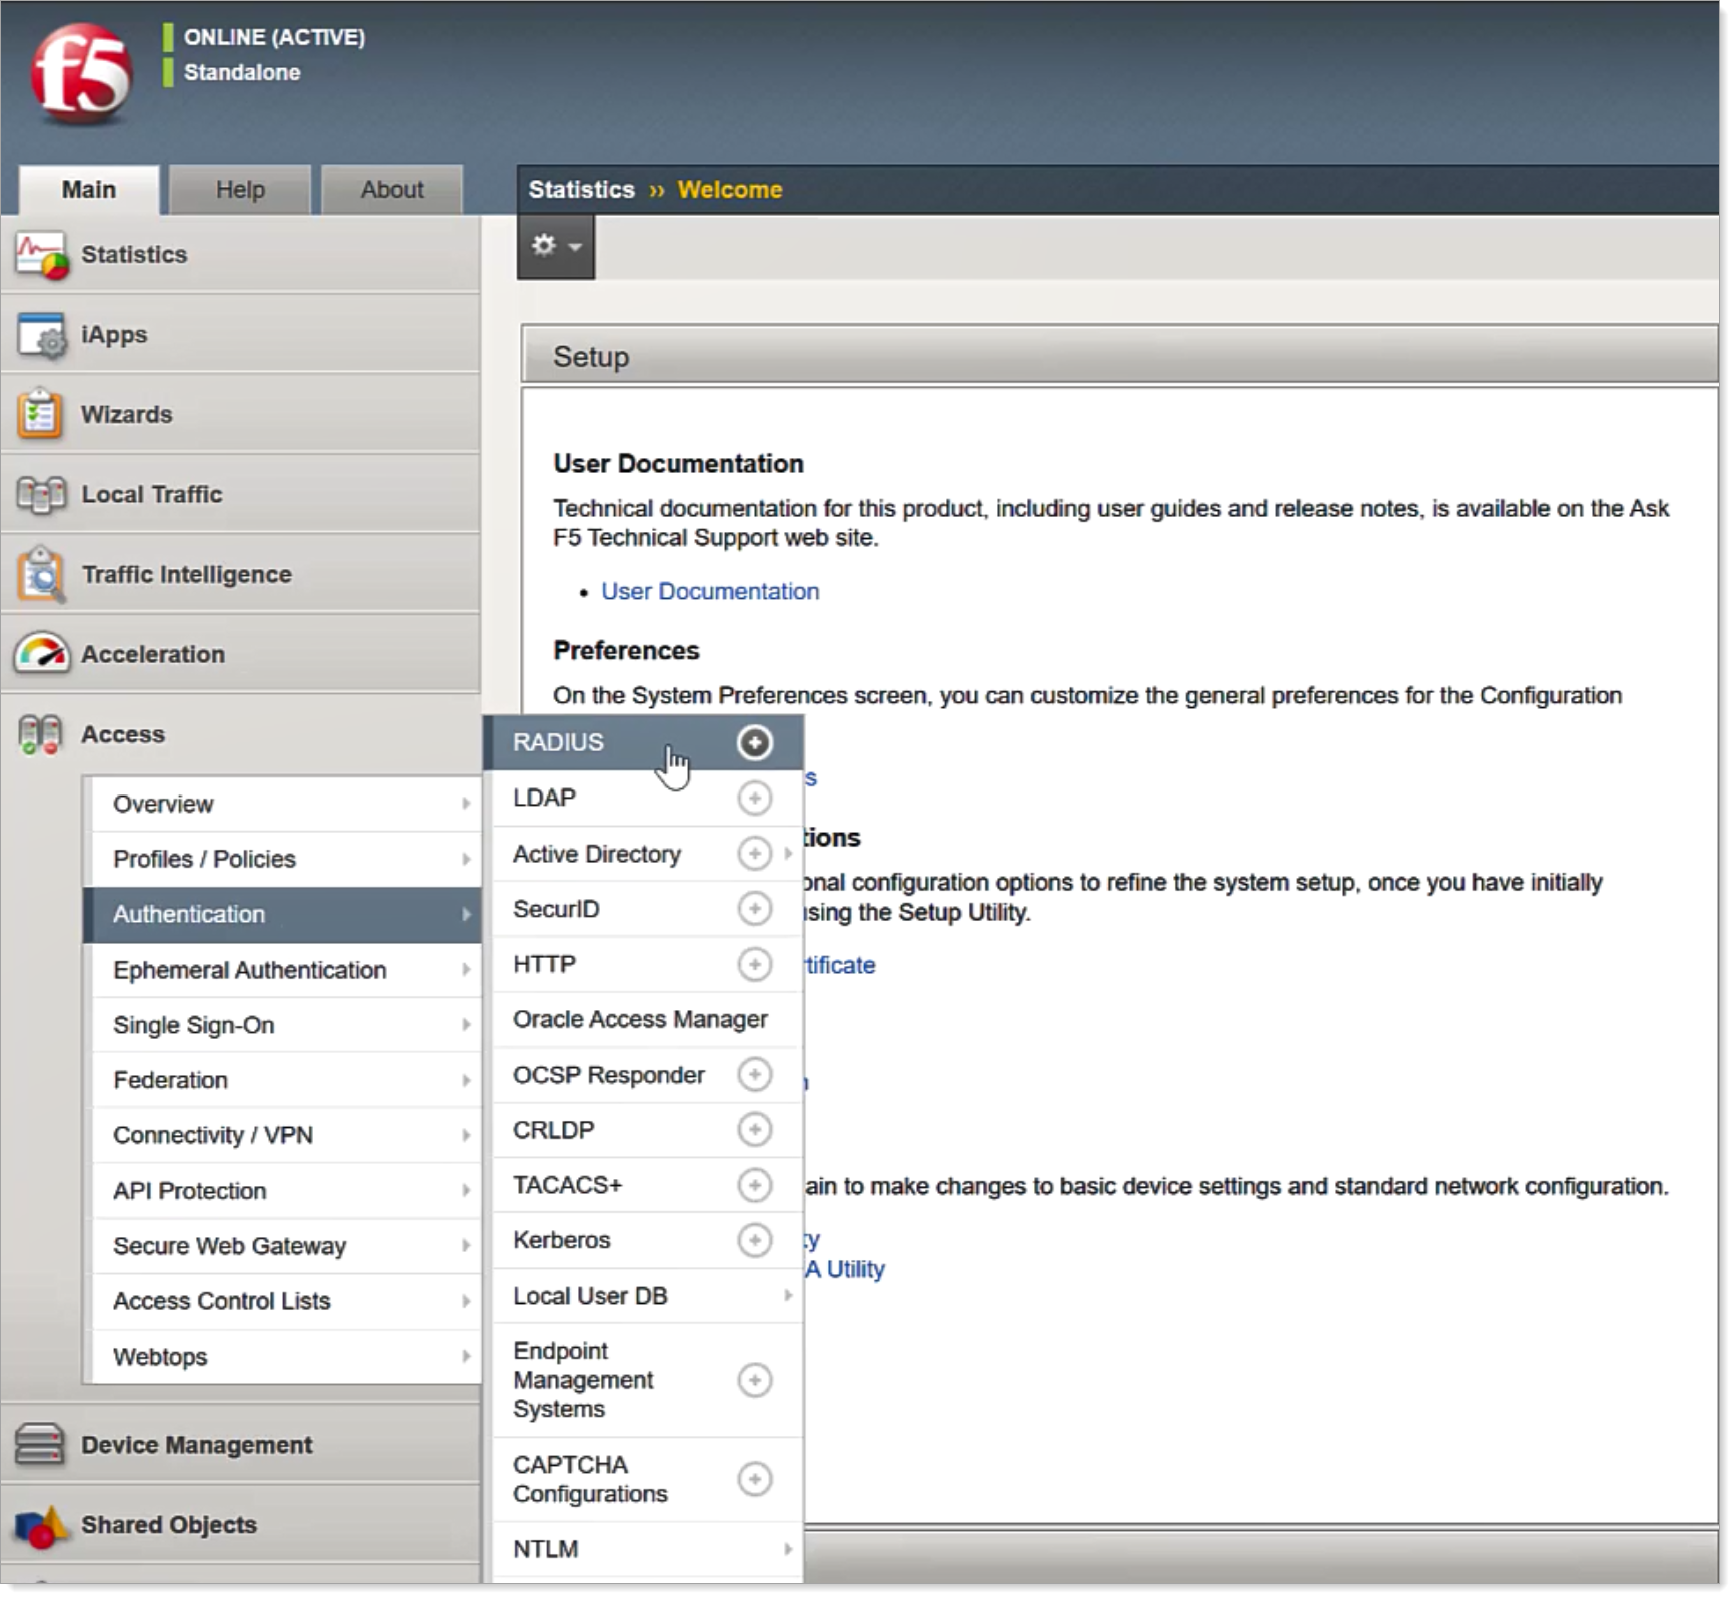
To create this new RADIUS server, set the following configurations.
Name
Enter the name of the RADIUS server.
For example, Arculix-RADIUS.
Mode
Set to Authentication.
Server Connection
Set to Direct.
Server Address
Enter the IP or name of the Arculix RADIUS Server Agent.
Authentication Service Port
Set to 1812.
Secret
Enter the RADIUS shared secret key for the Arculix RADIUS Agent.
Confirm Secret
Confirm the RADIUS shared secret key for the Arculix RADIUS Agent.
Timeout
Set to 60.
Retries
Set to 3.
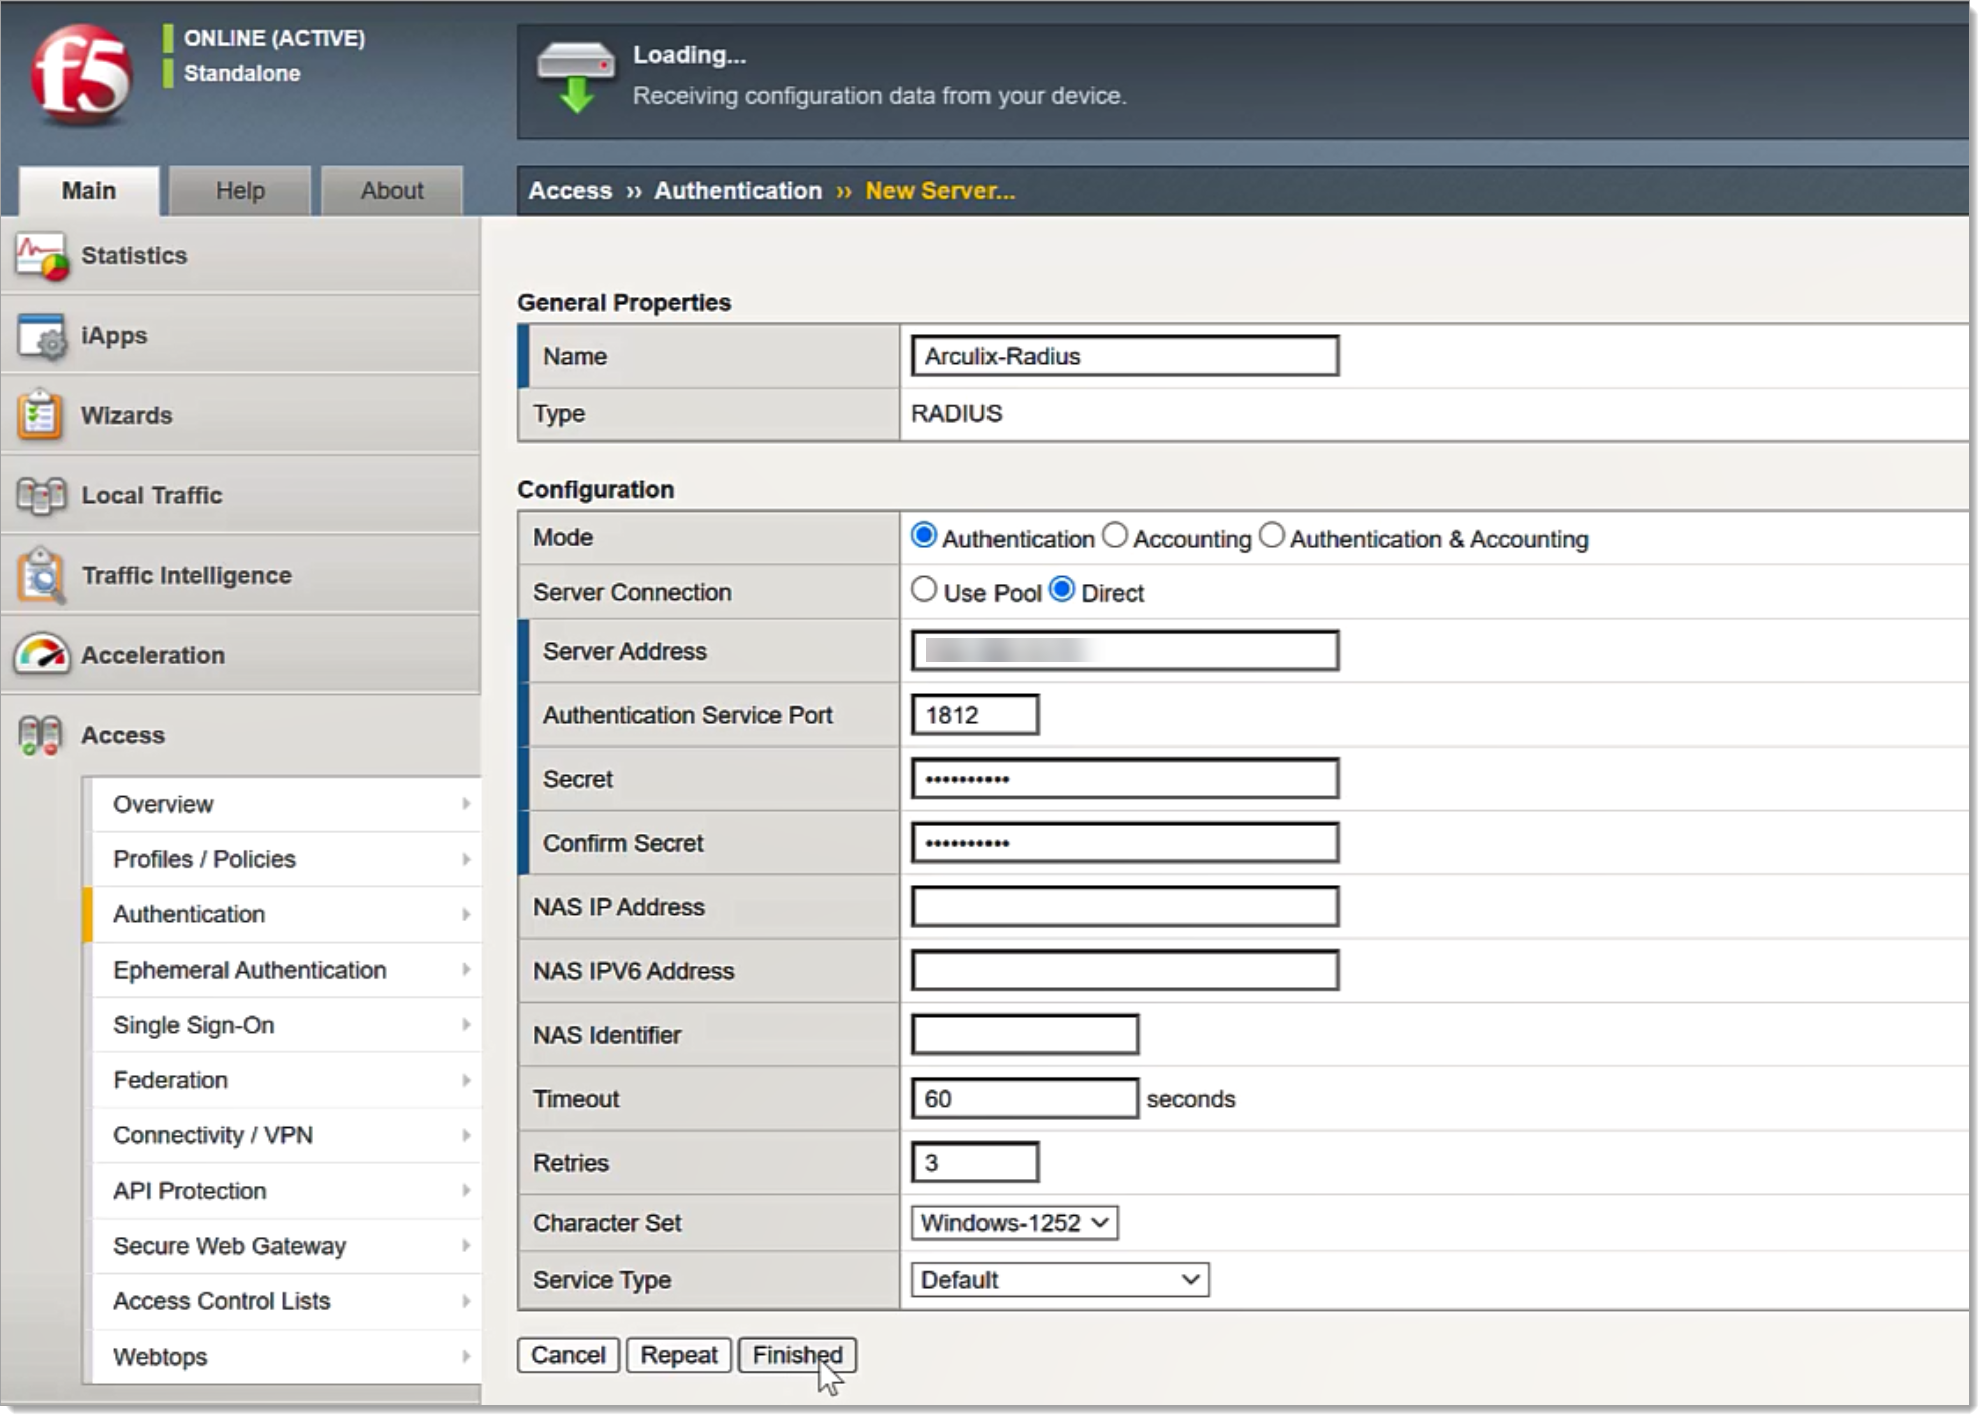
Optional. If you require and have a backup server, set the Server Connection to Use Pool.
Click Finished.
Task B: Set VPN authentication on RADIUS
On the F5 VPN admin portal, go to Access > Profiles / Polices > Access Profiles (Per Session Policies).
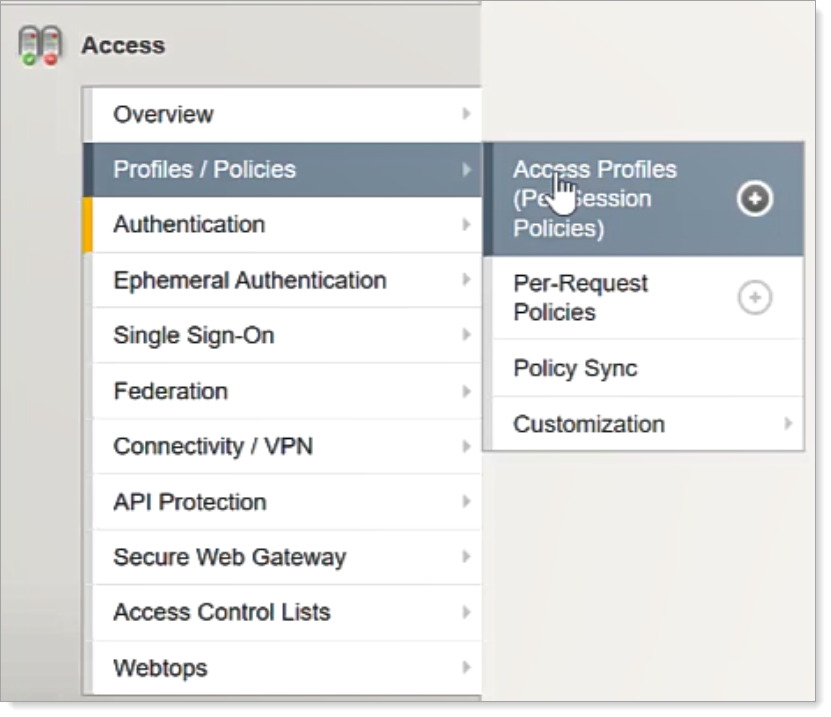
Click Edit for the Per-Session Policy for your required VPN configuration.

From the Policy Definition page, select + after the Logon page to add RADIUS authentication.

Go to the Authentication tab, choose RADIUS Auth, and click Add Item.
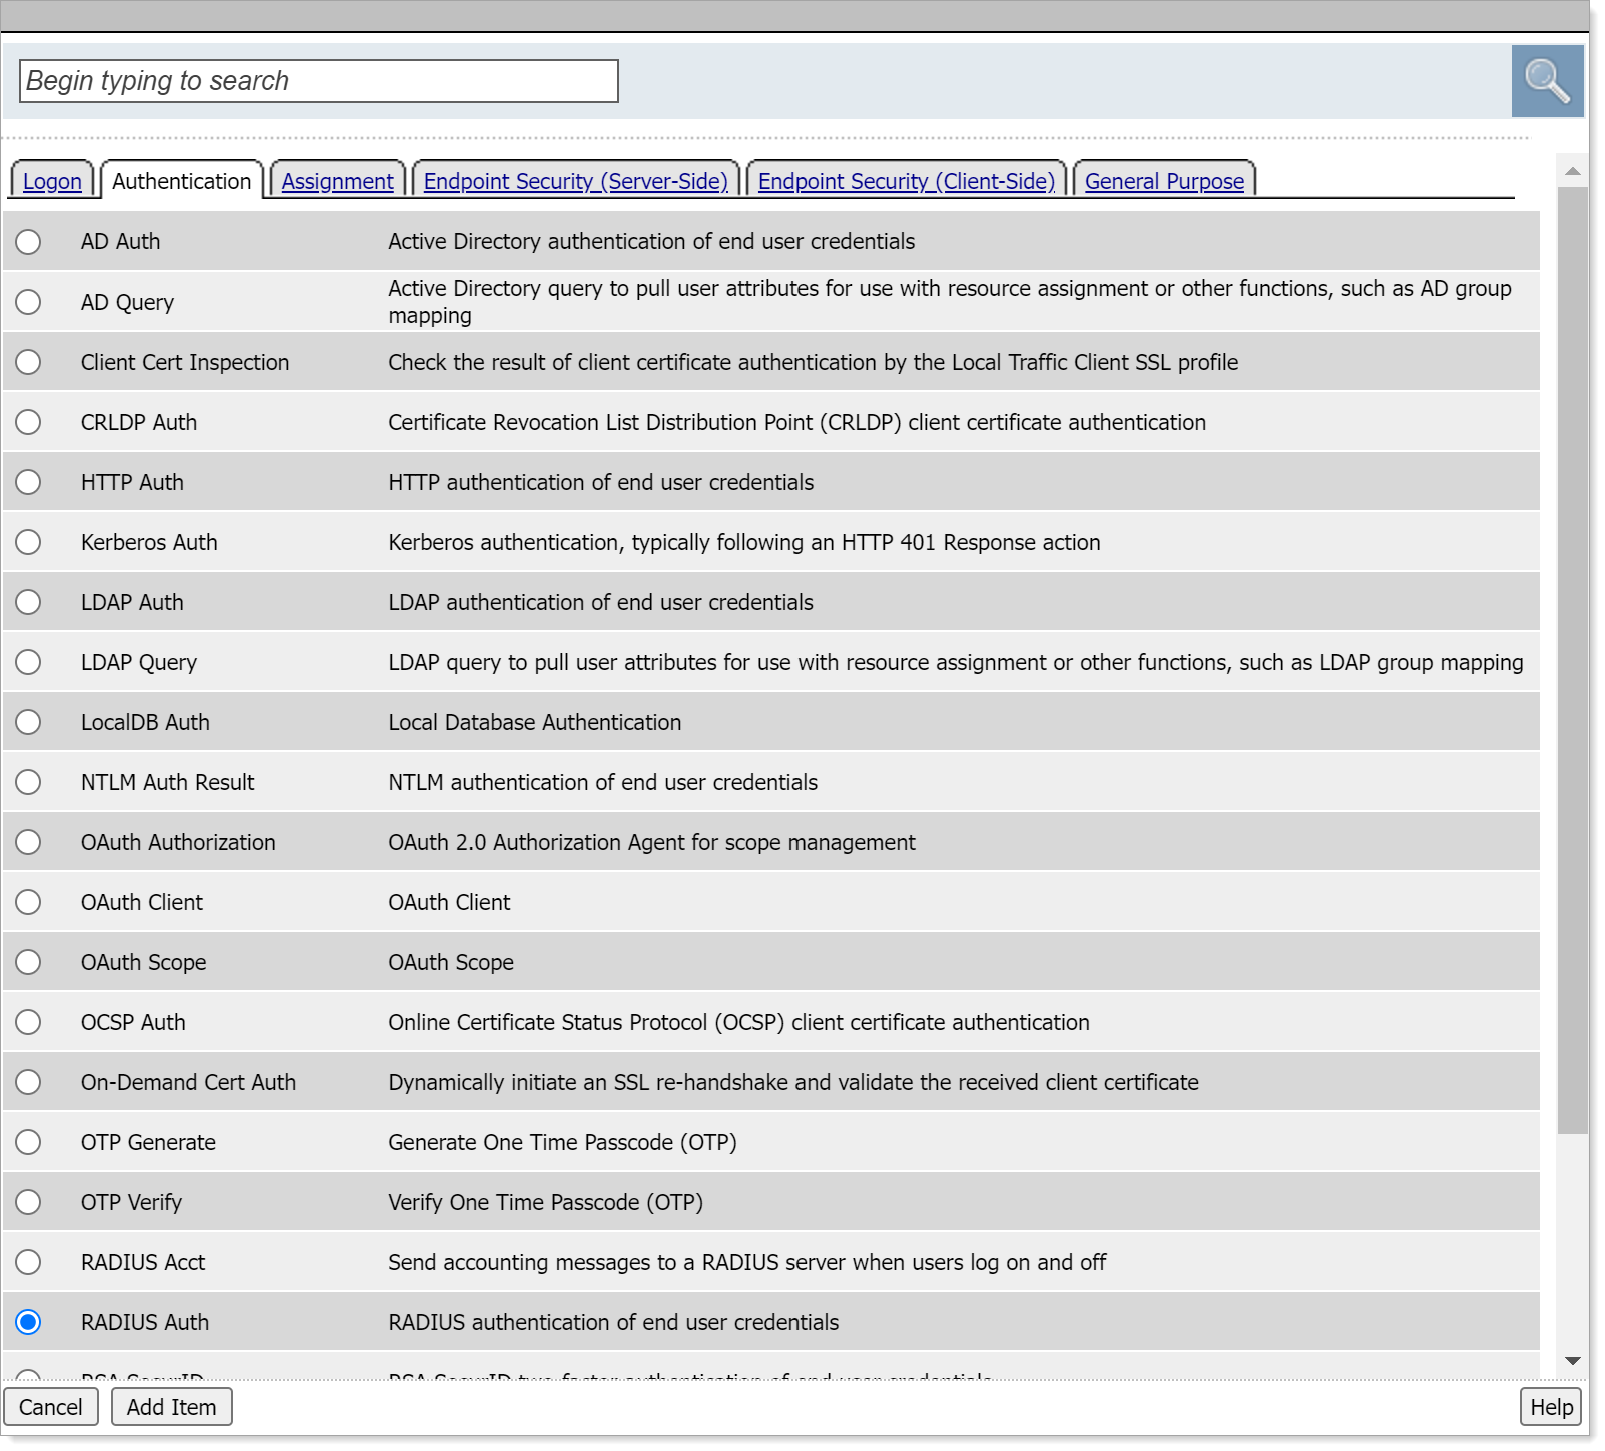
Set the AAA Server to the Arculix RADIUS server that you just defined and click Save.
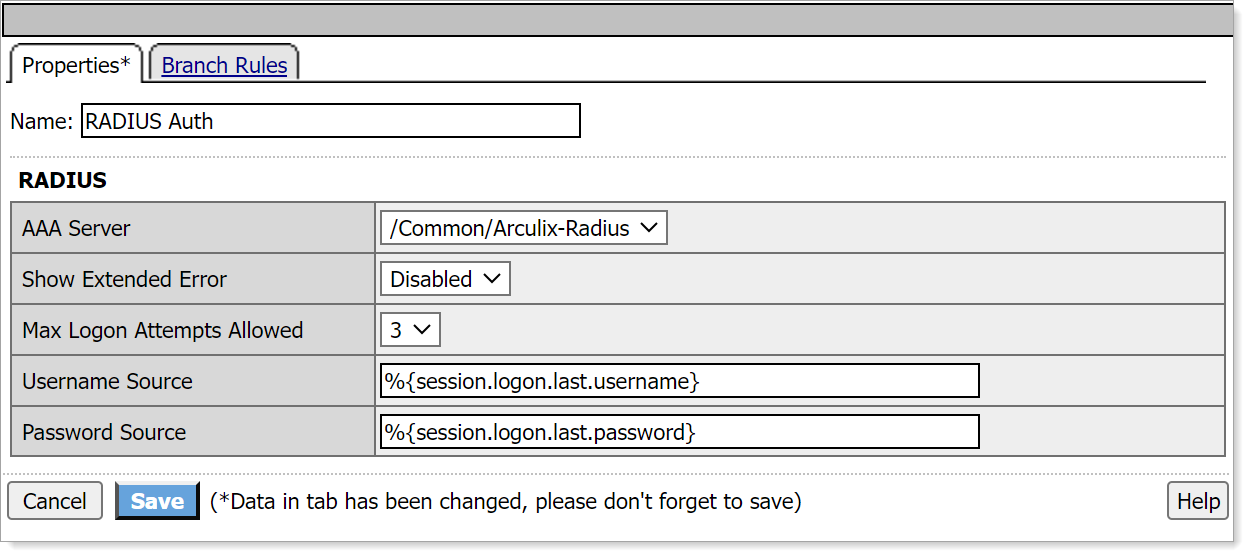
Remove the previous authentication methods and select Apply Access Policy.

Test your application integration
Go to your F5 VPN URL, enter your login credentials and click Logon.

The Arculix Mobile app receives a push notification for your approval to log in.
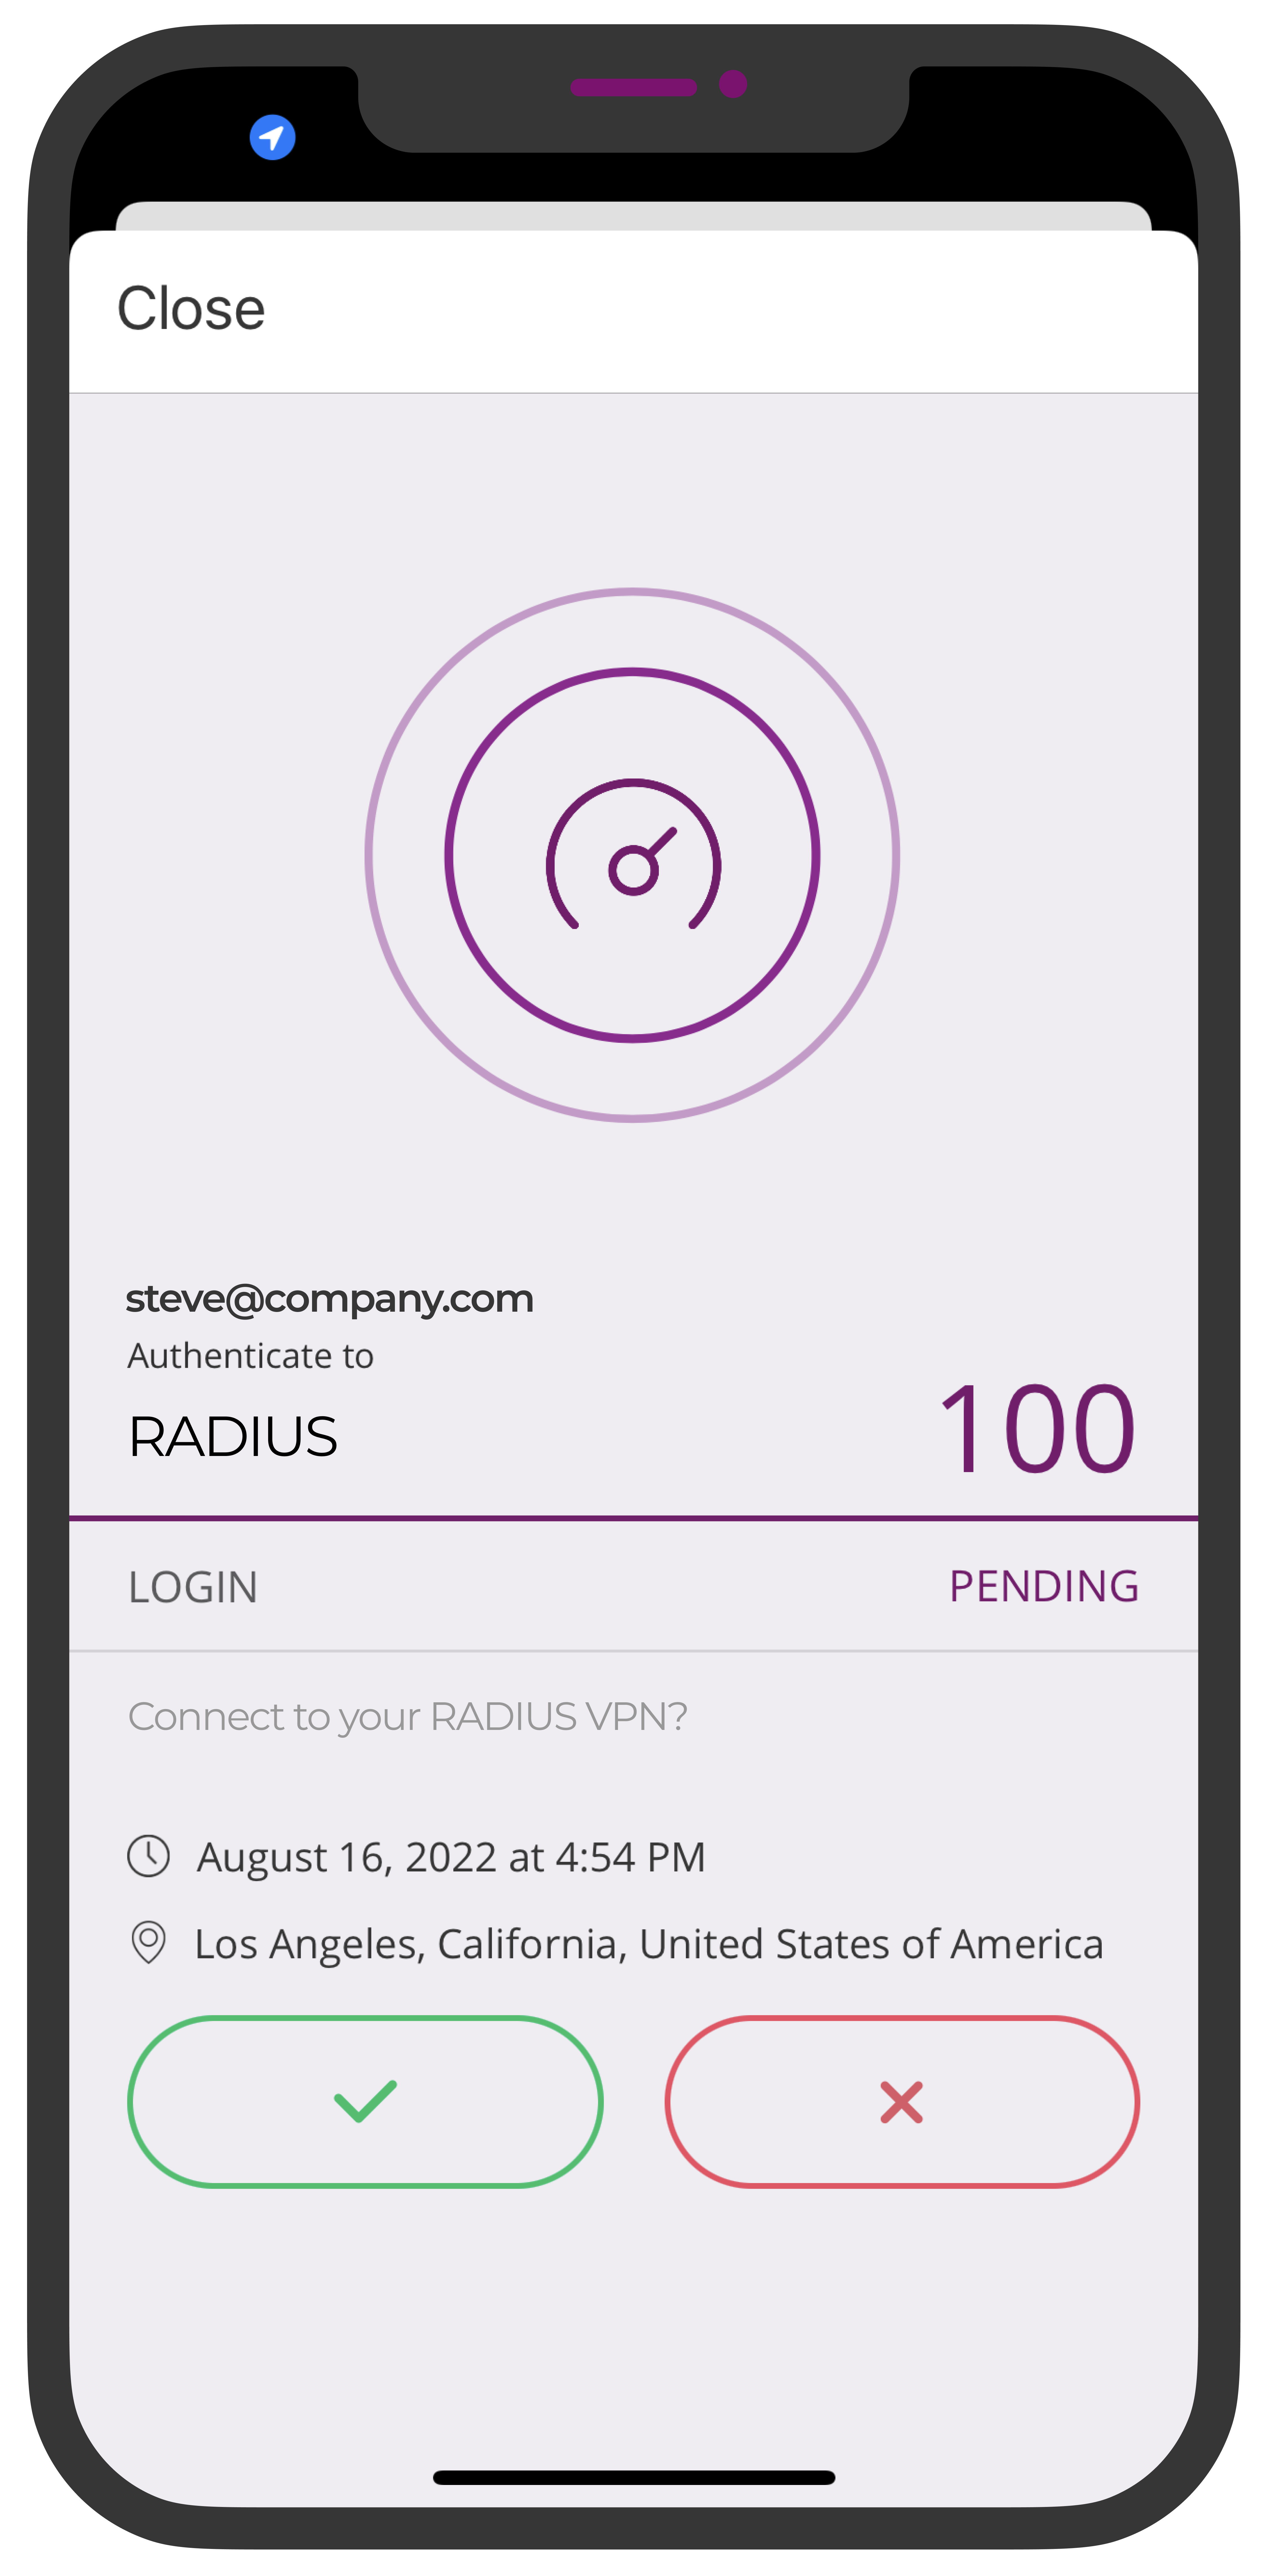
Tap approve and you are authenticated in.