Arculix LDAP Agent deployment guide
The Arculix LDAP Agent helps connect an enterprise's Active Directory service with Arculix and other services. It enables authentication and sharing user details for single sign-on (SSO) and more.
You can install the Arculix LDAP Agent in an on-prem server or a cloud environment. Just make sure the Arculix LDAP Agent can connect to the Active Directory in your organization.
Server requirements
Any virtualization platform that is capable of hosting Linux or Windows servers should be suitable, including on-premises solutions such as VMware ESXi and Microsoft Hyper-V, and cloud environments such as Amazon EC2 and Microsoft Azure.
Number of instances
We recommend you provision two or more instances to provide high availability. The LDAP Agent is a stateless service, so there is no limitation for horizontal scaling. However, the system can work with only one instance of the agent if high availability is not a hard requirement.
Supported operating systems
You can install the Arculix LDAP Agent on these operating systems:
Microsoft Windows Server 2012+
Red Hat Enterprise Linux 8
Red Hat Enterprise Linux 9
Rocky Linux 8
Rocky Linux 9
Amazon Linux 2
Ubuntu 22.04 LTS
Ubuntu 24.04 LTS
Hardware
The minimum hardware requirements for deploying the LDAP Agent are:
Linux | Windows | |
|---|---|---|
CPU | 2 CPU cores | 2 CPU cores |
RAM | 2 GB | 4 GB |
Storage | 16 GB SSD | 32 GB SSD |
Requirements
Network requirements
All communication with the LDAP Agent is over HTTPS. There is an additional layer of security that provides authenticity above and beyond the HTTPS certificates by signing all communication.
Outbound rules
The following external service should be reachable by the LDAP Agent:
Service | Protocol | Port Numbers | Host |
|---|---|---|---|
Arculix | WSS (WebSocket Secure) | 443 | switchboard.acceptto.com |
Additionally, your operating system or deployment environment may require external services to be reachable to install components and receive software updates. Please consult your operating system vendor for details.
If you choose to use the Docker-based deployment method, the following outbound access will be needed to install and manage Docker:
Service | Protocol | Port Numbers | Host |
|---|---|---|---|
Docker updates | TCP | 80, 443 | download.docker.com |
Docker Compose download | TCP | 80, 443 | github.com |
Internal network rules
The following internal services provided by the customer must be reachable by the agent:
Service | Protocol | Port Numbers | Service |
|---|---|---|---|
LDAPS | TCP | 636 | Secure LDAP service |
LDAP | TCP | 389 | Non-secure LDAP service |
DNS | UDP | 53 | DNS server |
Caution
Use of non-secure LDAP isn't recommended, but is available for rare situations where the customer can guarantee protection of the data in transit by other means (e.g. physical security controls)
User directory (AD) requirements
The Arculix LDAP Agent communicates with the user directory using the LDAP protocol. Before deployment, a user account must be provisioned which allows read-only access to the directory.
If password reset functionality is required, the bind user must have appropriate permissions, or a separate account with password reset permissions must be configured.
The following information needs to be prepared before the installation:
Name | Required | Description |
|---|---|---|
URL | Yes | The LDAP URL to use when performing LDAP queries. The URL must begin with Examples include |
Bind User | Yes | The user used when binding to the LDAP server. This may be a DN such as A new account with read-only access to the directory should be provisioned for the agent and used for binding. NoteThe Arculix integration will no longer function if this user account is disabled, its password is changed, or its privileges are lowered or revoked. |
Bind password | Yes | The password of the user used to bind to the LDAP server. |
Base DN | Yes | The Base DN used when performing LDAP queries. All relevant users and groups must be descendants of this DN. Example: |
TLS Trusted CAs | No | A list of certificates in PEM format representing trusted certificate authorities (CAs) to be used when verifying the LDAP server's certificate. These could include an enterprise CA used to issue certificates to LDAP servers, or even the certificate of the LDAP server itself. WarningIf this option is used, the operating system's default list of trusted CAs will not be used. Default: Use the operating system's list of trusted CAs. |
Pre-installation checklist
Please use this checklist to prepare for the installation:
The required servers or virtual machines should be provisioned.
The required firewall rules are in place.
An Active Directory read-only account has been provisioned for the agent.
The Active Directory LDAP service is reachable from the LDAP Agent hosts within the network.
Optional. If secure LDAP (LDAPS, port 636) is used, a certificate or certificate chain is available which may be used to verify the connection to the server. (See TLS Trusted CAs, above.)
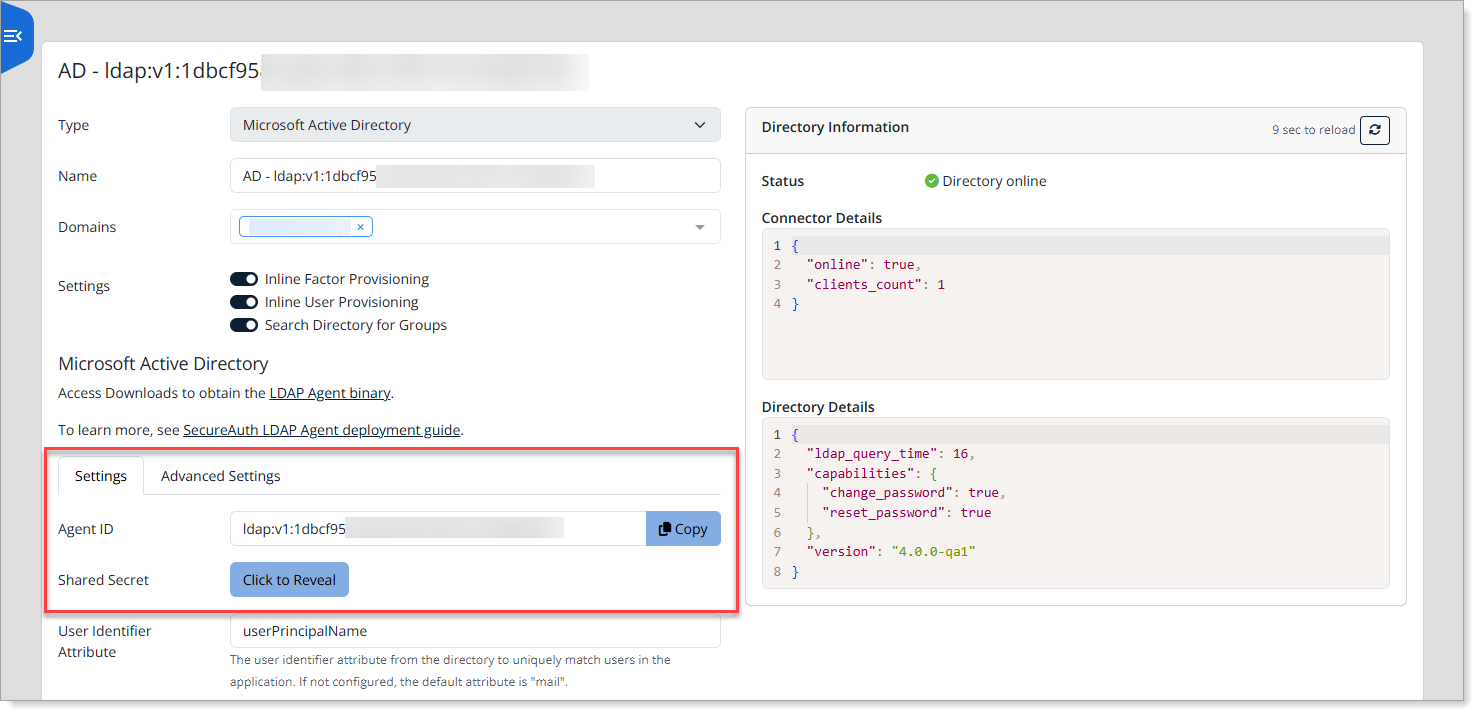
Get LDAP Agent connector information
You will need to copy the Arculix LDAP Agent connector ID and shared secret for the installation.
Log in to Arculix with administrative privileges and go to User Directories.
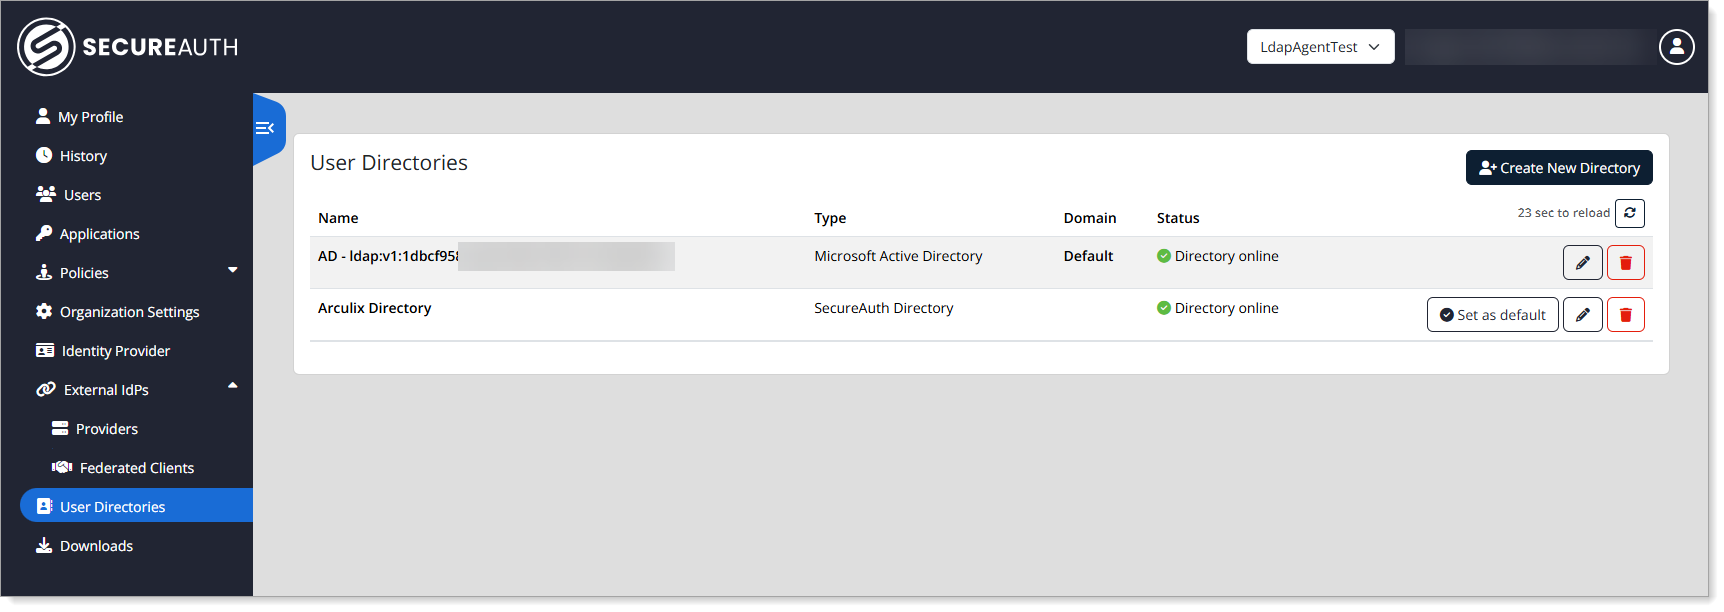
Add or edit a Microsoft Active directory and copy the Agent ID and Shared Secret.
Installation methods
You can install the LDAP Agent using one of the following methods. A separate package is available for each.
Find the download package in the Downloads section of the admin console, accessible from the left navigation menu.
Linux/RPM. Install the LDAP Agent using a standard RPM package for Linux environments.
Linux/Docker. Use a Docker image, packaged with supporting installation scripts, for flexible deployment on Docker-supported systems.
Windows. A self-installing executable for deploying the LDAP Agent on Windows Server environments.
The following sections describe each installation method in detail.
The LDAP Agent RPM package is named acceptto-ldap-agent-X.Y.Z-1.x86_64.rpm, where X.Y.Z is the version number.
When you install the agent via RPM, it integrates with systemd for service management, including automatic launch at boot and logging through syslog.
By default, agent logs are written to /var/log/messages automatically. Log locations may vary based on your organization's infrastructure.
Installing
The package may be installed using:
rpm -ivh acceptto-ldap-agent-X.Y.Z-1.x86_64.rpm
After installation, the customer should configure the agent using the YAML configuration file in /etc/acceptto/ldap-agent.conf. See the LDAP Agent configuration section below for full details on configuring the LDAP Agent.
Note
If an ldap-agent.env file is present in the /etc/acceptto directory, it will be treated as an environment-based configuration file and used instead of the YAML ldap-agent.conf file. This is only meant to provide backwards compatibility when migrating from a Docker-based deployment to an RPM-based deployment. SecureAuth recommends using the YAML ldap-agent.conf configuration for RPM deployments whenever possible.
After configuration, you can test the agent's connectivity to the LDAP server using the following commands. If you've used the YAML configuration (ldap-agent.conf), run the following command to test your installation:
ldap-agent -config /etc/acceptto/ldap-agent.conf -test
Note
If you have chosen to use the environment-based configuration (ldap-agent.env) instead of ldap-agent.conf, run the following command to test your installation:
( set -a && source /etc/acceptto/ldap-agent.env && ldap-agent -test )
Parentheses are part of the above command -- make sure they are included.
You should see diagnostics output similar to the following:
Using configuration: Config(AgentID=ldap:v1:f6ac662c-0c4f-45b2-8721-13388db62f8e,SharedSecret=✓,
  SwitchboardURL=wss://switchboard.acceptto.com,LogLevel=info,AuthenticationTimeout=5s,
  RequestTimeout=10s,RequestWorkers=500,LDAPURLs=[ldaps://ad1.acceptto.local/],
  LDAPBindUser=abe.lincoln@acceptto.local,LDAPBindPass=*****,LDAPBaseDN=dc=acceptto,dc=local,
  LDAPTLSDisableVerification=false,LDAPTLSTrustedCAs=✓,LDAPTLSServerNames=[])
Healthy: true
LDAP query time: 22 ms
After a successful connectivity test, the agent should be enabled in systemd to arrange for its launch when the server boots:
systemctl enable acceptto-ldap-agent
Then, start the agent:
systemctl start acceptto-ldap-agent
Upgrading
The agent may be upgraded to a newer version by using the -U option of RPM instead of -i:
rpm -Uvh acceptto-ldap-agent-X.Y.Z-1.x86_64.rpm
Removing
The package may be removed using:
rpm -e acceptto-ldap-agent
Any running LDAP Agent instance will be shut down. Any modified configuration file will be renamed and preserved with a .rpmsave extension.
Use the Docker installation method to deploy the LDAP Agent on any Linux system that supports Docker.
Note
Docker 19.3.0 or higher and Docker Compose 1.26 or higher are required.
You can use the included install-docker.sh script to install these components if they are not already present.
The Docker package is provided as an archive: ldap-agent-X.Y.Z.tar.xz, where X.Y.Z is the version number. It includes:
docker-compose.yml- Configuration file for launching the LDAP Agent container.install-docker.sh- Script to install Docker on supported Linux hosts.install.sh- Script to install the LDAP Agent.ldap-agent-image.tar- Docker image for the LDAP Agent.manifest.json- Metadata about this release (informational only, not used during installation).
SecureAuth will provide this archive along with a configuration file customized for your environment.
Installing
To install the Arculix LDAP Agent, first upload the provided ldap-agent-X.Y.Z.tar.xz archive to the server. (Where X.Y.Z, here and elsewhere in the installation instructions, is the version of this release.) On the server, find the archive and extract it using the following command:
tar -xvJ -f ldap-agent-X.Y.Z.tar.xz
Note that the extraction will create an ldap-agent-X.Y.Z directory containing the installation assets. Change to this directory:
cd ldap-agent-X.Y.Z
If this server does not have Docker and Docker Compose installed, they can be installed using the provided helper script:
sudo ./install-docker.sh
(Note the use of sudo, as this step requires root access.)
If this is a new installation, SecureAuth will provide an ldap-agent-config.env configuration file template pre-configured with any credentials needed to pair your agent with Arculix. You should edit this file using an editor of your choice (vi, vim, nano, or whatever editor may be available in your Linux system):
vi ldap-agent-config.env
This configuration file supplies settings in the form of environment variables. See the LDAP Agent configuration section below for full details on configuring the LDAP Agent.
Finally, to install the agent, run the install.sh script from a user account with sufficient privileges to manage Docker:
sudo ./install.sh
Note that sudo is used in the above example to run the script as root, which should always have Docker privileges.
The installation process needs a destination directory where it can store agent assets such as the configuration file. It will suggest a default path, but you can provide an alternate location if desired.
After the LDAP Agent is installed, you can test connectivity from the agent to Active Directory:
Change to the installed directory as the
rootuser.Execute the following command:
docker-compose exec ldap-agent ./ldap-agent -test
You should see diagnostics output similar to the following:
Using configuration: Config(AgentID=ldap:v1:f6ac662c-0c4f-45b2-8721-13388db62f8e,SharedSecret=✓,
  SwitchboardURL=wss://switchboard.acceptto.com,LogLevel=info,AuthenticationTimeout=5s,
  RequestTimeout=10s,RequestWorkers=500,LDAPURLs=[ldaps://ad1.acceptto.local/],
  LDAPBindUser=abe.lincoln@acceptto.local,LDAPBindPass=*****,LDAPBaseDN=dc=acceptto,dc=local,
  LDAPTLSDisableVerification=false,LDAPTLSTrustedCAs=✓,LDAPTLSServerNames=[])
Healthy: true
LDAP query time: 22 ms
After installation, the extracted contents of the archive are no longer needed and may be removed:
cd ..
rm -rf ldap-agent-X.Y.Z
Upgrading
Upgrading to a newer version of the LDAP Agent works mostly the same as performing a fresh installation: extract the provided archive and run its install.sh script. Note the following minor differences:
If an LDAP Agent is currently present on the system, its installation directory will be suggested as the destination for installing the new agent.
If the destination directory has an existing configuration file, it will be preserved instead of overwritten.
Any currently running agent will be stopped before starting the new agent.
Removing
The LDAP agent may be removed by shutting down the Docker container, then removing the installed files from the system. First, change directory to the installed location, then use Docker Compose to shut down the agent:
cd /root/acceptto/ldap-agent
docker-compose down
You will see output similar to the following:
Stopping ldap-agent ... done
Removing ldap-agent ... done
Removing network ldap-agent_default
After the container is shut down in this way, it will not restart when the system reboots. If the agent shutdown is meant to be temporary, you can run docker-compose up -d in the installation directory at a future time to restart the agent. To remove the agent permanently, simply remove the installation directory entirely.
The LDAP Agent for Windows is provided as a self-installing executable: LDAP-Agent-X.Y.Z.exe, where X.Y.Z is the version number.
Installing
Download the latest version of the Arculix LDAP Agent to a Windows Server that is prepared for installation. This server can be a member server in your Active Directory domain or a domain controller.
Login to Windows with a user account with administrative privileges, run the downloaded package, and click Next.

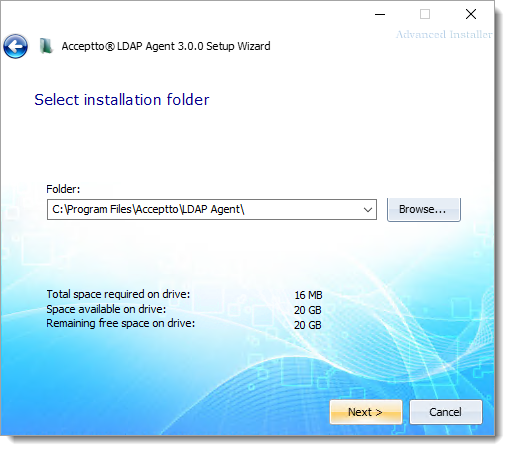
Select your installation folder and click Next.
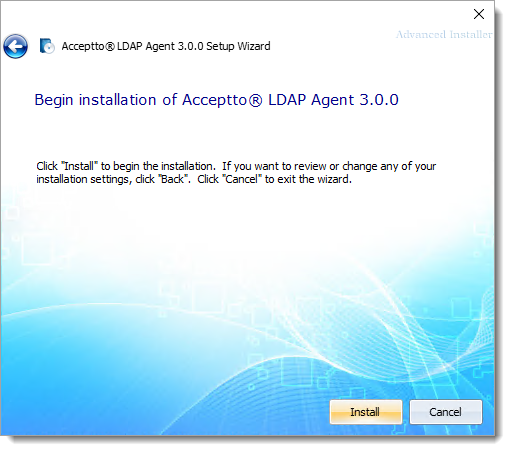
Click Install.
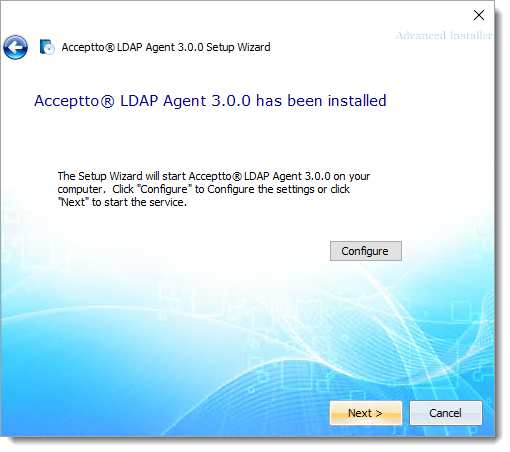
After installation is complete, click Configure to configure communication parameters.
In Arculix LDAP Agent Settings on the General tab, set the following configurations.
User Name
User account to connect to the LDAP server, in user@domain format like
johndoe@company.comThis should be a new account with read-only access to the directory and provisioned for the agent and used for binding.
Password
Password associated with the user account .
Base DN
The Base DN used when performing LDAP queries. All relevant users and groups must be descendants of this DN.
For example:
DC=company,DC=comURL
An LDAP URL to use when performing LDAP queries.
The URLs must begin with
ldap://orldaps://and can include an optional port number to override the defaults of port 389 for LDAP and 636 for LDAPS.For example,
ldaps://ldap.company.com/orldaps://ad1.example.org:3269/.Agent ID
Unique identifier of the LDAP agent.
This is the value provided in Arculix. See Get LDAP Agent connector information.
Shared Secret Key
The 256-bit (32 byte) shared secret used to sign messages sent between this agent and Arculix. This should be represented as a Base64 string.
This is the value provided in Arculix. See Get LDAP Agent connector information.
Log Level
Log events generated by the agent must be at least this severity before being sent to the event log.
The supported severity thresholds, from most severe to least severe, are
fatal,error,warning,info, anddebug. The default value isinfo. SecureAuth recommends leaving the log level set to this default, unless you have a specific need to increase or decrease log output.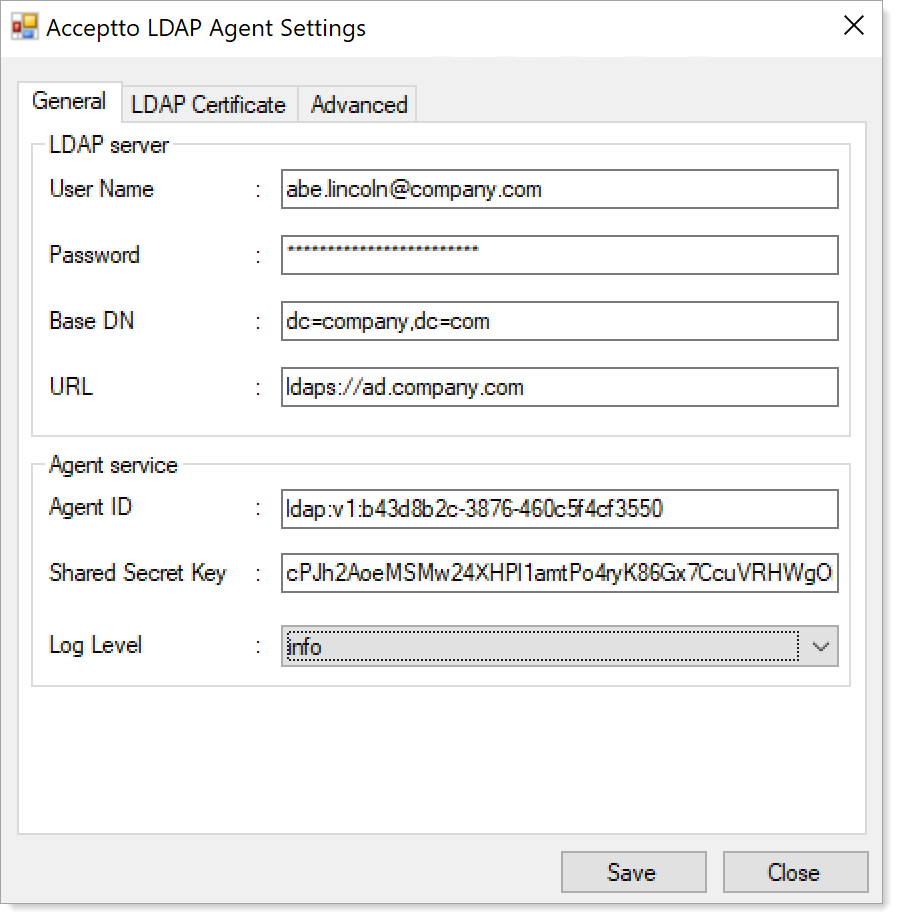
On the LDAP Certificate tab, include the certificate.
Include one or more trustworthy certificates when verifying the certificate of an LDAPS server. It can be the server's certificate itself, or preferably, the certificate an enterprise CA used to issue the server's certificate. (See TLS Trusted CAs in User directory (AD) requirements, above.)
Tip
You can use an LDAPS connection without providing a trusted certificate if the LDAP Agent server is a domain member and you have an internal certificate authority configured in your network.

On the Advanced tab, to establish communication through a proxy server between the LDAP Agent and Aruclix Core, enter the proxy address and port.
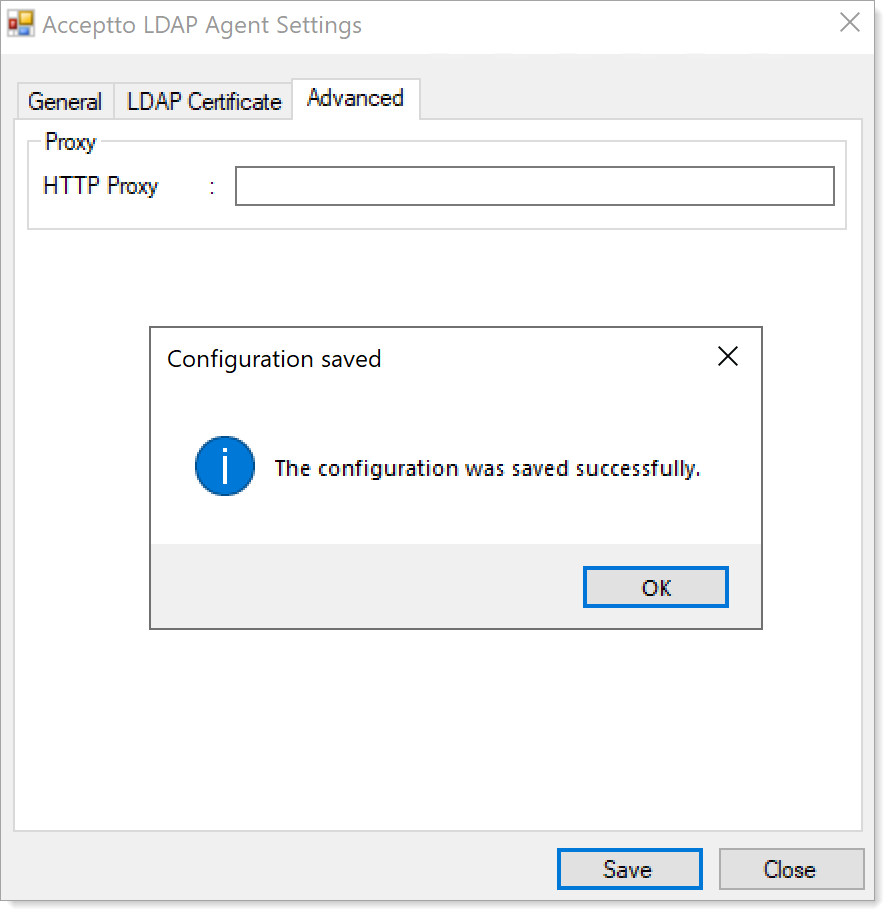
After entering all communication parameters, click Save and then OK.
Click the Finish to complete the setup process.
Test connection
After the LDAP Agent is installed, you can test connectivity from the agent to your LDAP server:
Open a command prompt window and navigate to the installation folder.
Execute the following command at the command prompt:
ldap-agent.exe -test
You should see diagnostics output similar to the following:
C:\Program Files\Acceptto\LDAP Agent>ldap-agent.exe -test
Using configuration: Config(AgentID=ldap:v1:f6ac662c-0c4f-45b2-8721-13388db62f8e,SharedSecret=✓,
  SwitchboardURL=wss://switchboard.acceptto.com,LogLevel=info,AuthenticationTimeout=5s,
  RequestTimeout=10s,RequestWorkers=500,LDAPURLs=[ldaps://ad1.acceptto.local/],
  LDAPBindUser=abe.lincoln@acceptto.local,LDAPBindPass=*****,LDAPBaseDN=dc=acceptto,dc=local,
  LDAPTLSDisableVerification=false,LDAPTLSTrustedCAs=✓,LDAPTLSServerNames=[])
Healthy: true
LDAP query time: 22 ms
Note
If you are installing the Arculix LDAP Agent on the same server as the Active Directory domain controller with which it will communicate, and IPv6 is enabled on this server, use the IPv4 localhost address (“127.0.0.1”) or the IPv4 address of the server when configuring the LDAP URL. (Using the hostname in this situation may result in the agent trying the IPv6 address before failing over to IPv4, adding needless latency to transactions.)
Tip
If you want to change the configuration of the Arculix LDAP Agent you can find the ConfigUI in the installation path or you can search for Arculix in the Windows Start menu to find the Arculix LDAP Agent Settings.
Upgrading
The LDAP Agent may be upgraded to a newer version using these steps:
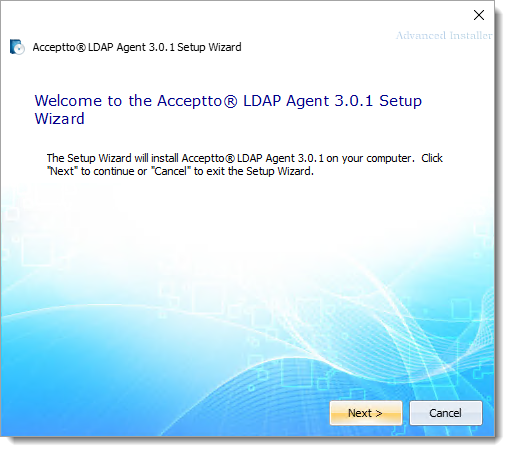
Run the new LDAP Agent package, and click Next:
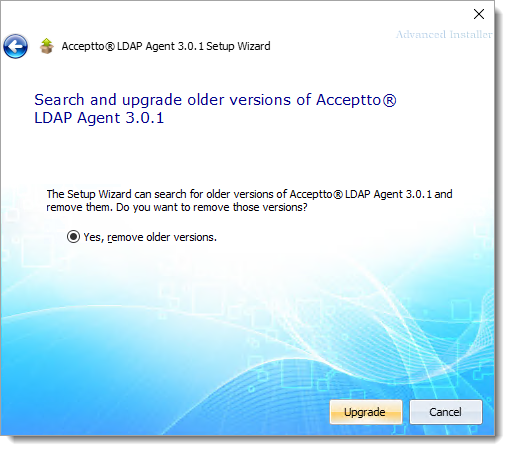
Allow the setup wizard to remove older versions of the LDAP Agent by clicking Upgrade:
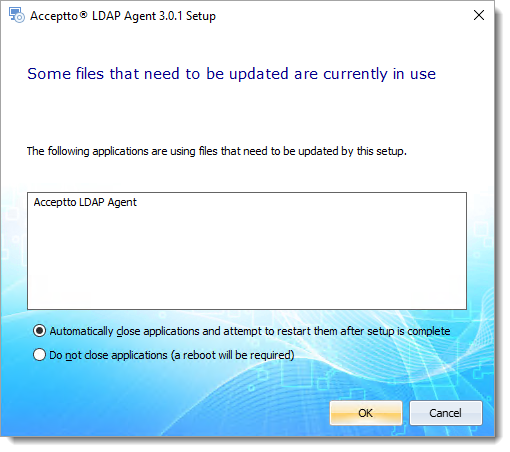
If an LDAP Agent is currently running, the wizard will offer to stop the existing agent so the new agent can be installed. Click OK to allow this:
The new agent will be installed, and the installation process will continue as documented in the Installing section, above.
Removing
The LDAP Agent may be removed the same way as most Windows applications:
In Windows Settings, select Apps, then select the LDAP Agent:
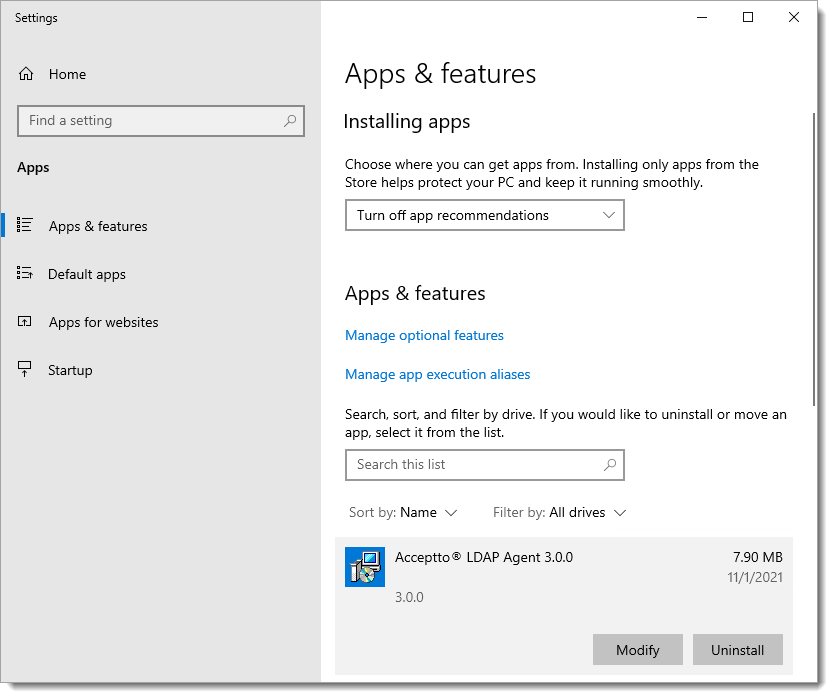
Click the Uninstall button, and confirm.
The LDAP Agent will be removed from the system.
The agent's configuration file (ldap-agent.conf) will remain in the installation directory, and will be used if another LDAP Agent is installed in the same directory in the future.
LDAP Agent configuration
The Arculix LDAP Agent may be configured using either a YAML-based configuration file (ldap-agent.conf) or environment variables. After making any configuration changes, the agent should be restarted for the changes to take effect.
You can obtain the AgentID and SharedSecret parameters in Arculix. Log in to Arculix and navigate to Connectors from the left side menu. (Admin access is required.)
Note
Use of environment variables to configure the LDAP Agent is primarily intended for Docker-based deployments. In the Docker world, using environment variables for configuration is a common convention, while mapping a YAML configuration into the container can require extra steps. For customers using the Linux/RPM and Windows deployment methods, we highly recommend use of the YAML configuration.
Tip
Windows administrators are encouraged to use the supplied configuration tool instead of editing the YAML configuration directly.
Configuration file templates
The following configuration files are templates for a minimal configuration setup. You may add more parameters as specified in the Required configuration options section.
YAML configuration file
# Login to https://mfa.acceptto.com and go to the "Connectors" page to get the
# "Agent ID" and "Shared Secret" parameters.
AgentID: CHANGE_ME
SharedSecret: CHANGE_ME

# The LDAP parameters used to reach Active Directory
LDAPURLs:
    - ldaps://acceptto.local/
LDAPBindUser: administrator@acceptto.local
LDAPBindPass: verysecret
LDAPBaseDN: dc=acceptto,dc=local

# If using LDAPS and the LDAP server's certificate is not issued by a public
# certificate authority, a trusted root CA or the LDAPS certificate itself may
# provided here to establish trust.
#
# LDAPTLSTrustedCAs: |
#     -----BEGIN CERTIFICATE-----
#     MIIFdzCCA1+gAwIBAgIUPhmZ5ytNQDJ1gqIYtPWXsFSXbm8wDQYJKoZIhvcNAQEL
#     BQAwYzELMAkGA1UEBhMCVVMxDzANBgNVBAgMBk9yZWdvbjERMA8GA1UEBwwIUG9y
#     ...
#     nRFv5H77DMo15HfFgGsy7zCt7OrIHl/G/PVLce4/4T+cLjahHDbn5J6Cz9DWNYYq
#     jRgO45686HIchzfyTpPRbdt+S7TA+1ToUX5nlnCFhsgcCwBuPqCozNBvTbYN7xdq
#     fkATtpM5lE4Ip7Y=
#     -----END CERTIFICATE-----
Environment-based (.env) configuration file
######################################################################
# To use this configuration, source this script into your bash shell:
#   ( set -a && source /etc/acceptto/ldap-agent.env && ldap-agent -test )
######################################################################

# Login to https://mfa.acceptto.com and go to the "Connectors" page to get the
# "Agent ID" and "Shared Secret" parameters.
ALA_AGENT_ID=CHANGE_ME
ALA_SHARED_SECRET=CHANGE_ME

# The LDAP parameters used to reach Active Directory
ALA_LDAP_URLS='ldap://acceptto.local/'
ALA_LDAP_BIND_USER='administrator@acceptto.local'
ALA_LDAP_BIND_PASS='verysecret'
ALA_LDAP_BASE_DN='dc=acceptto,dc=local'

# If using LDAPS and the LDAP server's certificate is not issued by a public
# certificate authority, a trusted root CA or the LDAPS certificate itself may
# provided here to establish trust.
#
# ALA_LDAP_TLS_TRUSTED_CAS='
# -----BEGIN CERTIFICATE-----
# MIIFdzCCA1+gAwIBAgIUPhmZ5ytNQDJ1gqIYtPWXsFSXbm8wDQYJKoZIhvcNAQEL
# BQAwYzELMAkGA1UEBhMCVVMxDzANBgNVBAgMBk9yZWdvbjERMA8GA1UEBwwIUG9y
# ...
# nRFv5H77DMo15HfFgGsy7zCt7OrIHl/G/PVLce4/4T+cLjahHDbn5J6Cz9DWNYYq
# jRgO45686HIchzfyTpPRbdt+S7TA+1ToUX5nlnCFhsgcCwBuPqCozNBvTbYN7xdq
# fkATtpM5lE4Ip7Y=
# -----END CERTIFICATE-----
# '
Required configuration options
The following configuration items are required for the agent to start:
YAML Key | Environment Variable | Description |
|---|---|---|
|
| The unique identifier used to identify the agent. Obtain this value by editing the Active Directory entry under User Directories after configuring it as a data store connection in Arculix. |
|
| The 256-bit (32 byte) shared secret, represented as a Base64 string, used to sign messages sent between this agent and Arculix. Obtain this value by editing the Active Directory entry under User Directories after configuring it as a data store connection in Arculix. |
|
| A list of LDAP URLs to use when performing LDAP queries. The URLs must begin with Examples include If provided via environment variable, multiple URLs may be separated by commas. Only the first URL is currently used. A future release may use additional LDAP URLs to round-robin outgoing connections or provide failover when one is not responding. |
|
| The user used when binding to the LDAP server. This may be a DN such as A new account with read-only access to the directory should be provisioned for the agent and used for binding. |
|
| The password of the user used to bind to the LDAP server. |
|
| The Base DN used when performing LDAP queries. All relevant users and groups must be descendants of this DN. Example: |
Optional configuration options
The following configuration items are optional, and may be used to further guide the behavior of the agent:
YAML Key | Environment Variable | Description |
|---|---|---|
|
| A list of certificates in PEM format representing trusted certificate authorities (CAs) to be used when verifying the LDAP server's certificate. These could include an enterprise CA used to issue certificates to LDAP servers, or even the certificate of the LDAP server itself. WarningIf this option is used, the operating system's default list of trusted CAs will not be used. Default: Use the operating system's list of trusted CAs. |
|
| If the hostname in an LDAP URL does not exactly match the hostname embedded in the certificate presented by the LDAP server, verification will fail. This option may be used to specify the hostname we expect to find in the LDAP server's certificate. If used, one such hostname should be provided for each configured LDAP URL, and in exactly the same order. Default: Use the hostname as provided in the URL. |
|
| Disable verification of the server certificate provided by the LDAP server. WarningUse of this option leaves the agent vulnerable to machine-in-the-middle attacks, and is only provided for development and debugging purposes. Default: |
|
| Specify the level of logging desired. Must be one of Default: |
|
| The URL used to communicate with the SecureAuth Switchboard service. Default: |
|
| How long the agent waits for the authentication to complete. Format: Default: |
|
| Timeout for LDAP connection requests. Format: Default: |
|
| Number of concurrent workers processing incoming requests, including LDAP lookups. Default: |
|
| URL of the proxy server used for outbound HTTP and HTTPS traffic. Equivalent to setting |
See note below. |
| Specifies the user account for performing password reset operations on Active Directory. Without this configuration, the password reset method will not function and will return an |
See note below. |
| The password associated with the Without this configuration, the password reset method will not function and will return an |
Note
Change password and reset password methods are supported only when using LDAPS (LDAP over SSL) connections.
The reset password method requires the
LDAPResetPasswordBindUserandLDAPResetPasswordBindPassconfigurations. The LDAP Agent will bind using these credentials to perform the password reset. Ensure this user has the necessary permissions on the LDAP server.
Accessing LDAPS servers via a load balancer
Some customers will provide a pool of LDAPS servers behind a load balancer. Thus, the agent will be configured with a single specific URL which points to the load balancer, but each backend LDAPS server may present a different certificate with a different hostname embedded. This can prevent certificate verification from working if we connect to the load balancer and expect a certificate that matches either the load balancer's address or a single item in LDAPTLSServerNames which corresponds to the single LDAPS URL.
Potential remedies include:
Terminate TLS at the load balancer, so the agent always sees a single certificate. This certificate's subject would need to match either the load balancer's address, or the configured entry in
LDAPTLSServerNames.Ensure that each pooled LDAPS server has a certificate with the same name (for example, by using the same certificate on each), and configure this name in
LDAPTLSServerNamesif it is not the load balancer address.If the customer needs discrete certificates for each LDAPS server with different hostnames, perhaps a Subject Alternate Name (SAN) with the load balancer's address could be added to each certificate.
Agent status
You can check the status of your agents in Arculix.
Log in to Arculix with administrative privileges and go to User Directories.
Edit an existing Active Directory and view status of LDAP Agents.

Frequently asked questions (FAQs)
- How many users can a single Arculix LDAP Agent serve?
- Once the LDAP Agent requirements are met, what is the typical deployment and configuration effort to connect to Active Directory?
- Would we need dedicated VMs for development and staging as well?
- Does the Arculix LDAP Agent support multiple Active Directory domains and forests?
- What kind of information does the LDAP Agent send to Arculix?
How many users can a single Arculix LDAP Agent serve? | |
Authentications are not compute intensive and a single Arculix LDAP Agent can generally serve thousands of users. We are able to provide more precise estimates after reviewing your specific needs. | |
Once the LDAP Agent requirements are met, what is the typical deployment and configuration effort to connect to Active Directory? | |
A typical remote or on-site deployment session takes our engineering team two hours start to finish. That is assuming all requirements are met and the team is ready to deploy and configure the agent. | |
Would we need dedicated VMs for development and staging as well? | |
Yes. While a single Arculix LDAP Agent instance can access development and staging directories stored in separate domains within an Active Directory forest (e.g. by using an Active Directory global catalog), we recommend using separate agent instances for development, staging, and production to maintain proper segregation between these deployments. | |
Does the Arculix LDAP Agent support multiple Active Directory domains and forests? | |
Yes. A single LDAP Agent may support multiple domains in a forest by using the Active Directory global catalog. Alternatively, multiple agents (or multiple load balanced agent groups) may be deployed -- each configured to serve users from specific domains. In this way, customers with multiple distinct forests may be easily accommodated. | |
What kind of information does the LDAP Agent send to Arculix? | |
The LDAP Agent acts as a worker waiting for commands from Arculix such as performing live user authentications, user lookups and checking the user group membership while enforcing Arculix group policies. |