Manage policies
In an authentication policy, you define an action to take during an authentication request when it meets a certain condition for a specified event.
Go to the Policies section in Arculix to review existing policies, create, update, or delete policies.
There are two types of policy sections, Standard and Advanced.
- Standard
Standard policies are either predefined by SecureAuth or by an administrator in your organization. As an administrator, you cannot change the policy actions, create a new policy, or delete an existing policy.
But, you can do the following operations:
Specify the target applications
Enable or disable the policy
Provide or adjust the conditions (in the When section) for the policy
- Advanced
As an administrator, you can create, update, or delete policies in addition to the available options in Standard mode. You can also create new predefined policies so that they appear in Standard mode.
Manage a policy
Log in to Arculix, and from the left navigation, click Policies > Advanced.
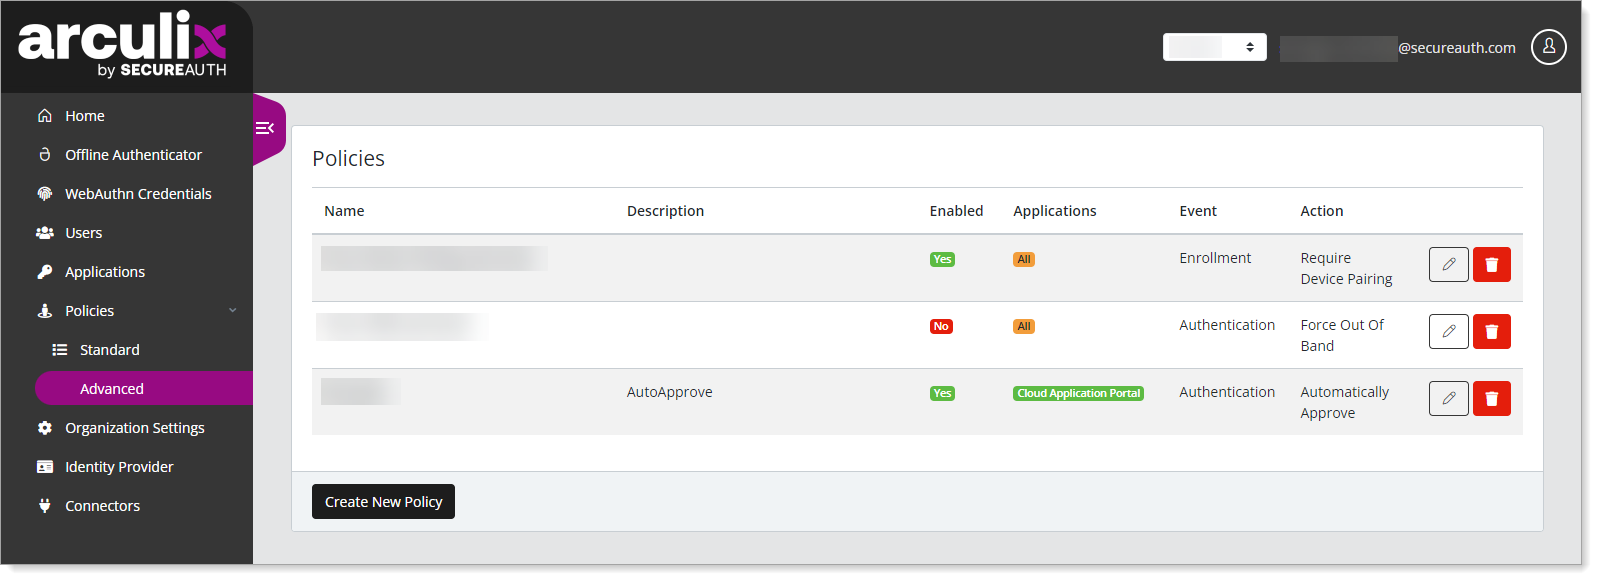
Do one of the following:
To create a policy, go to the bottom of the page and click Create New Policy.
To edit a policy, click the pencil icon of a policy.
To delete a policy, click the trash bin icon of a policy and confirm.
When creating or editing a policy, set the details in the Policy Information section.
As a reference to configuration settings, see Policy Information.
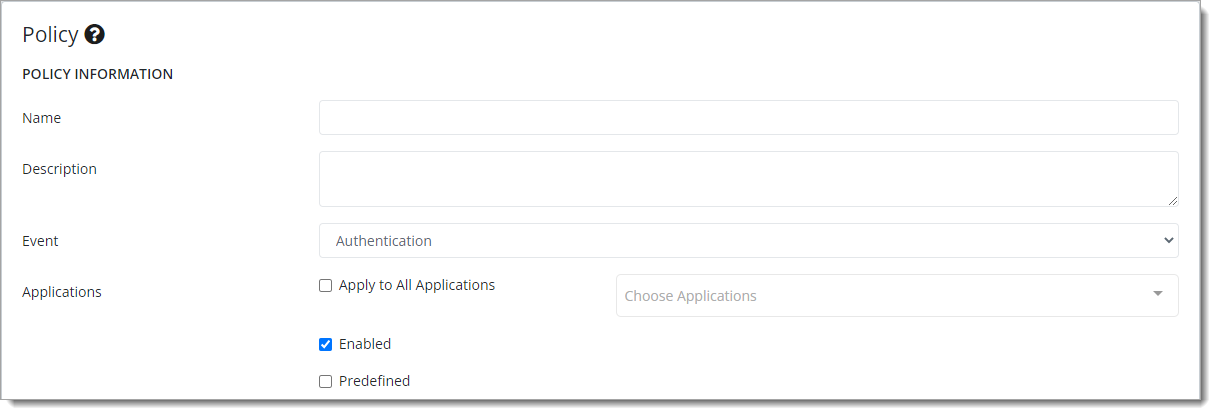
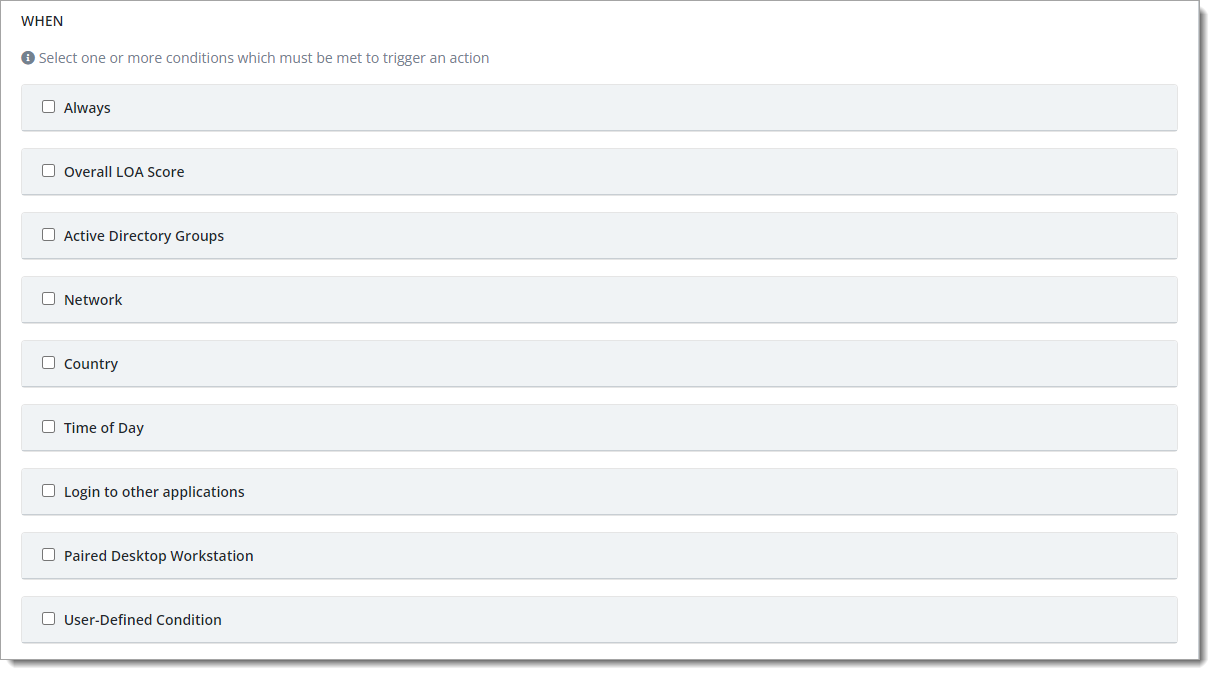
In the When section, set the conditions which invokes the specified action in this policy.
When an authentication or enrollment event meets all the condition predicates, then it invokes the policy. In other words, the logic between the condition predicates is AND when you have more than one condition.
As a reference to the configuration settings, see When.
Next, select the Action you want the policy to take when it meets all the conditions.
This is the policy action for whether you selected an event for Authentication or Enrollment in the Policy Information section.
As a reference to the configuration settings, see Actions.
To learn more about how Arculix prioritizes actions, see How authentication actions are prioritized.
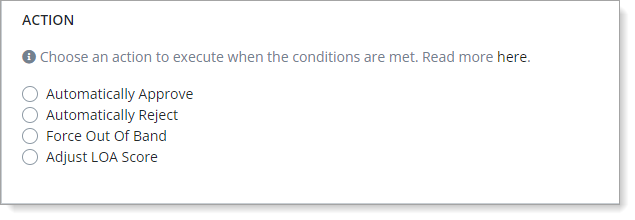
Actions for Authentication events

Actions for Enrollment events
Save your changes.
Policy Information
For the Policy Information section, see the following field descriptions.
 |
- Name
Name of policy.
- Description
(Optional). Description of policy.
- Event
Select the event on which the policy will be evaluated. Available options:
Authentication – Policy applies to first-time authentication events and continuous authentication events.
For example, a user logs in to a SAML-based application and it provides continuous authentication access when the user switches to another SAML-based application while still logged in.
Enrollment – Policy applies to users logging in for the first time.
For example, when a user logs in for the first time, it forces device pairing.
- Applications
To universally apply this policy to all applications, select the Apply to All Applications check box.
Otherwise, select the SAML applications to which the policy applies from the list.
- Enabled
To make this policy active, select the Enabled check box.
- Predefined
To show this policy on the Standard policies page, select the Predefined check box.
When
For the configuration settings in the When section, see the following field descriptions.
 |
When an authentication or enrollment event meets all the condition predicates, then it invokes the policy. In other words, the logic between the condition predicates is AND when you have more than one condition.
- Always
Apply this policy in all circumstances for the specified applications and event.
For example, you want to temporarily disable MFA for all users.

- Overall LOA Score
Set the LOA Score Range for the LOA score to trigger the policy action.
It will trigger an action when the LOA score is either greater than or equal to or less than or equal to a specified value.
For example, if you set a greater than or equal to score as 3 and select the Auto Approve action for the policy, then it will allow the user to log in without MFA. That is, if the user meets the LOA score of 3 or greater.
To learn more, see LOA score.

- Active Directory Groups
If you have an Active Directory integration with Arculix, you can specify one or more user groups for this policy.
It will invoke the policy if the authenticating user belongs any of the specified groups.
- Network
Set condition based on the IP address of the user.
You can specify one or more IP addresses or a range of IPs using CIDR notation. You can separate them by commas, like
1.2.3.4,1.2.3.5,1.2.10.0/24.
- Country
Set condition to determine access based on whether the user is or is not in a specified country.
If you specify more than one country, then it invokes the policy action when the user is in any of the selected countries.

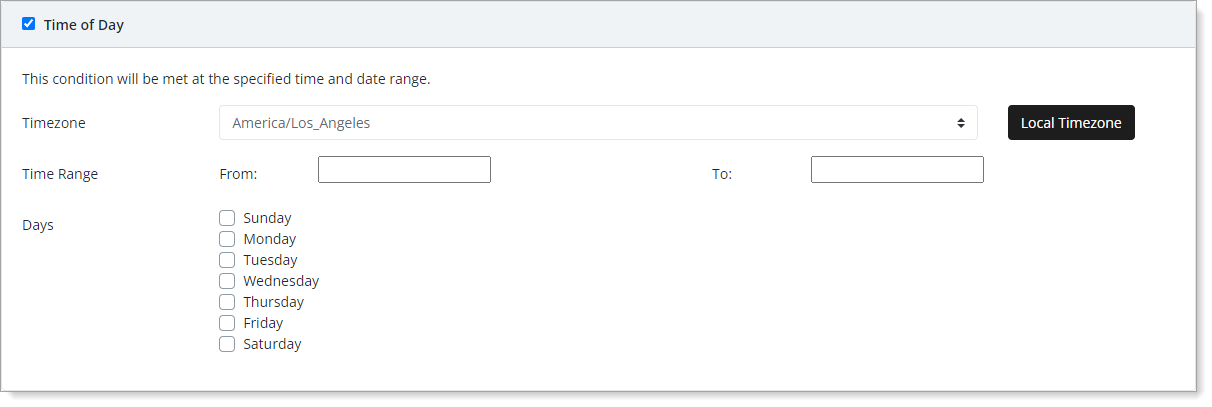
- Time of Day
Set condition to use time and day pattern when the user is trying to authenticate. You can specify not only the time range but also the days of the week.
For example, when you combine this with the Country condition, you can increase friction for users located in a specific country when they try to access the system outside of business hours or during the weekend.
- Login to other applications
Set condition based on applications that the user has logged into within the specified period of time.
To meet this condition only when the user is coming from the same IP address for each application, select the Require matching IP address check box.
For example, you can define a policy to auto-approve a user authentication request to a web application if the same user has used MFA to their Windows machine from the same IP address within the past 5 minutes.

- Paired Desktop Workstation
Set condition based on whether the user has a paired workstation with specified configurations. It will invoke the policy action only if it matches all the specified fields.
This allows granular control over when to apply this policy.
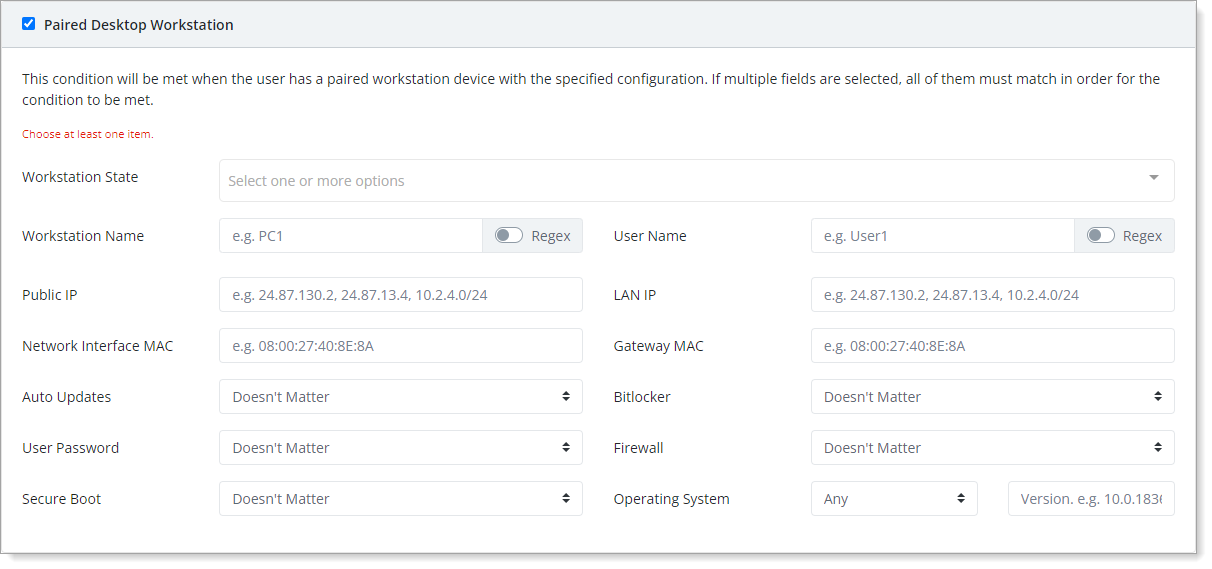
If you use this condition, you must choose at least one item. You can use any of the following conditions:
Workstation State – Indicate the status of the workstation at the time of the authentication event to meet this condition. Options are: Logged In, Logged Out, Locked, Unlocked, Login Failed.
Workstation Name – Enter the name of the workstation or enable Regex to create a matching pattern.
Public IP – The public IP address of the workstation where the authentication attempt is coming from.
Network Interface MAC – The network interface MAC address of the workstation in where the authentication attempt is coming from.
Auto Updates – Indicate whether to check if the workstation has operating system automatic updates enabled. Options are Doesn't Matter, Enabled, or Disabled.
User Password – Indicate whether to check if the workstation has password login enabled. Options are: Doesn't Matter, Enabled, or Disabled.
Secure Boot – Indicate whether to check if the workstation has secure boot enabled. Options are: Doesn't Matter, Enabled, or Disabled.
User Name – Enter the login username or enable Regex to create a matching pattern.
LAN IP – The local IP address of the workstation where the user login is coming from.
Gateway MAC – The gateway MAC address of the network where the workstation login is coming from.
Bitlocker – Indicate whether to check if the workstation has Bitlocker enabled. Options are: Doesn't Matter, Enabled, or Disabled.
Firewall – Indicate whether to check if the workstation has a firewall enabled. Options are: Doesn't Matter, Enabled, or Disabled
Operating System / Version – Indicate whether the condition applies to a specific operating system of workstations. Options are: Any, Windows, or macOS.
- User-Defined Condition
This predicate gives you the highest level of customization. You can create a predicate using the Ruby programming language.
For example, for this Network predicate on the UI:

You can write this in Ruby as custom predicate:
IPAddr.new('10.20.30.0/24').include?(context.auth_request.ip_address)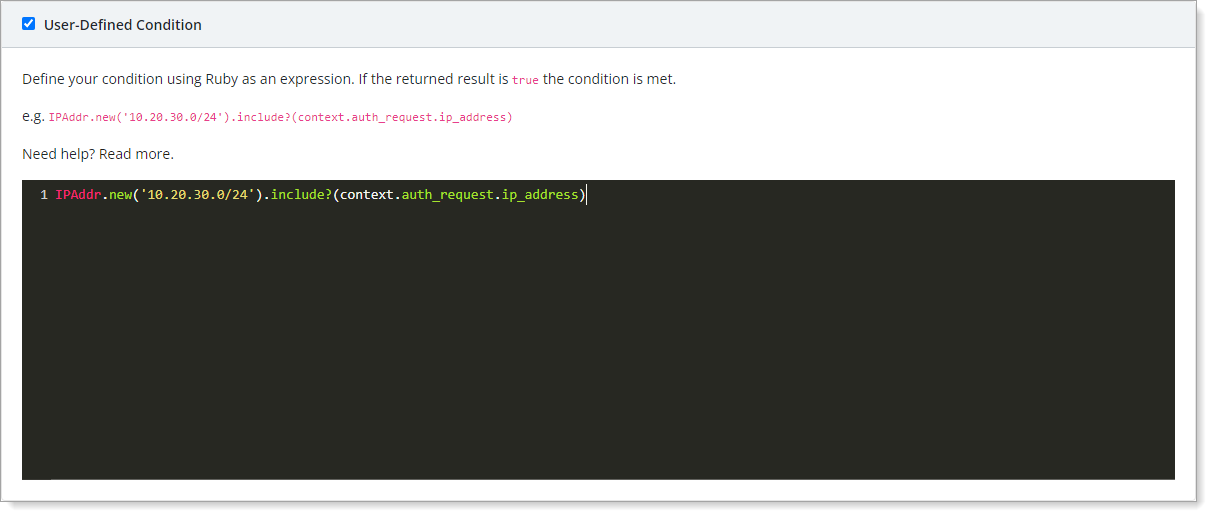
To learn more see User-defined policy predicate.
Actions
Select the Action you want the policy to take when it meets all the conditions.
This is the policy action for whether you selected an event for Authentication or Enrollment in the Policy Information section.
For Authentication events, select an action for the policy:
Automatically Approve – Automatically approve the authentication request and skip MFA
Automatically Reject – Automatically reject the authentication request and block user access
Force Out Of Band – Override all current rules and force user to complete MFA
Adjust LOA Score – Depending on your organization needs, increase or decrease the user's LOA score

For Enrollment events, select an action for the policy:
Require Device Pairing – Force user to pair their mobile device. User must pair if they are authenticating for the first time or if their device is not currently paired.
Adjust LOA Score – Depending on your organization needs, increase or decrease the user's LOA score

How authentication actions are prioritized
In cases where is more than one policy applied to the same transaction, it calculates the result in the following order of actions:
Automatically Reject. If one or more matching policies have this action, it will reject MFA and deny user access.
Force Out of Band. If the above rule is not true, and one or more matching policies have this action, it will send MFA to the user.
Automatically Approve. If the above two rules are not true, and one or more policies have this action, it automatically approves MFA for the user.
For example, there are five different policies that match the current conditions. One of them has an action set to "Automatically Reject", so it will reject the user access no matter what specified action is in other policies.