Configure Arculix as a Microsoft Entra ID external authentication method (EAM)
External Authentication Method (EAM) is a feature in Microsoft Entra ID that lets users use different multi-factor authentication (MFA) providers for signing in. This means that instead of using Microsoft's MFA options, your organization can choose and integrate Arculix as an MFA provider to meet your security needs.
To set up Arculix as an EAM provider, the following is an outline of tasks to complete.
- Task A: Configure Arculix application in Microsoft Entra
Create an Enterprise application for Arculix integration in Microsoft Entra.
You will need the Application ID generated by Microsoft Entra for Arculix configuration.
- Task B: Configure Microsoft Entra OIDC application in Arculix
Create an OIDC application for Microsoft Entra integration in Arculix.
You will need the UID and OIDC Provider Configuration generated by Arculix for further Microsoft Entra configuration.
- Task C: Configure Conditional Access policy in Microsoft Entra
Create a new Conditional Access policy to enable MFA for users and applications.
- Task D: Add external MFA method in Microsoft Entra
Register Arculix as your external authentication provider in Microsoft Entra.
Task A: Configure Arculix application in Microsoft Entra
In this task, you will create an application for Arculix in Microsoft Entra. Save its identifying information to complete integration between Arculix and Microsoft Entra.
Note
This task is completed in the Microsoft Entra admin center. For up-to-date, detailed instructions, refer to Microsoft's documentation for the Microsoft Entra application gallery and reach out to their support resources.
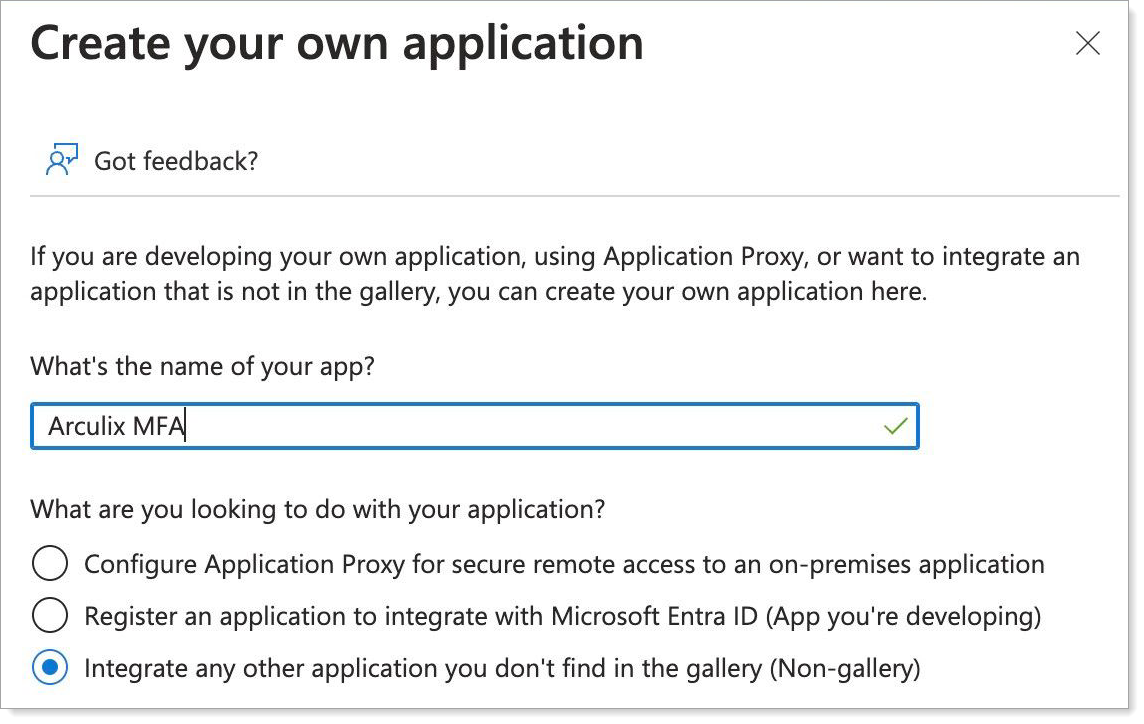
Log in to your Microsoft Entra admin account and create a new Enterprise application for Arculix.
Select the option to Integrate any other application you don't find in the gallery (Non-gallery).
Copy the Application ID for Arculix configuration.
Task B: Configure Microsoft Entra OIDC application in Arculix
In this task, you will create an OIDC application for Microsoft Entra in Arculix. To learn more about integrating an OIDC application with Arculix, see OAuth / OIDC configuration.
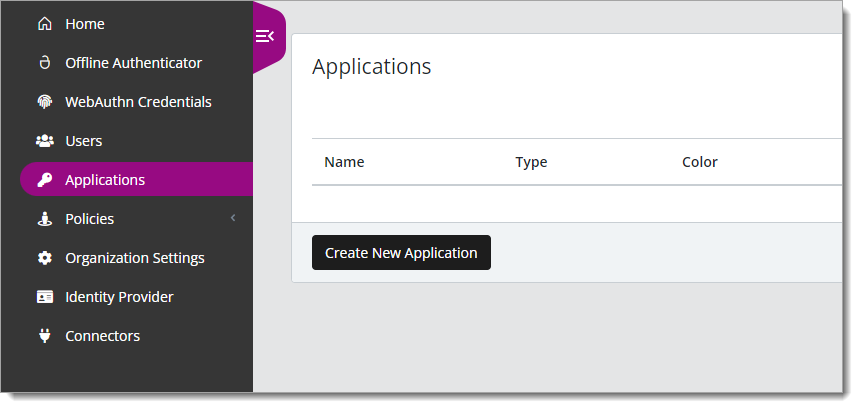
Log in to Arculix with an administrative account and go to Applications.
Click Create New Application.
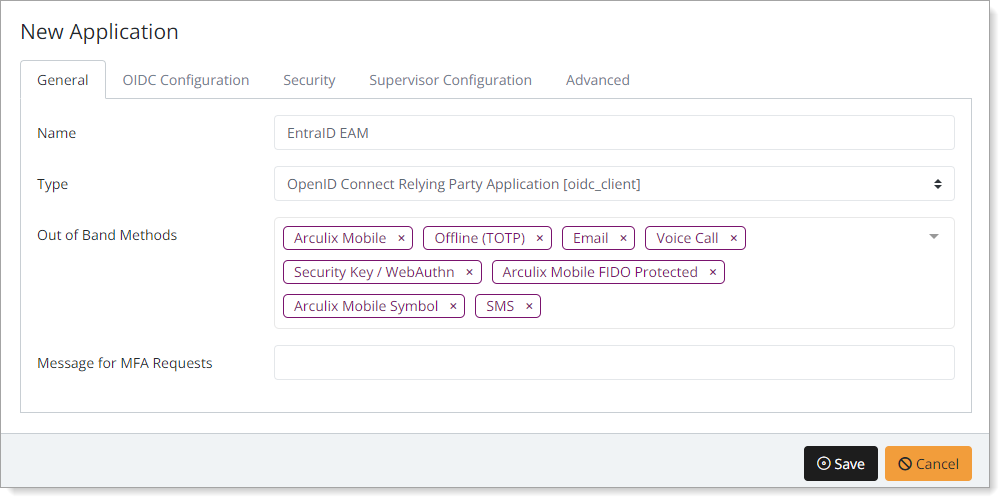
In the New Application form, on the General tab, set the following configurations:
Name
Set the name of the application. This is the name to display for push notifications, in the Admin panel, Application portal, and audit logs.
For example, EntraID EAM.
Type
Set to OpenID Connect Relying Party Application [oidc_client].
Out of Band Methods
Select the allowed methods end users can choose to approve MFA requests.
For example, Arculix Mobile app (push notifications), SMS, or Security Key.
Message for MFA Requests
Optional. Type a message displayed to end users when sending an MFA request via push notification, SMS, or email.
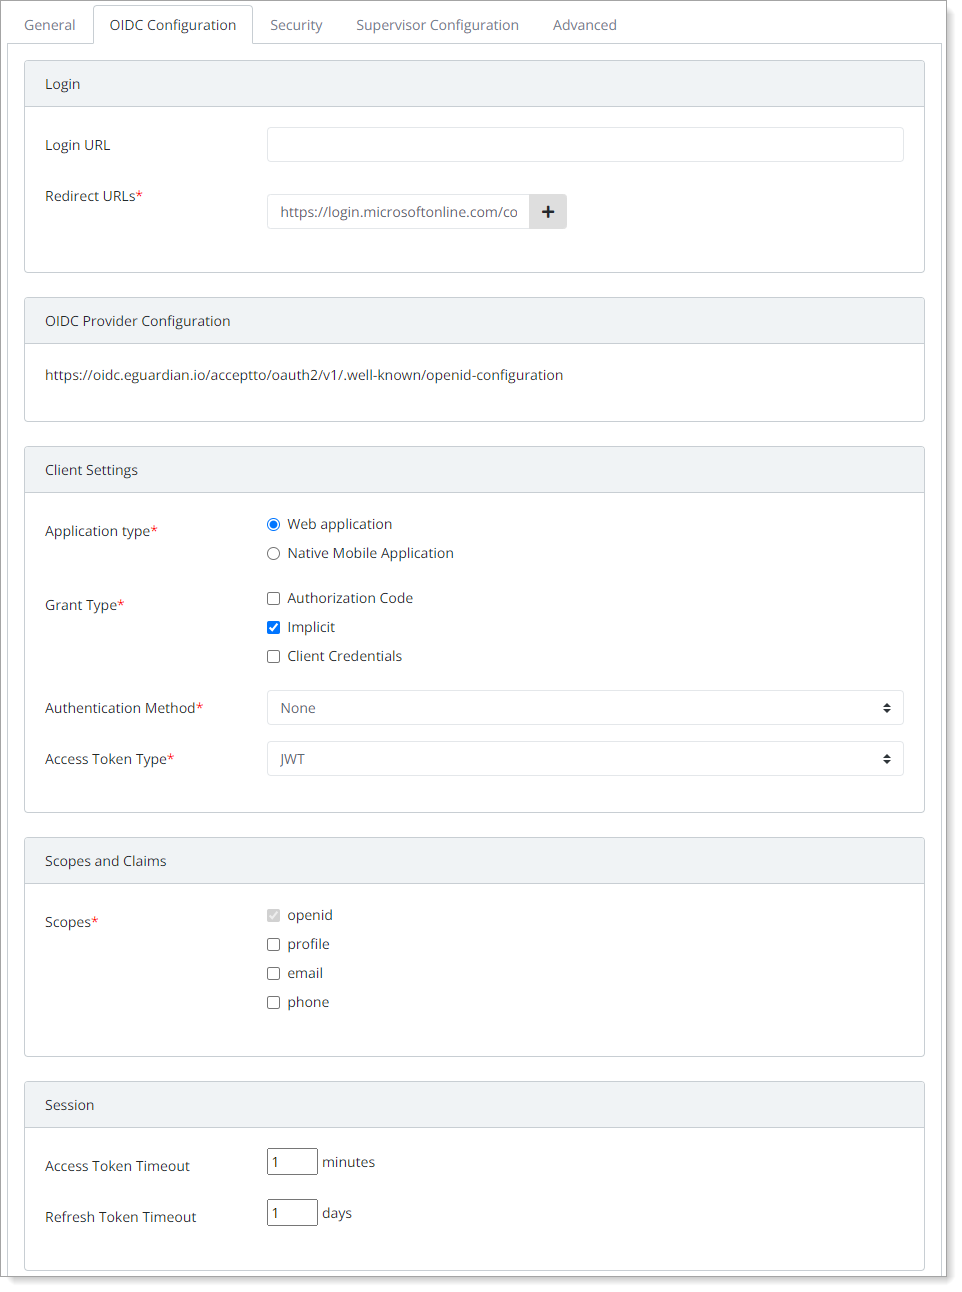
Select the OIDC Configuration tab, and set the following configurations:
Login
Redirect URLs
Enter the redirect URL (Redirect_uri) that Arculix will use to send back the authorization code.
For Microsoft Entra, it is usually:
https://login.microsoftonline.com/common/federation/externalauthproviderSee Microsoft's documentation for Microsoft Entra multifactor authentication external method provider reference for a full list of possible redirect URLs.
Client Settings
Application Type
Set to Web application.
Grant Type
Set to Implicit.
Microsoft Entra ID requires and only supports the Implicit grant type. Upon login, the application redirects to Arculix for authentication. Entra ID asks Arculix for a user identity token and expects the response to be sent back in a secure form. The user completes MFA through Arculix and it sends the identity token back to Entra ID to complete the login.
Authentication Method
Set to None.
Access Token Type
Set to JWT.
Scopes and Claims
Scopes
Select the following scopes:
openid – Set by default. Allow access to the user's identity information like the username and email address.
Session
Access Token Timeout
Set how long the access token is valid for before it times out. By default this set to 1 minute.
Refresh Token Timeout
Set how long the refresh token is valid for before it times out and requires the user to reauthenticate. By default this is set to 1 day.
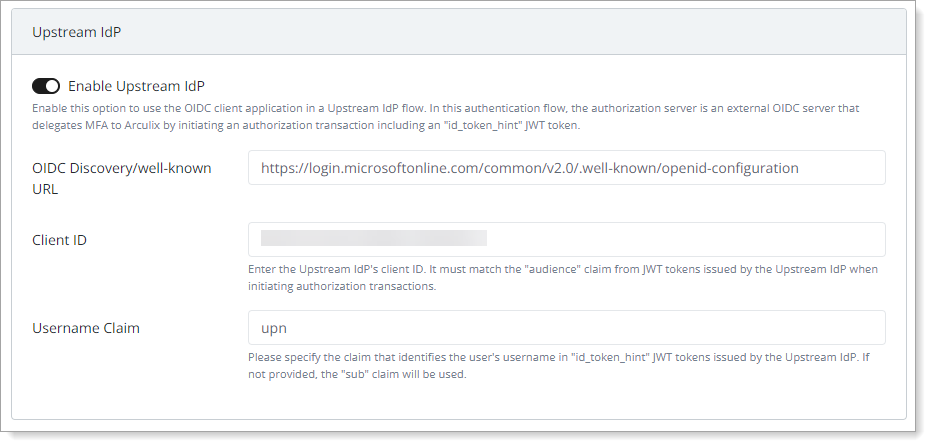
Slide the Enable Upstream IdP toggle to On and set the following configurations:
OIDC Discovery/well-known URL
Enter the OIDC Discovery URL for your Microsoft Entra instance.
For global EntraID customers, this is usually:
https://login.microsoftonline.com/common/v2.0/.well-known/openid-configurationReach out to Microsoft support for questions about your specific setup.
Client ID
Enter the Application ID provided by Microsoft Entra.
Username Claim
Enter the claim that identifies the user's username in "id_token_hint" JWT tokens issued by the Upstream IdP.
The claim should match to a unique user’s username in Arculix.
Save your changes.
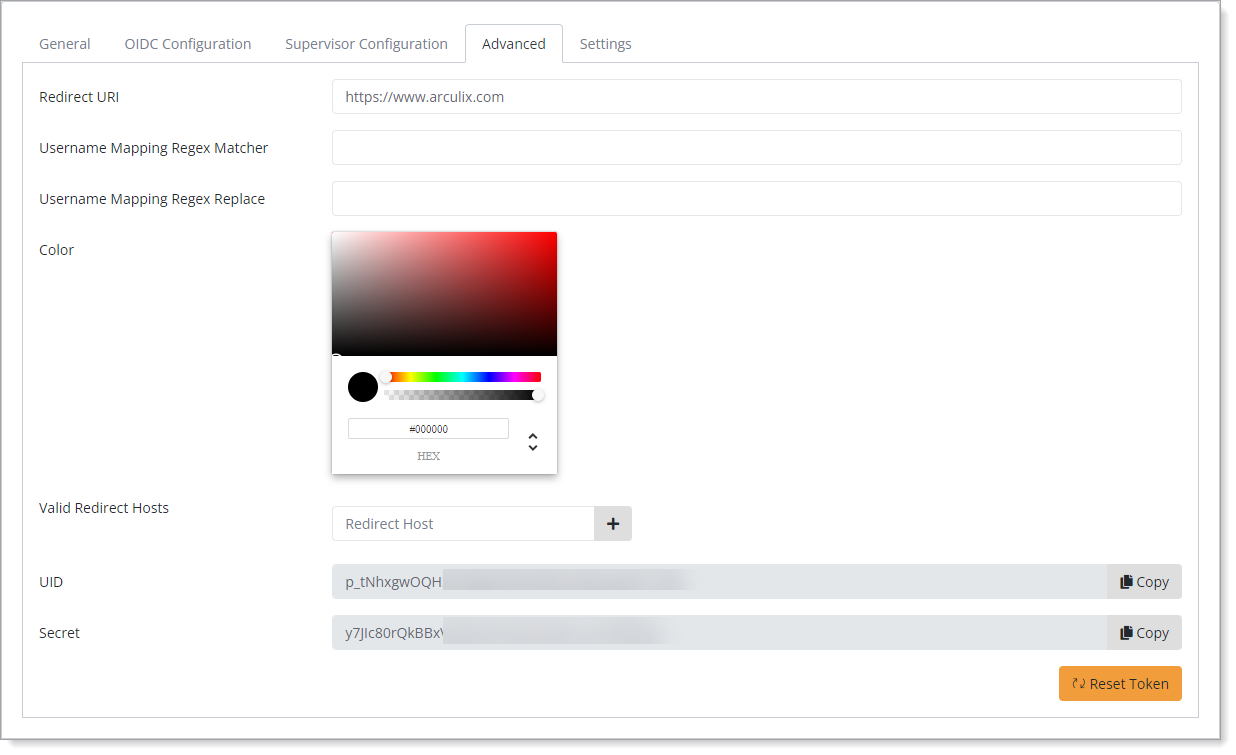
Edit the configured OIDC application and select the Advanced tab.
Copy the UID value.
You will need this for further Microsoft Entra configuration.
Select the OIDC Configuration tab.
Copy the OIDC Provider Configuration value.
You will need this for further Microsoft Entra configuration.
Task C: Configure Conditional Access policy in Microsoft Entra
In this task, you will return to your Microsoft Entra admin center to create a new Conditional Access policy. This will allow you to redirect users to Arculix for authentication as an EAM for applications.
Note
This task is completed in the Microsoft Entra admin center. For up-to-date, detailed instructions, refer to Microsoft's documentation for Tutorial: Secure user sign-in events with Microsoft Entra multifactor authentication and reach out to their support resources.
In the Microsoft Entra admin center, create a new policy for Conditional Access.
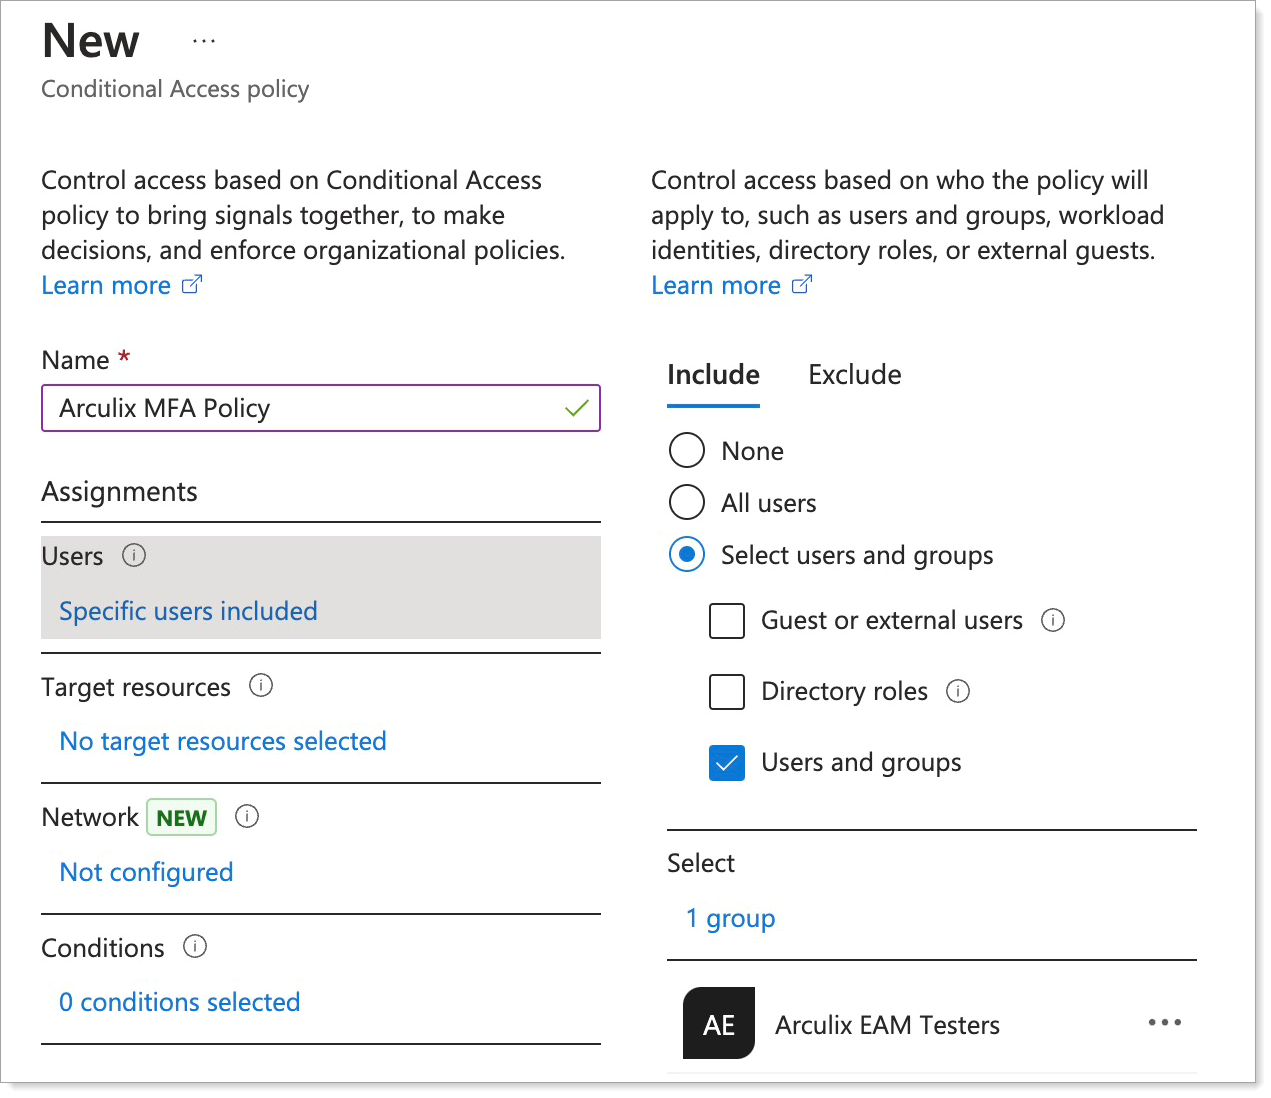
Select which users, groups, and applications to apply the policy to.
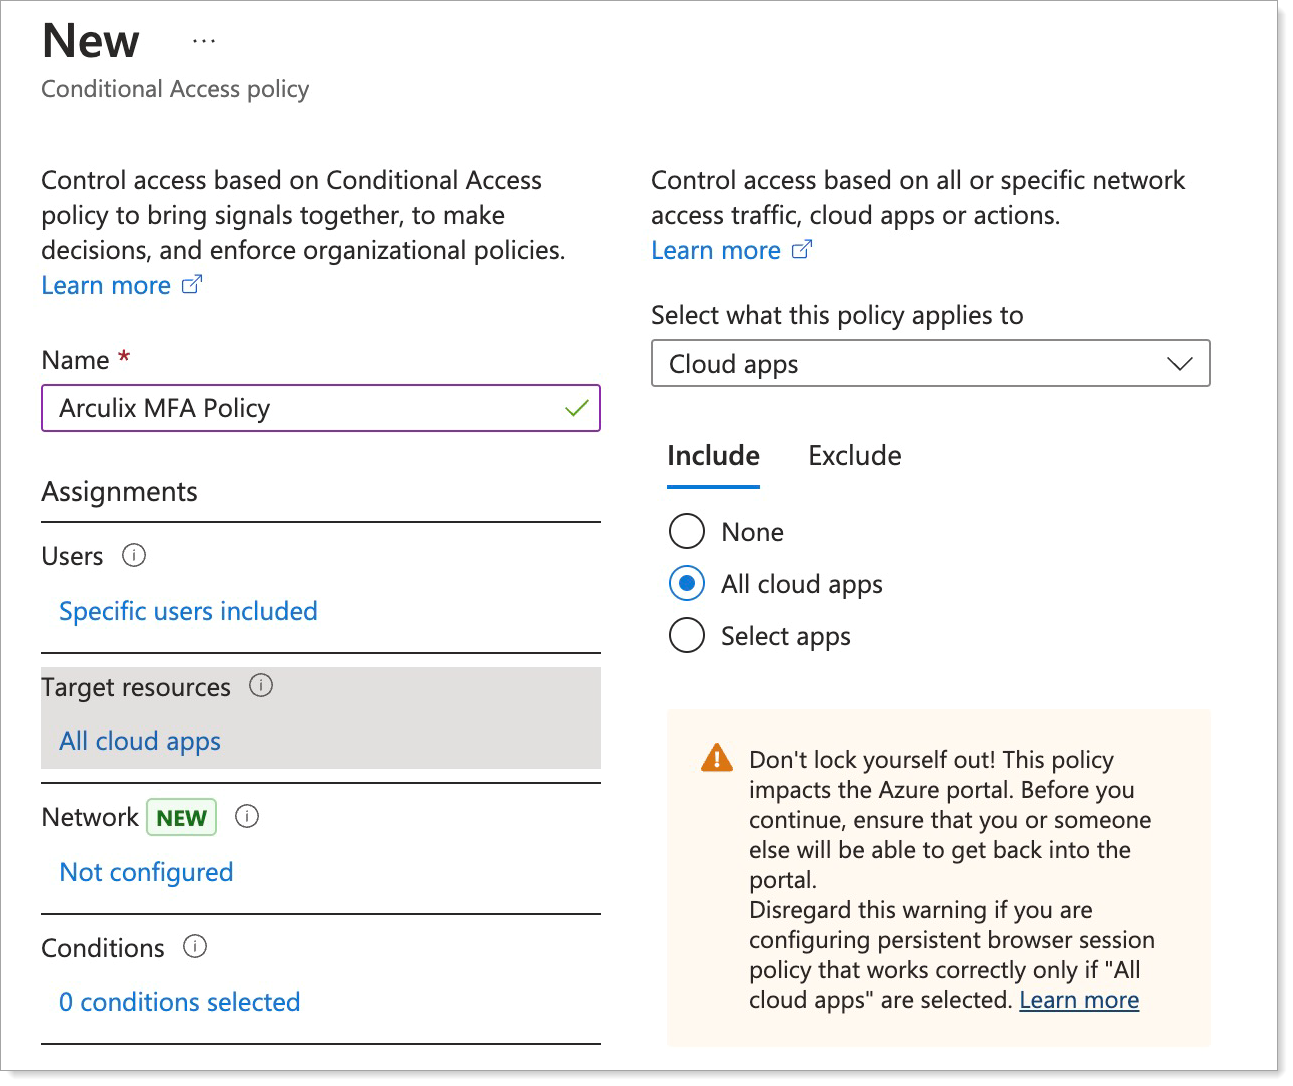
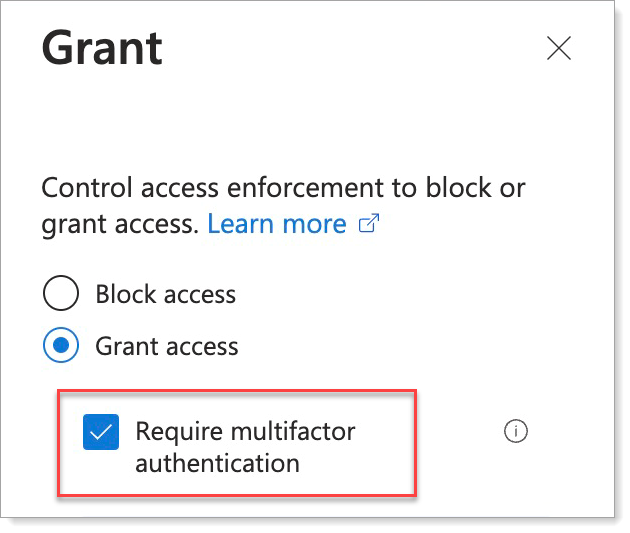
In the Grant section, select Grant access and the Require multifactor authentication check box.
Set the Enable policy value to On.
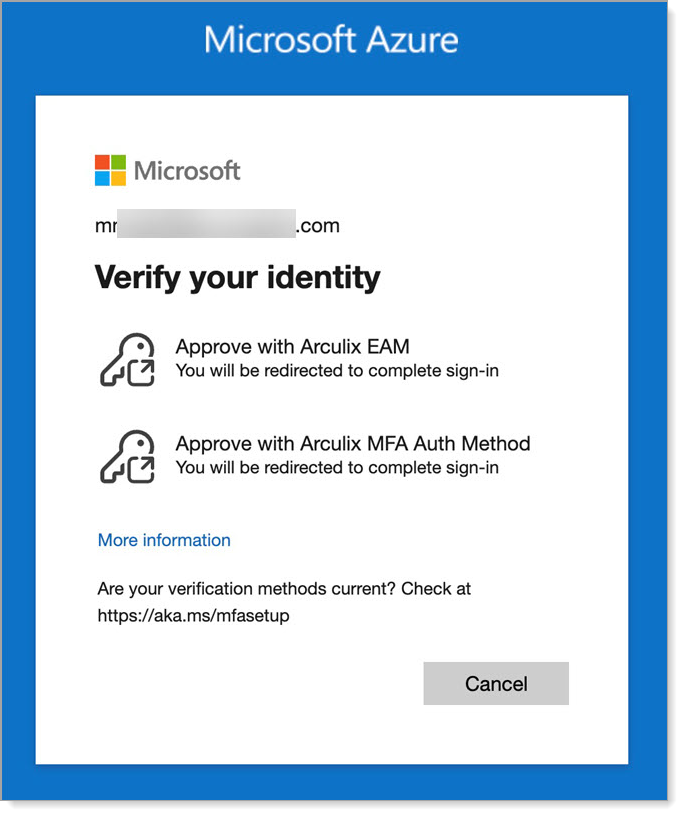
Result: When you log in to Microsoft Azure, you see Approve with Arculix as an MFA option.
Task D: Add external MFA method in Microsoft Entra
In this task, you will configure Arculix as your external authentication provider.
Note
This task is completed in the Microsoft Entra admin center. For up-to-date, detailed instructions, refer to Microsoft's documentation for Manage an external authentication method in Microsoft Entra ID and reach out to their support resources.
In the Microsoft Entra admin center, add an external method with the following values:
Client ID
Enter the UID of the OIDC application you created in Arculix.
Discovery Endpoint
Enter the OIDC Provider Configuration for the OIDC application you created in Arculix.
App ID
Enter the Application ID for the Enterprise application you created in Microsoft Entra for Task A.
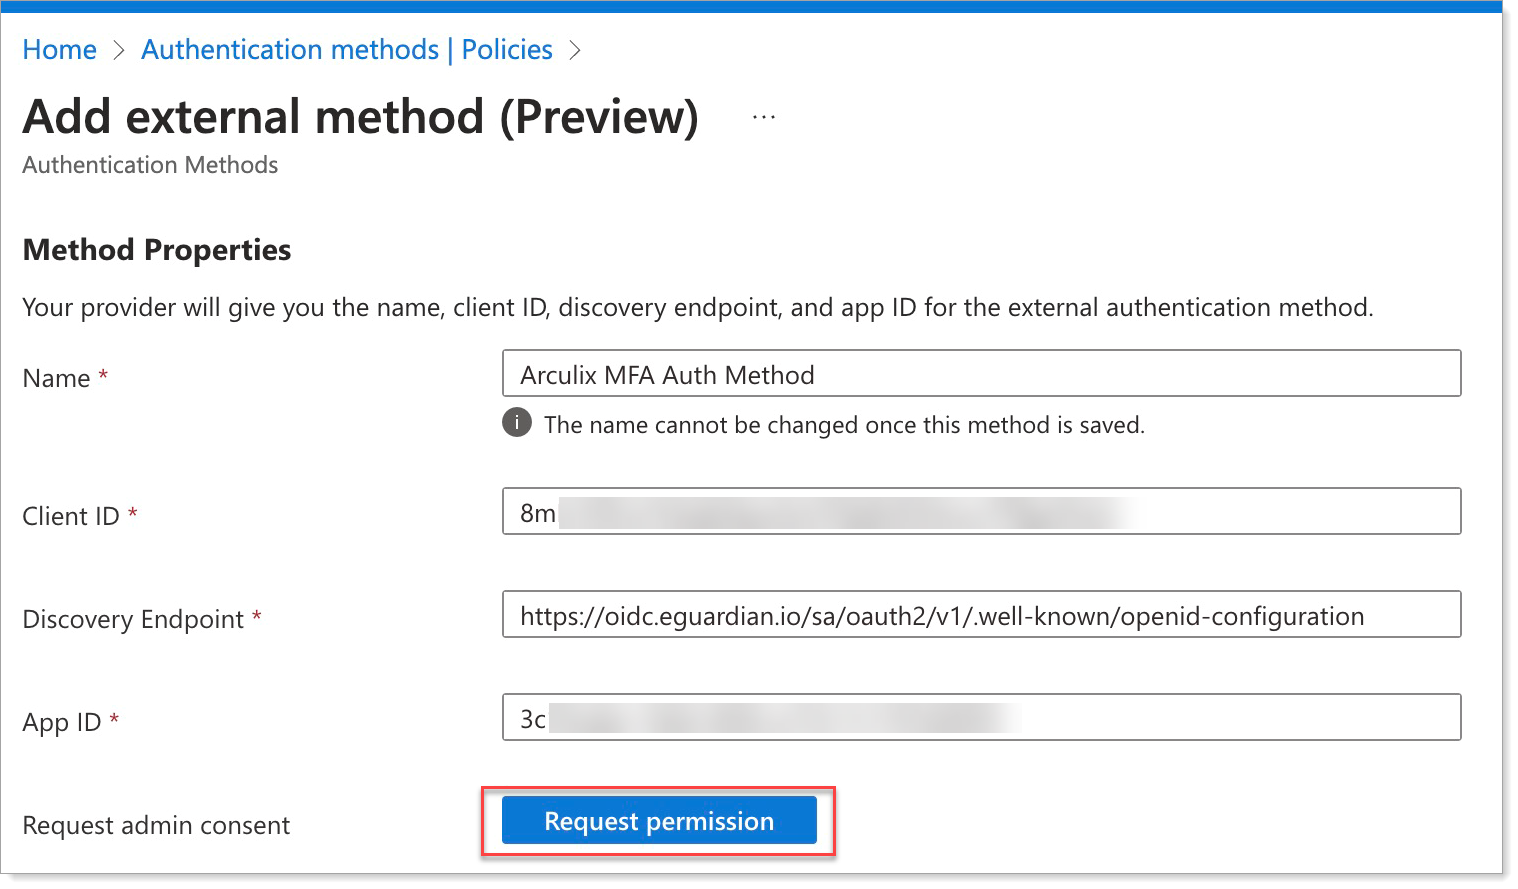
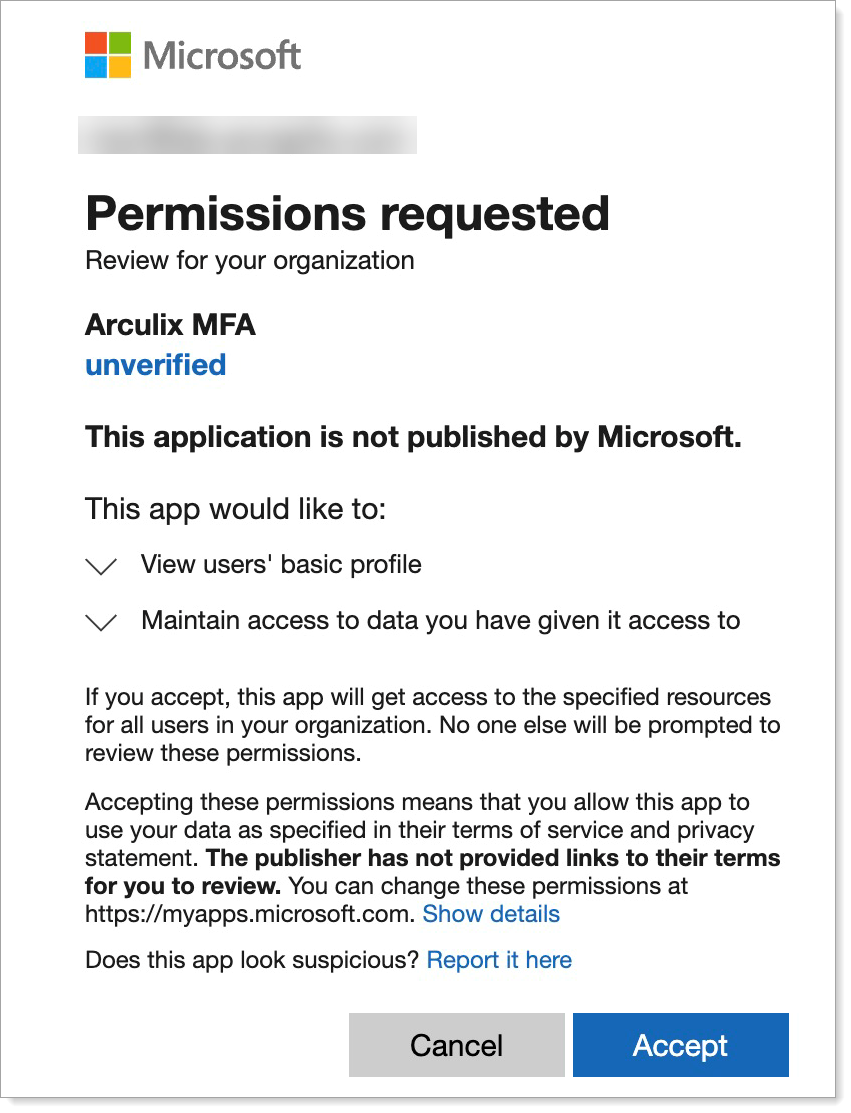
Click Request permission. You will need Microsoft Entra admin access to grant the necessary permissions.
Configure Enable and target to set who to enable this external authentication method for.
Slide the toggle to On and select which users or groups of users to include or exclude.
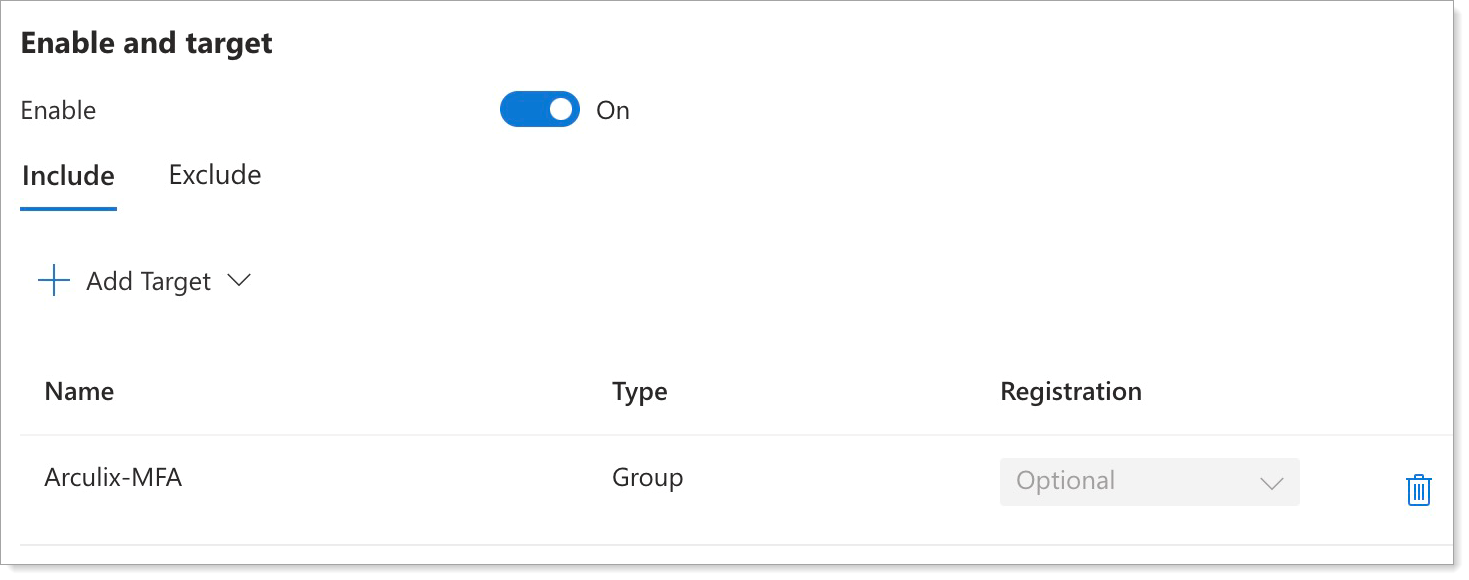
Save your changes.
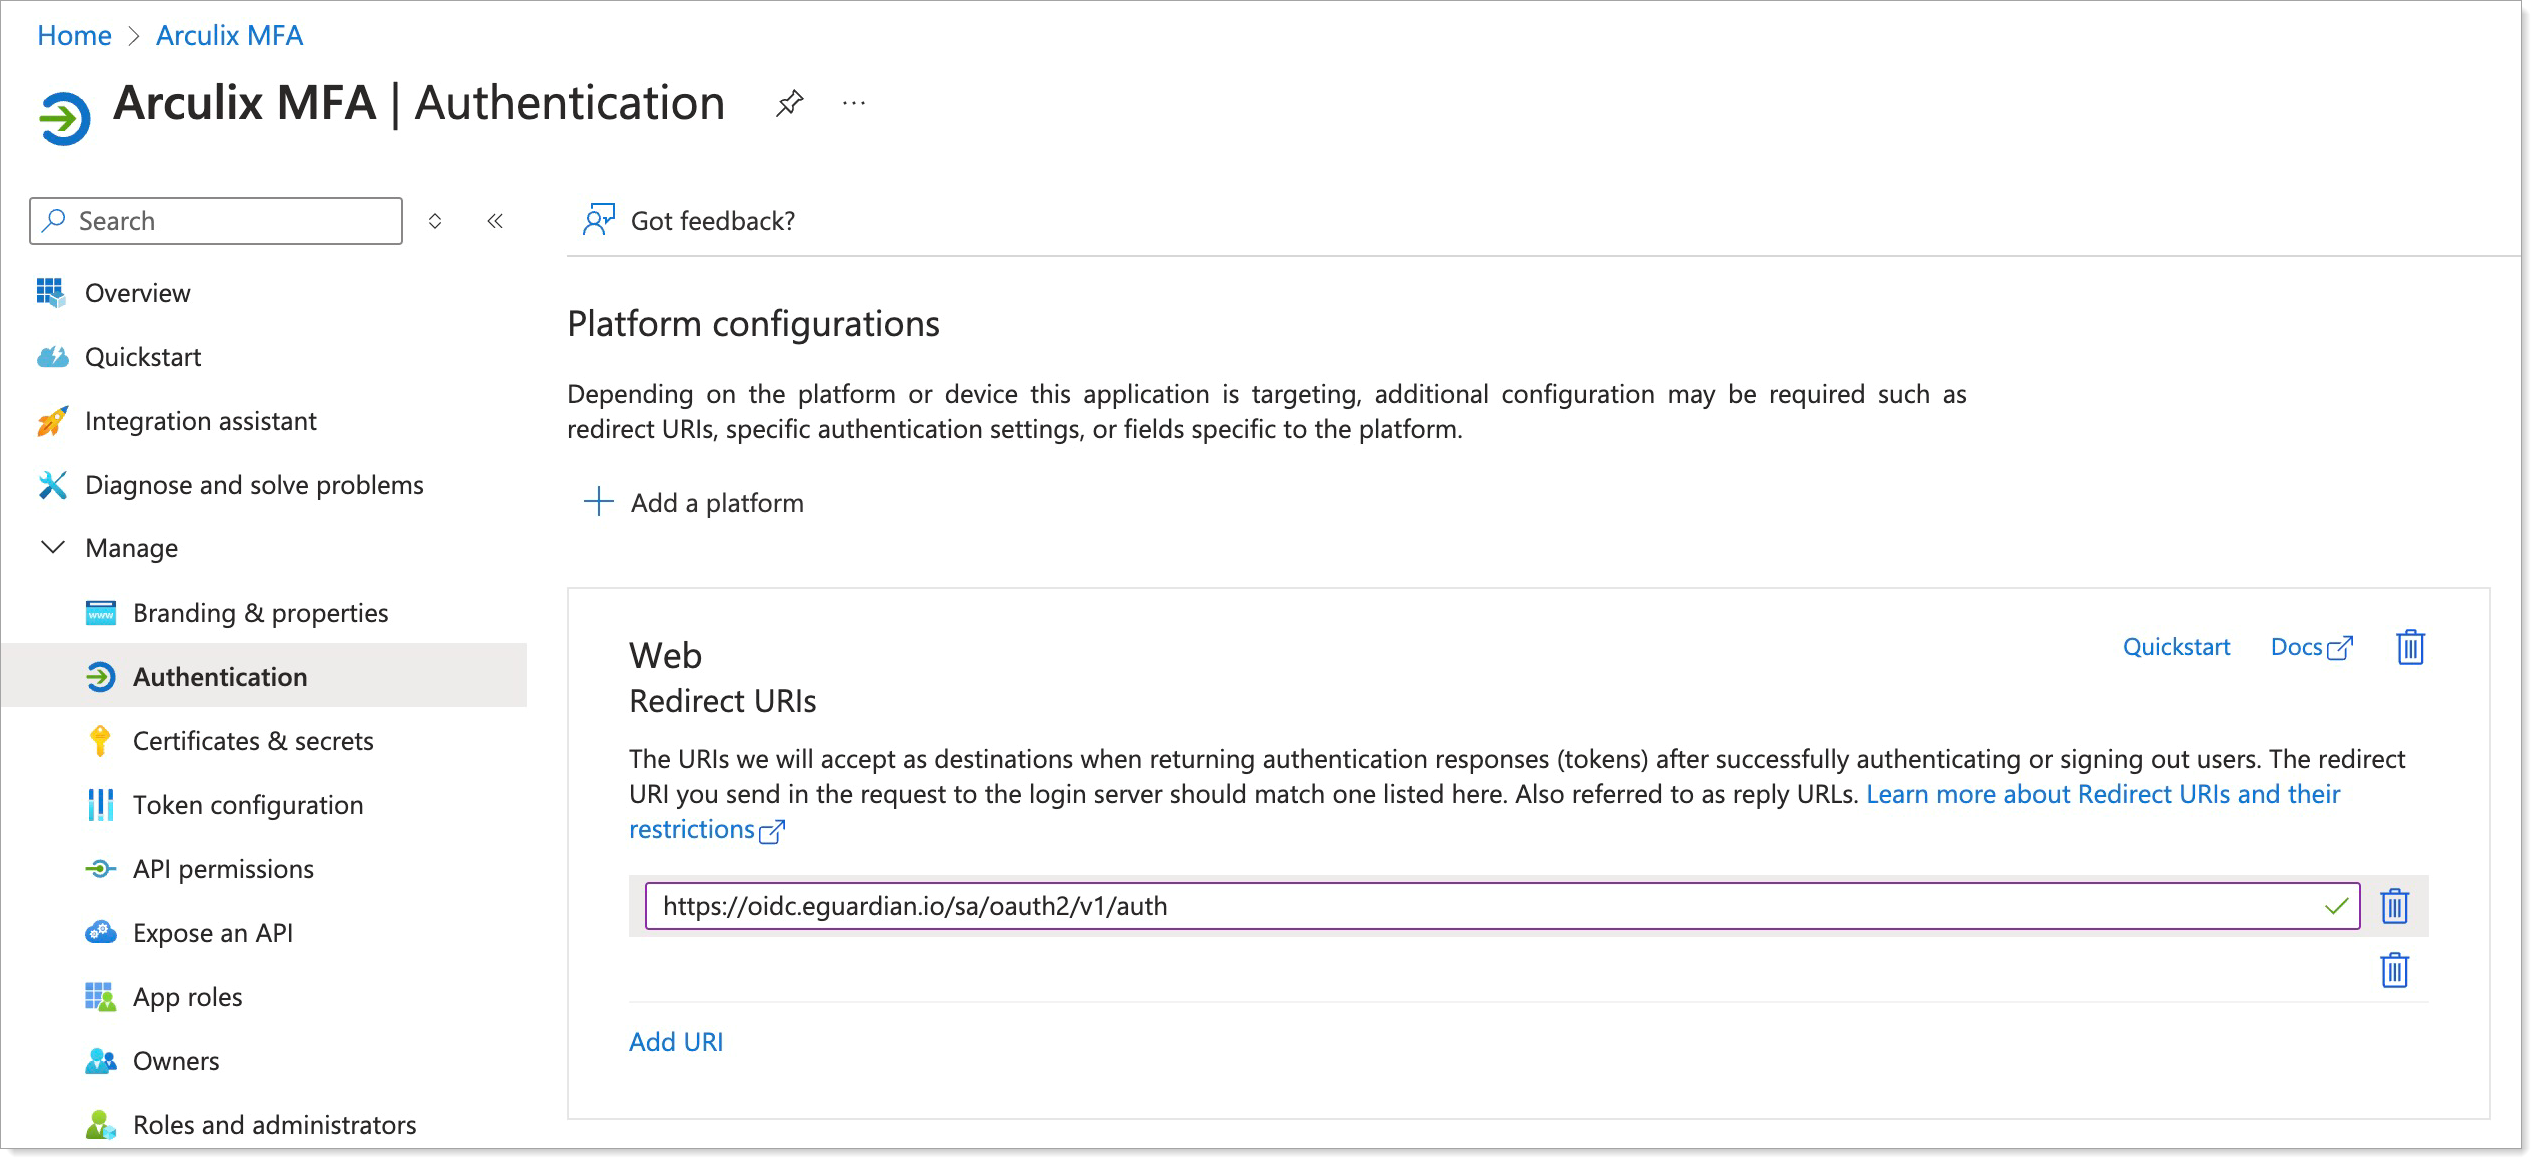
Go to App Registrations and find the Enterprise application you created for Task A. Edit the application's details with the following values:
Redirect URIs
Enter the auth URL for your tenant Arculix OIDC provider.
For example,
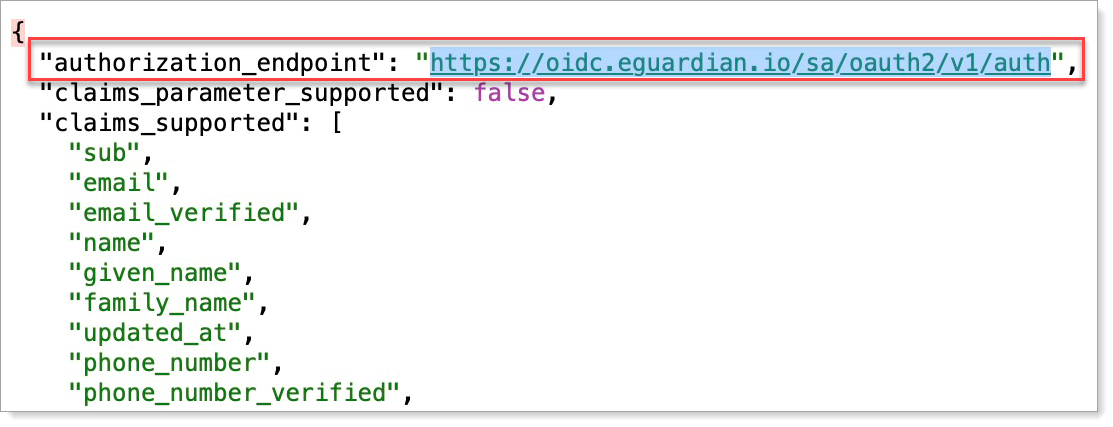
https://{{ARCULIX_OIDC_SERVER}}/{{YOUR_ARCULIX_TENANT_SLUG}}/oauth2/v1/authNOTE: You can also find this value in the Arculix OIDC application you configured by clicking the OIDC Provider Configuration link and finding the value for
authorization_endpoint
Save your changes.
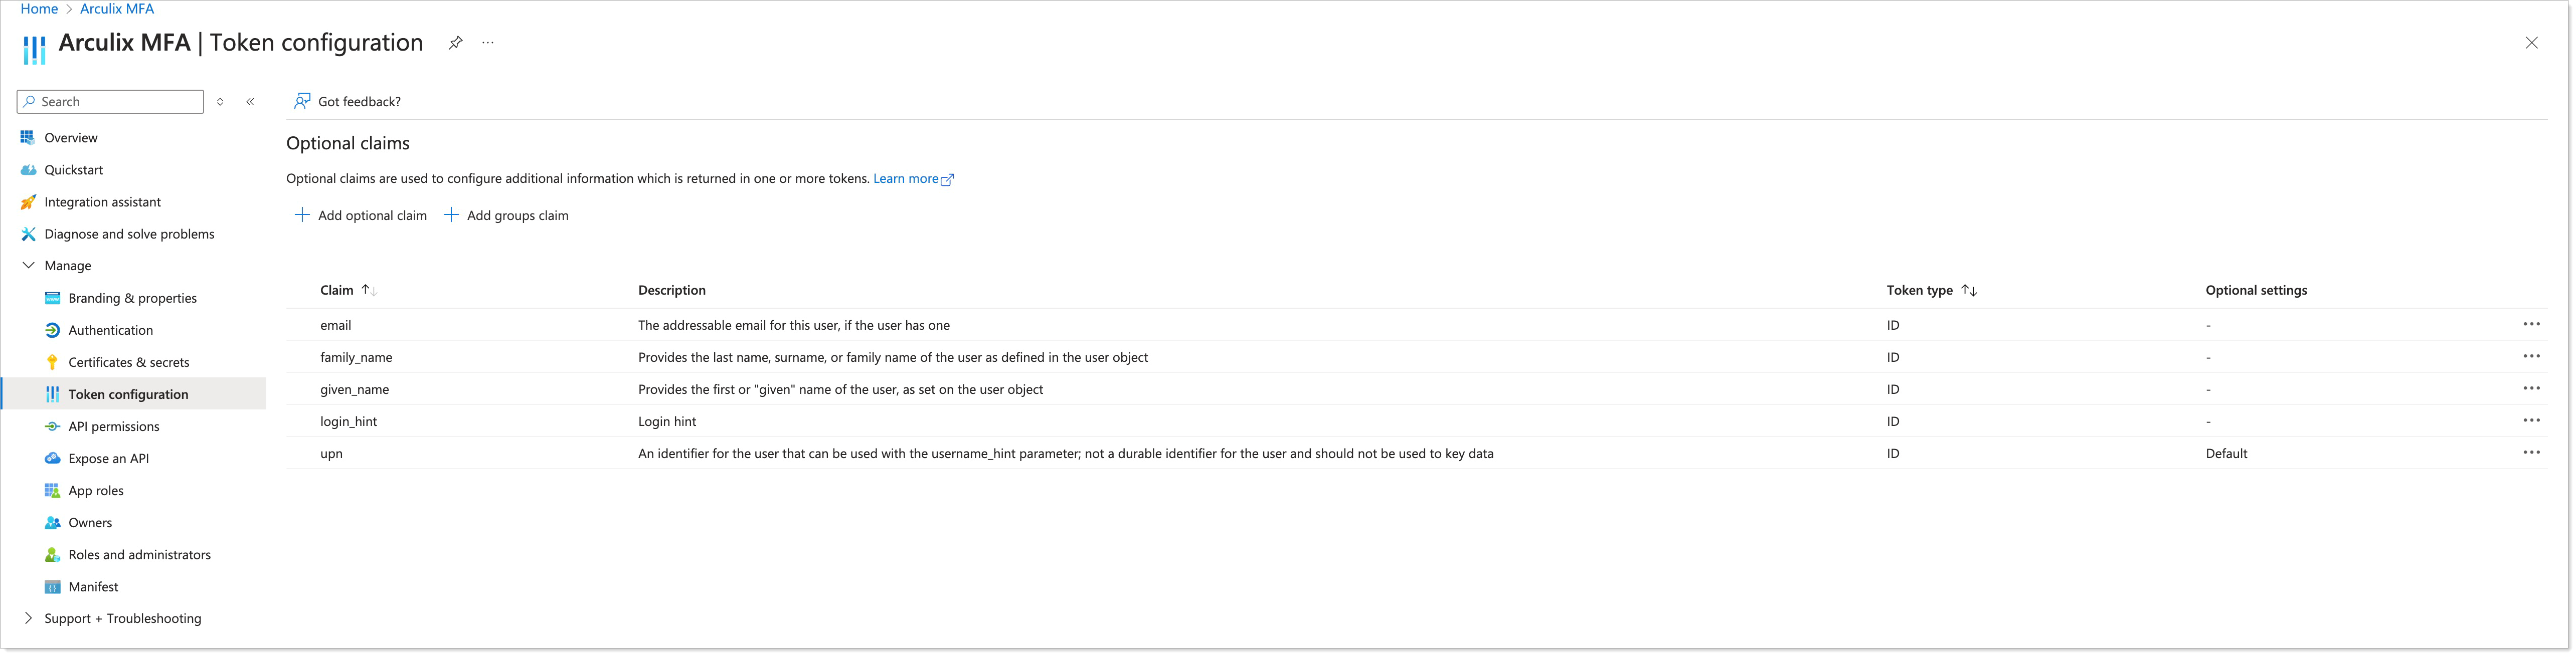
Optional. Under Token Configuration, you can customize the claims that Microsoft Entra will send to Arculix. This can be helpful for matching the Microsoft Entra username with the Arculix username.
For example, if you set Microsoft Entra's
upnas the username in Arculix, you can add a custom claim for it.