Ivanti Connect Secure RADIUS integration
Multi-Factor Authentication (MFA) is an extra layer of security used when logging into websites or apps. Individuals are authenticated through more than one required security and validation procedure that only they know or have access to.
Remote Authentication Dial-In User Service (RADIUS) is a protocol commonly used to authenticate, authorize, and account for user access and actions.
Arculix by SecureAuth offers a simple method for adding single sign-on (SSO) MFA to Ivanti Connect Secure (formerly Pulse Connect Secure) through its RADIUS solution.
Prerequisites
Arculix RADIUS Agent that is configured and connected to your user directory. For example, Microsoft Active Directory (AD).
For more information, see the Arculix RADIUS Agent deployment guide.
User account with administrative privileges for Ivanti Connect Secure.
Arculix RADIUS Agent configuration
To integrate Arculix with your Ivanti Connect Secure, you install the Arculix RADIUS Agent on a machine in your network. This server will receive RADIUS requests from your Ivanti Connect Secure, check with the AD server to perform primary authentication, and then connect to the Arculix cloud service for secondary authentication.
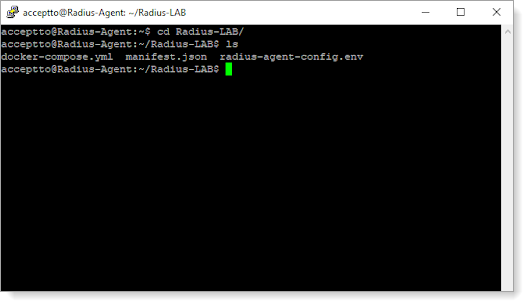
Follow these steps to configure the Arculix RADIUS Agent.
Log in to the Arculix RADIUS Agent as an administrator.
Open the radius-agent-config.env file with an editor.
The file is located in the installed directory of RADIUS Agent. RADIUS clients are configured in this setting.
At the end of the radius-agent-config.env file, set the following configuration for the ARA_CLIENTS attribute:
Note
The values should be separated by semicolons (;).
ARA_CLIENTS = <An optional name for your Ivanti Connect Secure>; <Internal IP address of your Ivanti Connect Secure>; <a shared secret>
For example, set:
ARA_CLIENTS = IvantiCSVPN;192.168.1.50/32;testing12345
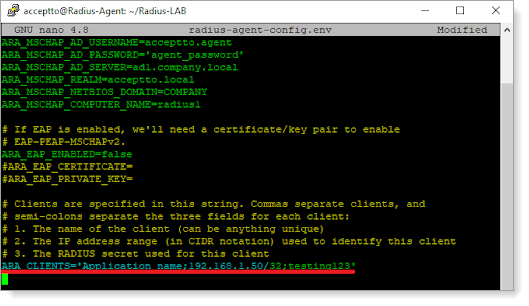
Save the file.
Ivanti Connect Secure configuration
In this section, you will configure Ivanti Connect Secure as a RADIUS client. See the following tasks.
Task A: Add Arculix as a RADIUS Server
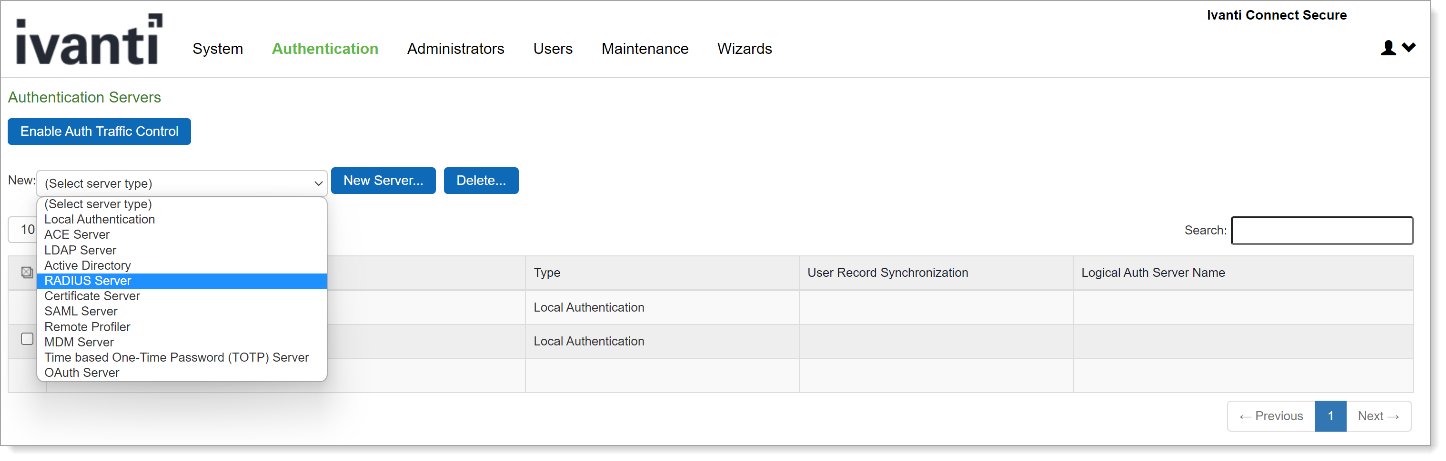
Log in to the Ivanti Connect Secure admin portal with an administrative account, then navigate to Authentication > Auth Servers.

From the list, select RADIUS Server and click New Server.
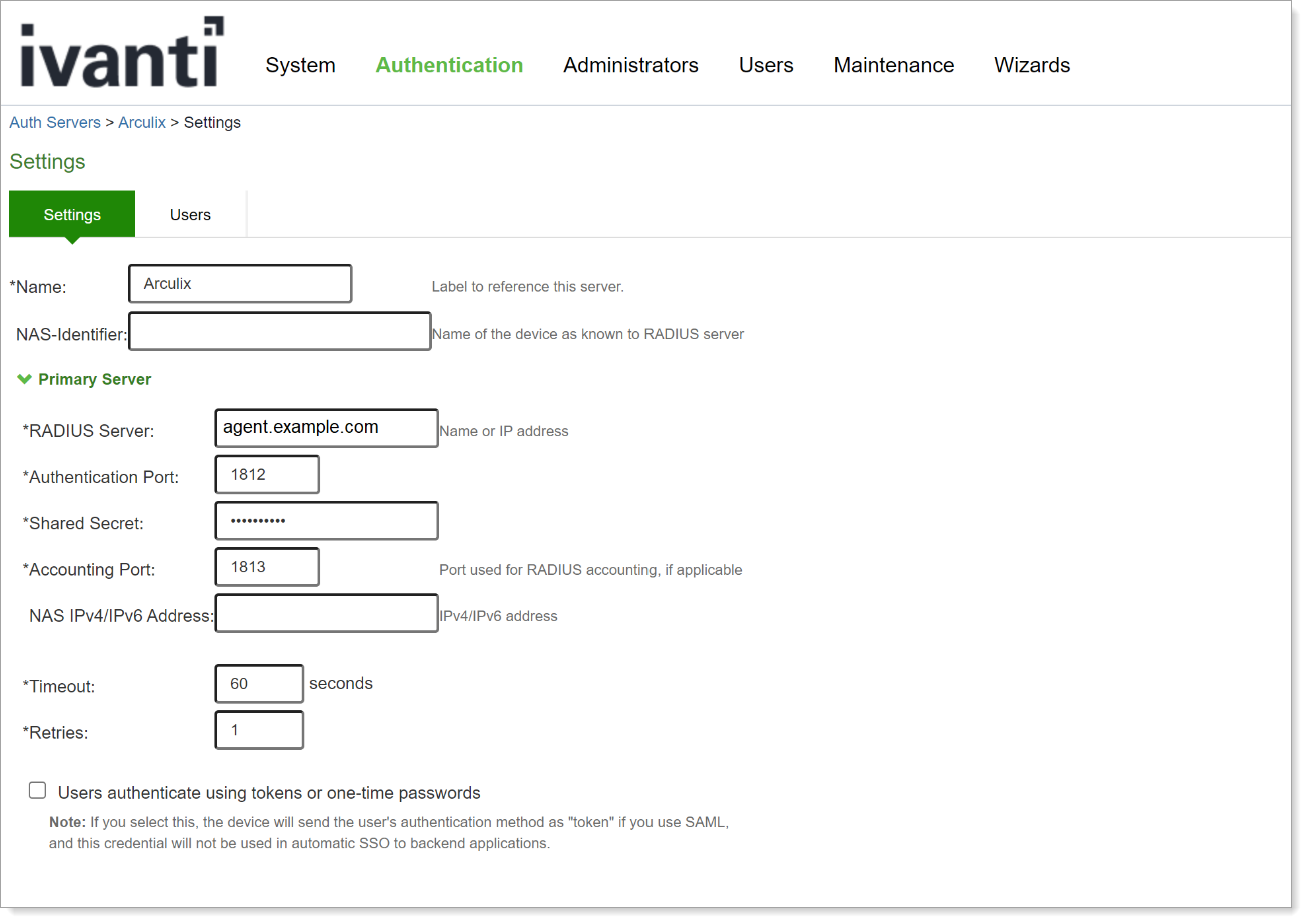
To define the new RADIUS server, set the following configurations.
Name
Set the name of the RADIUS server.
For example, Arculix.
RADIUS Server
Set to the Name or IP address of the Arculix RADIUS Server Agent.
For example, agent.example.com
Authentication Port
Set to 1812.
Shared Secret
Enter the RADIUS shared secret key for the Arculix RADIUS Agent.
Timeout
Set to 60.
Retries
Set to 1.
Optional. If you require and have a backup server, repeat the above configuration settings.
Save your changes.
Task B: Add a custom RADIUS rule
From your newly created RADIUS server settings, scroll down to the Custom RADIUS Rules section and click New RADIUS Rule…

Set the following configurations.
Name
Enter a unique name.
For example, Arculix Challenge Rule.
Response Packet Type
Set to Access Challenge.
Attribute Criteria
Set the following attribute criteria:
RADIUS Attribute – Set to Reply-Message (18)
Operand – Set to matches the expression
Value – Leave blank.
Then take action
Set to show Generic Login page
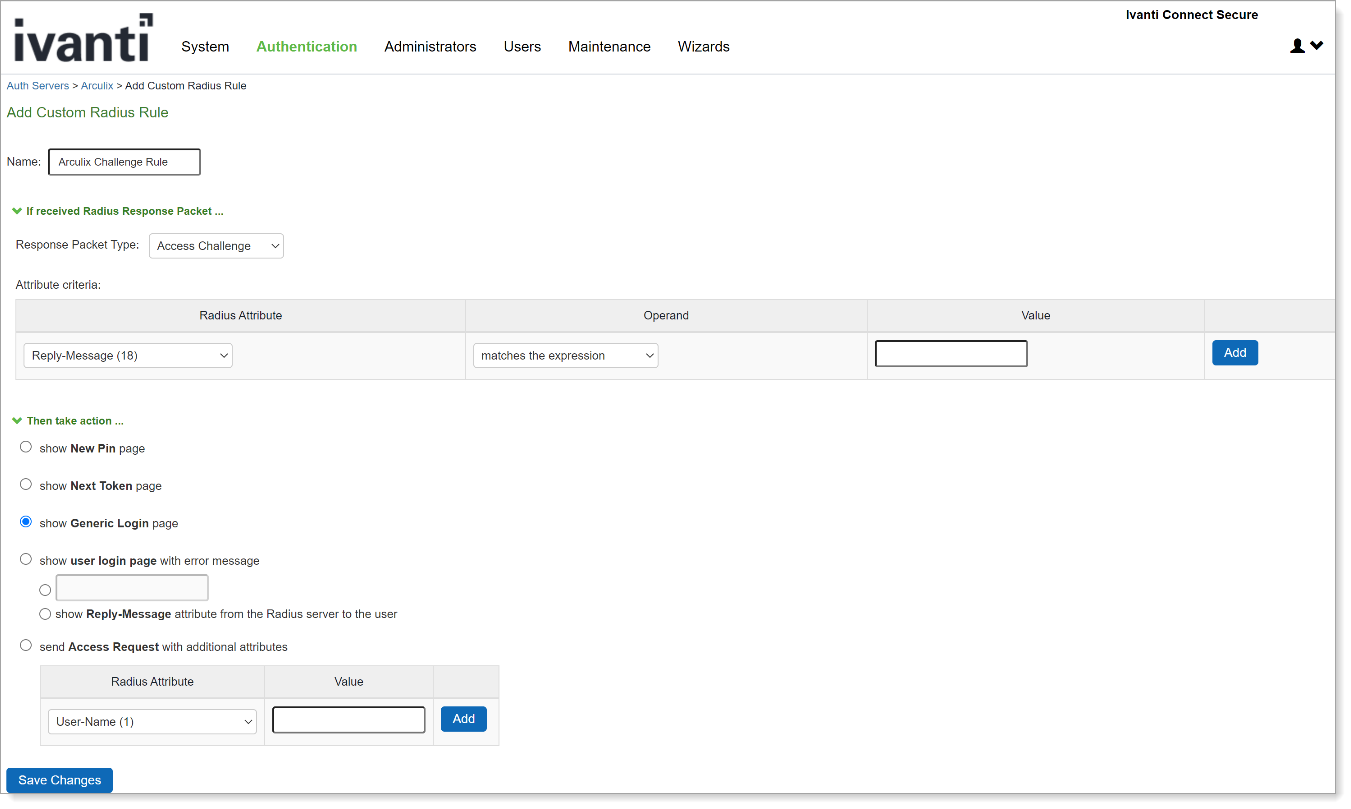
Save your changes.
Ignore the warnings that the rule is not specific.
Task C: Create a user realm
On the Ivanti Connect Secure admin portal, navigate to Users > User Realms.
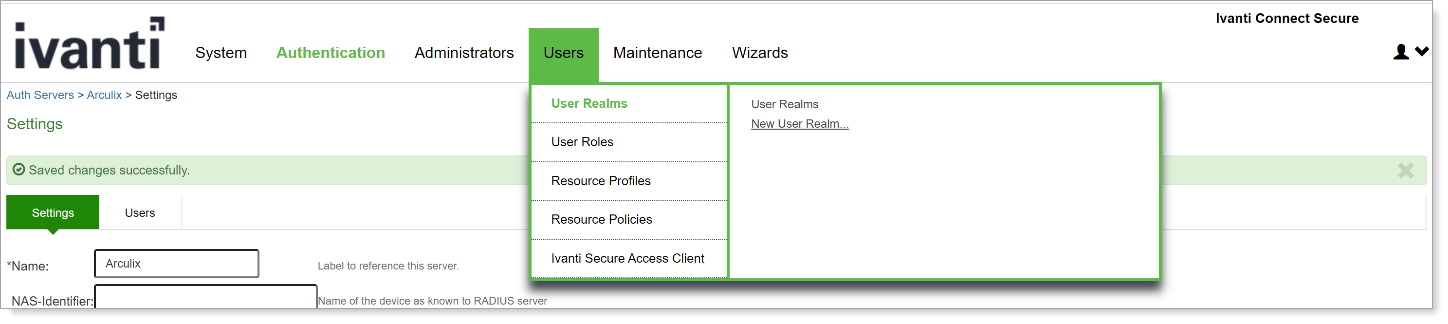
Click the New User Realm link and set the following configurations.
Name
Enter a Unique name.
For example, Arculix-RADIUS.
Authentication
Set to Arculix.
User/Directory Attribute
Set to Same as Above.
Accounting
Set to None.
Device Attributes
Set to None.

Save your changes.
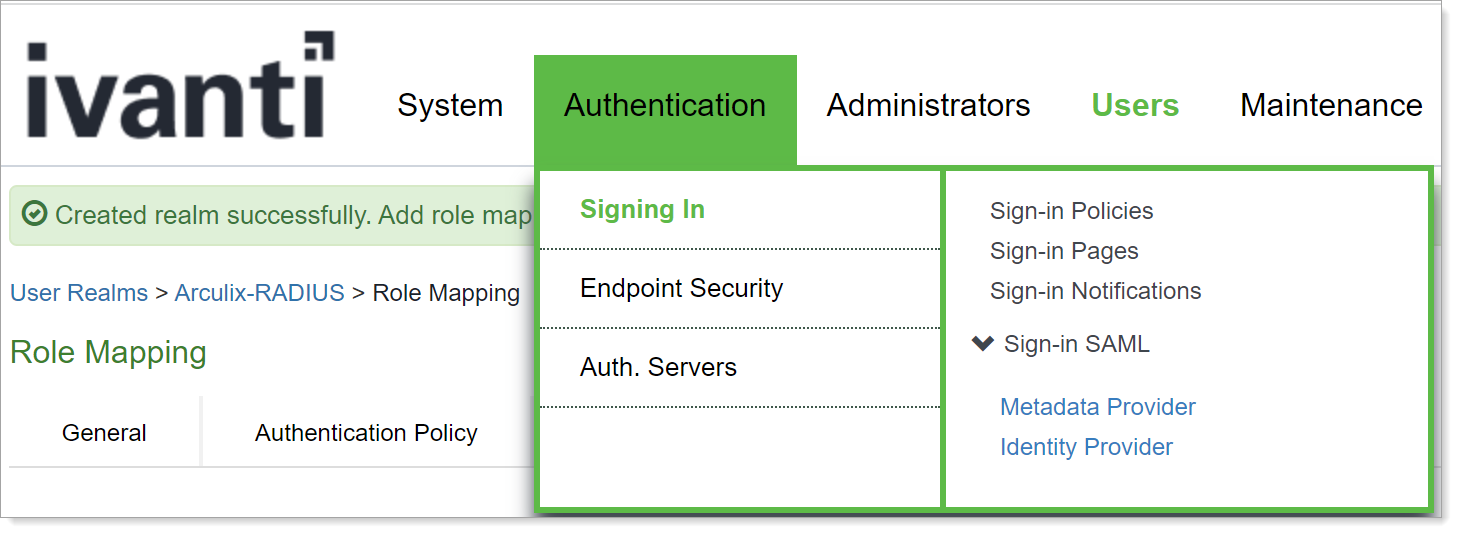
Optional. Navigate to Role Mapping from the top menu, click New Rule and set the following configurations.
Rule based on
Set to Username.
Name
Enter a unique name.
For example, Arculix-Mapping.
Rule: if username
Set to is and type required usernames or use the wildcard character *.
then assign these roles
Select the roles to assign.

Save your changes.
Task D: Modify the sign-in policies
Navigate to Authentication > Signing In > Sign-in Policies.
Click the link for the sign-in policy that you want to modify.
In the Authentication realm section, choose User picks from a list of authentication realms. Then, in the Available realms box on the left, select the user realm you just configured and click Add to move it to the Selected realms box on the right.
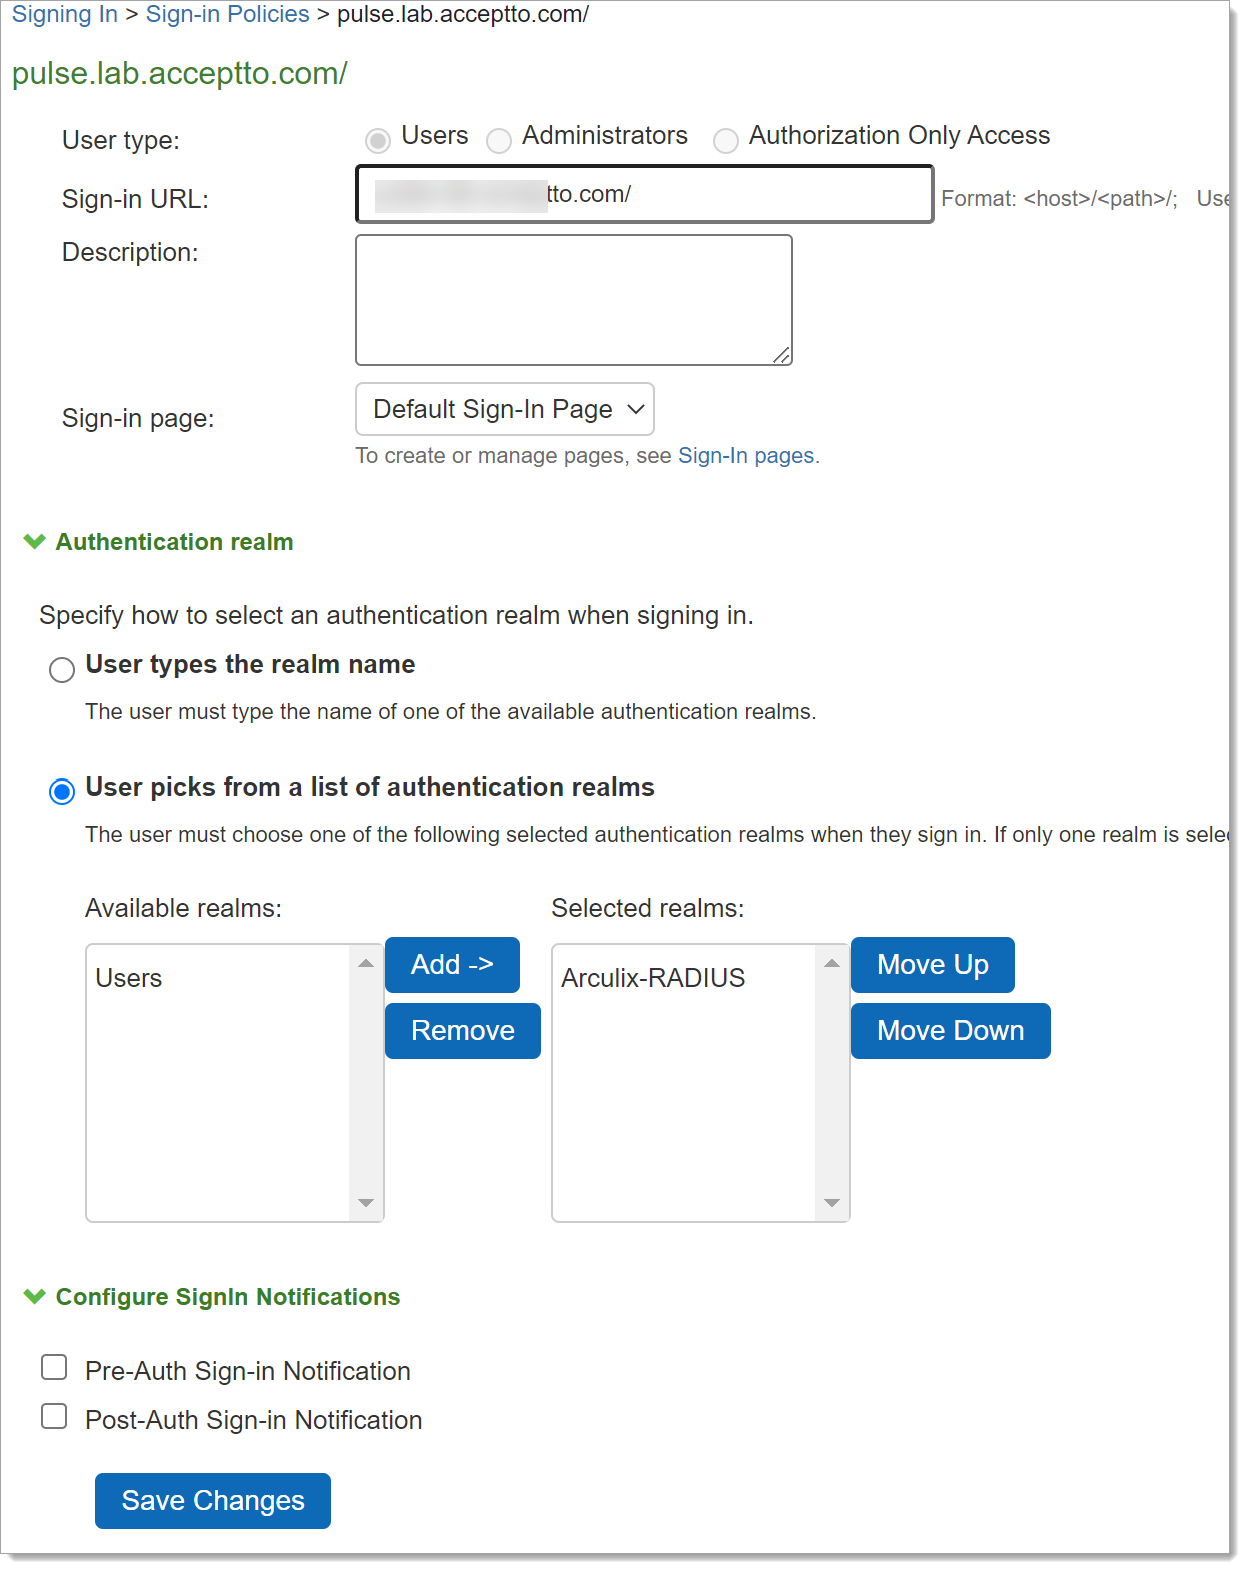
Save your changes.
Test your application integration
On the Ivanti Connect Secure Client, enter login credentials and click Connect.
The Arculix Mobile app receives a push notification for your approval to log in.
Approve the request and you are redirected to the Ivanti Connect Secure home page.