PingFederate IdP factor MFA integration
Arculix integrates with PingFederate to enable increased security with Arculix's intelligent Multi-factor Authentication. This integration uses PingFederate's IdP Adapter Plugin feature to enable Arculix intelligent MFA. This allows administrators to configure their PingFederate SSO applications to require Arculix's Smart MFA before authenticating users.
Watch a video about this integration with Arculix in under 5 minutes.
Prerequisites
Configured Arculix instance and user account with administrative privileges for Arculix.
User account with administrative privileges for the PingFederate admin panel.
Arculix SAML metadata XML file for your account.
Arculix PingFederate IdP Adapter plugin
Install the Arculix PingFederate IdP Adapter plugin
Download the Arculix PingFederate IdP Adapter plugin JAR file from the Arculix Download Center.
Install the JAR file in the deploy directory for your PingFederate instance.
Restart the PingFederate server.
Add a new IdP Adapter instance
In the PingFederate admin panel, add a new IdP Adapter instance.
Download the SAML metadata and certificate for your organization from Arculix.
Metadata download:
https://sso.acceptto.com/<myorganization>/saml/download/metadataView metadata:
https://sso.acceptto.com/<myorganization>/saml/metadataCertificate download:
https://sso.acceptto.com/<myorganization>/saml/download/certLog in to the PingFederate admin panel..
Select Authentication > IdP Adapters > Create New Instance.
In the Type section, set the following:
Instance Name
Enter a unique name.
For example, Arculix.
Instance Id
Enter a unique ID.
For example, arculix.
Type
Set to Arculix IdP Adapter.
Parent Instance
Set to None.
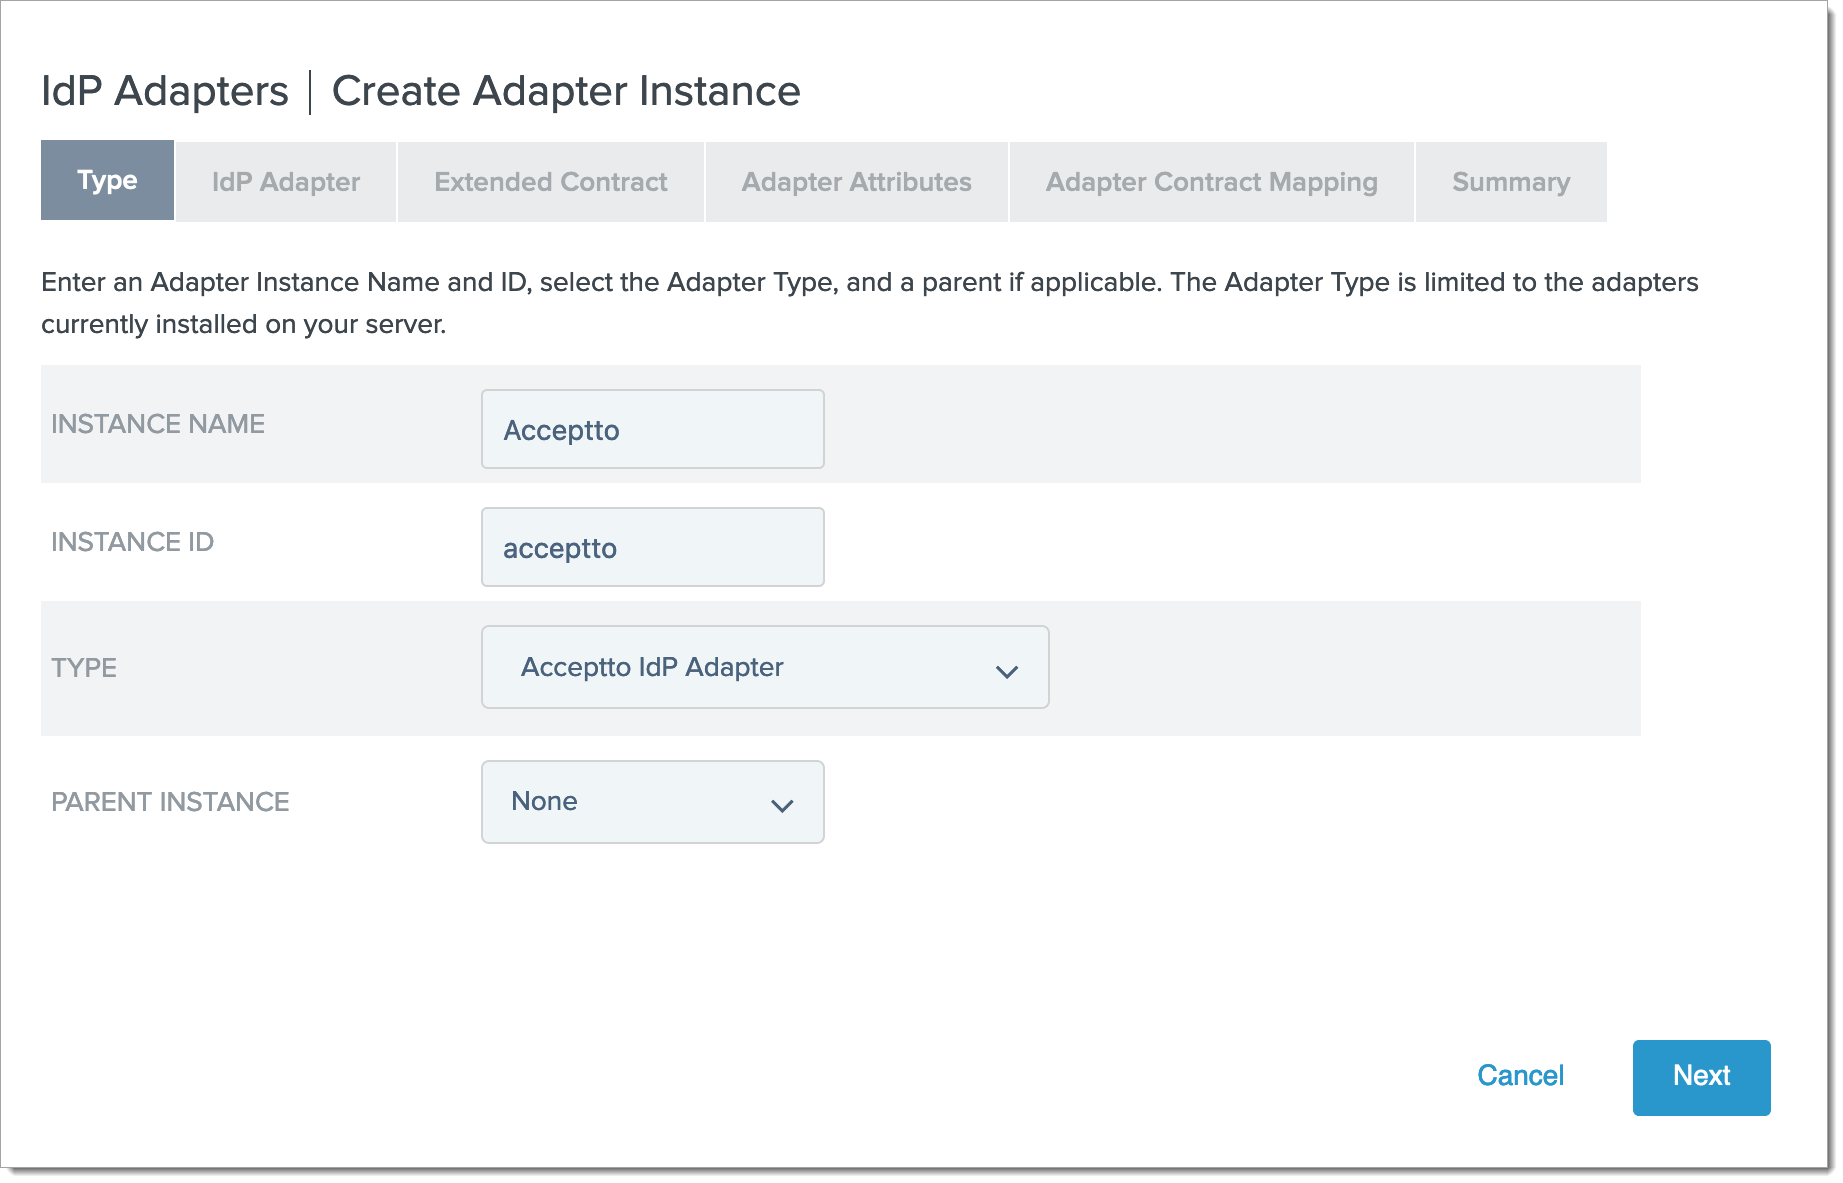
Click Next.
In the IdP Adapter section, set the following:
Application Issuer ID
Enter a unique ID.
For example, PingFederate Arculix Plugin.
Application Metadata File
Upload the Arculix metadata file downloaded in Step 1.
SP Certificate
Select an existing certificate or click Manage Signing Certificates to create a new one.
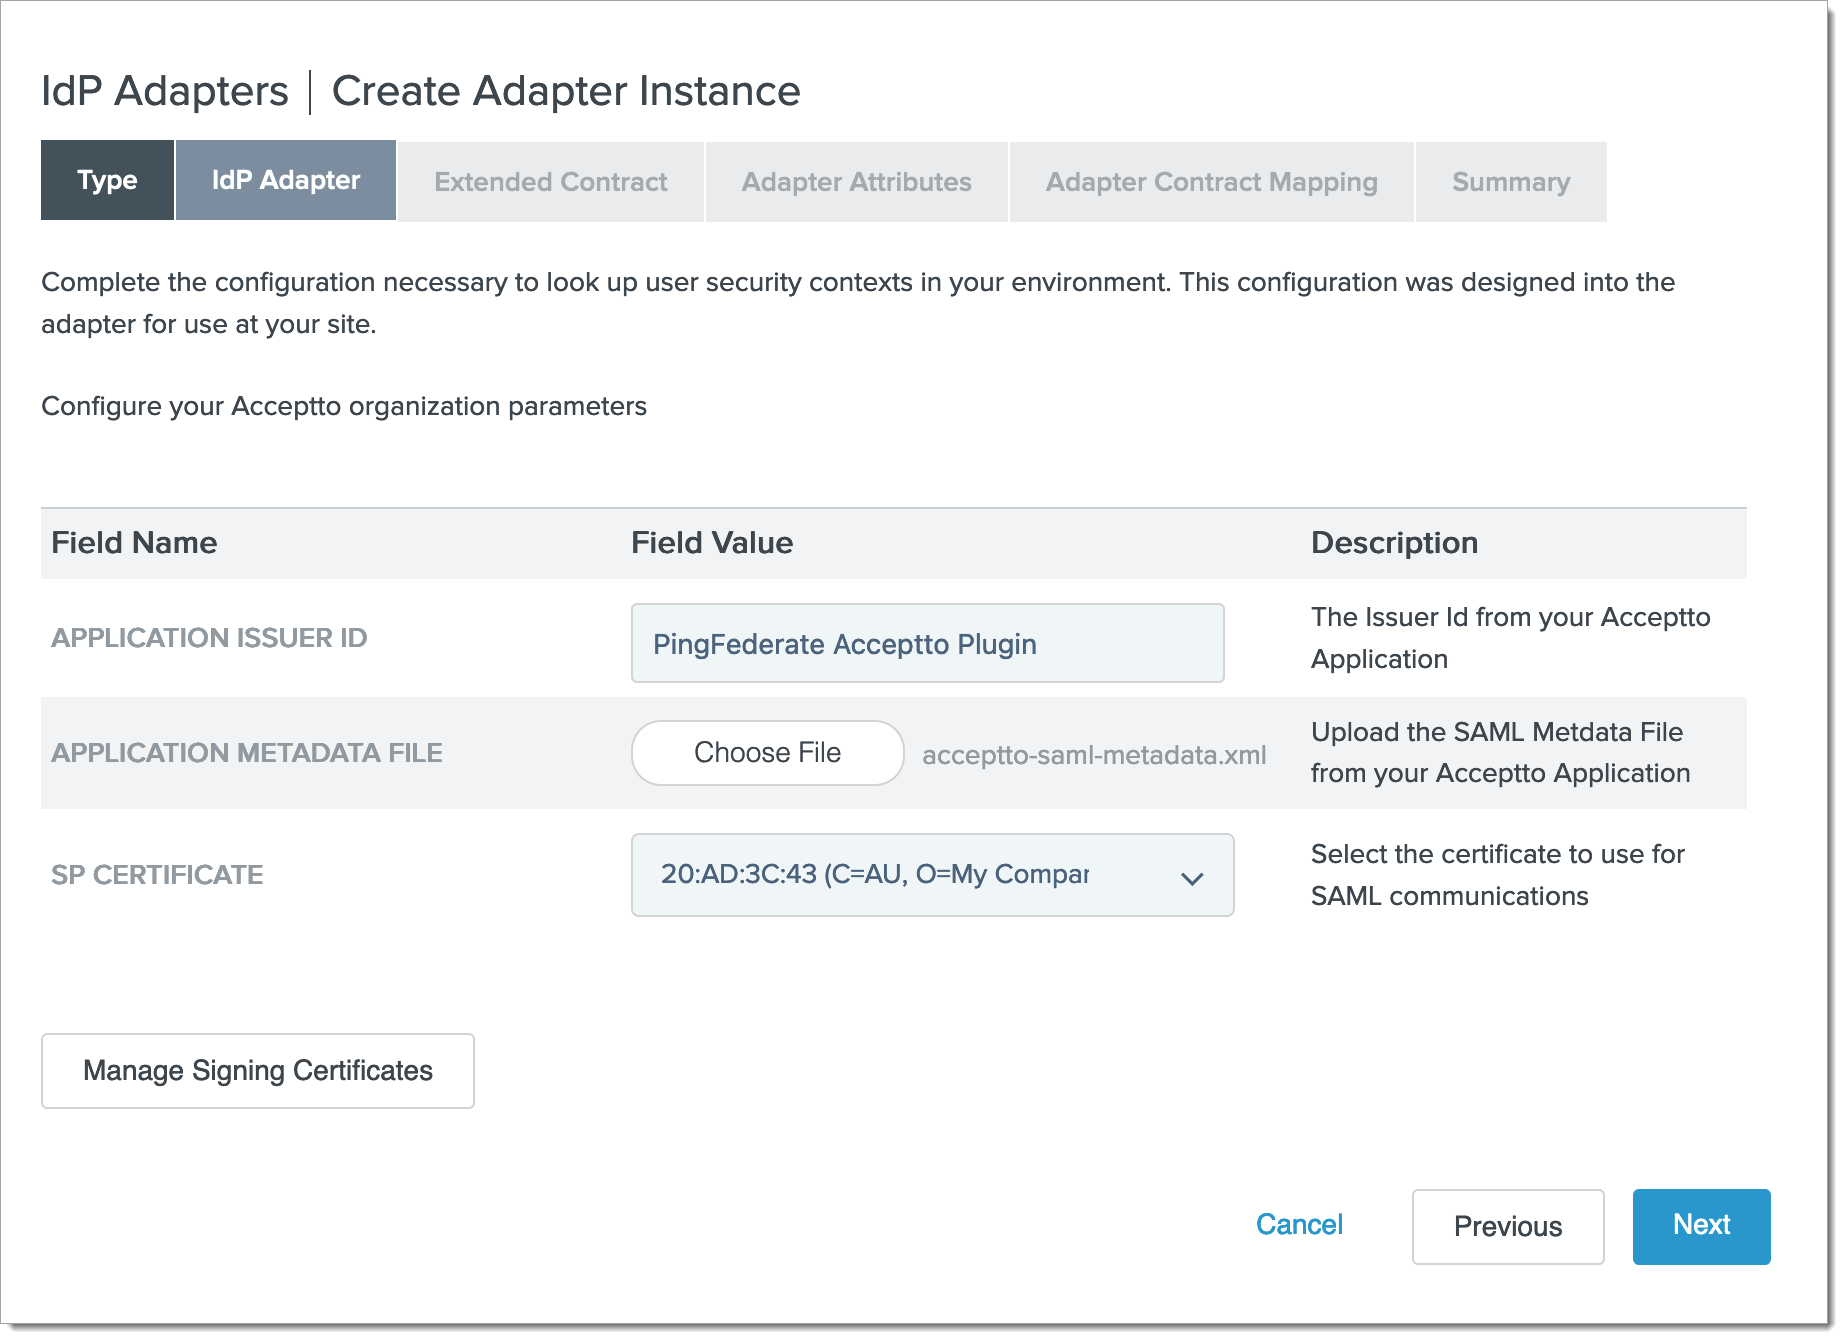
Click Next.
In the Extended Contract section, click Next.
In the Adapter Attributes section, set the following:
Unique User Key Attribute
Set to email.
email
Select the Pseudonym check box.
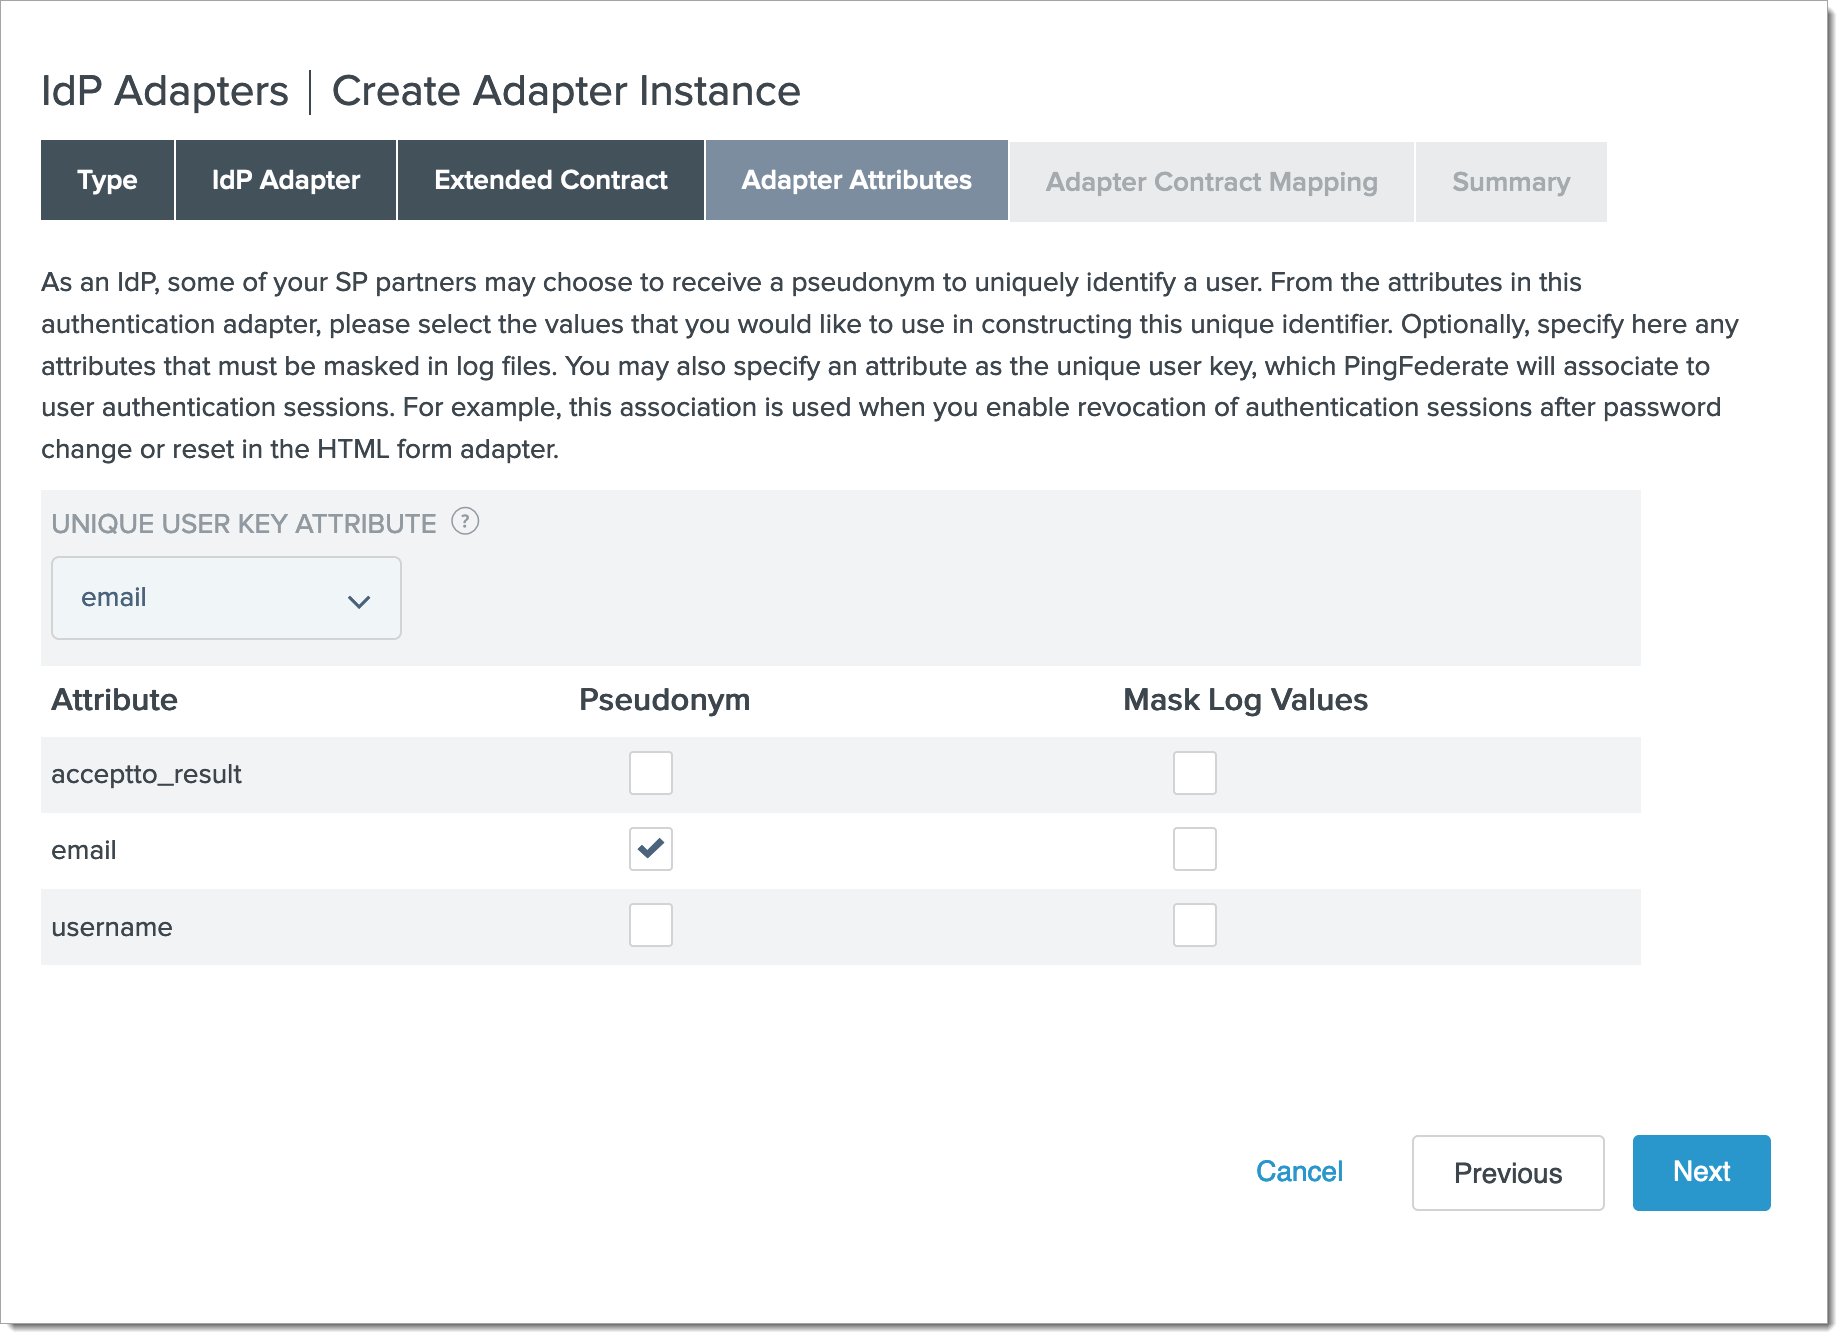
Click Next.
Click Configure Adapter Contract and do the following:
In the Attribute sources & User Lookup section, click Next.
In the Adapter Contract Fulfillment section, set the following:
arculix_result
Set to Adapter.
email
Set to Adapter.
username
Set to Adapter.
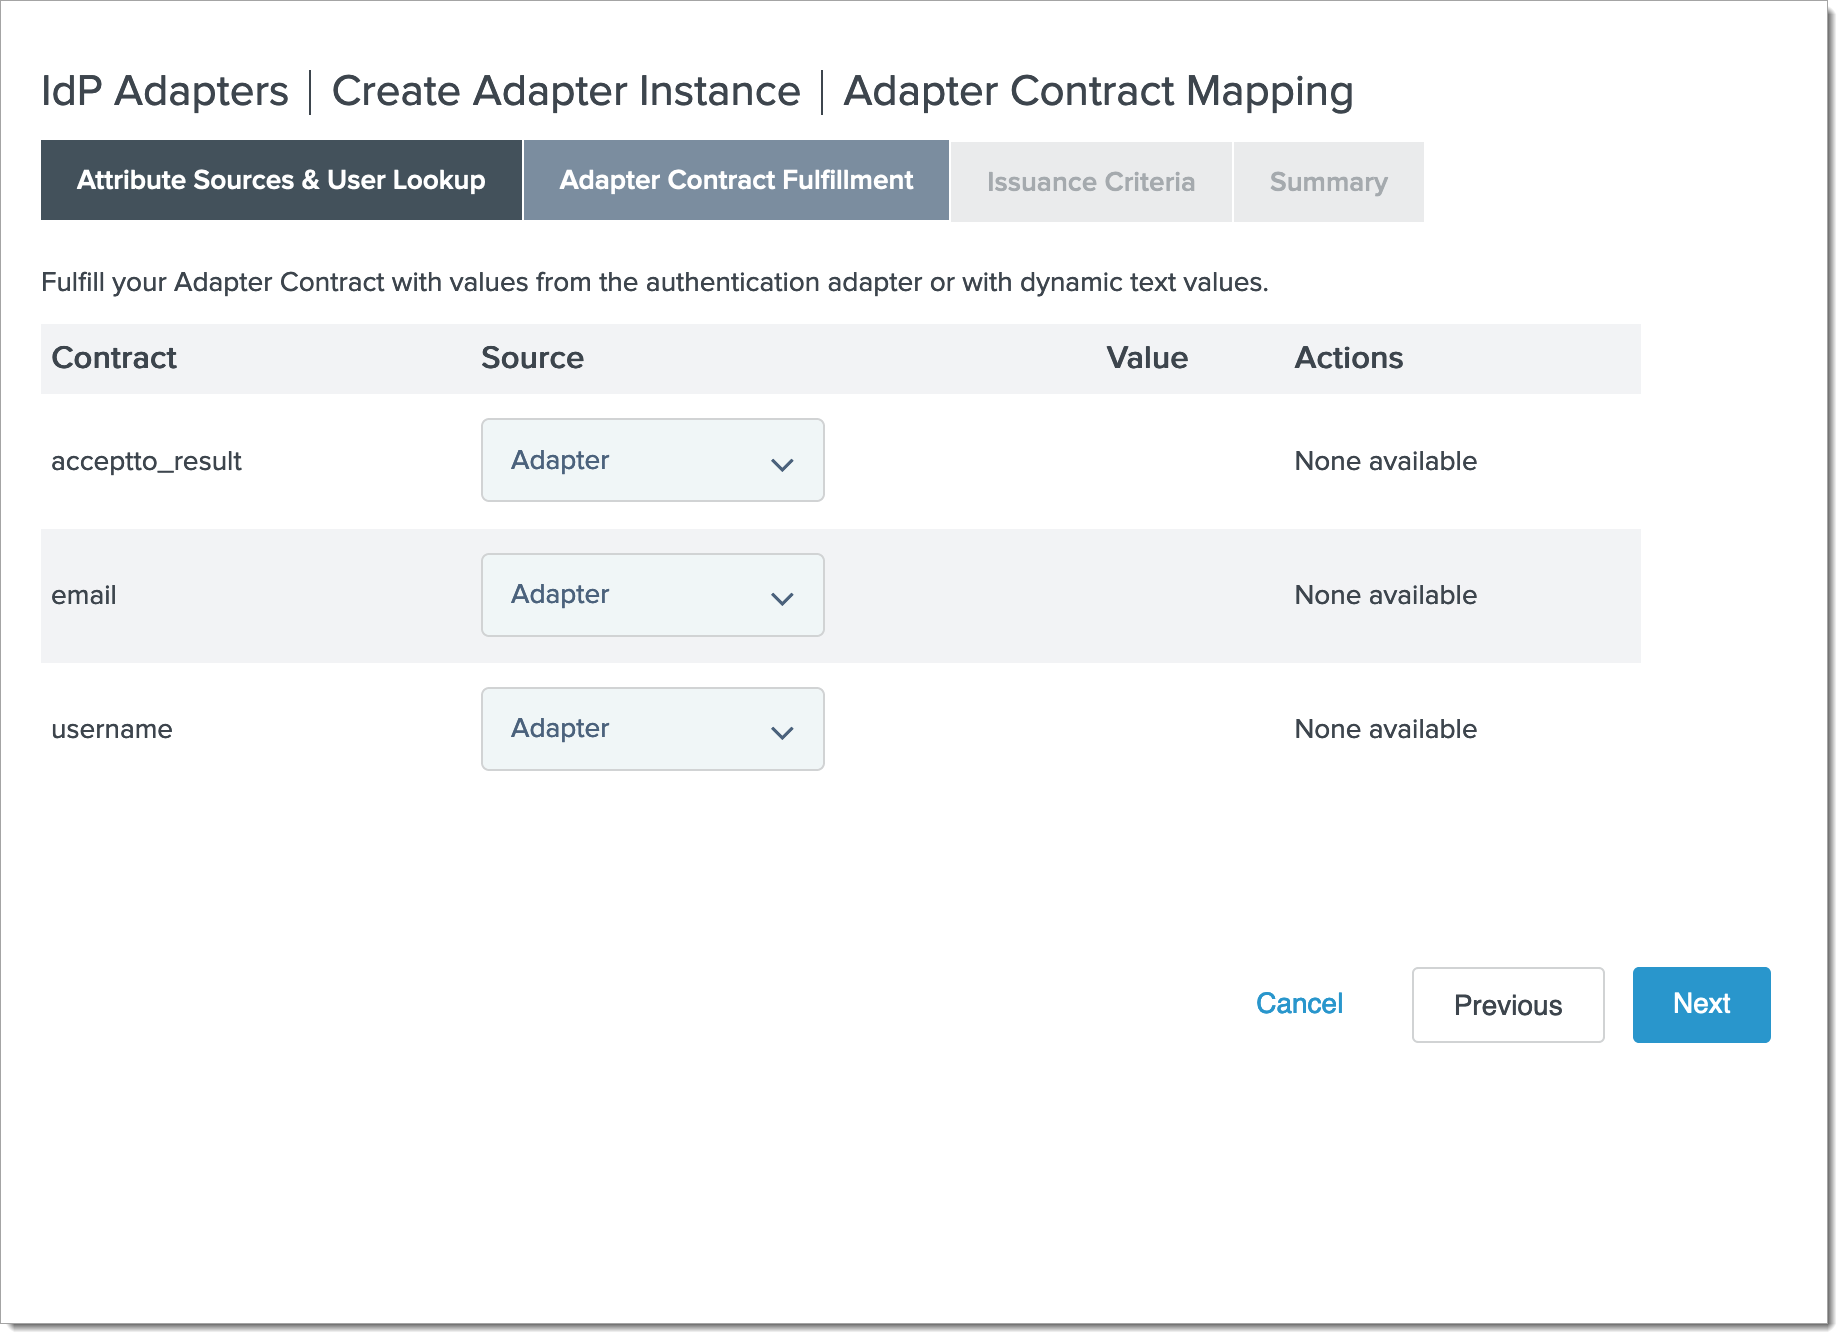
Click Next.
In the Issuance Criteria section, click Next.
Click Done.
Click Next.
Click Save.
Add chained adapter
In order to enable Arculix's MFA after initial authentication, we use a chained adapter.
Select Authentication > IdP Adapters > Create New Instance.
In the Type section, set the following:
Instance Name
Enter a unique name.
For example, Chained Arculix.
Instance Id
Enter a unique ID.
For example, chained.
Type
Set to Composite Adapter.
Parent Instance
Set to None.
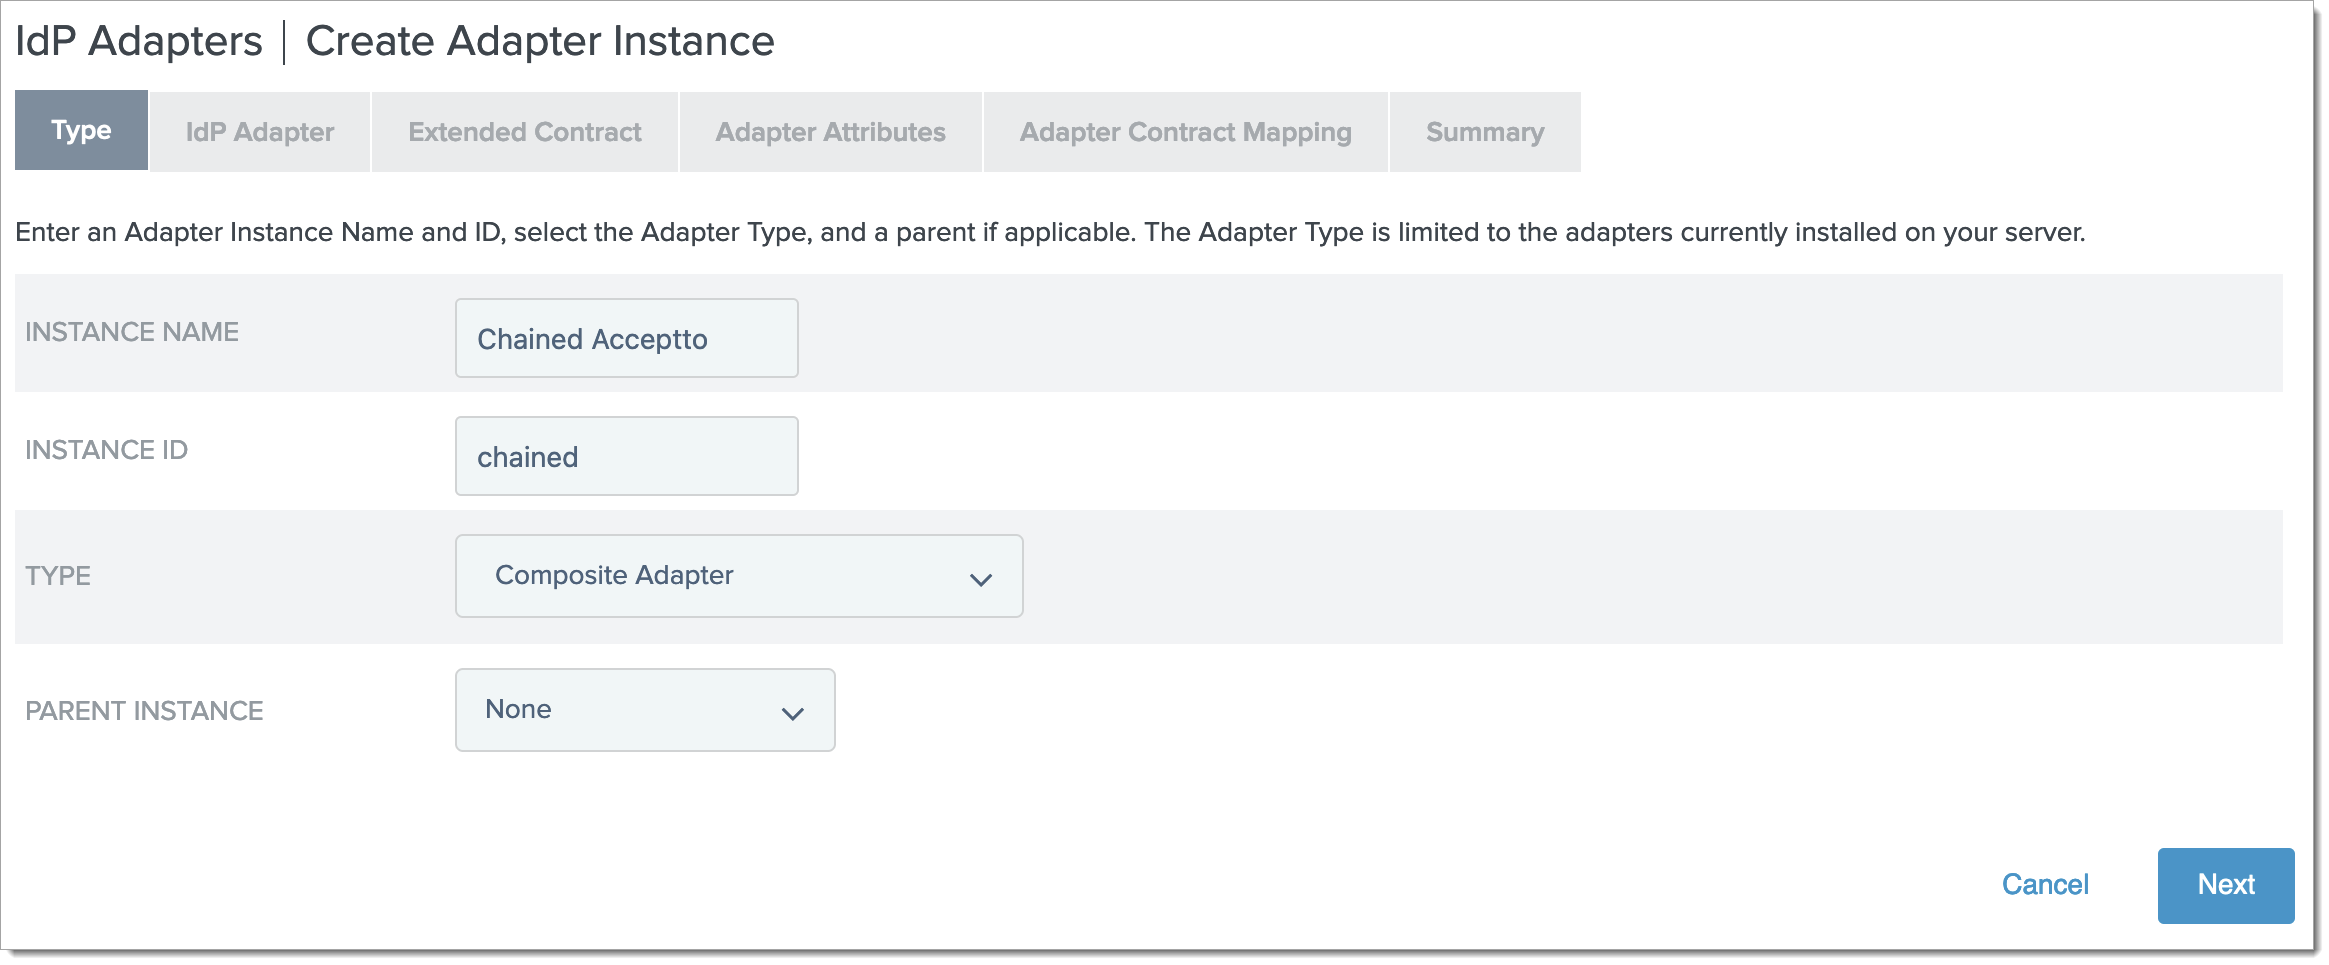
Click Next.
In the IdP Adapter > Adapters section, do the following:
Click the Add a new row to 'Adapters' link.
Set Adapter Instance to HTMLFormPD (or your primary authentication adapter).
Click Update.
Click the Add a new row to 'Adapters' link.
Set Adapter Instance to your adapter instance. For example, Arculix.
Click Update.
In the IdP Adapter > Input User ID Mapping section, do the following:
Click the Add a new row to 'Input User ID Mapping' link and set the following:
Target Adapter
Set to HTMLFormPD (or your primary authentication adapter).
User ID Selection
Set to username.
Click Update.
Click the Add a new row to 'Input User ID Mapping' link and set the following:
Target Adapter
Set to to your adapter instance.
For example, Arculix.
User ID Selection
Set to email.
Click Update.
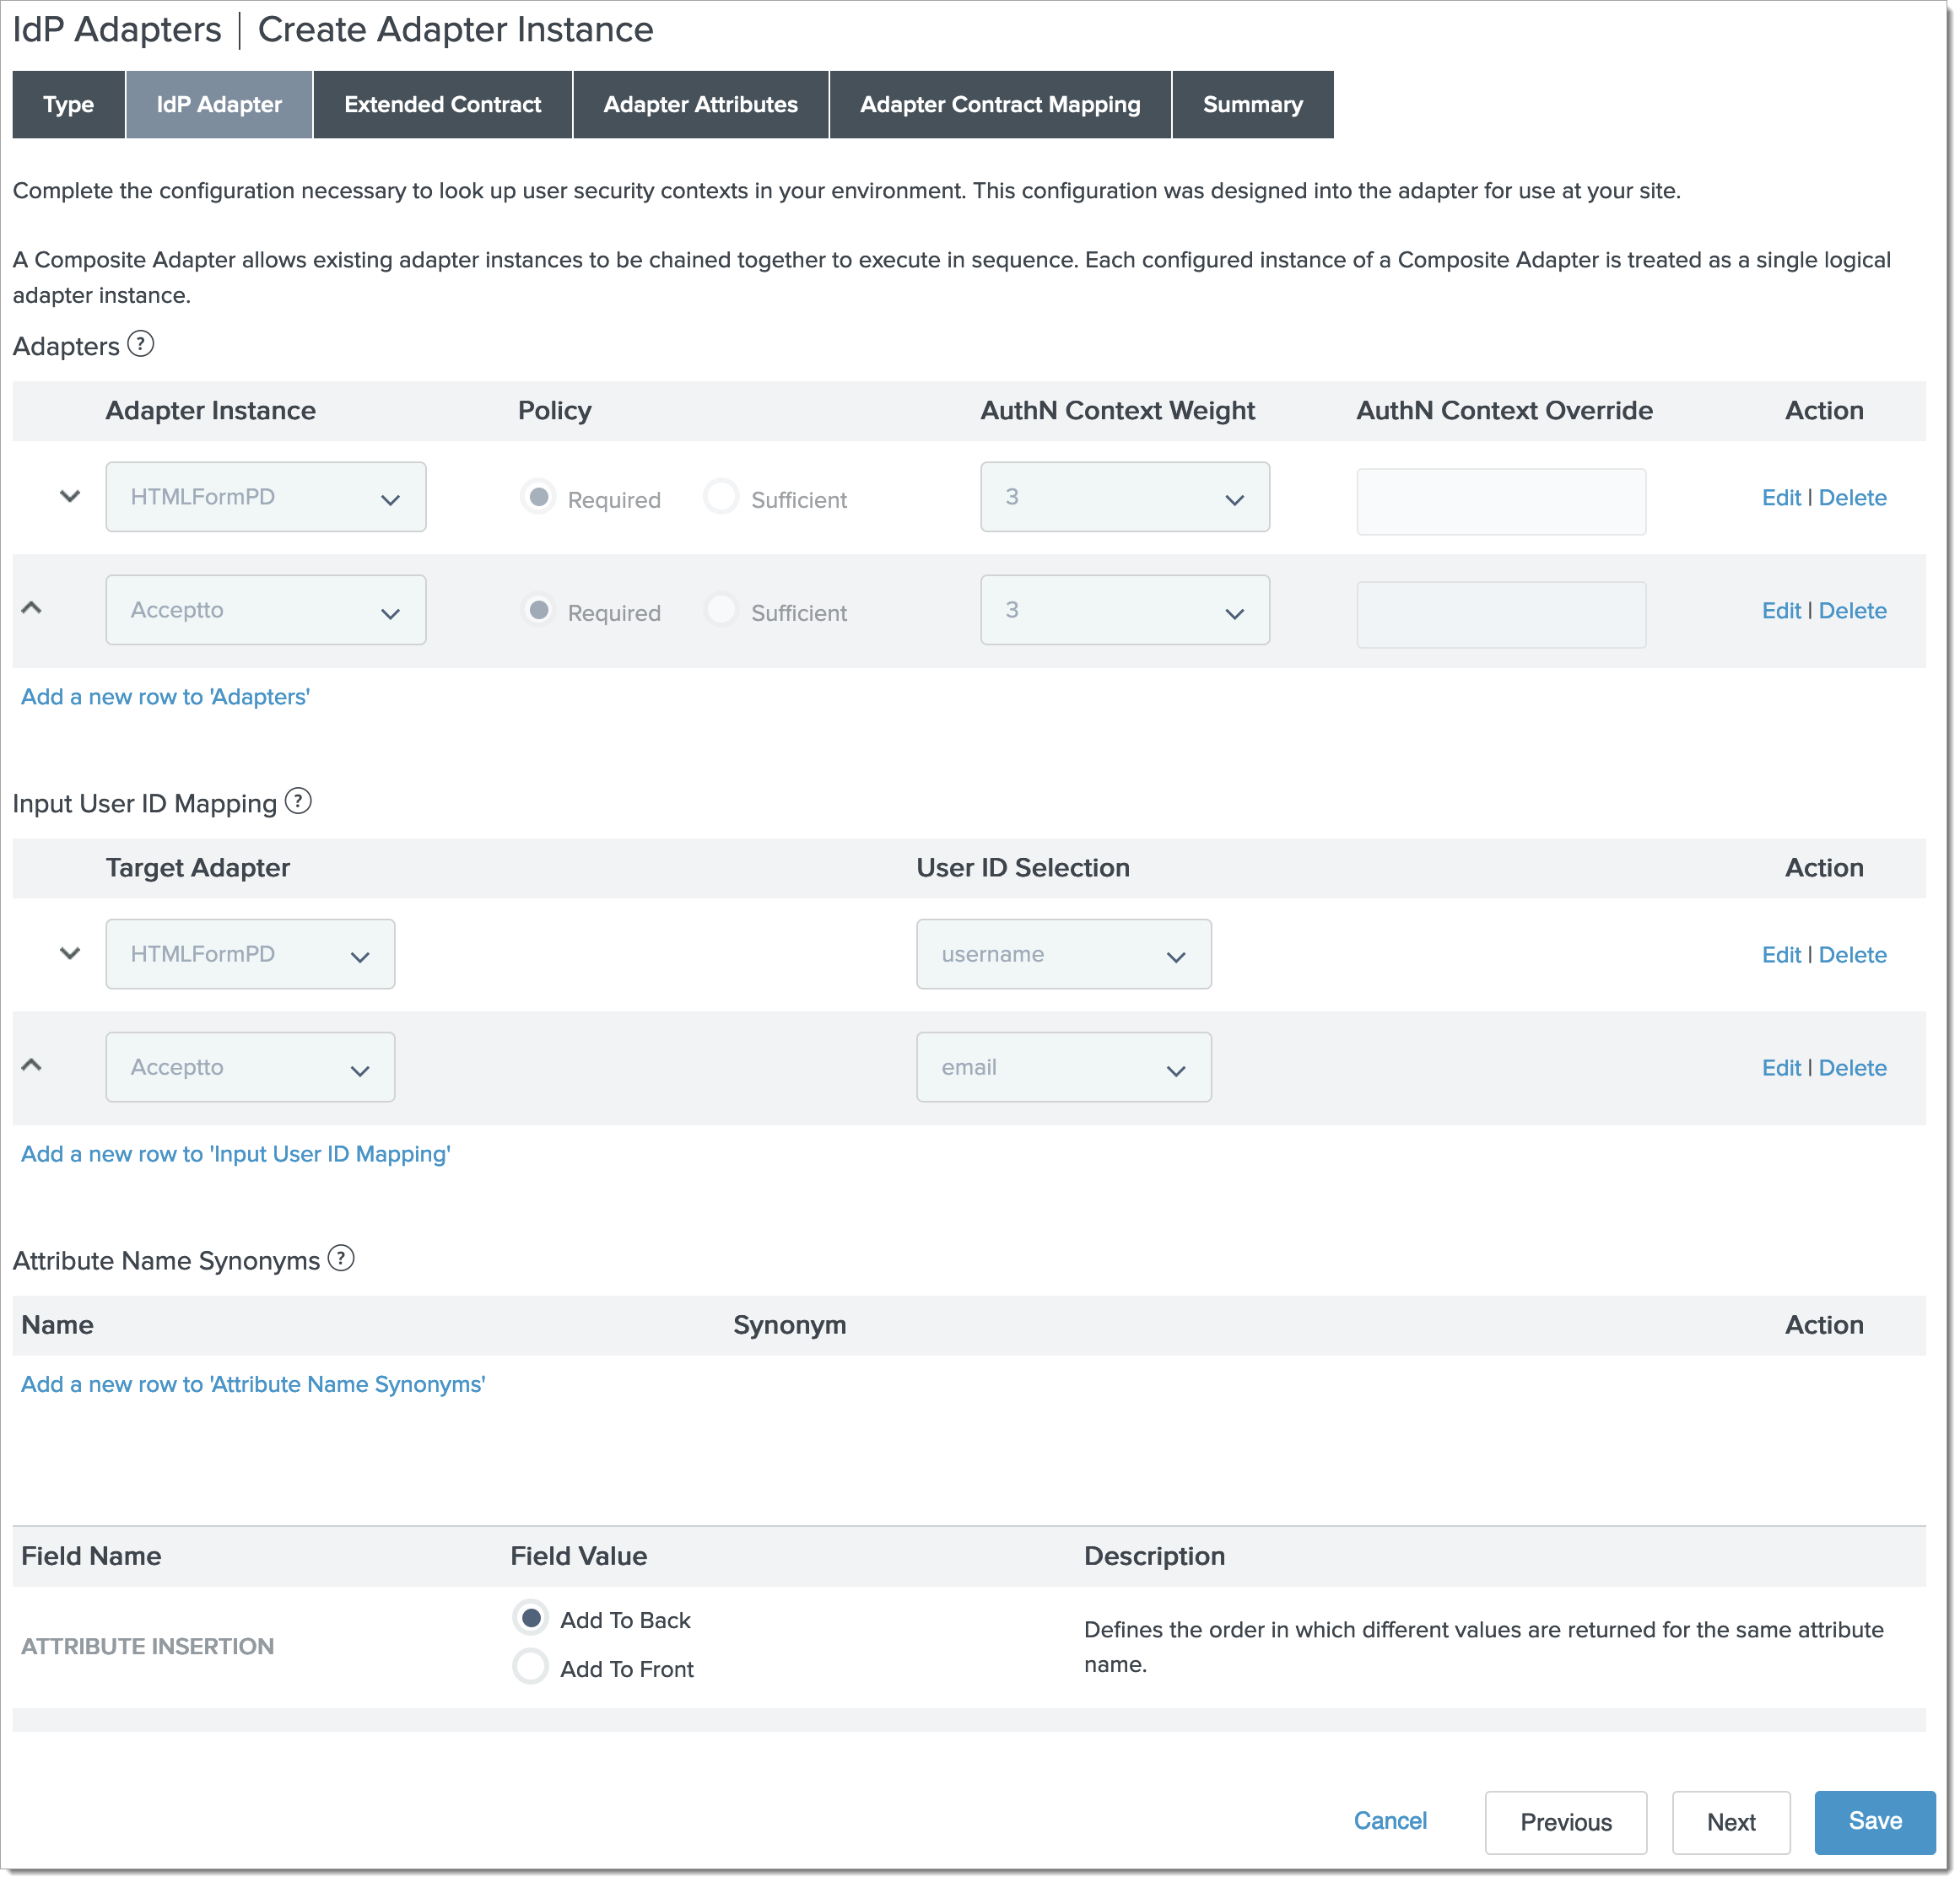
Click Next.
In the Extended Contract section, do the following:
Under Extend the Contract, enter username.
Click Add.
Under Extend the Contract,. enter email.
Click Add.
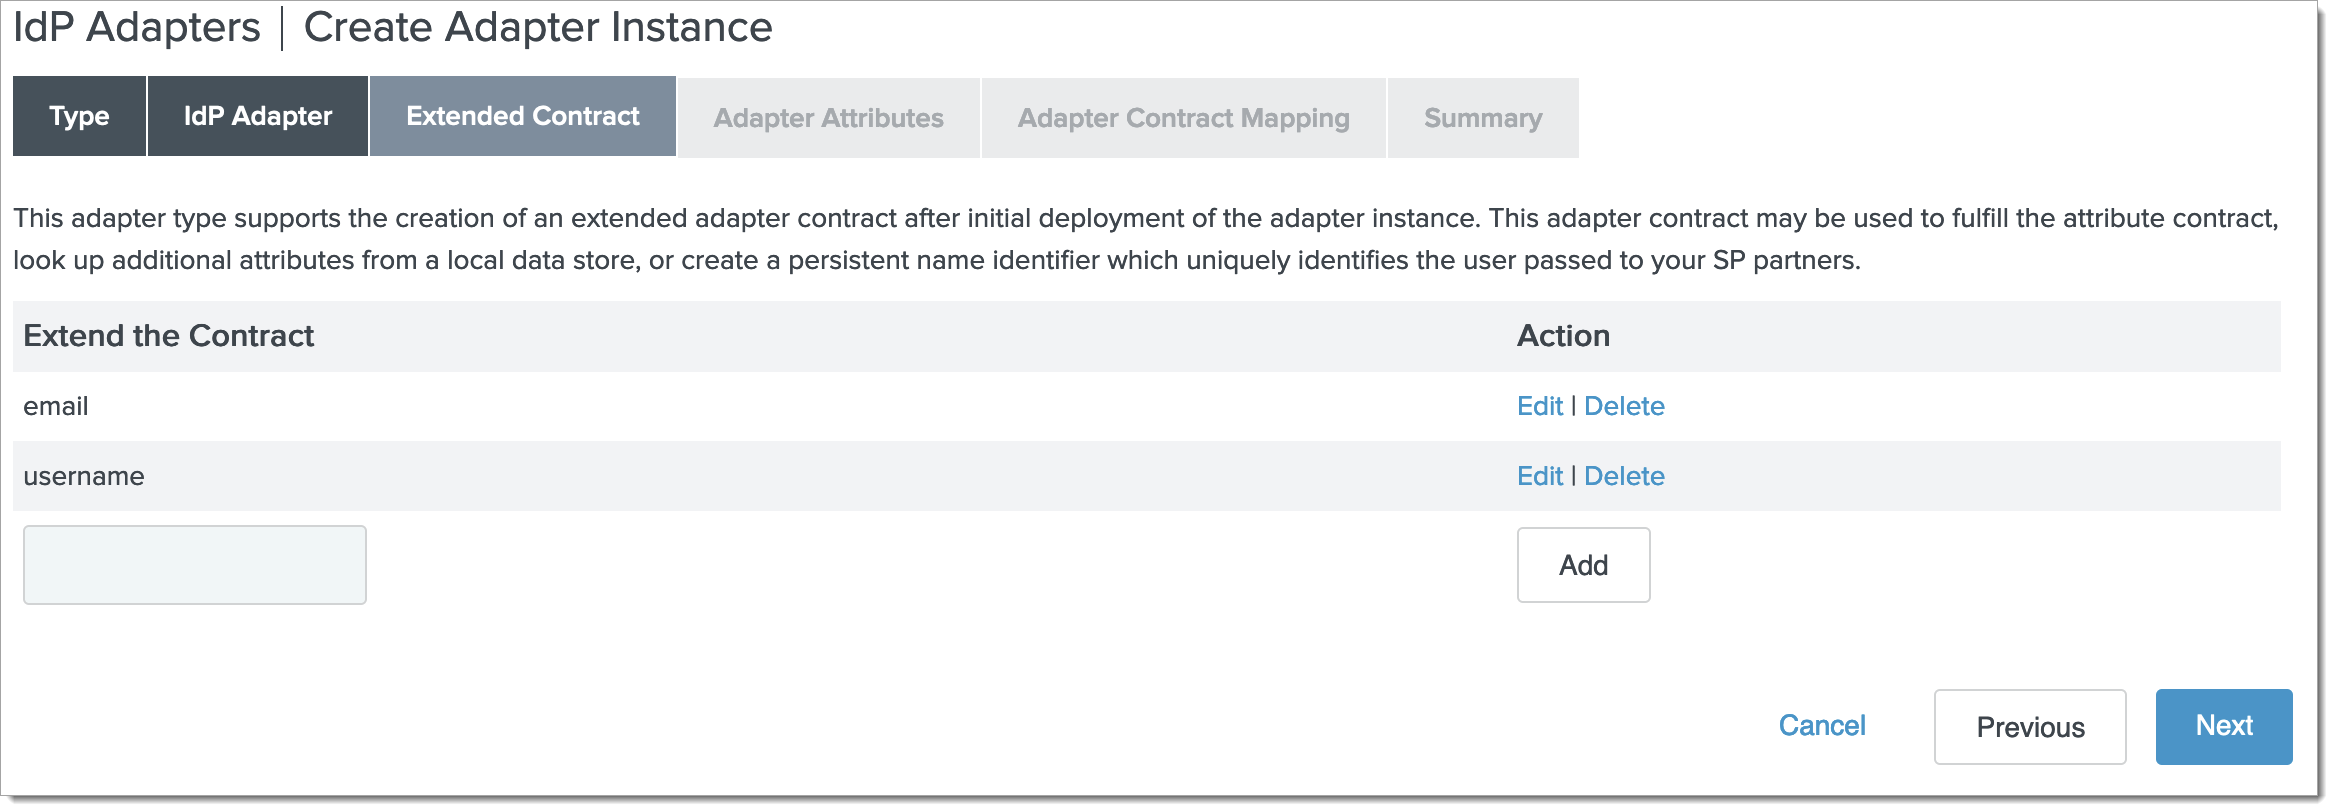
Click Next.
In the Adapter Attributes section, set the following:
Unique User Key Attribute
Set to email.
email
Select the Pseudonym check box.
Click Next.
Click Configure Adapter Contract and do the following:
In the Attribute sources & User Lookup section, click Next.
In the Adapter Contract Fulfillment section, set the following:
arculix_result
Set to Adapter.
email
Set to Adapter.
username
Set to Adapter.
Click Next.
In the Issuance Criteria section, click Next.
Click Done.
Click Next.
Click Save.
Add application to Arculix
Add PingFederate IdP Factor as a service provider in the Arculix admin panel. Some required information can be found in PingFederate.
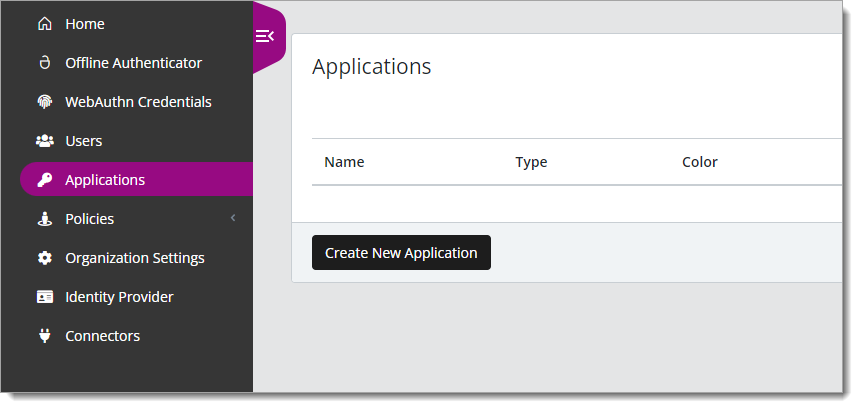
Log in to Arculix with an administrative account and go to Applications.
Click Create New Application.
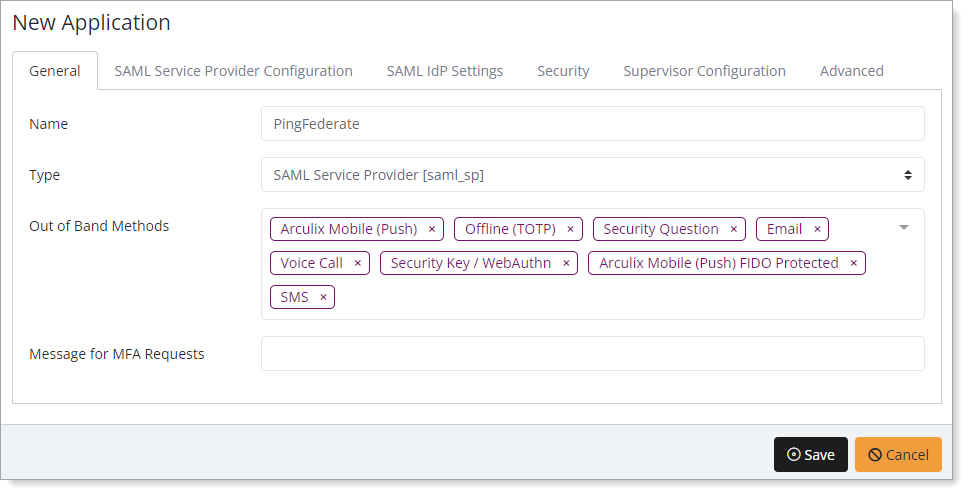
In the New Application form, on the General tab, set the following configurations:
Name
Set the name of the application. This is the name to display for push notifications, in the Admin panel, Application portal, and audit logs.
For example, PingFederate.
Type
Set to SAML Service Provider.
Out of Band Methods
Select the allowed methods end users can choose to approve MFA requests.
For example, Arculix Mobile app (push notifications), SMS, or Security Key.
Message for MFA Requests
Optional. Type a message displayed to end users when sending an MFA request via push notification, SMS, or email.
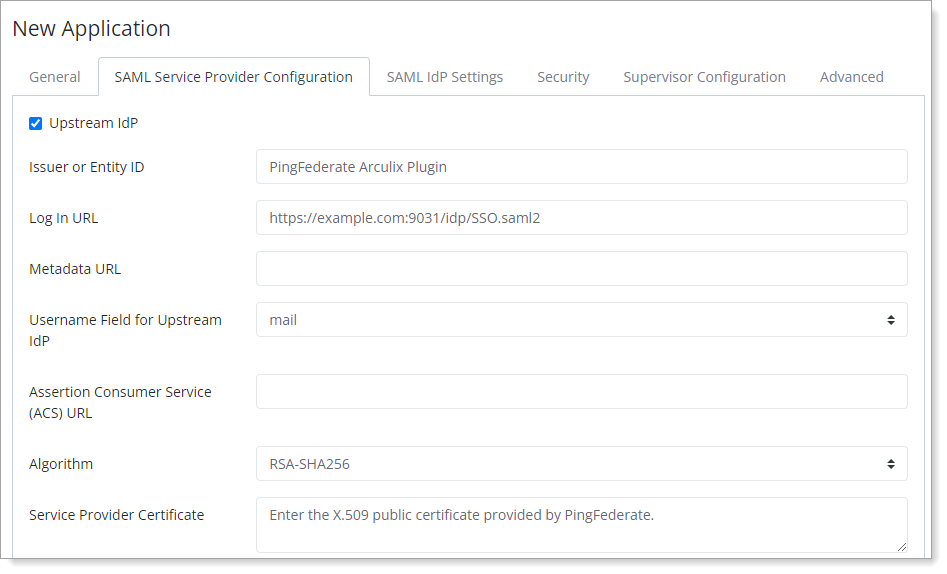
Select the SAML Service Provider Configuration tab, and set the following configurations:
Upstream IdP
Select the check box.
Issuer or Entity ID
Enter the Application Issuer ID provided by PingFederate.
Log in URL
Enter the URL provided by PingFederate.
Metadata URL
Leave blank.
Username Field for Upstream IdP
Set to mail.
ACS URL
Leave blank.
Certificate
Enter the X.509 public certificate provided by PingFederate.
Save your changes.
User Experience
After the admin has enabled IdP factor MFA, the user will be prompted to add this custom factor on their next login via PingFederate.
The user then selects the IdP Factor option and is taken to a QR pairing screen.
They can then download the Arculix Mobile application from Google Play Store or Apple App Store.
The user opens the mobile application and is prompted to scan the displayed QR code.
After scanning the QR code, the user's device is paired.
On subsequent authentication attempts, the user will be asked to confirm the IdP factor MFA and be taken to the select MFA option by PingFederate.
Upon approval of MFA, the user will be authenticated to their application.