HashiCorp Vault OIDC integration
Multi-Factor Authentication (MFA) is an extra layer of security used when logging into websites or apps. Individuals are authenticated through more than one required security and validation procedure that only they know or have access to.
OIDC (OpenID Connect) is an open standard protocol that provides a way to authenticate and authorize access to applications without giving the application your login credentials.
Arculix by SecureAuth, offers a simple method for adding single sign-on (SSO) MFA to HashiCorp Vault with its OIDC solution.
Prerequisites
Configured Arculix instance and user account with administrative privileges for Arculix.
Configured Arculix LDAP Agent.
For more information, see the LDAP Agent deployment guide.
User account with the following permissions configured for HashiCorp Vault or use the HashiCorp Vault root token token.
# Mount the OIDC auth method
path "sys/auth/oidc" {
  capabilities = [ "create", "read", "update", "delete", "sudo" ]
}

# Configure the OIDC auth method
path "auth/oidc/*" {
  capabilities = [ "create", "read", "update", "delete", "list" ]
}

# Write ACL policies
path "sys/policies/acl/*" {
  capabilities = [ "create", "read", "update", "delete", "list" ]
}

# List available secrets engines to retrieve accessor ID
path "sys/mounts" {
  capabilities = [ "read" ]
}
Add OIDC application in Arculix
In this section, you'll configure Arculix to act as an OIDC Provider to authenticate the user and grant access to HashiCorp Vault.
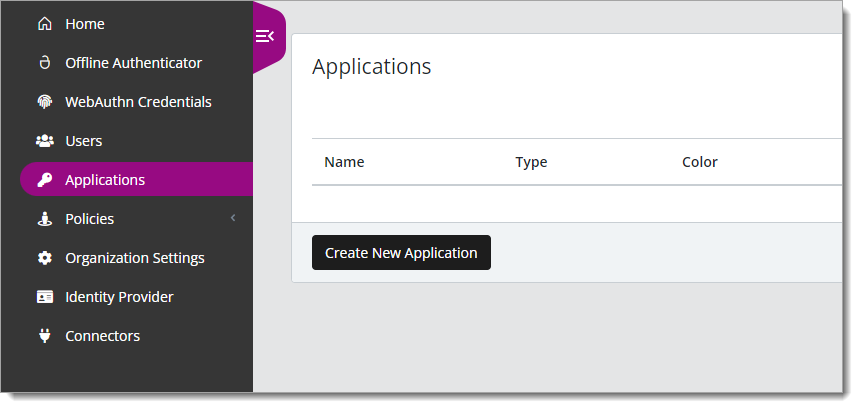
Log in to Arculix with an administrative account and go to Applications.
Click Create New Application.
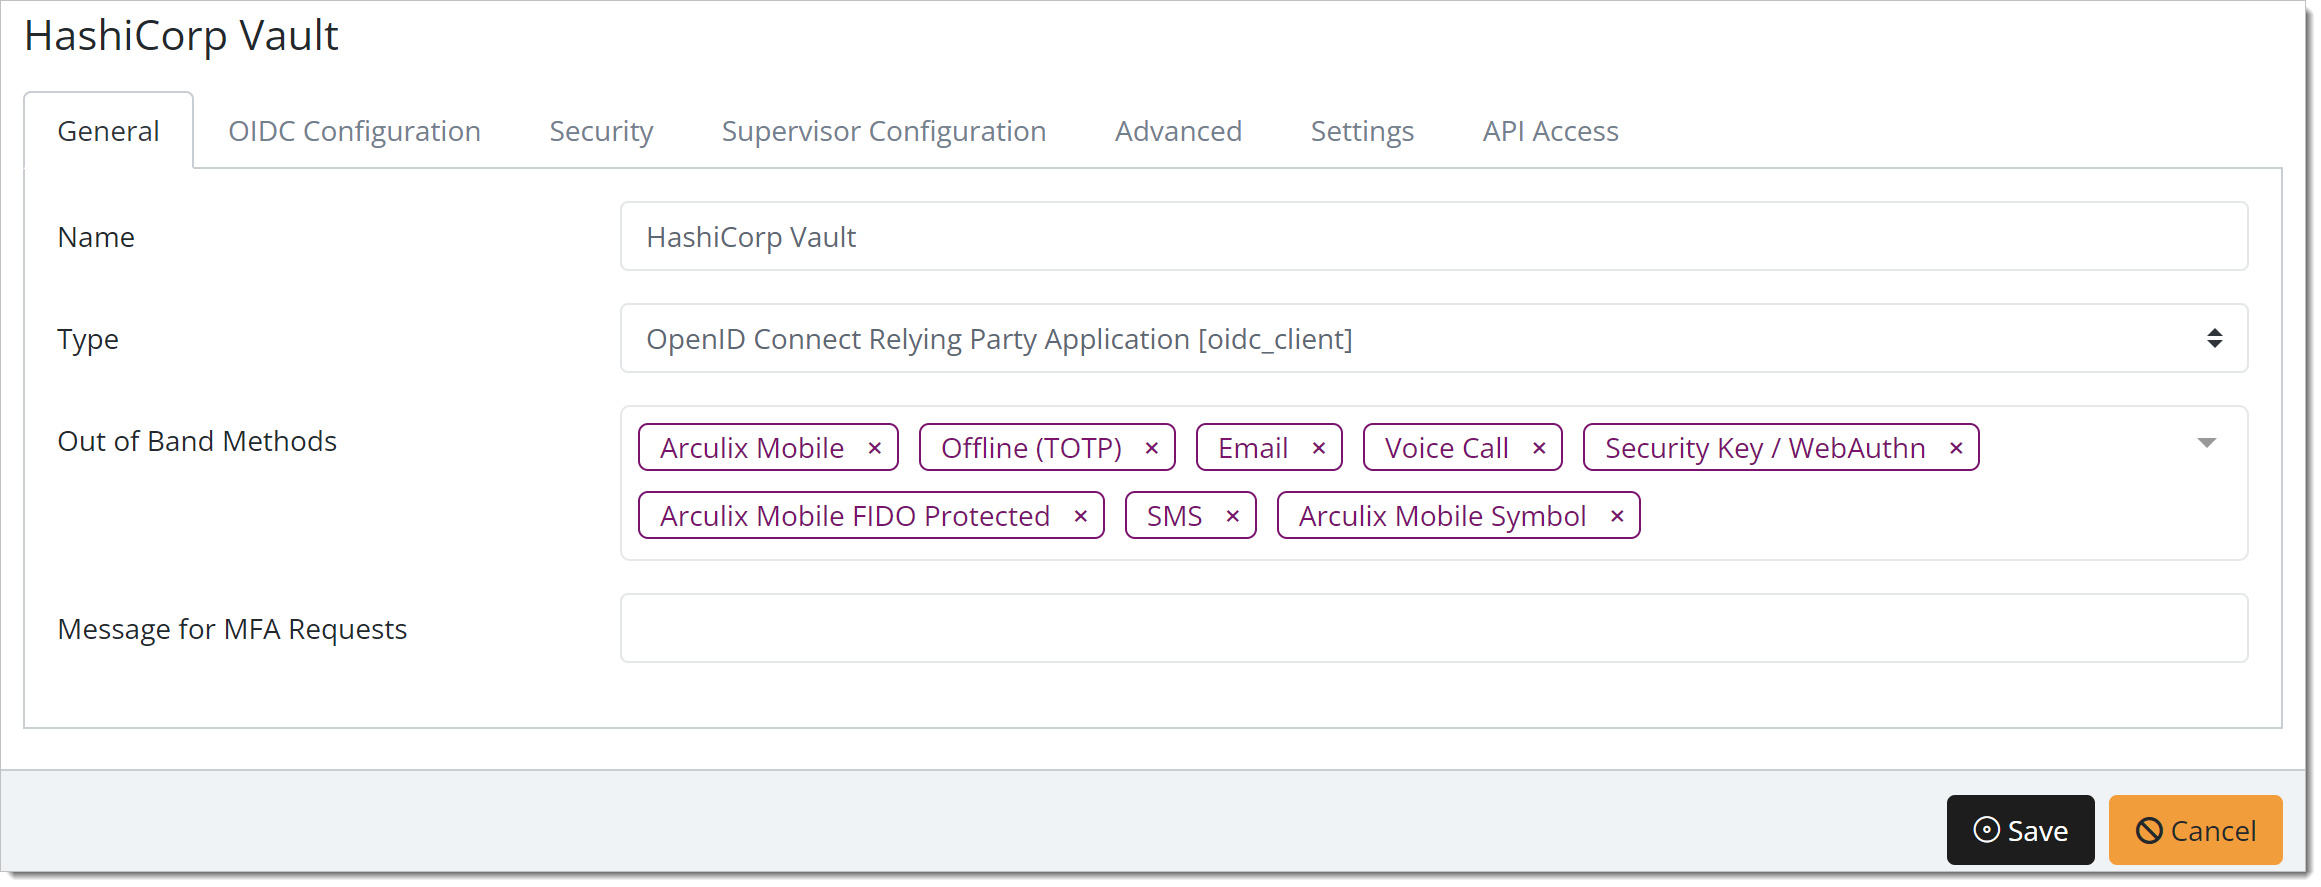
In the New Application form, on the General tab, set the following configurations:
Name
Set the name of the application. This is the name to display for push notifications, in the Admin panel, Application portal, and audit logs.
For example, HashiCorp Vault.
Type
Set to OpenID Connect Relying Party Application [oidc_client].
Out of Band Methods
Select the allowed methods end users can choose to approve MFA requests.
For example, Arculix Mobile app (push notifications), SMS, or Security Key.
Message for MFA Requests
Optional. Type a message displayed to end users when sending an MFA request via push notification, SMS, or email.
Select the OIDC Configuration tab, and set the following configurations:
Login
Login URL
Optional. Enter the login URL for your HashiCorp Vault instance.
Redirect URLs
Enter the redirect URL (Redirect_uri) that Arculix will use to send back the authorization code.
You can register more than one redirect URL (Redirect_uri).
If you are running Vault locally, it should be:
https://<your-local-instance-address>:8250/oidc/callback, https://<your-local-instance-address>:8200/ui/vault/auth/oidc/oidc/callbackIf you are running Vault in HCP, replace
-URL-with the public address of your HCP Vault, and it should be:https://<your-local-instance-address>:8250/oidc/callback, -URL-/ui/vault/auth/oidc/oidc/callbackClient Settings
Application Type
Set to Web application.
Grant Type
Set to Authorization code – User logs in to the application, then the application redirects the flow to Arculix for authentication. After authentication, Arculix returns an authorization code to the application, then exchanges the code for an access token and an identity token.
Authentication Method
Set to Basic – Basic authentication method that transmits the client secret in clear text. To ensure the security of the client secret, use HTTPS to encrypt the communication.
Scopes and Claims
Scopes
Select the following scopes:
profile – Allow access to user's profile information like postal address and phone number.
email – Allow access to user's email address.
Session
Access Token Timeout
Set how long the access token is valid for before it times out. By default this set to 1 minute.
Refresh Token Timeout
Set how long the refresh token is valid for before it times out and requires the user to reauthenticate. By default this is set to 1 day.

Save your changes.
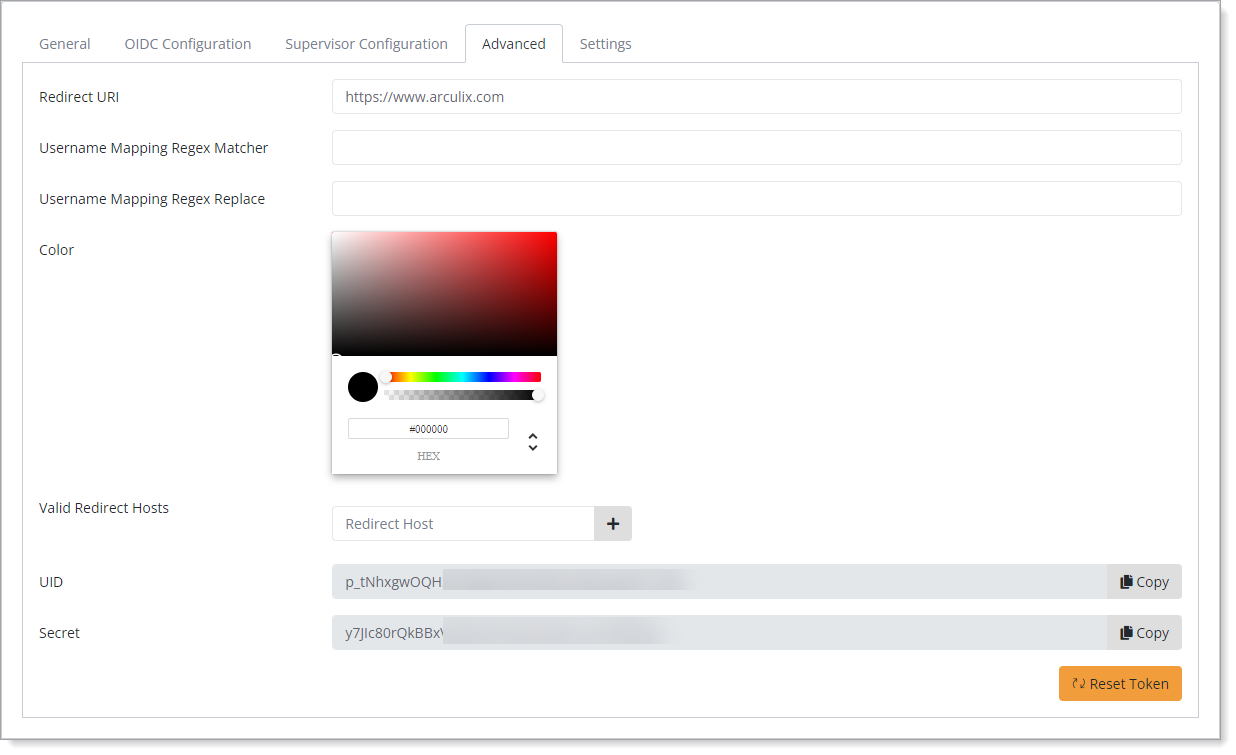
Edit the configured OIDC application and select the Advanced tab.
Copy the UID and Secret values.
You will need these for the HashiCorp Vault configuration.
HashiCorp Vault configuration
In this section, you will configure the HashiCorp Vault application that supports OIDC.
For the initial configuration, do the following as applicable for Vault or HCP Vault.
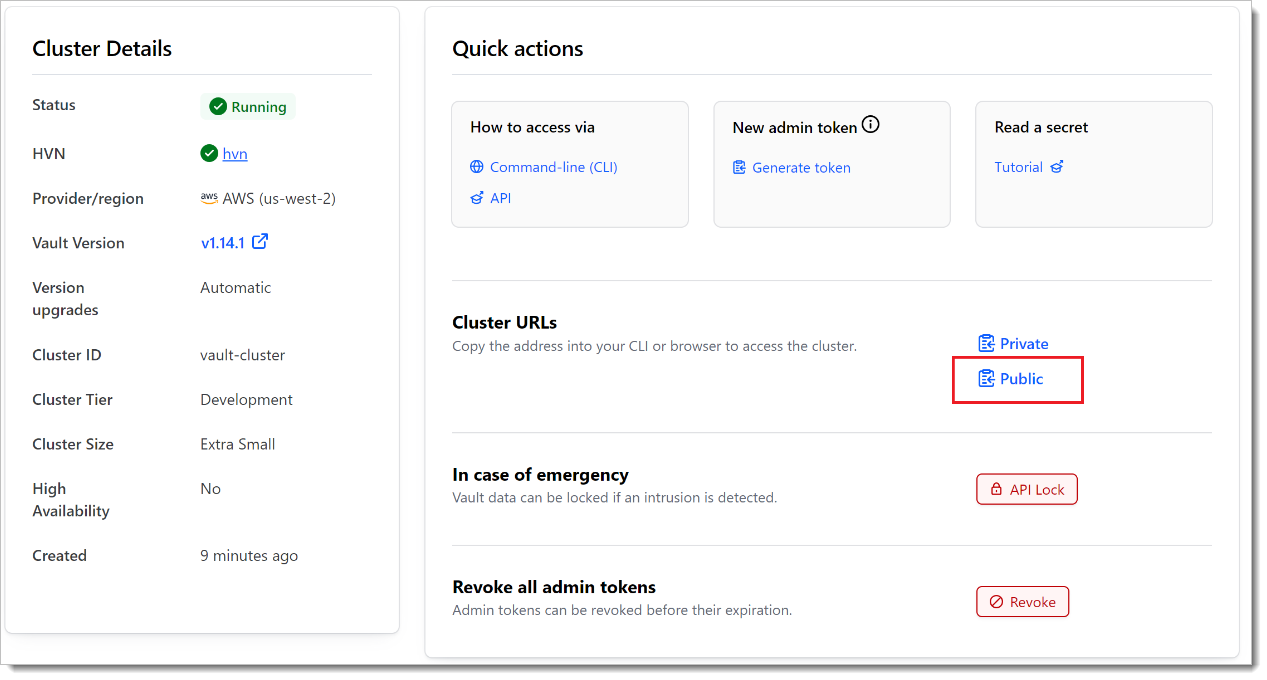
Open and log in to the HCP portal.
In the left navigation, click Vault.
In the Vault clusters pane, click vault-cluster.
In the Cluster URLs category, click Public.
Open a terminal and use the following command to set the VAULT_ADDR environment variable to the copied address.
Linux and Mac
export VAULT_ADDR=<Public_Cluster_URL>
Windows
set VAULT_ADDR=<Public_Cluster_URL>
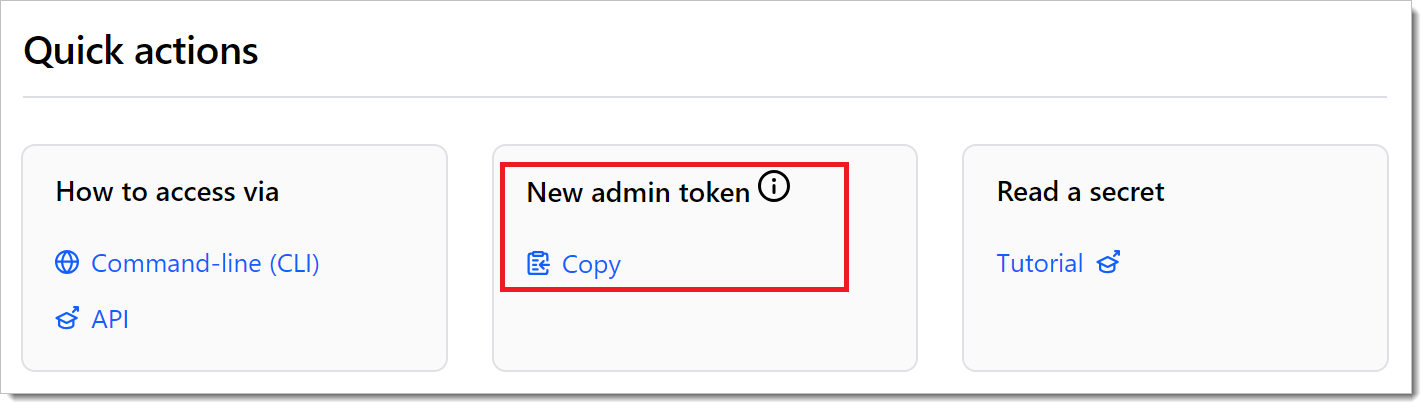
Go back to the Overview page and click Generate token.
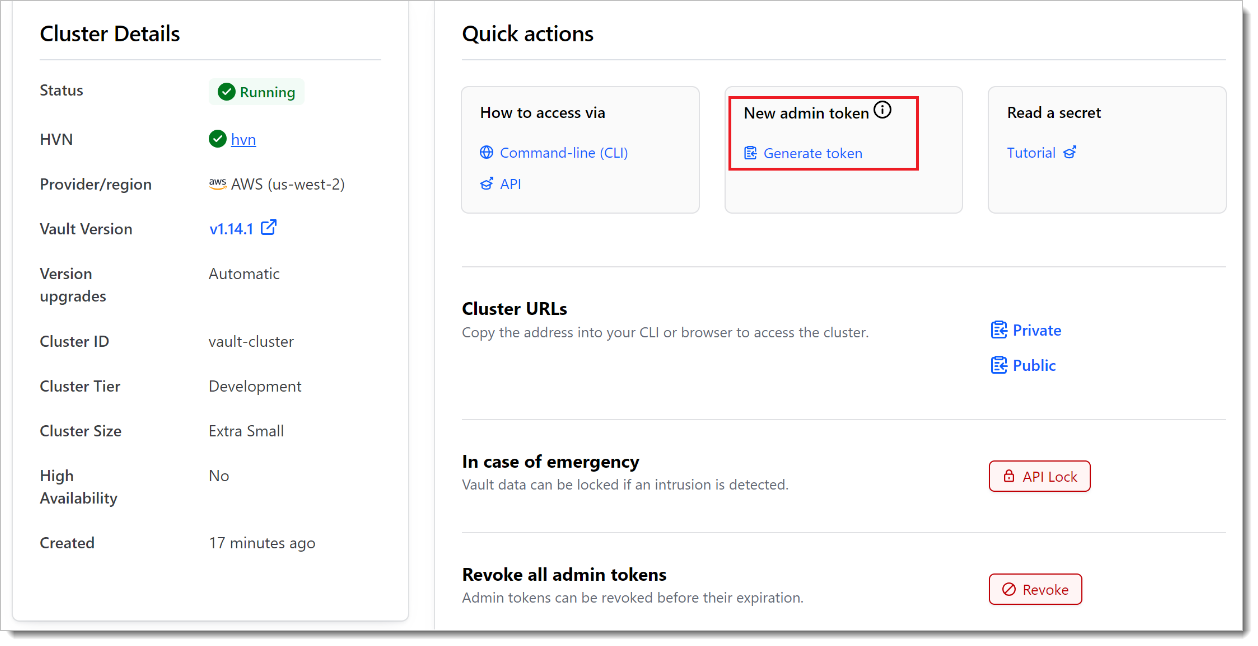
Wait a few moments for the token to generate, then Copy the token.
From the command line, set the VAULT_TOKEN environment variable.
Linux and Mac
export VAULT_TOKEN=<token>
Windows
set VAULT_TOKEN=<token>
Set the VAULT_NAMESPACE environment variable to admin.
The admin namespace is the top-level namespace automatically created by HCP Vault. All CLI operations default to use the namespace defined in this environment variable.
Linux and Mac
export VAULT_NAMESPACE=admin
Windows
set VAULT_NAMESPACE=admin
Use the following command to verify your connectivity to the Vault cluster.
Vault status
From the command line, create a variable for the Arculix secret.
Linux and Mac
export Arculix_secret=<Arculix-secret-from-OIDC-app-configuration>
Windows
set Arculix_secret=<Arculix-secret-from-OIDC-app-configuration>
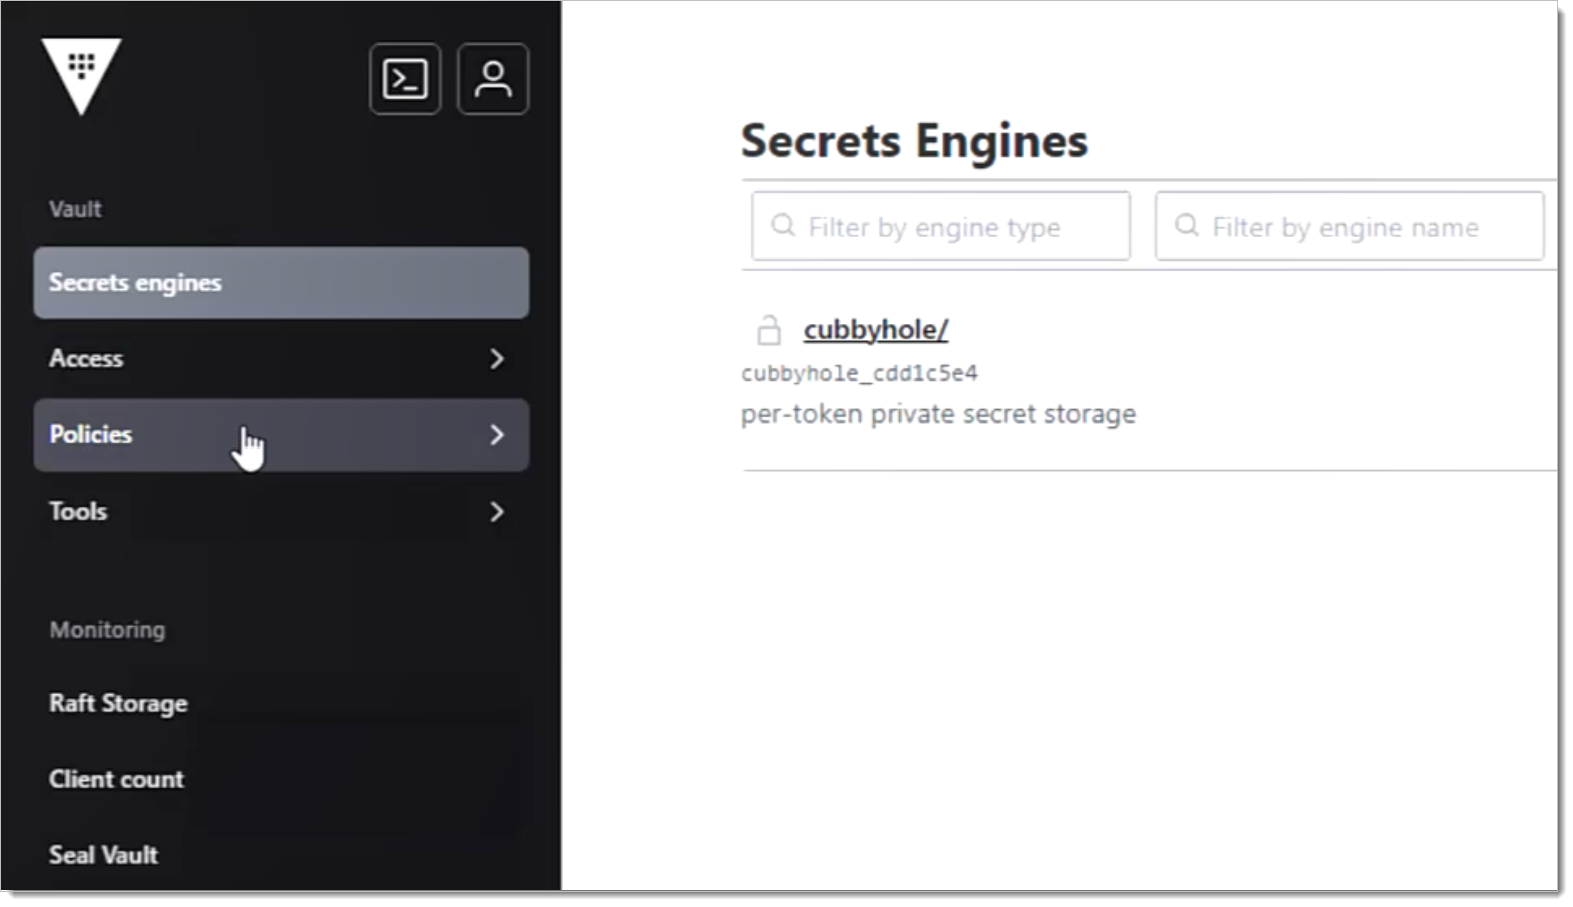
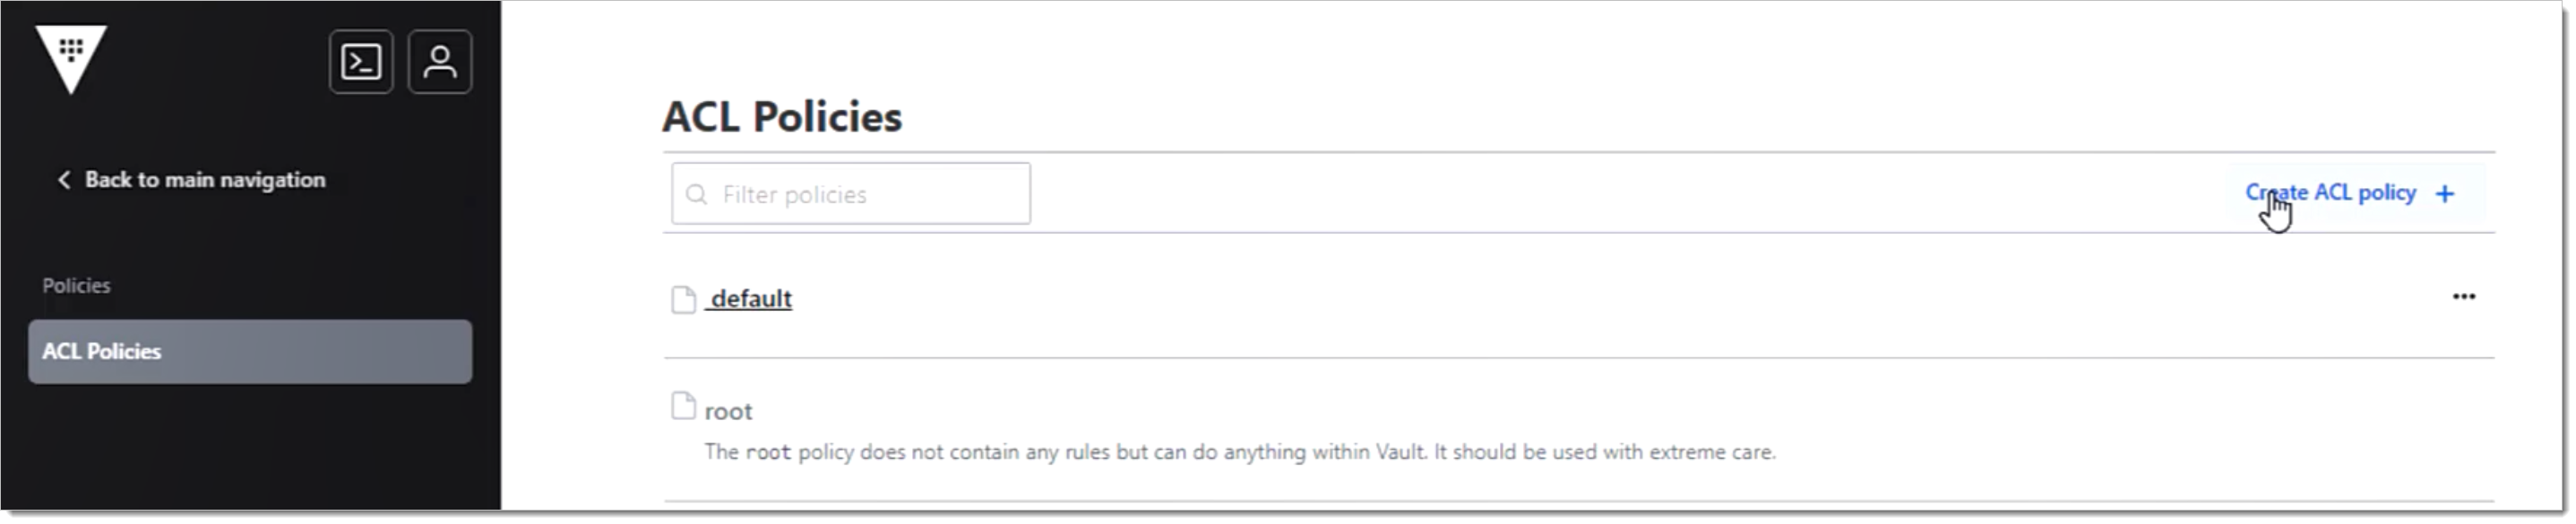
Log in to HashiCorp Vault with an administrator account and click Policies.
Click Create ACL policy.
In the Create ACL policy page, set the following:
Name
Enter a unique name for your policy.
For example, manager.
Policy
Enter the following code:
# Manage k/v secrets
path "/secret/*" {
    capabilities = ["create", "read", "update", "delete", "list"]
}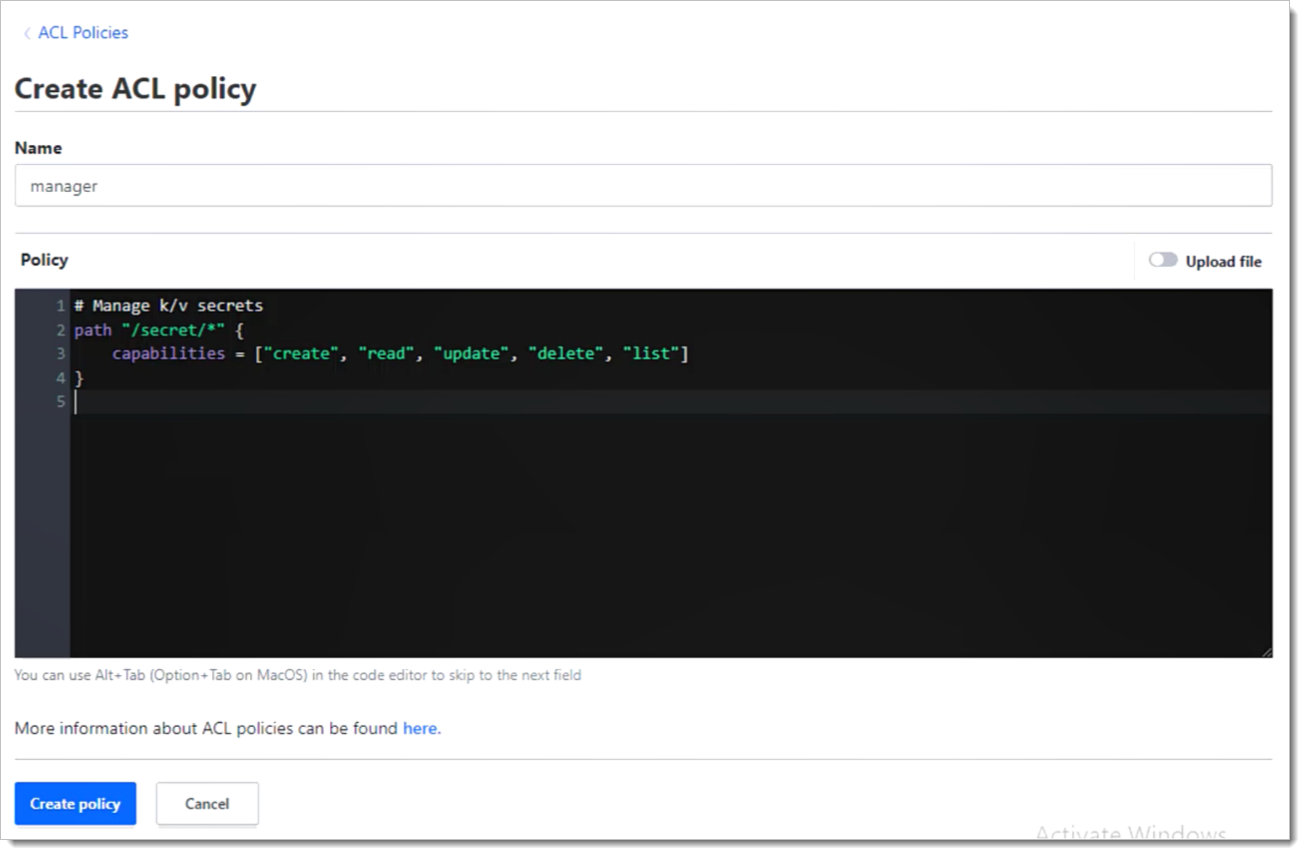
Click Create policy.
Return to ACL Policies to create another new policy.
In the Create ACL policy page, set the following:
Name
Enter a unique name for your policy.
For example, reader.
Policy
Enter the following code:
# Read permission on the k/v secrets
path "/secret/*" {
    capabilities = ["read", "list"]
}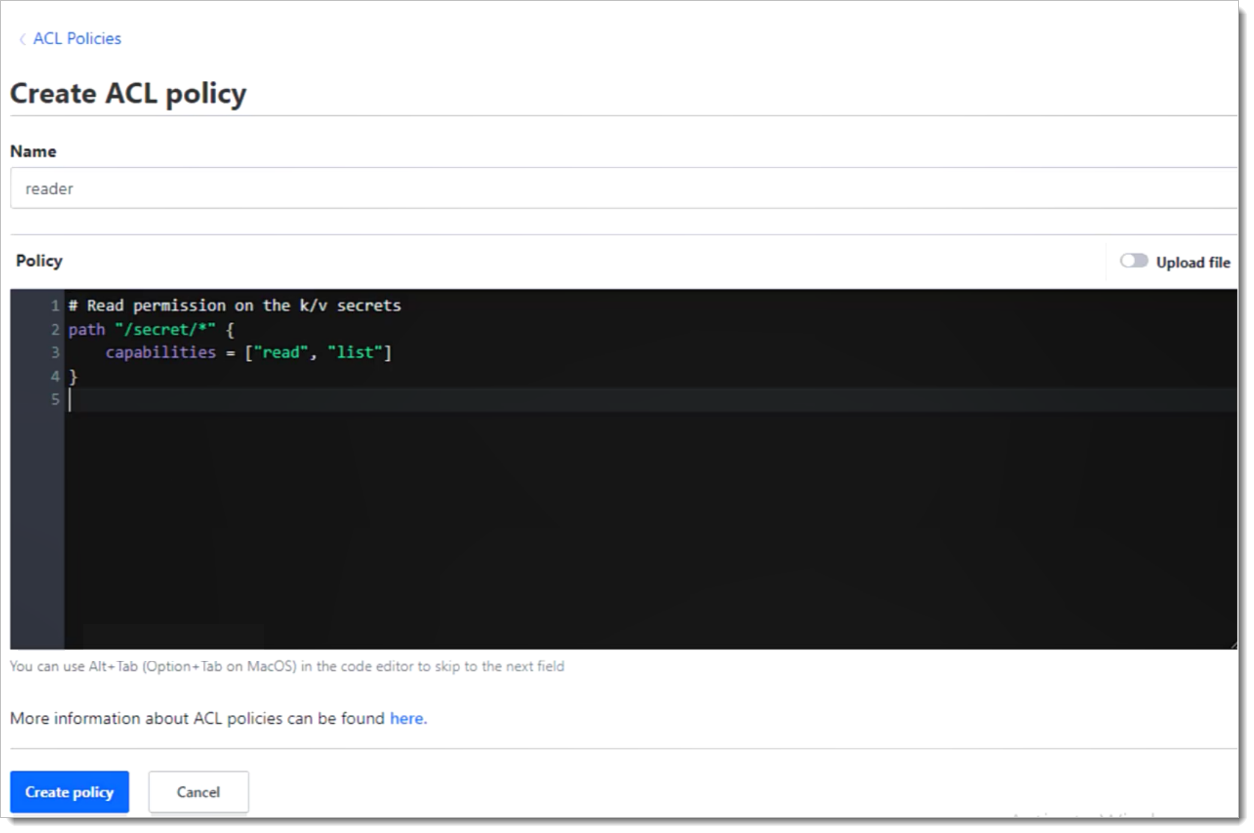
Click Create policy.
From the main navigation, go to Access to configure OIDC on HashiCorp Vault.

Click Enable new method.

On the Enable an Authentication Method page, select OIDC.
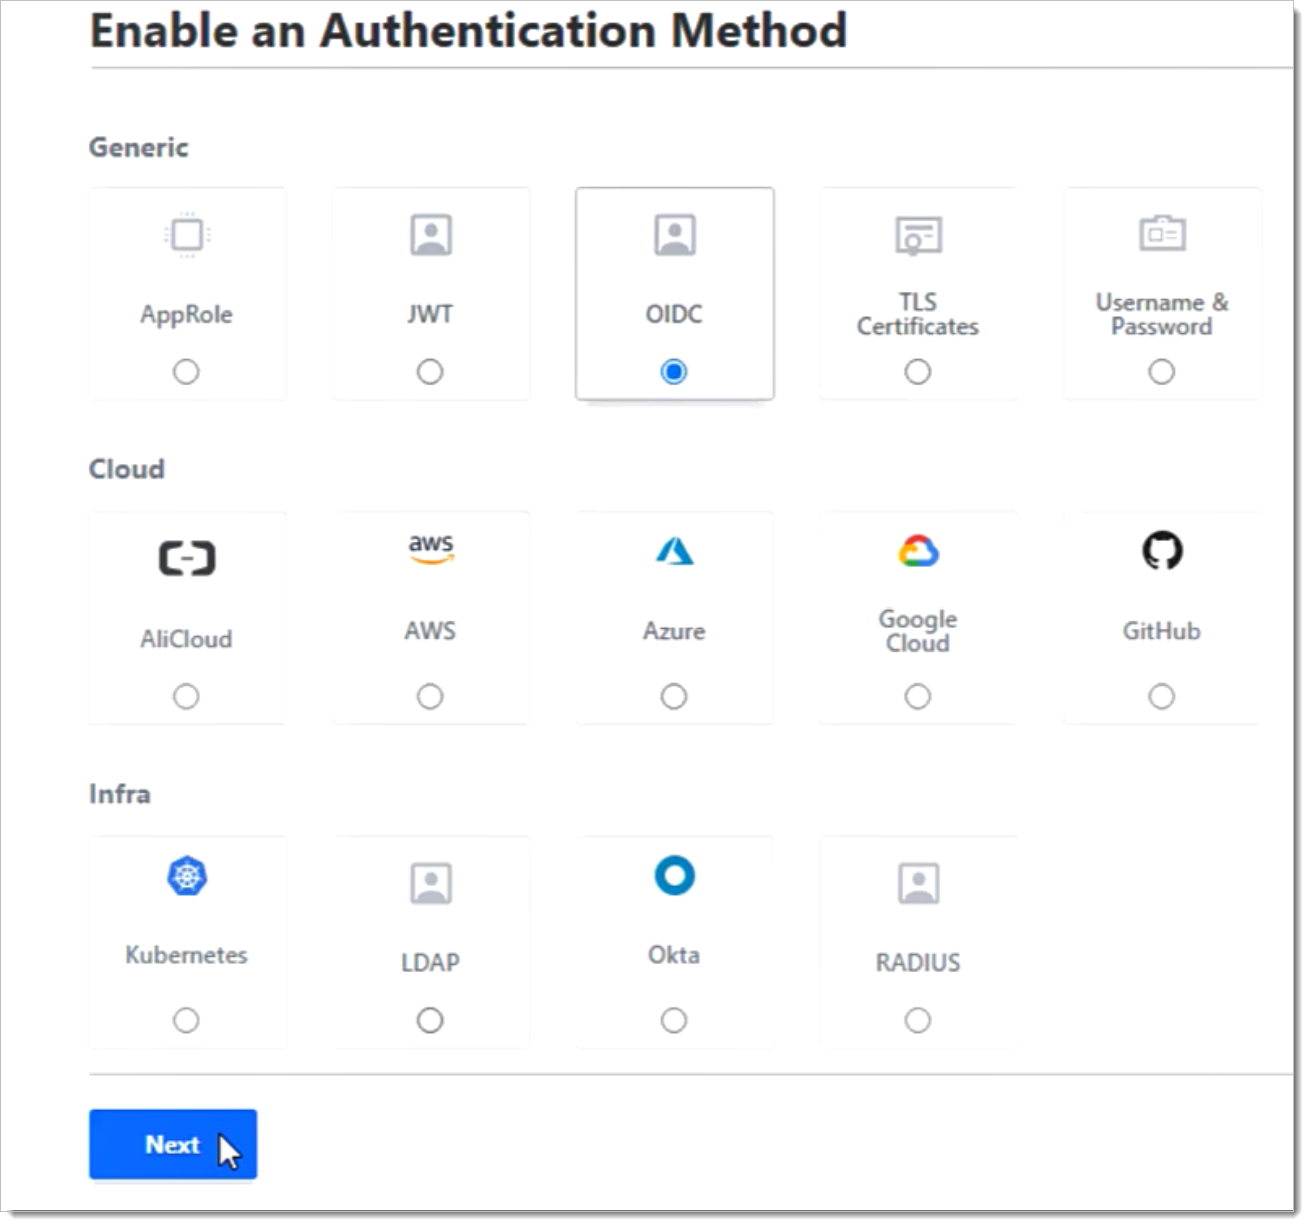
Click Next, then select Enable Method.
In the Configure OIDC section, set the following configurations:
OIDC discovery URL
Enter the Arculix discovery URL in this format:
https://oidc.acceptto.com/<organization>/oauth2/v1/Default role
Set to reader.
Toggle OIDC Options to expand it, and set the following:
OIDC Client ID
Enter the UID value copied from the HashiCorp Vault OIDC application in Arculix.
OIDC Client Secret
Enter the Secret value copied from the HashiCorp Vault OIDC application in Arculix.
Save your changes.
In the top left, click the Vault CLI shell icon (>_) to open a command shell.

Use the following commands in the terminal to create the reader role.
Note
The allowed_redirect_uris and allowed_redirect_uris use the Redirect URLs defined in the Arculix configuration.
The user_claim sets the claim to use to uniquely identify the user.
vault write auth/oidc/role/reader \
      bound_audiences="$AUTH0_CLIENT_ID" \
      allowed_redirect_uris="https://<your-local-instance address>:8200/ui/vault/auth/oidc/oidc/callback" \
      allowed_redirect_uris="https://<your-local-instance address>:8250/oidc/callback" \
      user_claim="sub" \
      token_policies="reader"
Test your OIDC application integration
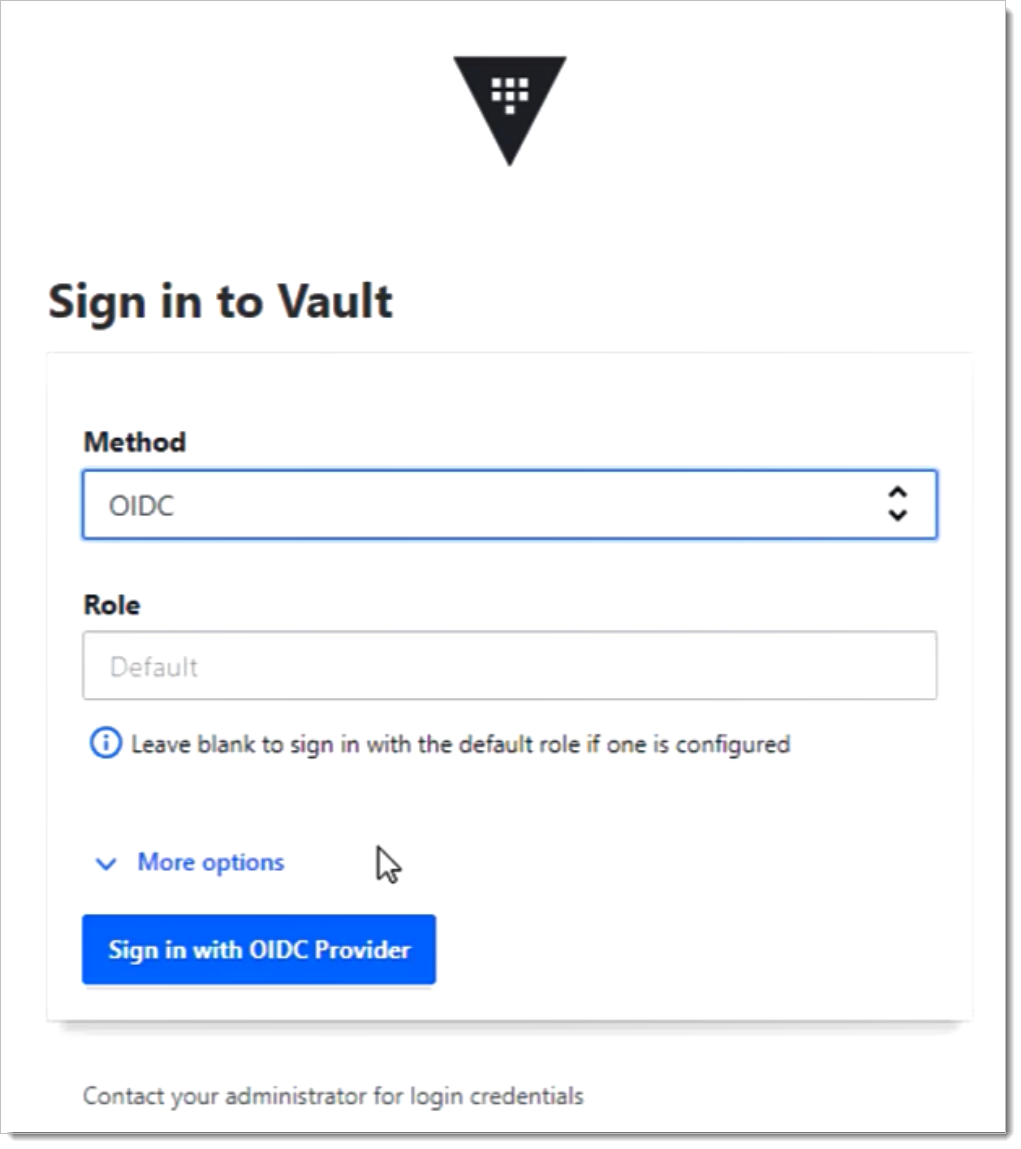
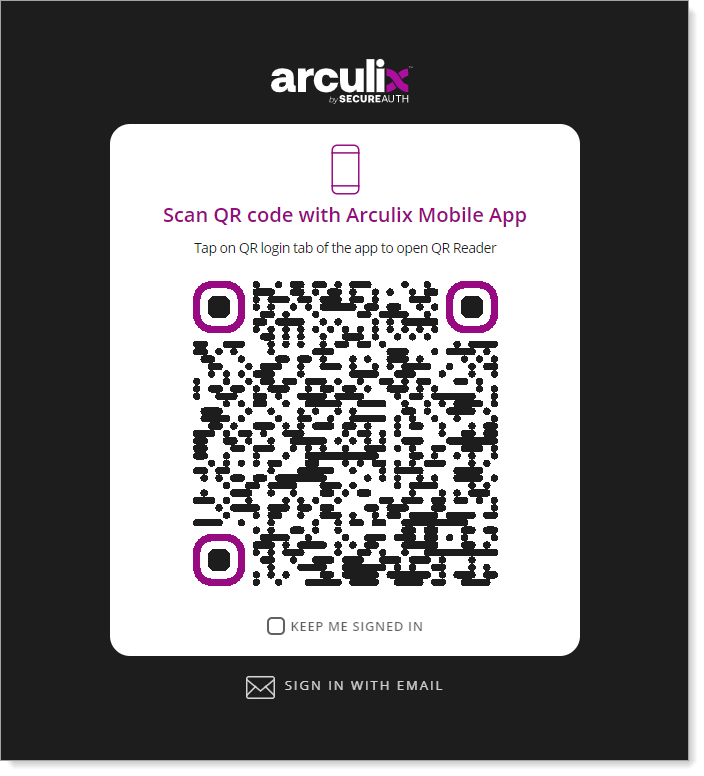
Go to your HashiCorp Vault URL. Set Method to OIDC and click Sign in with OIDC Provider.
You will be redirected to the Arculix SSO page.
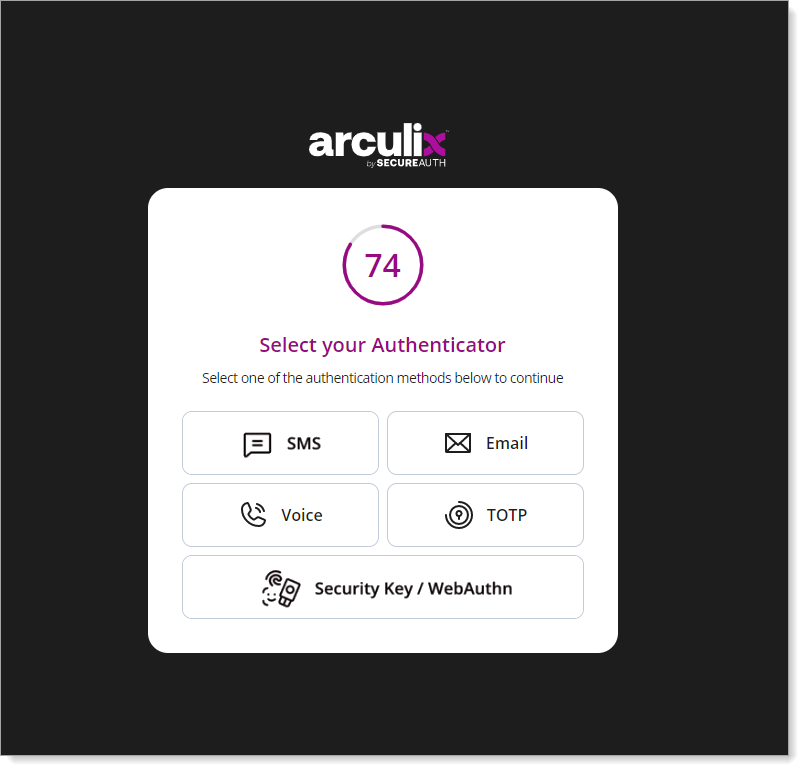
After successful authentication, select your preferred MFA method to approve access to the HashiCorp Vault application.
Finally, you'll be redirected to the HashiCorp Vault application home page.
Support
If you have questions or need assistance, contact SecureAuth Support.
Sales
Want to learn more about our MFA solutions? Contact our Professional Services for a demo today.
Disclaimer
All product names, trademarks, and registered trademarks are the property of their respective owners.
All company, product, and service names used in this document are for identification purposes only. The use of these names, trademarks, and brands do not constitute an endorsement by the SecureAuth Corporation.