Microsoft Entra ID configuration
Use this guide to configure Microsoft Entra ID to allow read and optional write access and connect with Arculix by SecureAuth.
After you complete this configuration, it is ready for integration with Arculix.
Prerequisites
Have an Application Administrator account in Microsoft Entra ID.
To grant access to users in Microsoft Entra ID, you assign Microsoft Entra roles. A role is a collection of permissions.
You will need a Microsoft Entra ID user account with an assigned role of Application administrator on the Directory scope.
To assign this role a user, do the following.
Log in to the Microsoft Azure portal as at least a Privileged Role Administrator or Global Administrator.
Go to the Microsoft Entra ID directory and from the left navigation, click Roles and administrators.
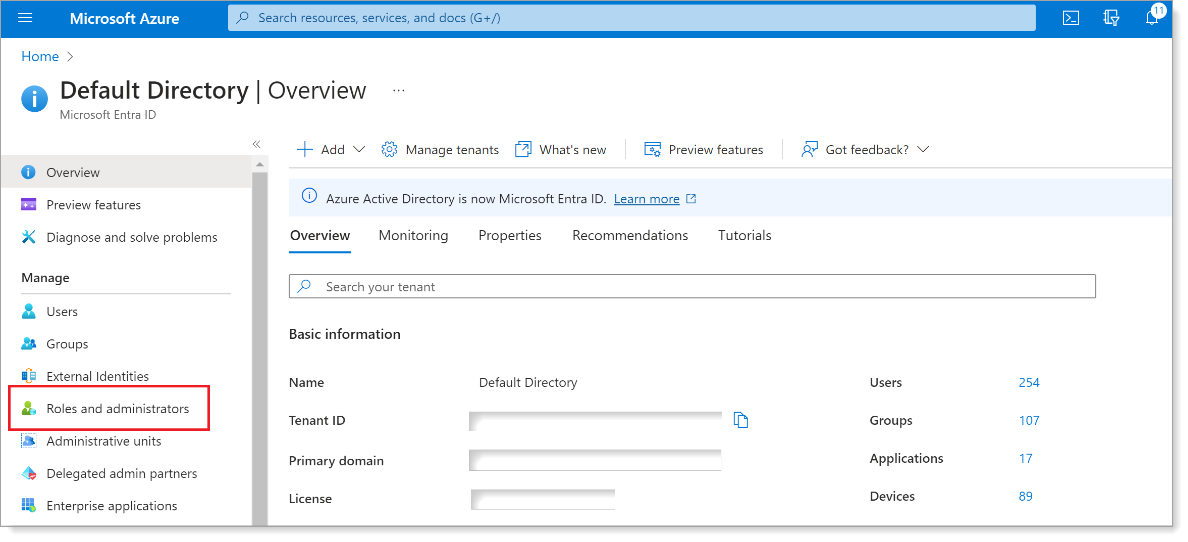
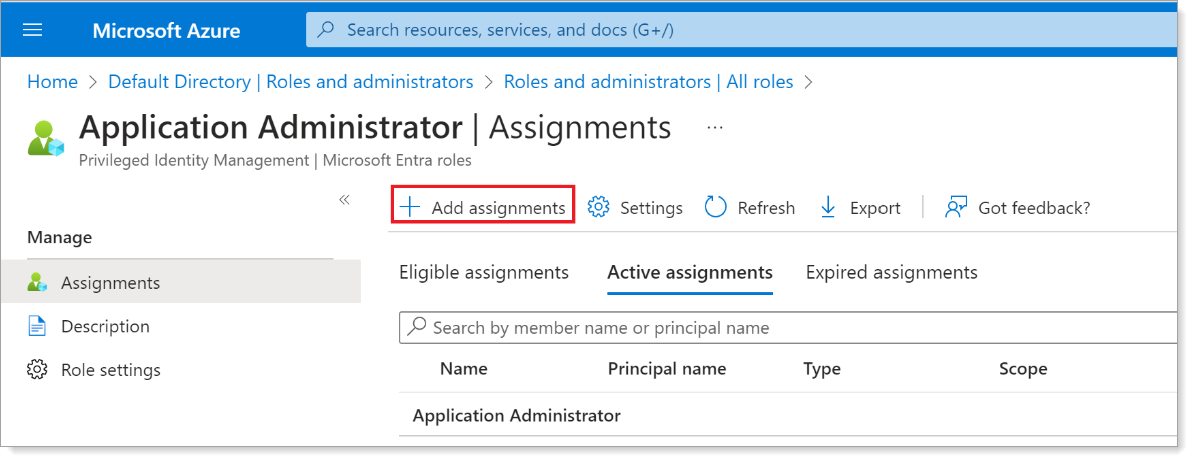
Search for and select the Application Administrator role.
Click Add assignments.
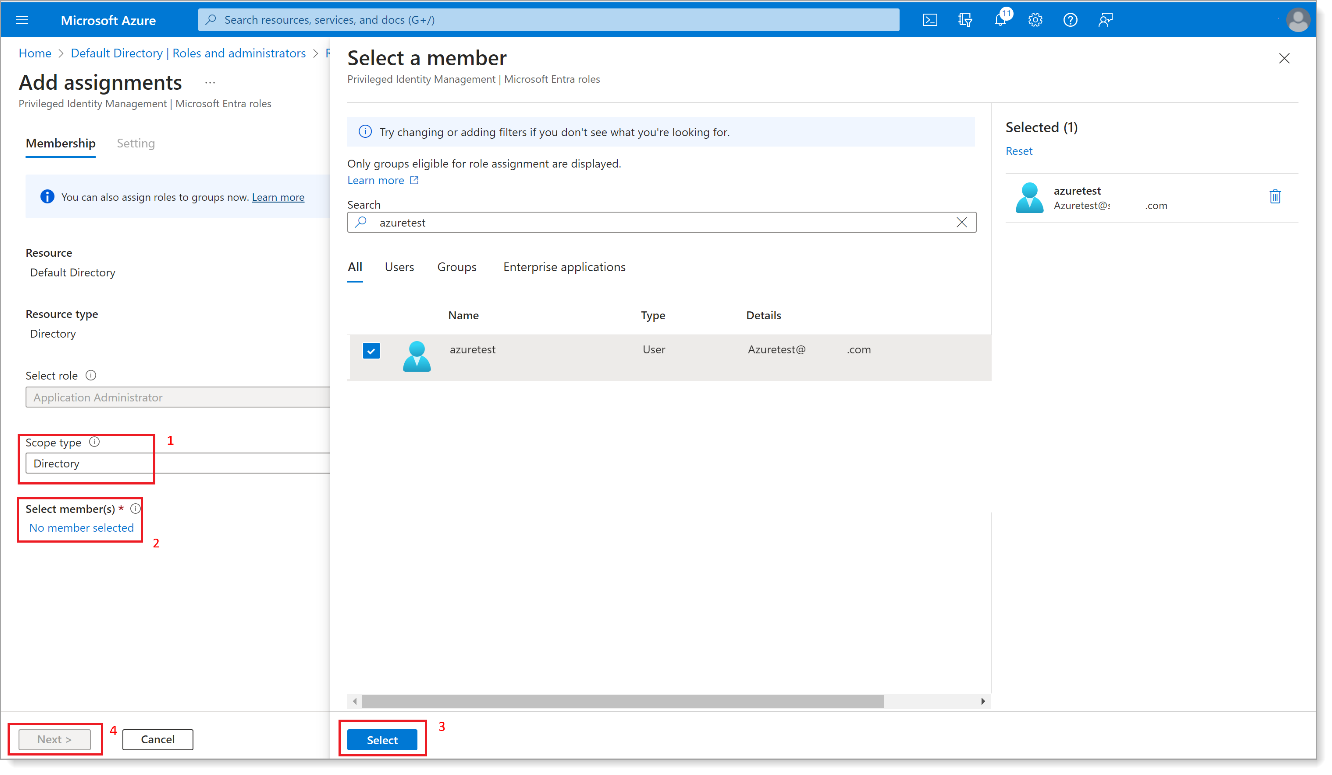
In the left navigation, set the Scope type to Directory. Then, select a user as a member and click Next.
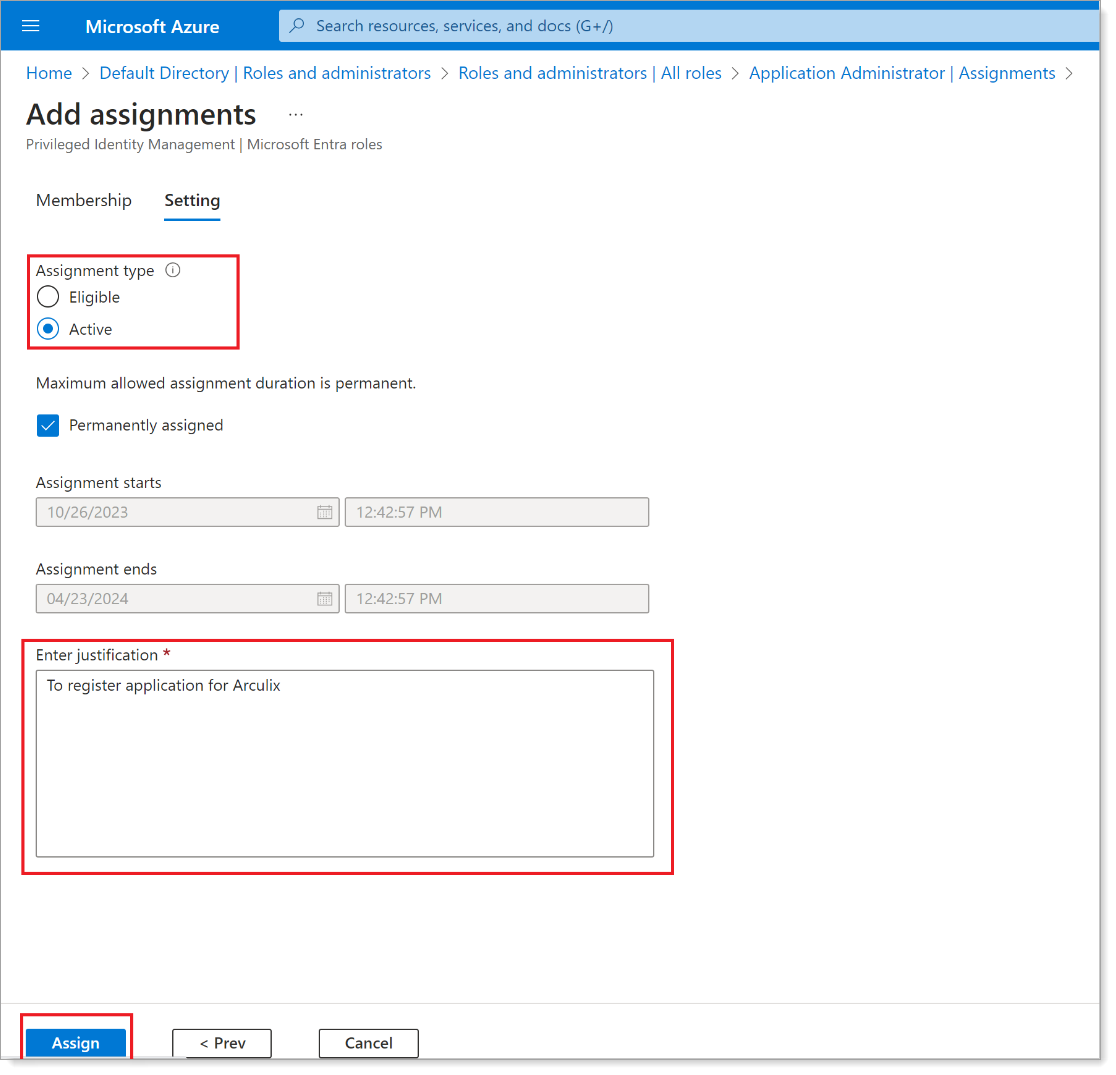
Set the Assignment type to Active, enter the justification, and click Assign.
Process
View a simple outline of the steps to configure Microsoft Entra ID for Arculix in the Azure portal.
Task A: Register an application for Arculix
To integrate Microsoft Entra ID with Arculix, you need to register an application in the Azure portal.
Log in to your Azure Account through the Azure portal.
Select Microsoft Entra ID.
Select App registrations and click New registration.
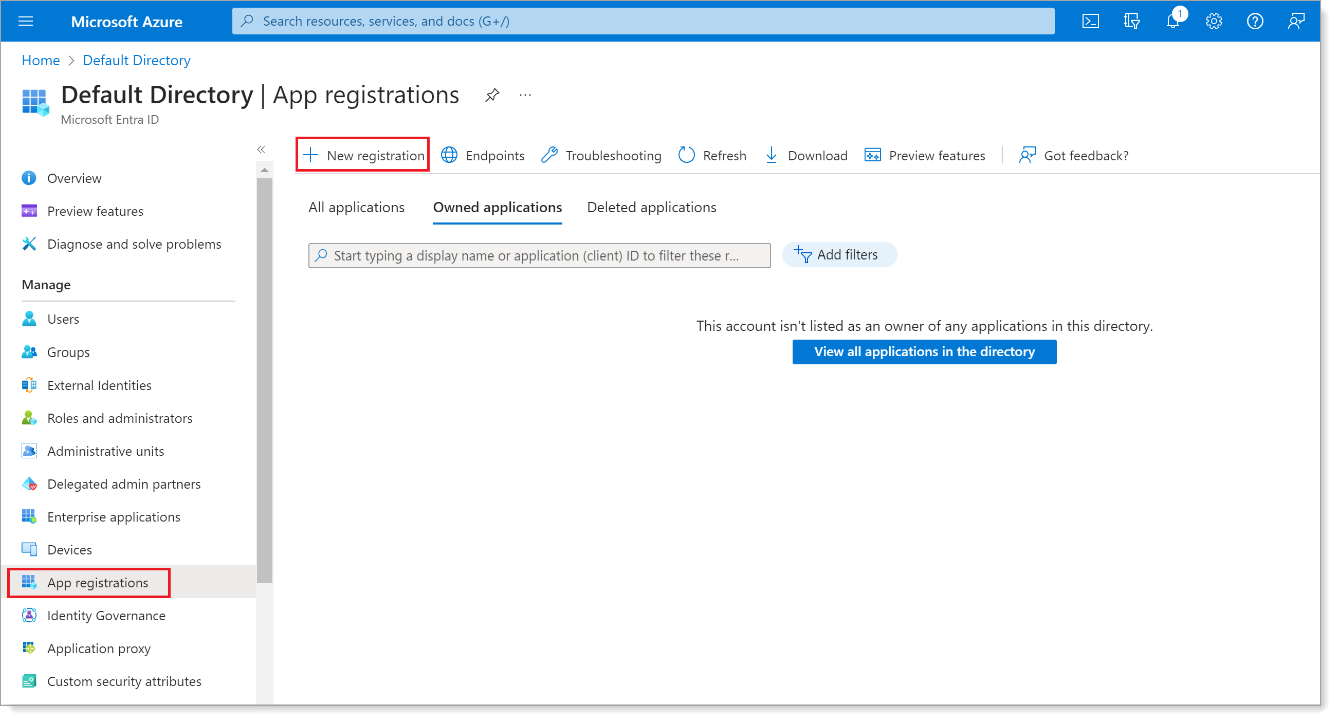
Set a Name and keep the default Supported account types selection option to a single tenant.
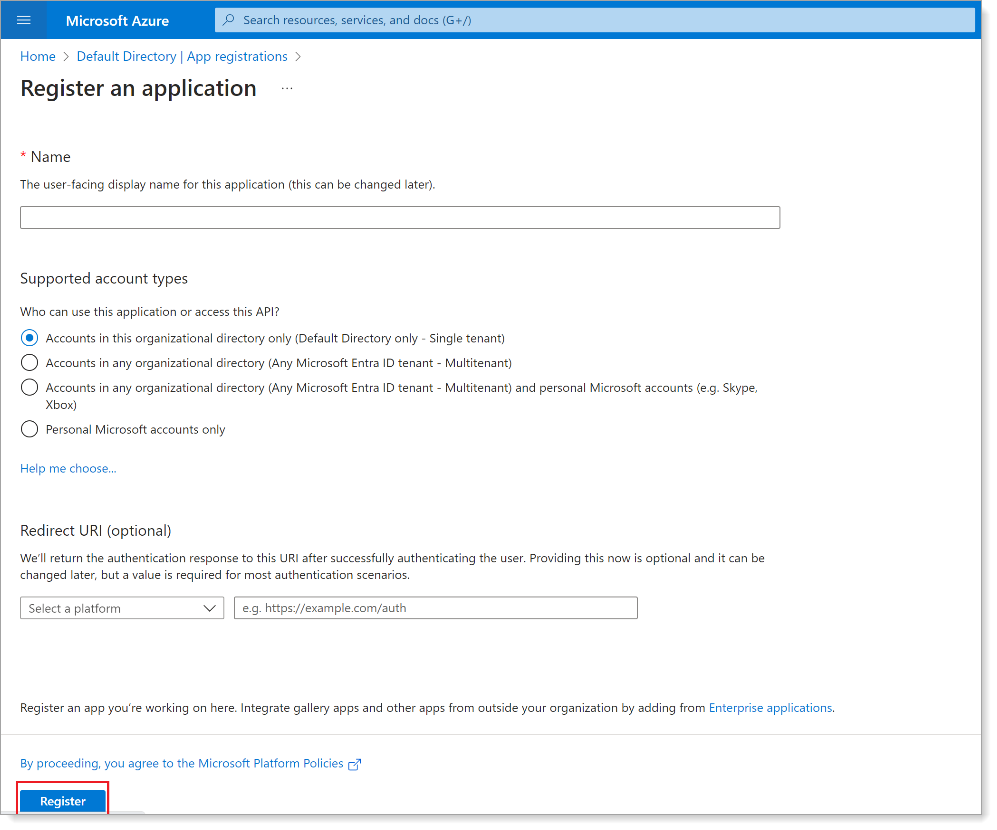
Click Register.
Task B: Add API permissions for Arculix
You will need to grant read and write permissions for the Arculix API calls to Microsoft Entra ID.
From the App registrations list, click name of the registered app that you just created.
In the left pane, click API Permissions. Then, click Add a permission.
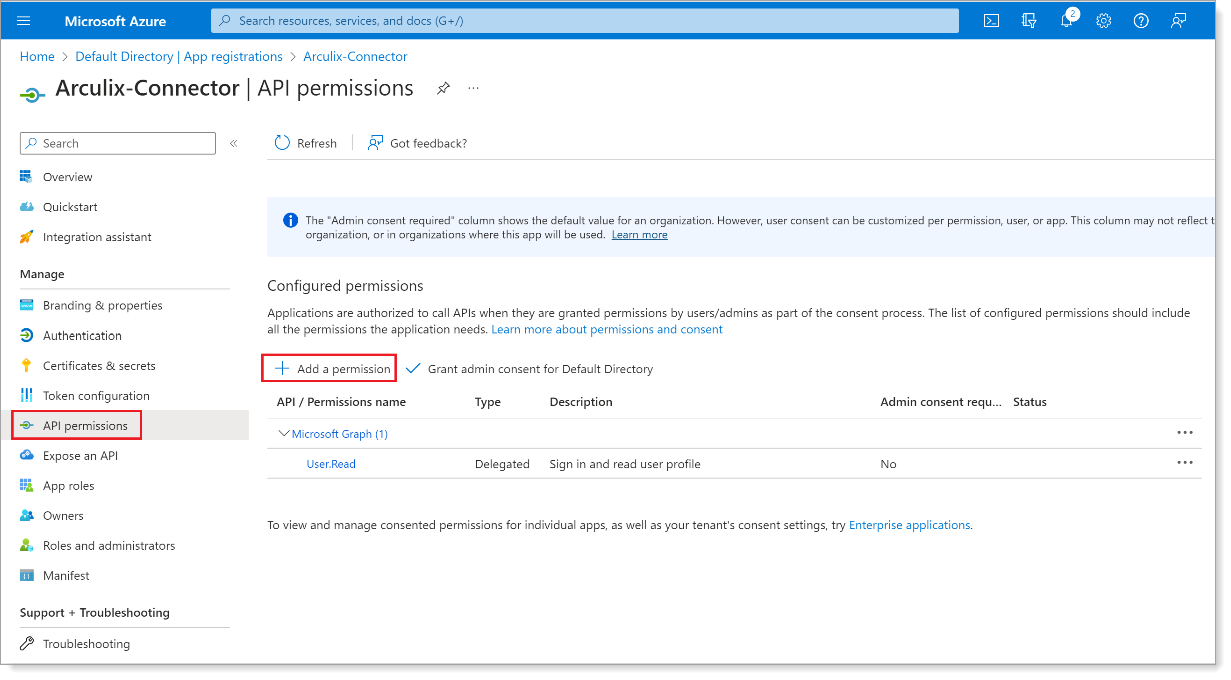
Select Microsoft Graph.
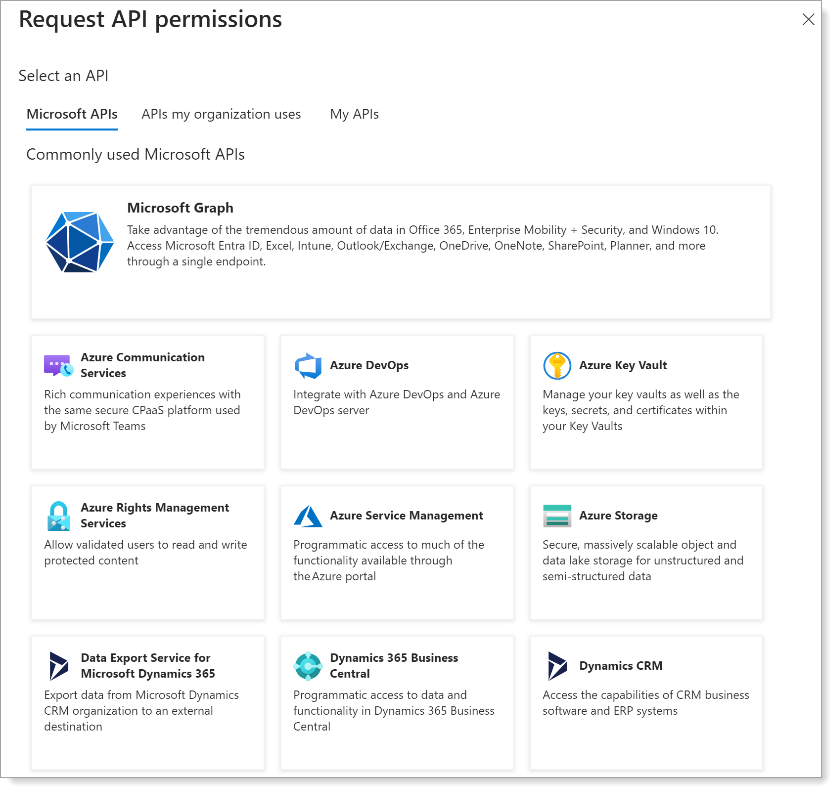
Click Delegated permissions. Scroll down to find and select the following check boxes:
Directory.AccessAsUser.All
Directory.Read.All
Group.Read.All
User.Read
User.Read.All
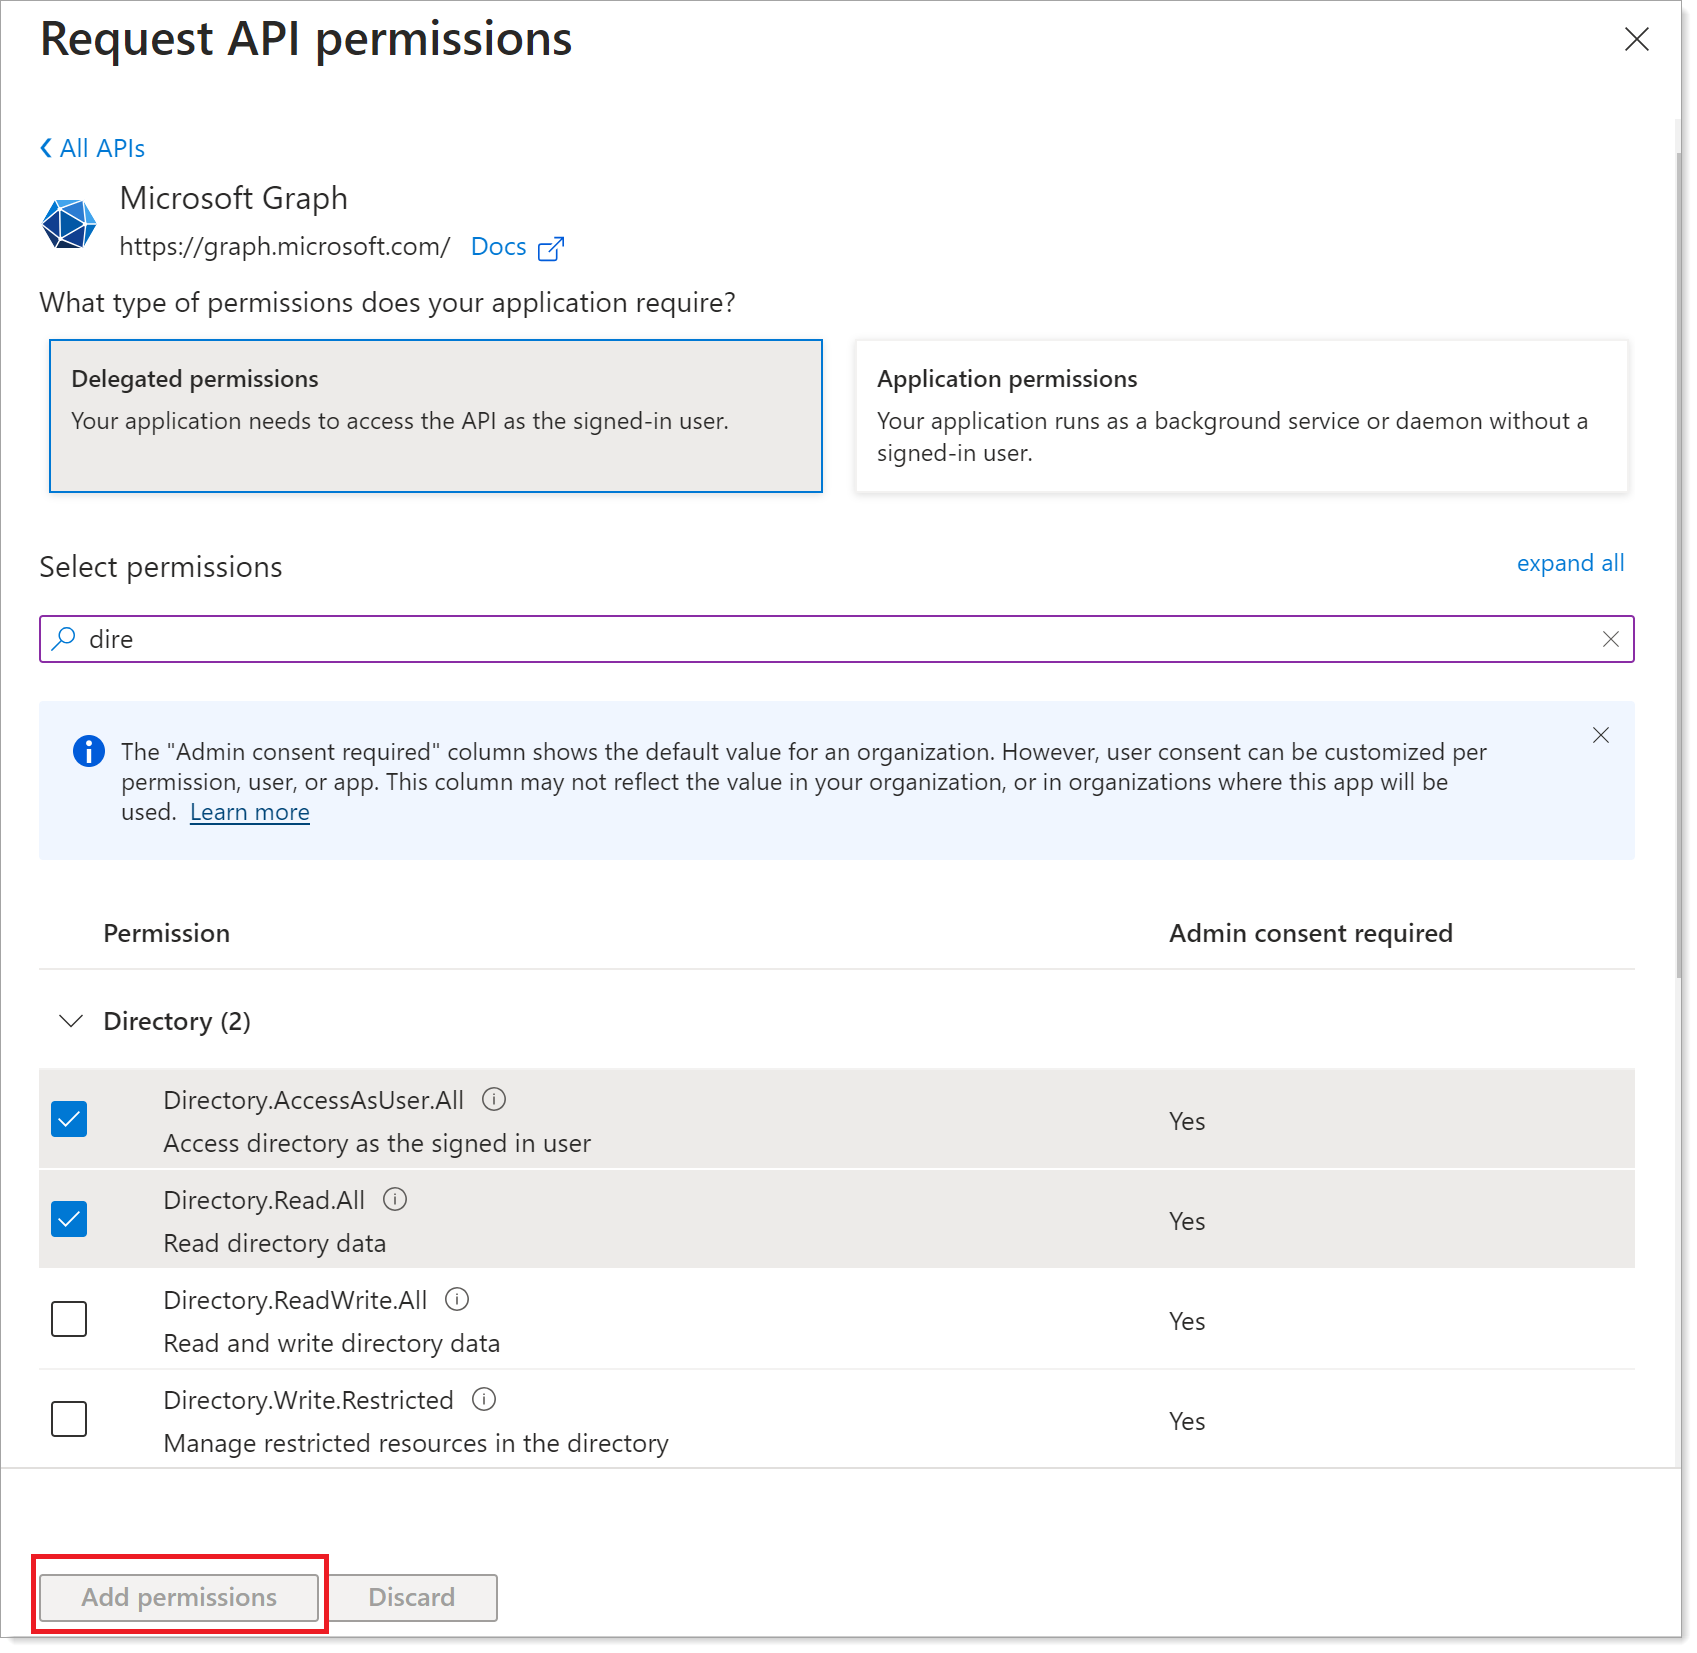
When you are done making your selections for delegated permissions, go to the bottom of the page and click Add permissions.
Click Add a permission again and select Microsoft Graph.
Click Application permissions. Scroll down to find and select the following check boxes:
Directory.Read.All
Group.Read.All
User.Read.All
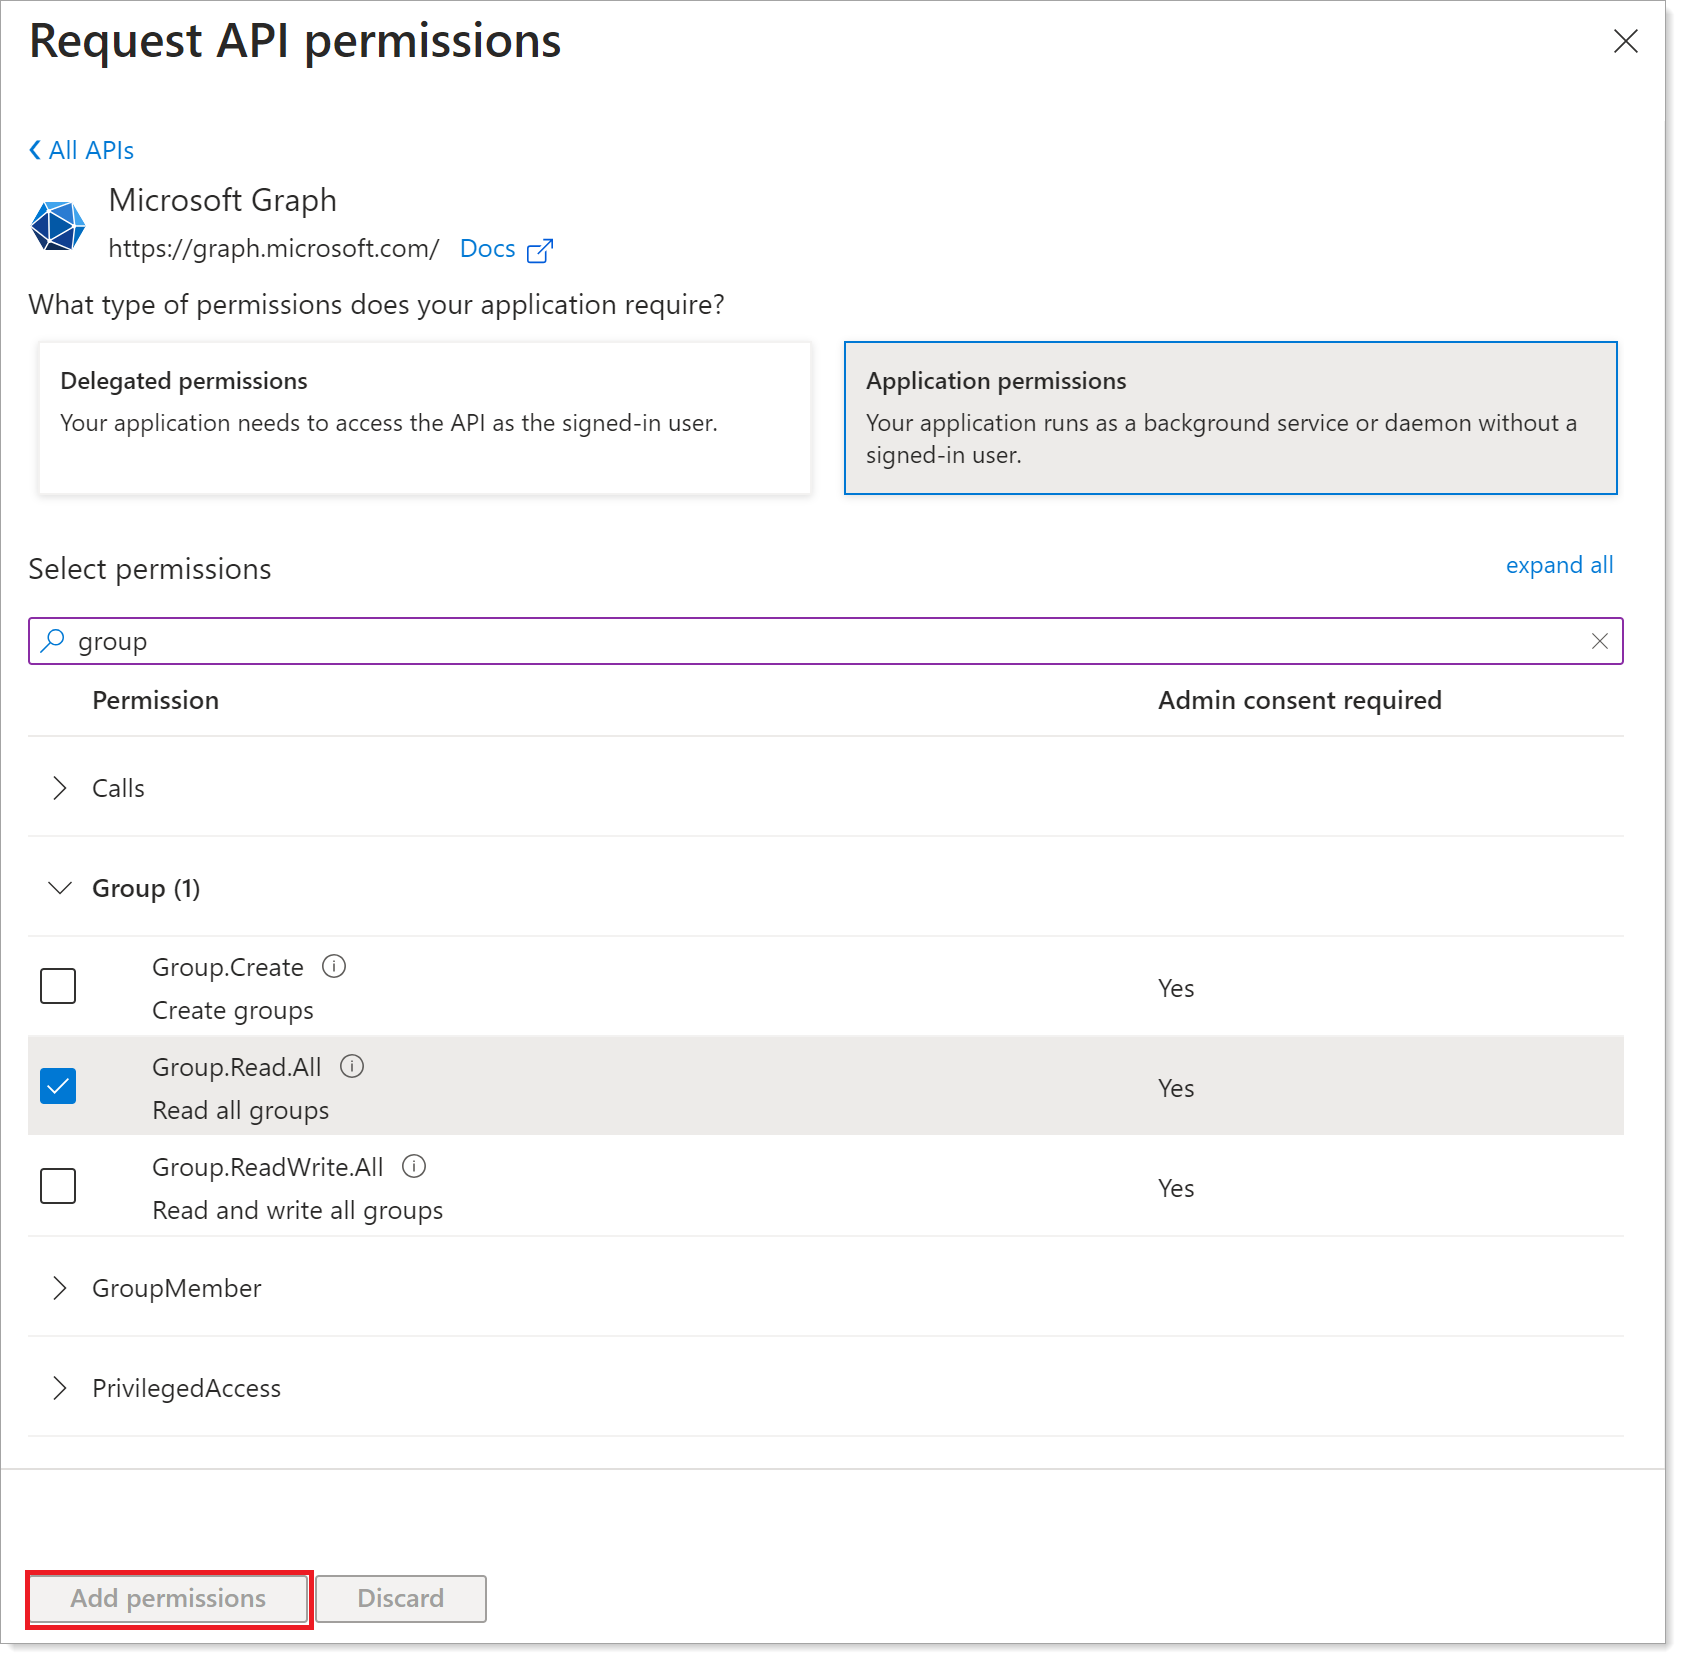
When you are done making your selections for application permissions, go to the bottom of the page and click Add permissions.
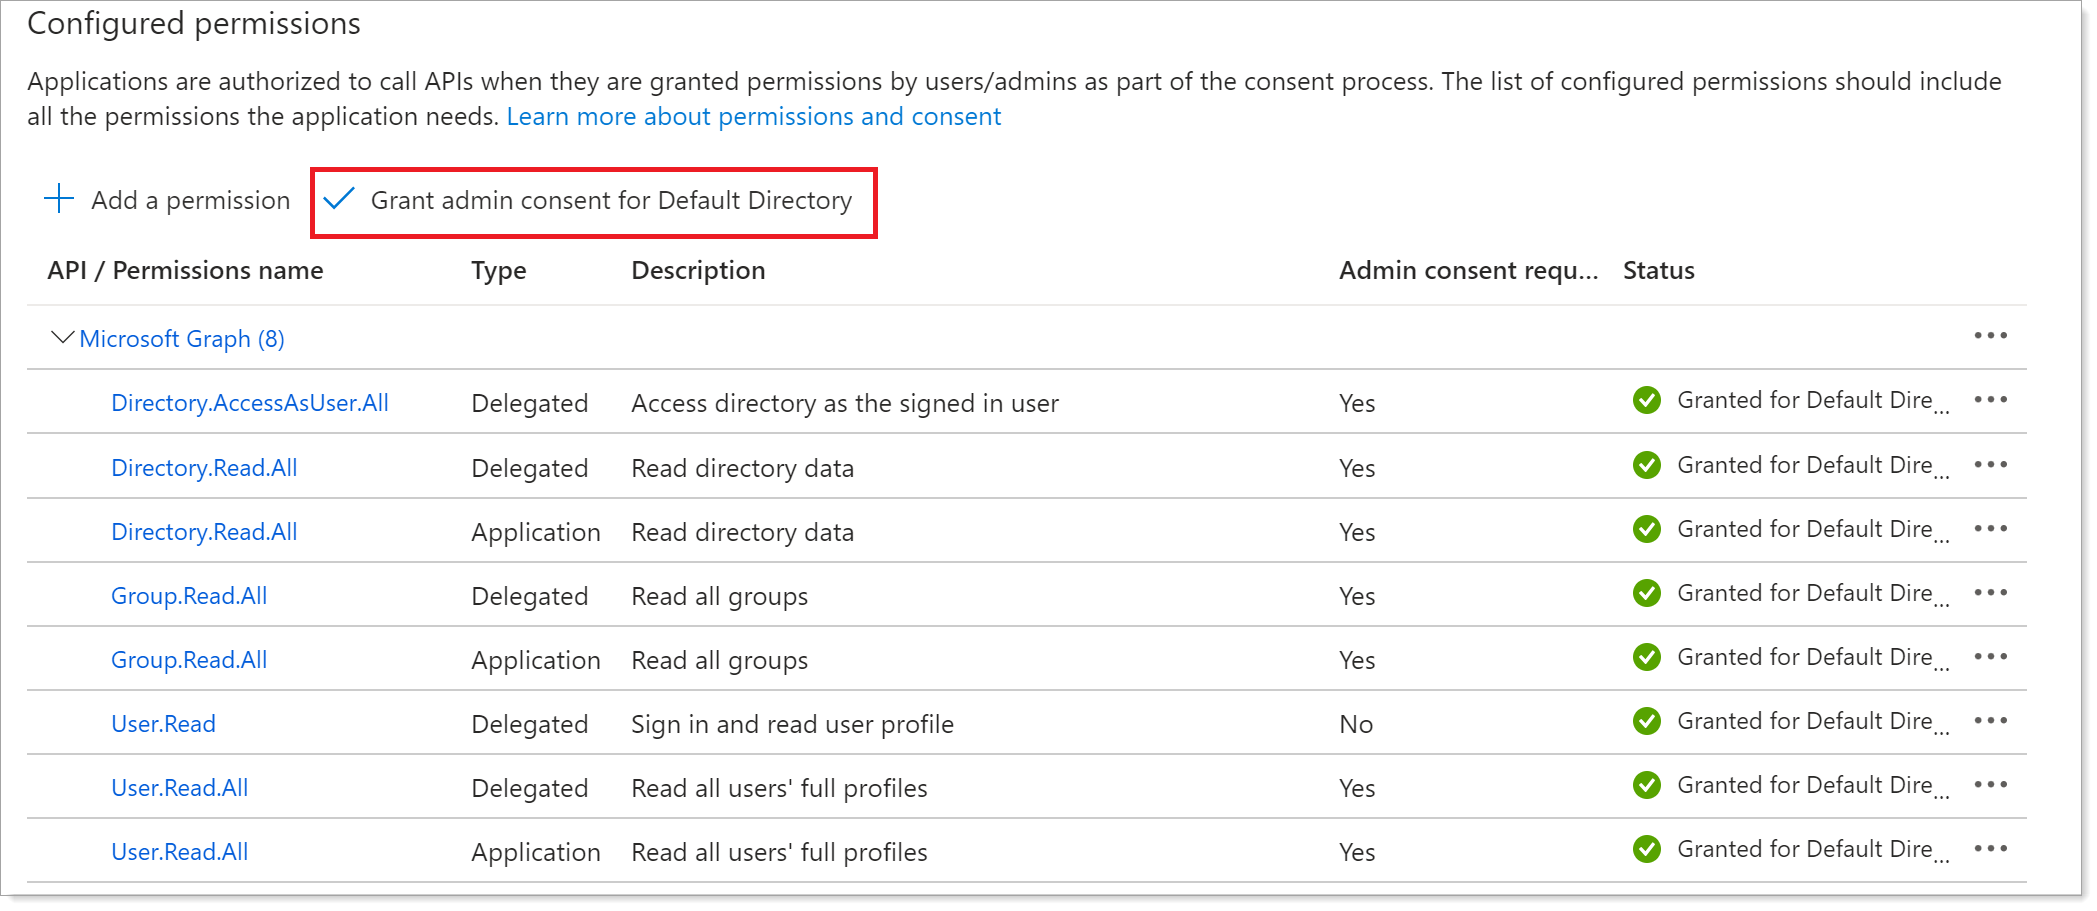
View and verify the list of configured permissions and click Grant admin consent.
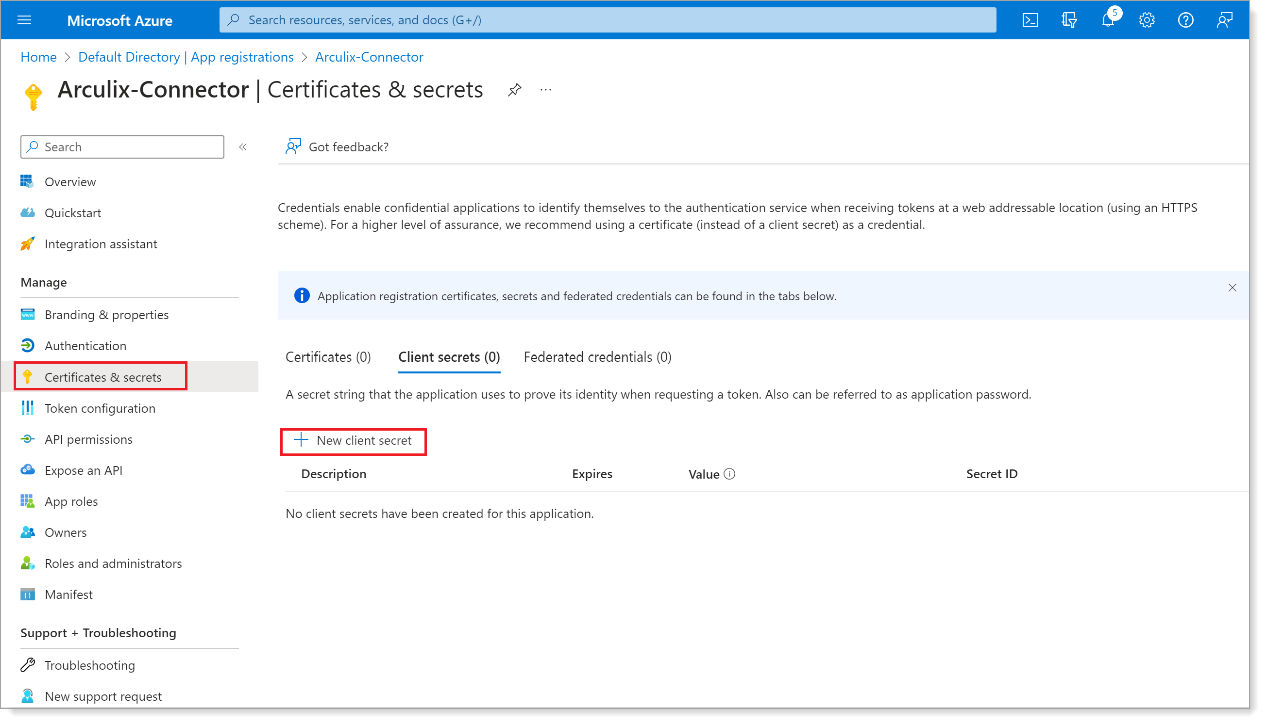
Task C: Create the client secret
Create an application secret key for the Arculix connection to Microsoft Entra ID. You will need to provide this client secret to SecureAuth Support for the Arculix side of the configuration.
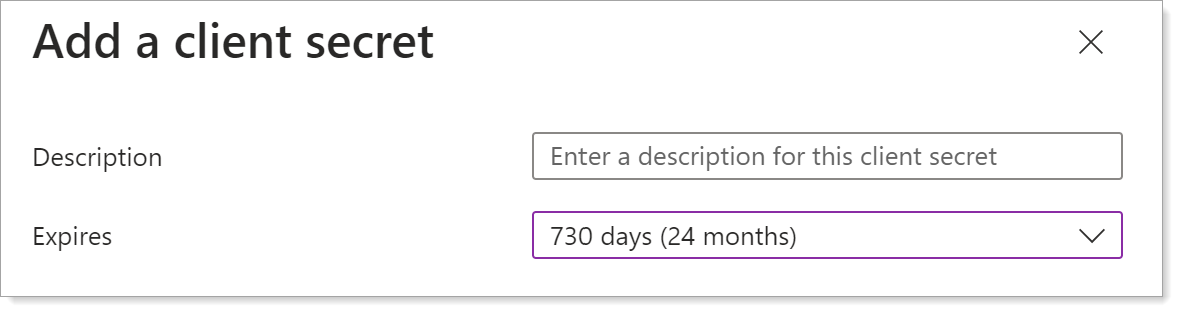
From the left pane, click Certificates & secrets. Then, click New client secret.
Add a description for the client secret and choose 24 months for the expiration. Then, click Add.
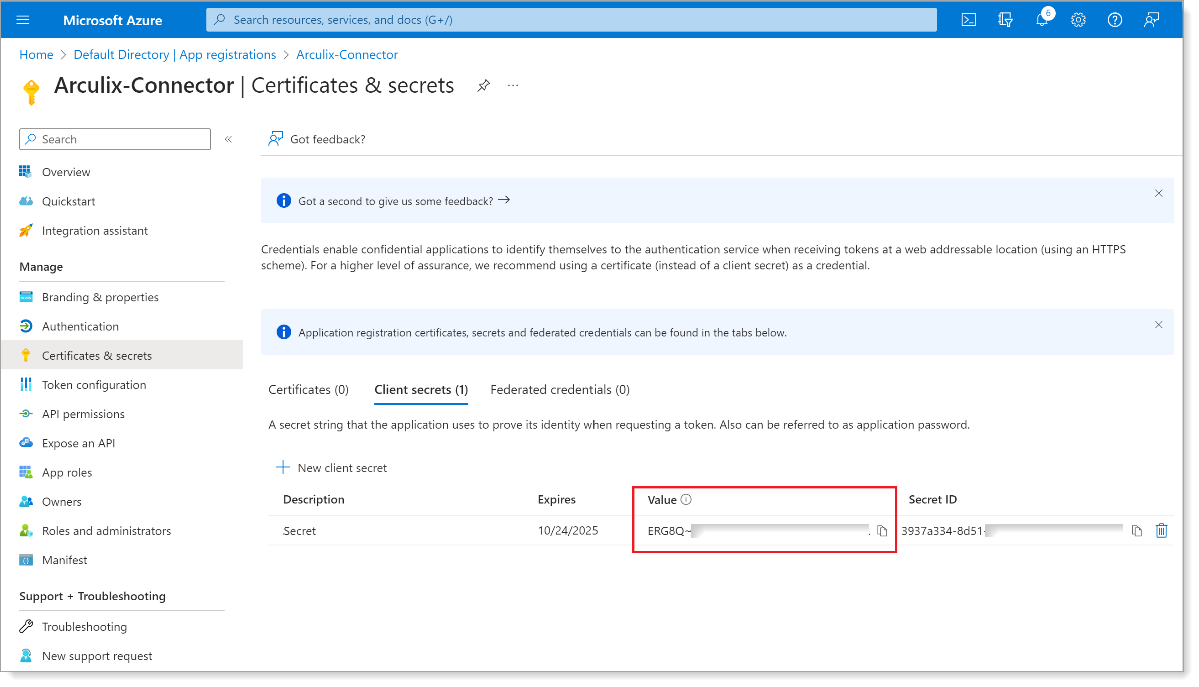
Copy the client secret Value, before it gets masked when you leave the page.
Note: You will need provide this client secret value to SecureAuth Support.
From the left pane for this app registration, click Authentication.
In the Advanced settings section, select Yes.
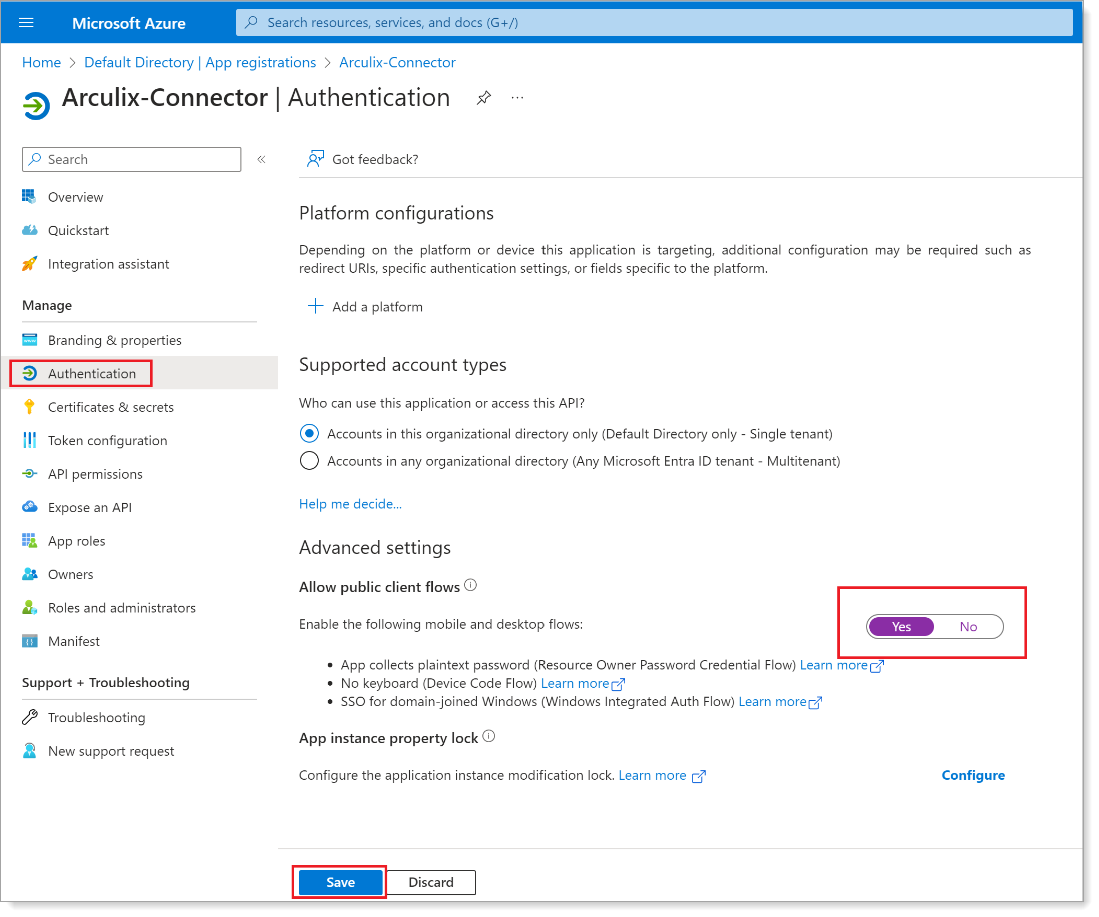
Save your changes.
Task D: Get registered application information
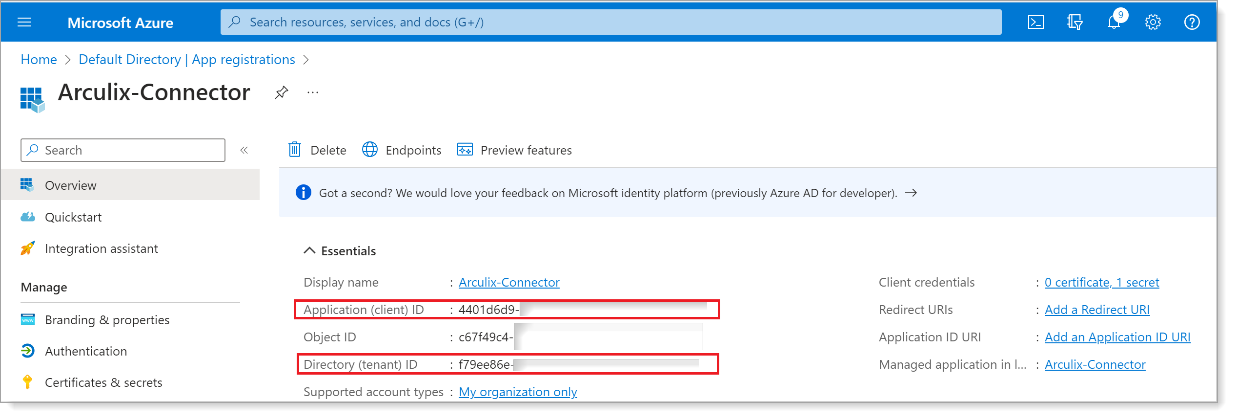
For the Arculix side of the configuration, you will need to copy and provide these two values: Application (client) ID and Directory (tenant) ID.
Select Microsoft Entra ID.
Select App registrations.
From the list, click the application name link.
In the Overview section, copy these values:
Note: You will need these values for SecureAuth Support.
Application (client) ID
Directory (tenant) ID
Next steps
After completing the configuration steps in your Microsoft Entra ID (Azure AD) portal, proceed to Connect a Microsoft Entra ID directory in Arculix.
To complete this step in the Arculix admin console, you'll need the following values:
Directory Tenant ID – Your Microsoft Entra (Azure AD) tenant ID
Client ID – The application (client) ID from your Microsoft Entra ID app registration.
Client Secret – The client secret associated with your Microsoft Entra ID application.
Azure Tenant Domain – Your verified domain, such as
company.onmicrosoft.com.