Deploy Arculix Device Trust
Deploying Arculix Device Trust involves three steps:
Installing the Arculix Mobile app on a mobile device (iOS / Android) and registering with Arculix
Installing the Device Trust Agent on a workstation
Registering the workstation with Arculix
Install Arculix Mobile and register with Arculix
The Arculix Mobile app is installed by downloading from the Apple App Store or Google Play Store, depending upon the target device. After installing on the mobile device, registration occurs with Arculix. There are two ways to register.
In-line registration. A QR code is provided via a web browser that is then scanned by app.
This method requires a workflow and solution to be developed that presents the QR code to the user in a manner that conforms to the organization’s processes, procedures and workflows.
Email registration. The user enters their organization email address.
This method involves a few more steps for the end user than in-line registration, but requires no solution development on the part of the organization.
Install the Device Trust Agent on workstations
The Device Trust Agent is a small executable that resides on the workstation and communicates with the Arculix server. It can be installed either manually, or via an auto-push mechanism.
For broad deployments to systems in an IT managed environment, the recommended deployment is Auto-Push. Manual installation applies primarily to testing, resolving end-user support issues, and installing on workstations that are not IT-managed (for example, BYOD systems).
Push installation
Using logon scripts or a systems management product, system administrators can install the agent executable using the following commands:
For Windows silent install, invoke the run options
/exenoui /qnWith progress UI:
/passiveFor example:
ATCPSetup.exe /exenoui /qn
For Mac silent install, run:
sudo installer -target / -pkg ATCPSetup.pkg
Manual installation
To install manually, download the Arculix Device Trust Agent installation package for Windows from the Download Center. Run the installer as an administrator.
Uninstalling
You can uninstall either manually or via the command line.
Command line | Manual | |
|---|---|---|
macOS |
| Uninstall under /Applications/Utilities/Arculix Note: This is formerly /Applications/Utilities/Acceptto. |
Windows | Administrator command prompt: | Uninstall from Add/Remove Programs in the Control Panel |
Register workstation with Arculix
Once the agent is installed on the workstation and Arculix Mobile registered on a smartphone, the workstation is ready to be registered.
Log into the workstation that is to be protected using the username and password associated with the user’s account.
A QR code will be presented to the user to register the workstation with Arculix using the Arculix Mobile app QR function. If a QR code is not presented, then the agent is either not installed or not running on the system.
Scan the QR code with the Arculix Mobile app and accept the push sent to Arculix Mobile to complete the registration.
Scan the QR code on the workstation screen.
Accept the push notification to complete registration.
macOS login configuration
There are three modes to configure the macOS login: Basic, Hybrid, and Advanced. These modes utilize two settings: MFAFileVaultEnabled and MFALockEnabled. Depending on whether these settings are on or off, MFA will be required at various states.
See the diagram below to understand how they all work.
 |
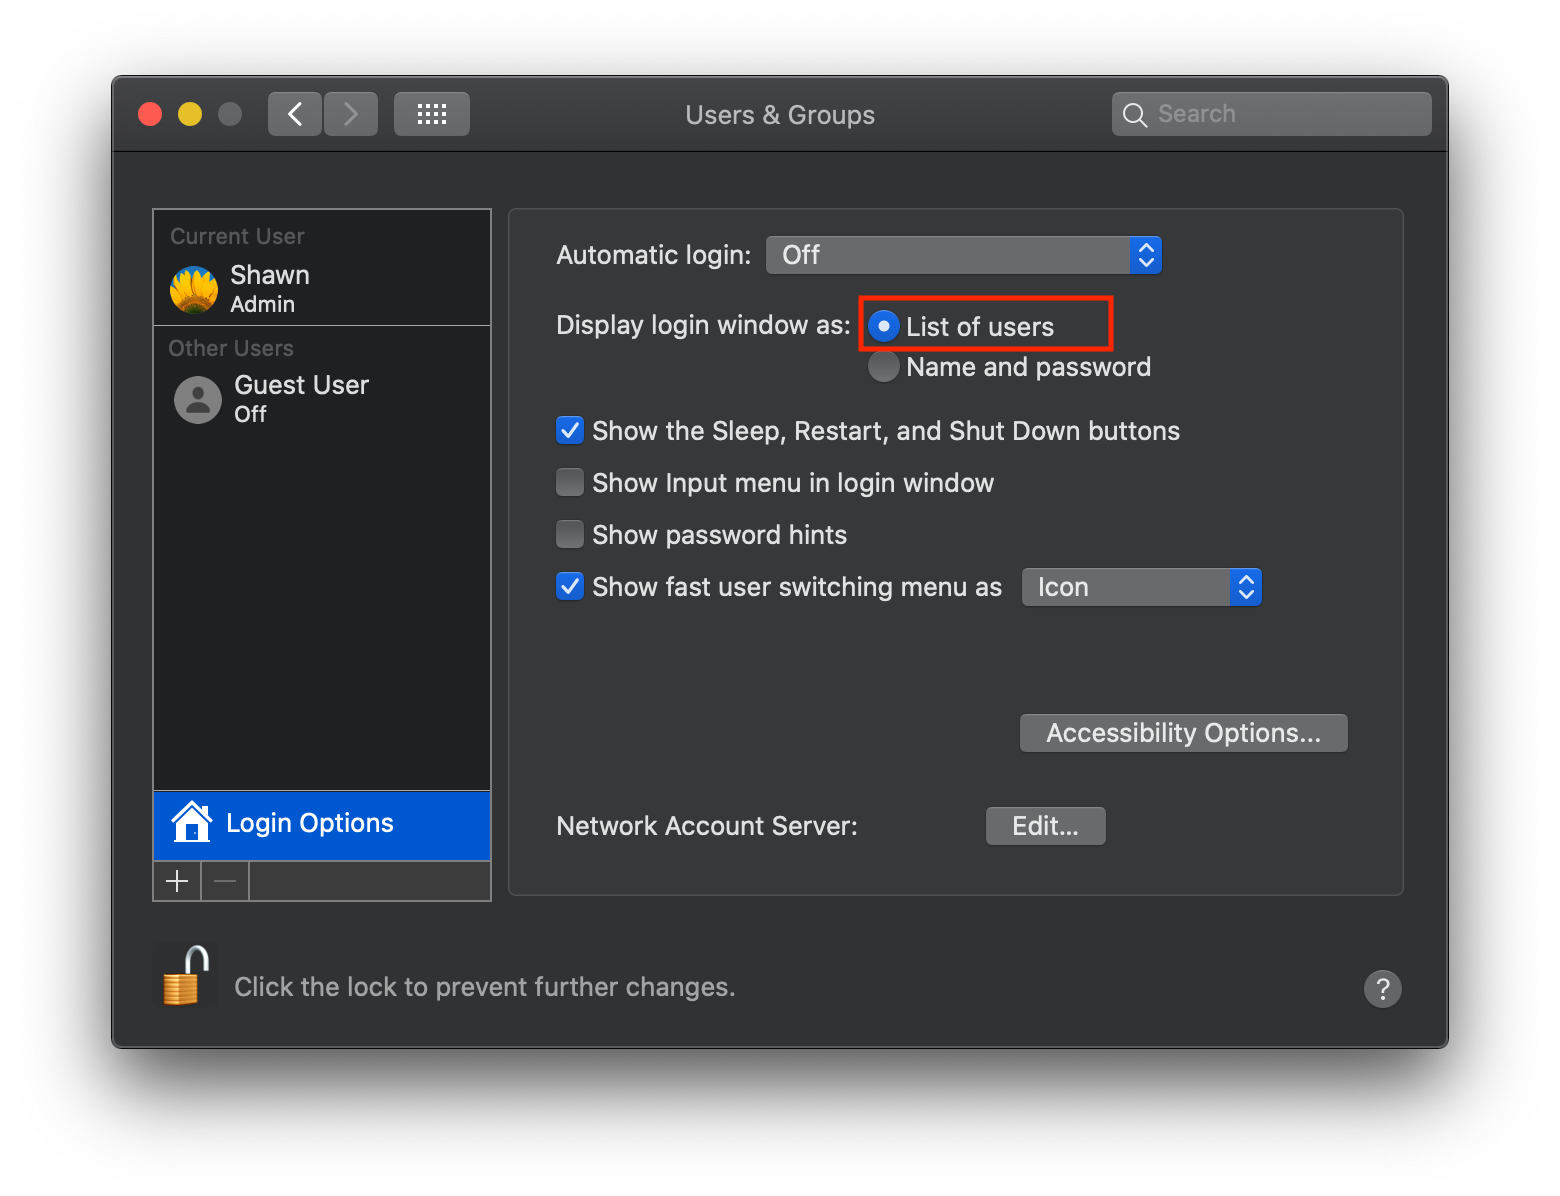
Configure macOS / Windows 10 login screen
On macOS, Arculix requires the login screen to be configured with ‘List of Users’. This setting is enabled by default.
Note that legacy and ineffective security precautions, such as discrete user and password entry, no longer make sense in the context of passwordless as Arculix protects the user’s account. For this reason, the Show input menu in login window and Show password hints check boxes are not selected in the dialog box below.
Terminal command:
defaults write /Library/Preferences/com.apple.loginwindow SHOWFULLNAME -bool false
 |
The same requirement applies for Windows 10 via GPO setting:
Run
secpol.mscNavigate to Local Policies\Security Options
Double-click Interactive logon: Don’t display last signed-in
Set Interactive Logon: Do not display last username as Disabled