.NET Forms Based Authentication (FBA) Web Integration Guide
Introduction
Use this guide to secure a website using .NET Forms Based Authentication and SecureAuth IdP, which is achieved through the sharing of the Validation Key, Decryption Key, and Validation and Decryption Method.
NOTE: Forms based authentication can only be used on a single domain.
Prerequisites
1. Have a website / custom application and access to the web.config file
2. Create a New Realm or access an existing realm to which the configuration applies in the SecureAuth IdP Web Admin for the FBA Web Integration
3. Configure the following realms before configuring for the integration:
Overview – the description of the realm and SMTP connections must be defined
Data – an enterprise directory must be integrated with SecureAuth IdP
Workflow – the way in which users will access this application must be defined
Registration Methods – the SSO Authentication method that will be used to access this page must be defined
SecureAuth IdP Configuration Steps
Post Authentication
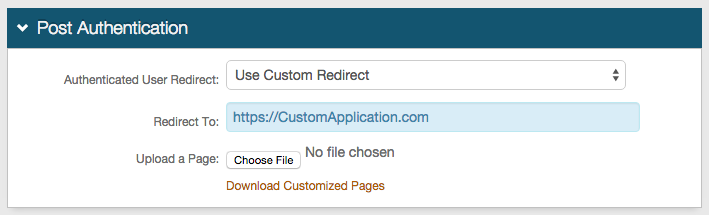
1. In the Post Authentication section, select Use Custom Redirect from the Authenticated User Redirect dropdown
2. Set the Redirect To to the application's URL
 |
Warning
Click Save once the configurations have been completed and before leaving the Post Authentication page to avoid losing changes
Forms Auth / SSO Token
3. Select View and Configure FormsAuth keys / SSO token
 |
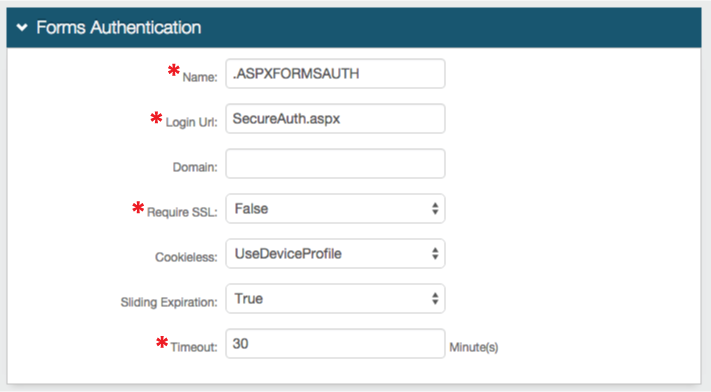
Forms Authentication
NOTE: In the Forms Authentication section, the settings here are also configured in the Website's web.config file
Leave all as default if preferred, or make any changes; but ensure that all changes here are also applied to the Website's web.config file configuration
 |
Machine Key
4. Select the Validation requirement from the dropdown, or leave as default (SHA1)
5. Click Generate New Keys and the Validation Key and Decryption Key fields are populated with the keys
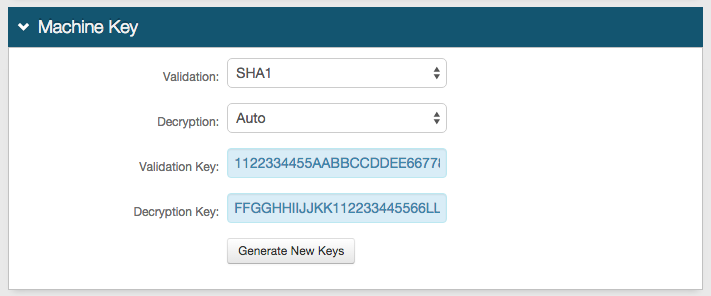 |
6. Copy the Validation Key and Decryption Key values, which are used in the Website Configuration Steps
Warning
Click Save once the configurations have been completed and before leaving the Forms Auth page to avoid losing changes
Website Configuration Steps
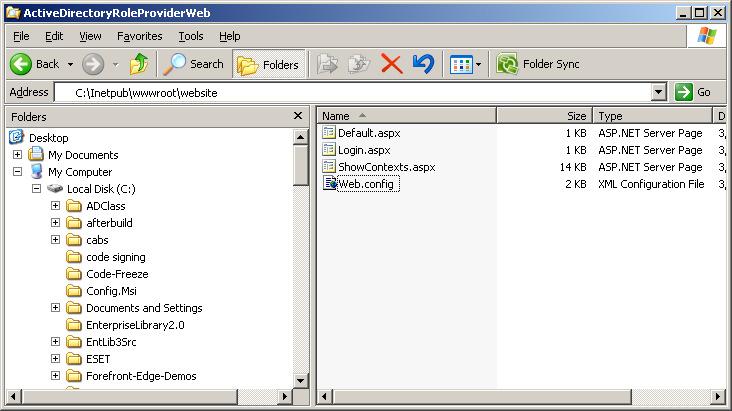
1. Open the web.config file of the website
 |
web.config Configuration Steps
2. Find the Machine Key section, and replace the value with the Validation Key and Decryption Key values generated in the SecureAuth IdP Web Admin (step 5)
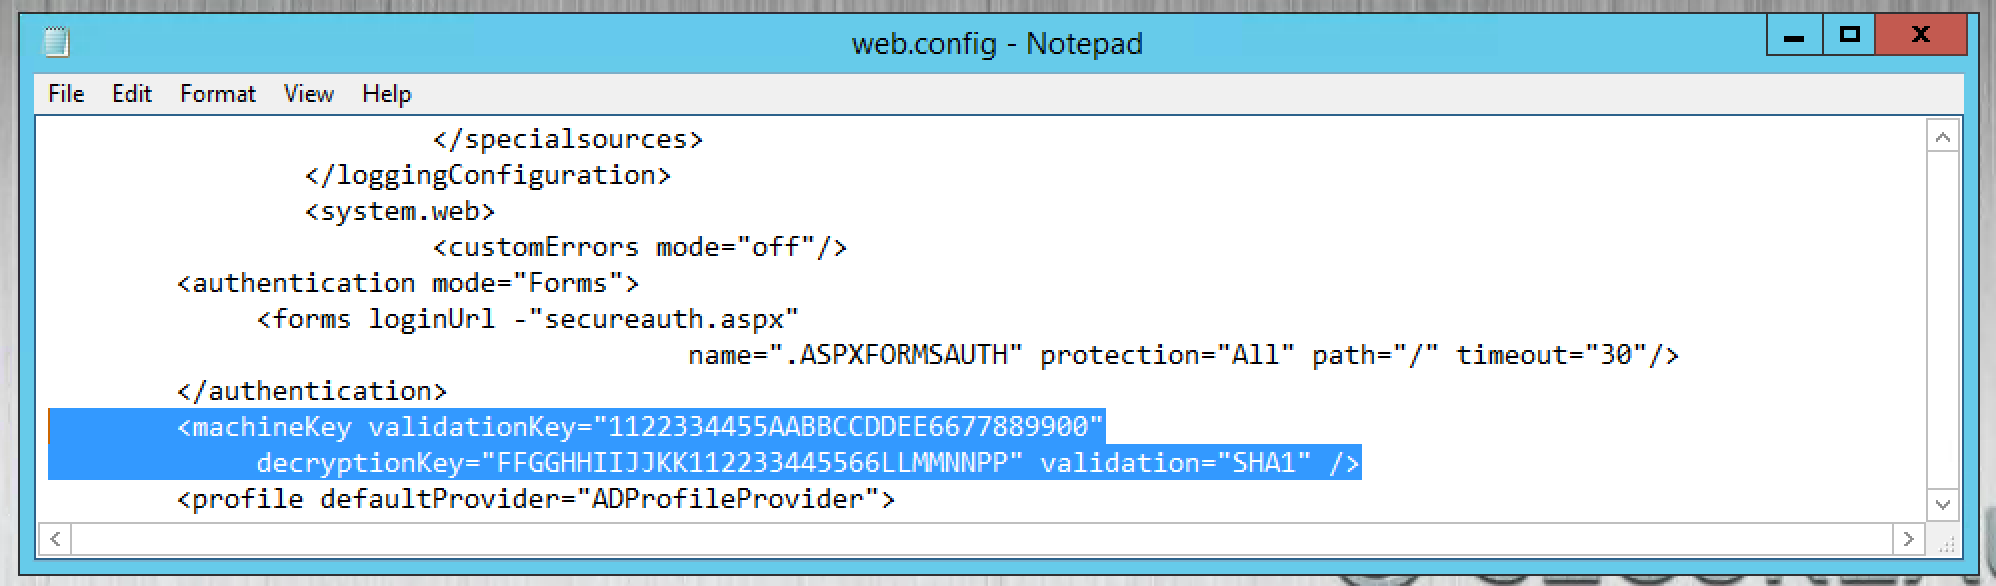 |
Note
The validation="" should reflect the selection made in the SecureAuth IdP Web Admin (step 4)
3. Find the Authentication Mode section, and set authentication mode to Forms ( <authentication mode="Forms"> )
4. Set the Forms LoginUrl to the Fully Qualified Domain Name (FQDN) of the SecureAuth IdP appliance, followed by the SecureAuth IdP realm (e.g. SecureAuth2), and /secureauth.aspx, e.g. https://secureauth.company.com/secureauth2/secureauth.aspx
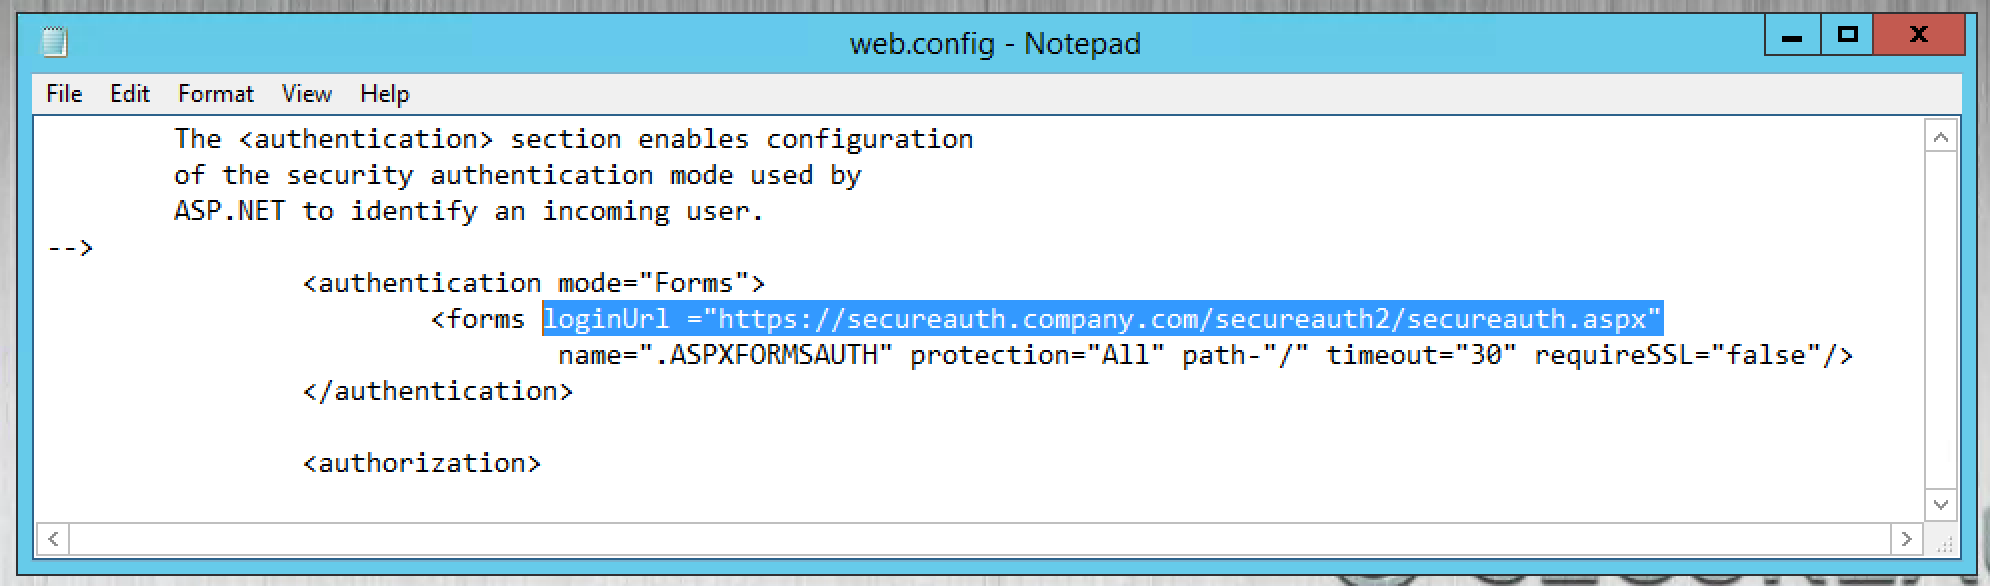 |
Note
The name=, timeout=, and requireSSL= values must match those set in the SecureAuth IdP Web Admin (Forms Authentication section)
5. Save the web.config file
Related Documentation
Refer to Create a Custom Post Authentication Token to add customized tokens sent in the request