SQL Server as Additional Profile Provider Configuration Guide
Introduction
Use this guide along with the Data Tab Configuration guide to configure a SecureAuth IdP realm that uses SQL Server as an additional Profile Provider.
Prerequisites
1. Have an on-premises SQL Server data store
2. Designate a service account with read access (and optional write access) for SecureAuth IdP
SQL Server Configuration Steps
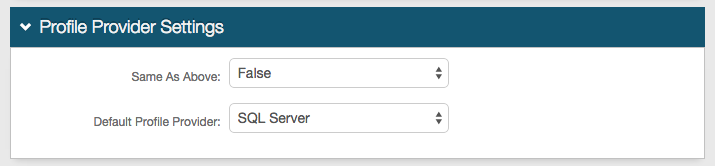 |
1. In the Profile Provider Settings section, select True from the Same as Above dropdown to copy the data store integration from the Membership Connection Settings section for use in profile connection; or select False if that directory is only used for the membership connection.
2. Select SQL Server from the Default Profile Provider dropdown if SQL is to be used as the default profile provider
Note
If another SQL Server data store (LDAP, AD, others) is configured in the Membership Connection Settings section, and True is selected from the Same as Above dropdown, then those settings appear in the Profile Connection Settings (below) and must be modified to reflect the settings of the new SQL Server data store
Only one SQL Server can be utilized for profile connection
If another directory is selected from the Default Profile Provider dropdown, then SQL Server must be selected from Source dropdown in the Profile Fields section for the SecureAuth IdP Properties that are mapped to SQL Server fields
Profile Connection Settings
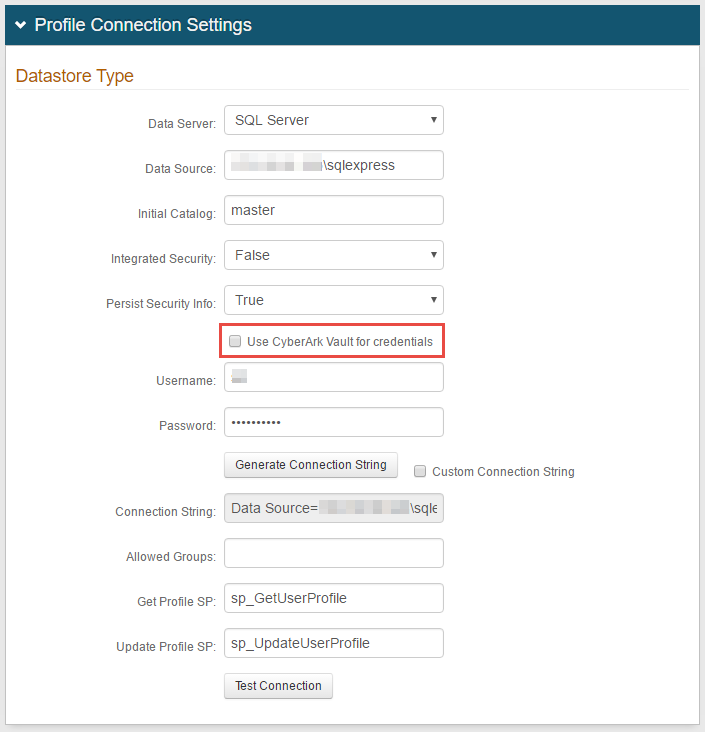 |
Datastore Type
3. Select SQL Server from the Data Server dropdown
4. Provide the Fully Qualified Domain Name (FQDN) or the IP Address in the Data Source field
5. Provide the Database Name in the Initial Catalog field
6. Select True from the Integrated Security dropdown if the IIS app pool's service account is to be used in the connection (see Integrated Auth Requirements below)
Select False to specify a SQL service account instead
7. Select True from the Persist Security Info dropdown if access to the username and password information is allowed
Note
If using CyberArk Vault for credentials, enable Use CyberArk Vault for credentials and follow the steps in CyberArk Password Vault Server and AIM Integration with SecureAuth IdP
With this feature, steps 8 and 9 are not required
8. Provide the Username of the SecureAuth IdP Service Account (if False is selected in step 6)
9. Provide the Password associated to the Username (if False is selected in step 6)
10. Click Generate Connection String, and the Connection String auto-populates
11. Create a list of Allowed Groups that can access the target resource of this realm
12. Provide the Stored Procedure Name for Get Profile SP
13. Provide the Stored Procedure Name for Update Profile SP
14. Click Test Connection to ensure that the connection is successful
Note
Refer to Data Tab Configuration to complete the configuration steps in the Data tab of the Web Admin.
Refer to SQL User Data Store Tables and Stored Procedures Configuration Guide for more configuration information
OPTIONAL Configuration
Follow these configuration steps to create accounts in SQL automatically based on the identity used to log into the primary data store provider (specified in the Membership Connection Settings section) when utilizing SQL Server as a secondary data store provider
System Info
 |
1. In the Links section, click Click to edit Web Config file
Web Config Editor
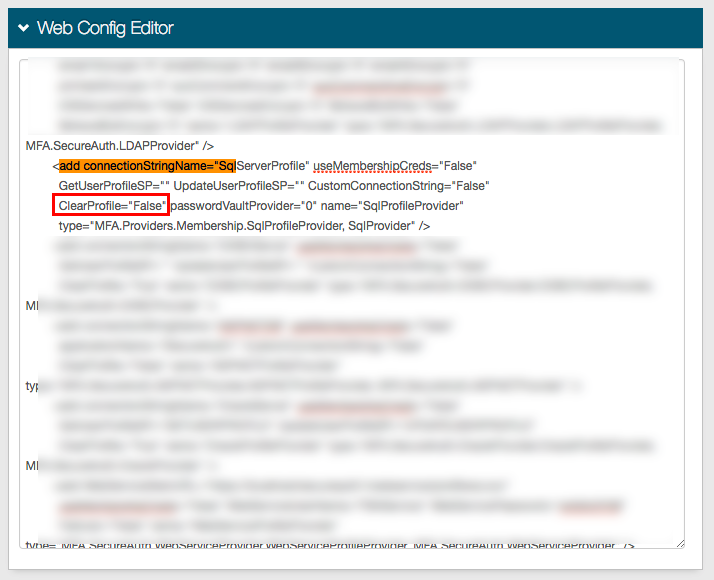 |
2. Locate <add connectionStringName="SqlServerProfile and set ClearProfile to False
Warning
Click Save once the configurations have been completed and before leaving the Web Config Editor page to avoid losing changes