Secure Portal single sign-on configuration
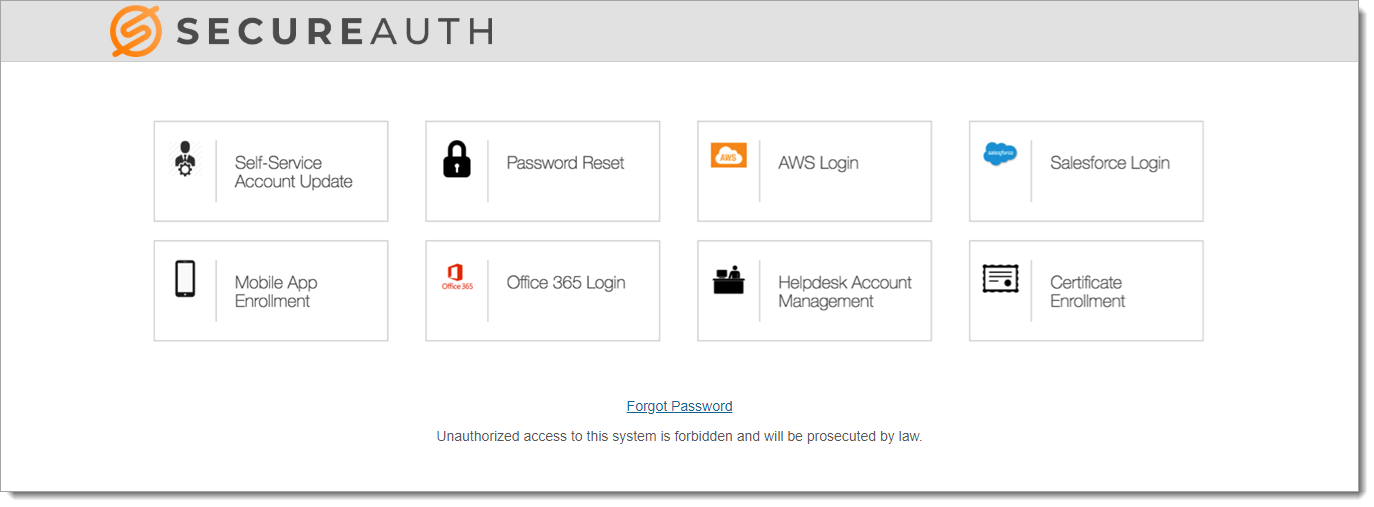
The Identity Management (IdM) tool in SecureAuth® Identity Platform (formerly SecureAuth IdP) contains the Secure Portal page.
The Secure Portal provides a centralized page for end user single sign-on (SSO) access to resources. You can associate many realms to the Secure Portal, allowing users easy navigation between resources with SSO. Also, you can upload icons to customize the appearance of the Secure Portal page.
 |
Prerequisites
Configured realms for resources to which the Secure Portal page connects for access. For example, Office 365 and Salesforce logins.
A realm for the Secure Portal page with the following tabs configured before setting up the Post Authentication tab:
Overview
Data
Workflow
Multi-Factor Methods
Identity Platform configuration
There are two sets of instructions to allow SSO to a resource linked in the Secure Portal.
Step A: Link resources to Secure Portal page
In each integrated resource (realm) you want to allow SSO from the Secure Portal, complete the following steps.
In the integrated realm, go to the Overview tab > Details section.
Upload the Application Logo for the resource tile to appear on the Secure Portal page.
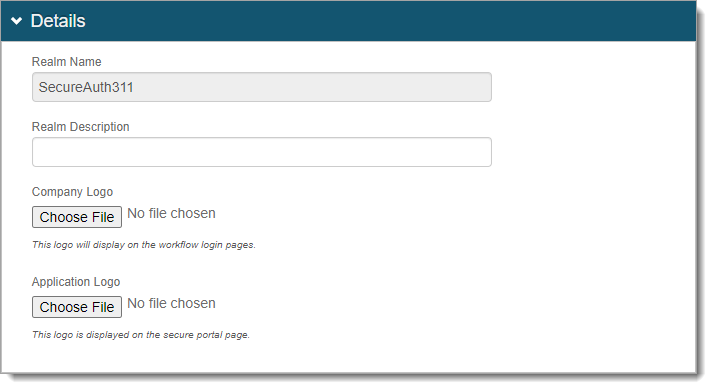
In the Look and Feel section, set the name of the resource in both the Document Title and Page Header fields.
This appears with the application logo on the Secure Portal page.

Save your changes.
Make sure the Data tab is set up correctly in the realm to allow users access to the resource.
For example, you have the correct Group Permissions in the Profile Connection Settings section. And the correct profile property for Groups (like memberOf) in the Profile Fields section.
Step B: Secure Portal configuration
Now you'll configure the Secure Portal to show as one page with
Go to the Post Authentication tab.
In the Post Authentication section, set the following.
Authenticated User Redirect
Set to Secure Portal.
Redirect To
This field is autopopulated with the post authentication .aspx page. This is appended to the domain name and realm number in the web address bar. For example, Authorized/SecurePortal.aspx.
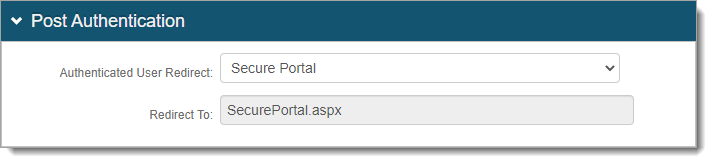
Save your changes.
In the Portal Page section, click the View and Configure the portal page link.

In the Portal Page Builder section, set the following.
Portal Page Authorization
Select one of the following options:
Not Available – Disables the use of the Secure Portal.
Token Required – Requires two-factor authentication (2FA) to access the Secure Portal.
NO Token – Allow access to the Secure Portal without 2FA. Access to a resource associated with the Secure Portal requires 2FA only when configured in the resource login workflow.
GAE – Allow access with a token from a Google Apps Engine (GAE) SecureAuth IdP instance.
Links shown on portal page
Select the Identity Platform resources to display on the Secure Portal and allow SSO access.

Save your changes.
In the Forms Auth / SSO Token section (Post Authentication tab), click the View and Configure FormsAuth keys/SSO token link.

In the Forms Authentication section, set the following configurations.
Name
Set the Forms Based Authentication (FBA) token name and make sure it matches in each realm for which SSO is enabled.
By default, the name is set to .ASPXFORMSAUTH[realm#], but you can change this to another name.
If a realm is already set up for SSO, then use the name from that realm here.
Domain
Set the common domain name and make sure it matches in each realm for which SSO is enabled.
By default, this field is empty and the Identity Platform uses the domain of appliance.
If a realm is already set up for SSO, then use the domain from that realm here.
Require SSL *
Set whether to require SSL to view the token (True / False).
Cookieless *
Choose how the Identity Platform sends the token in a cookie to the user's browser or device:
UseCookies – Always send a cookie.
UseUri – Do not send a cookie. Instead, send the token in a query string.
AutoDetect – Send a cookie if the user settings allow it.
UseDeviceProfile – Deliver a cookie if the browser settings allow it, regardless of the user settings.
Sliding Expiration *
Set the expiration of the cookie:
True – Cookie remains valid as long as the user is interacting with the page.
False – Cookie is allowed to expire and user must reauthenticate.
Timeout *
Set time in minutes, how long a cookie is valid.
Notice
* The FBA token settings must be the same on each integrated SSO realm. The timeout value can be distinct.

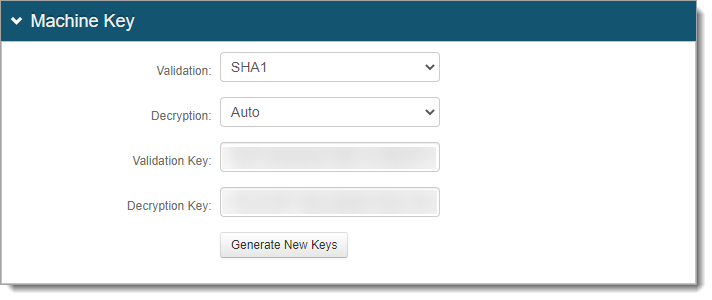
In the Machine Key section, see the following settings.
Validation and Decryption
Make sure the Validation and Decryption settings are the same on all integrated SSO realms.
Validation Key and Decryption Key
If a realm is set up for SSO, do not click Generate New Keys. Instead, it uses the validation and decryption keys from that realm.
If a realm is not set up for SSO, click Generate New Keys. The keys must match on all integrated SSO realms.
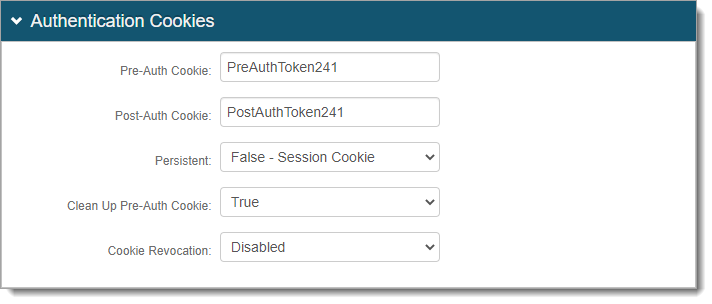
In the Authentication Cookies section, see the following settings.
Pre-Auth Cookie and Post-Auth Cookie
Set the Pre-Auth Cookie and Post-Auth Cookie names and make sure they match in each integrated realm for which SSO is enabled.
By default, the names are set to PreAuthToken[realm#] and PostAuthToken[realm#], but you can change them to other names.
If a realm is already set up for SSO, then use the names from that realm here.
Save your changes.