Palo Alto SAML Single Sign-on Deployment Guide
Introduction
This guide provides information on how to integrate Palo Alto SAML Single Sign-On (SSO) for use with SecureAuth IdP.
Palo Alto Networks maintains a Content Delivery Network (CDN) infrastructure for delivering content updates to Palo Alto Networks firewalls. When configured as specified in this guide, the Palo Alto firewall structure works seamlessly with SecureAuth IdP to increase network protection using authentication features only SecureAuth can offer.
Prerequisites
The prerequisites for deploying this SSO use case are:
Installation of Palo Alto Networks PAN-OS 8.x (or later) appliance
Deployment of GlobalProtect Client 4.x or later
Deployment of one or more SecureAuth IdP appliances
SecureAuth IdP Configuration Steps
Post Authentication
 |
1. Execute the procedures in the Generic SAML Guide to create one or more realms for sup- porting Palo Alto VPN access and populating the Overview, Data, Workflow, and Multi-Factor Methods tab pages with the required values.
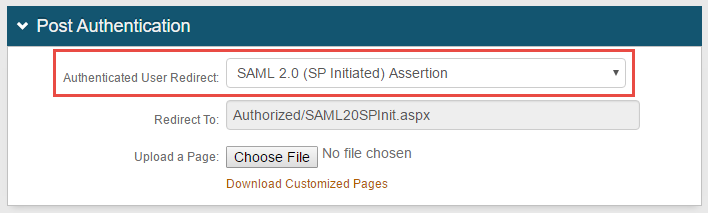
2. Specify the required values on the Post Authentication tab page
3. Select SAML 2.0 (SP Initiated) Assertion from the Authenticated User Redirect dropdown
The Redirect To field auto-populates with the URL to which SecureAuth IdP redirects successfully authenticated end-users. In this case, Authorized/SAML20SPInit.aspx
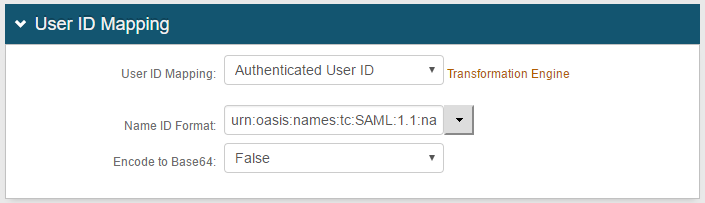 |
4. Since the end-user logs on to the application with the same SecureAuth IdP credentials, select Authenticated User ID from the User ID Mapping dropdown
5. Select urn:oasis:names:to:SAML:1:1:nameid-format:unspecified from the Name ID Format dropdown
6. Select False from the Encode to Base64 dropdown
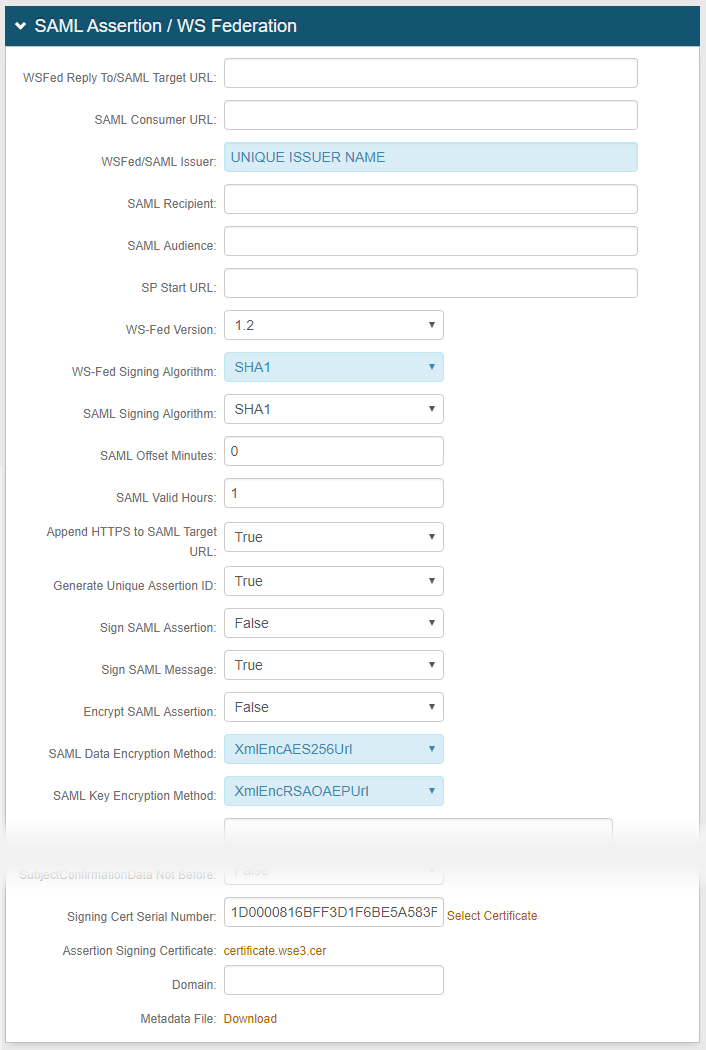 |
7. Set WSFed / SAML Issuer to a unique name that identifies the IdP to the application, such as the SAML ID
8. Set WS-Fed Version to 1.2
9. Set WS-Fed Signing Algorithm to SHA1
10. Leave SAML Offset Minutes at the default 0
11. Set SAML Valid Hours to 1
12. Set Append HTTPS to SAML Target URL to True
13. Set SAML Data Encryption Method to XmlEncAES256Url (that is AES-256 encryption)
14. Set SAML Key Encryption Method to XmlEncRSAOAEPUrl
15. For Signing Cert Serial Number, upload the certificate into the SecureAuth IdP appliance's certificate store, then click Select Certificate
16. For Assertion Signing Certificate, click to download the certificate that is typically uploaded to the configured application
Warning
Click Save and remain on the Post Authentication page
 |
17. Return to the User ID Mapping section, and click Transformation Engine to generate the XSLT Editor file
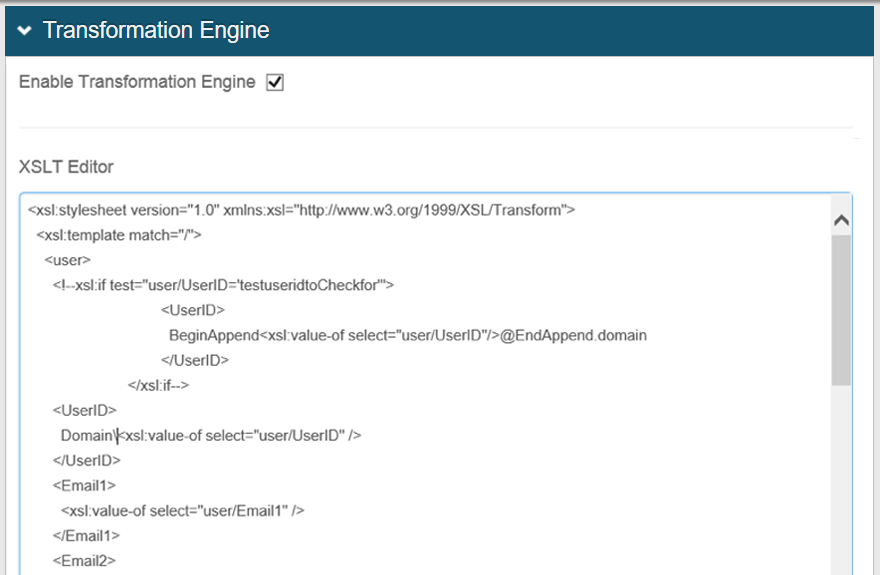 |
18. Click the Enable Transformation Engine checkbox
19. Modify only the first element — <UserID> — by typing/pasting the value Domain\ before the <xsl:value of select="user/UserID"> tag
Warning
Click Save once the configuration is complete and before leaving the Post Authentication page to avoid losing changes
Palo Alto VPN Configuration Steps
 |
1. Start the Palo Alto VPN admin console
Refer to the PAN-OS Documentation for more information
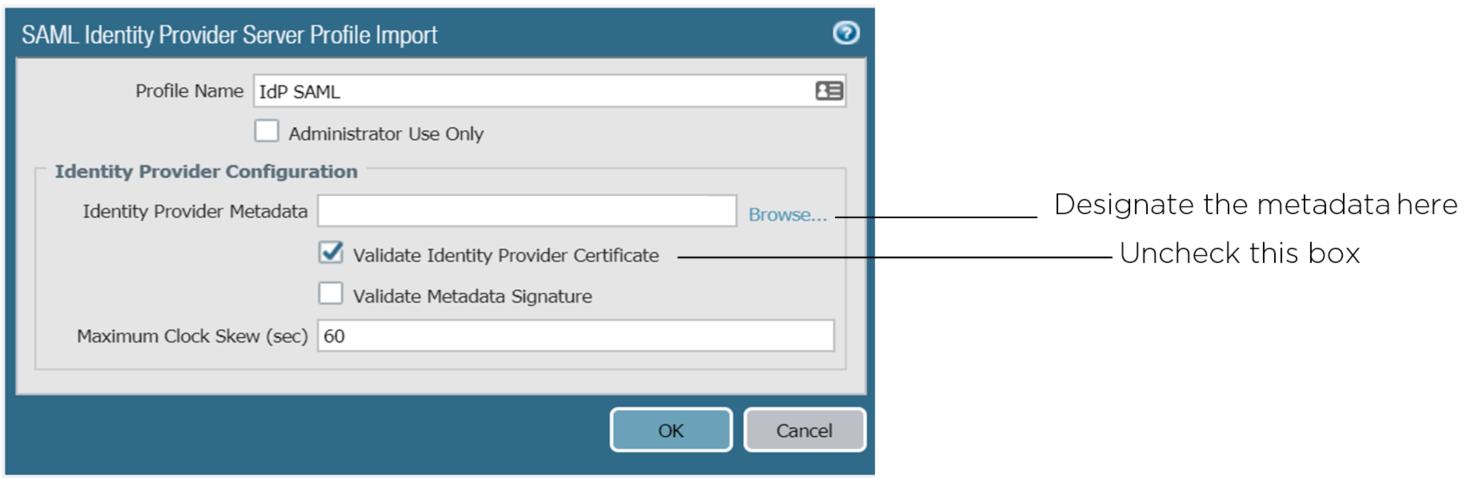
2. Import SecureAuth IdP realm metadata to the Palo Alto appliance
a. On the Palo Alto VPN admin console, click Device > Server Profiles > SAML Identity Provider > Import
 |
b. In the Identity Provider Metadata text field, either enter the location and name of the metadata XML file you have copied to this appliance, or click Browse... to navigate to the correct location and specify the XML file
3. After importing the metadata, uncheck the Validate Identity Provider Certificate box
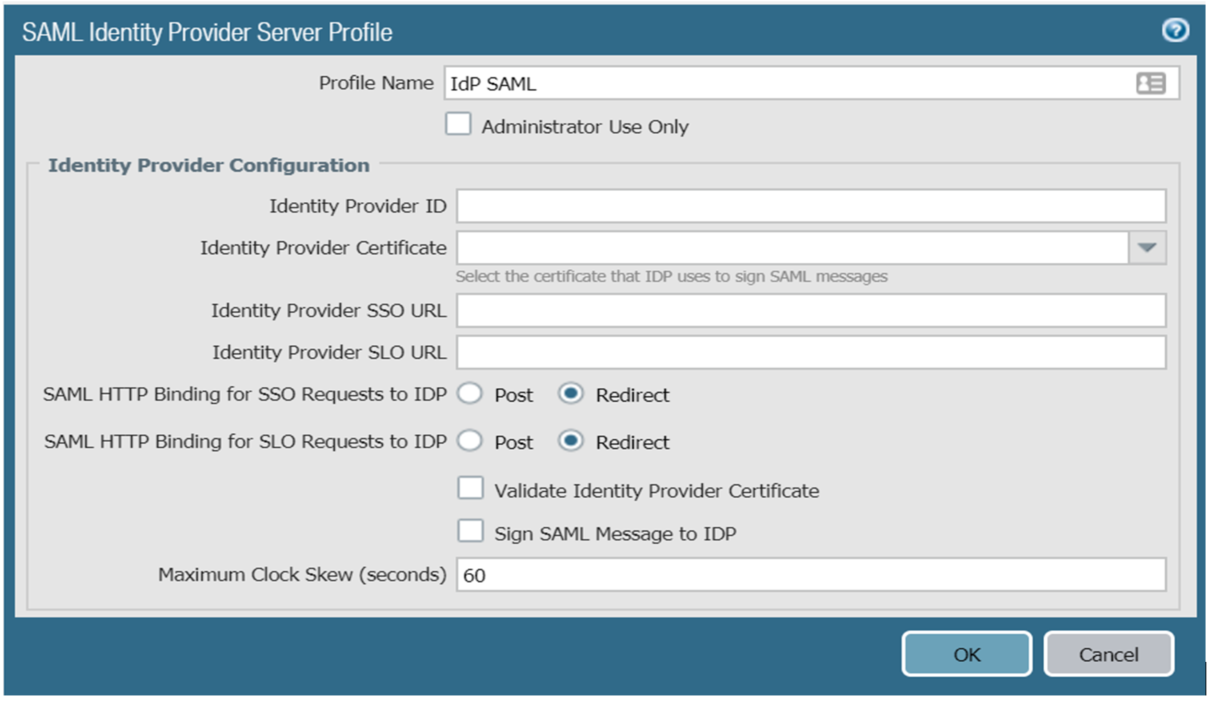
4. Create a SAML Identity Server Profile by clicking Device > Server Profiles > SAML Identity Provider > Add
5. Modify these fields as follows:
a. For Profile Name, enter the required profile name
b. For Identity Provider ID, enter the same ID used as the Issuer Name on SecureAuth IdP Web AdminPost Authentication page
c. For Identify Provider Certificate, enter the same certificate used for the SAML certificate on the SecureAuth IdP Web Admin Post Authentication page
d. For Identity Provider SSO URL, indicate the SecureAuth URL in which SAML is configured for this app
6. Click OK when finished
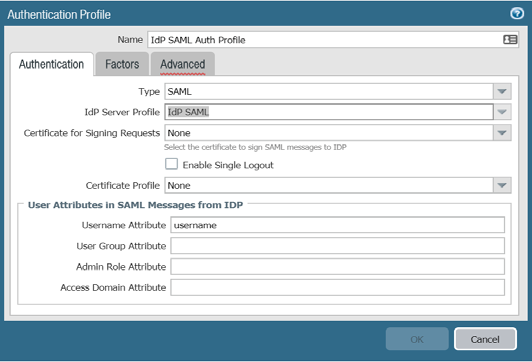 |
7. From the configuration main menu, select Device > Authentication Profile
8. Create an authentication profile for the previously created SecureAuth IdP SAML Identity Provider and supply all required values
The fields under the User Attributes in SAML Messages from IdP section should match the default values shown on the SecureAuth IdP Web Admin Post Authentication page
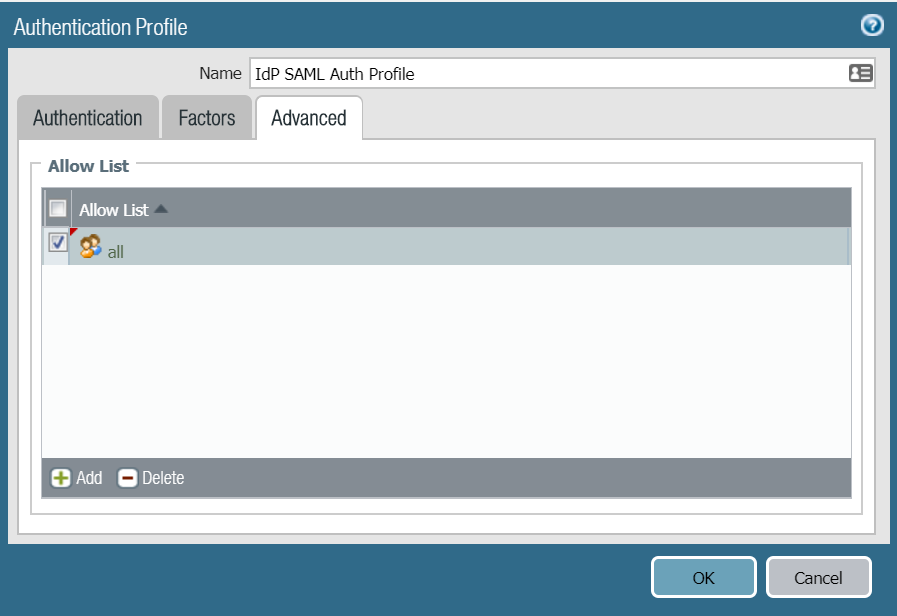 |
9. Click the Advanced tab and then click Add to add Allow List members as required
10. When finished, click OK
 |
11. Start the GlobalProtect Portal Configuration utility as specified in your GlobalProtect documentation
 |
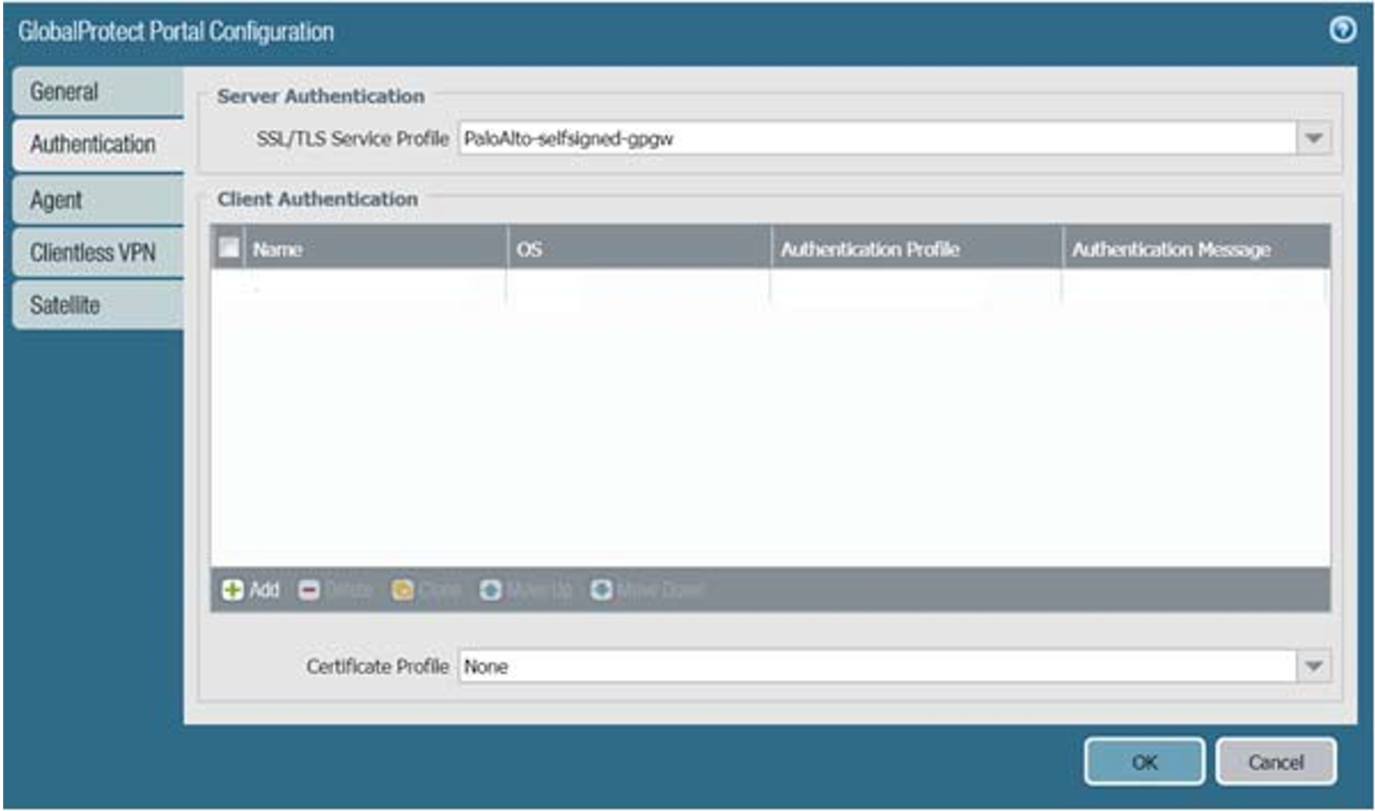
12. Click the Authentication tab, then create a Portal and Gateway profile that will enable you to use the SecureAuth IdP SAML Auth Profile
13. When finished, click OK
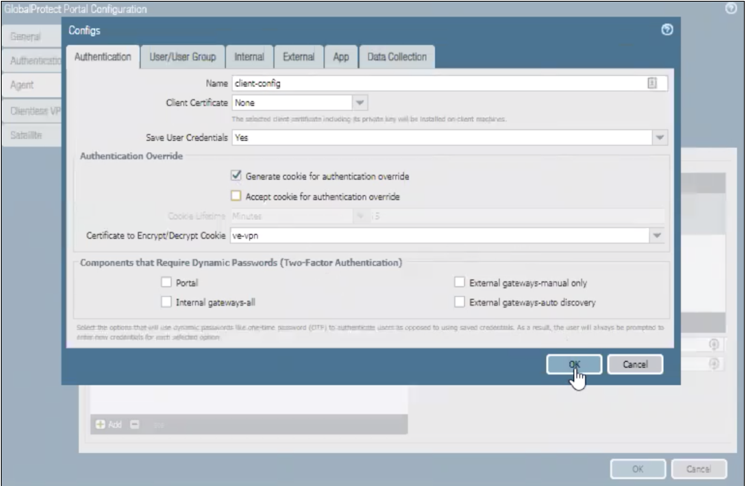 |
14. Click the Agent tab
15. Click the Authentication tab, then click the checkbox next to Generate cookie for authentication override
16. Click OK
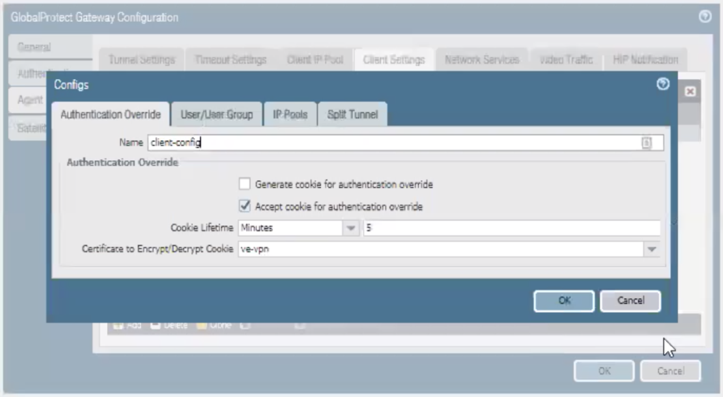 |
17. Click the Agent | Client Settings | Authentication Override tabs
18. Click the checkbox next to Accept cookie for authentication override
19. Click OK
GlobalProtect Client Steps
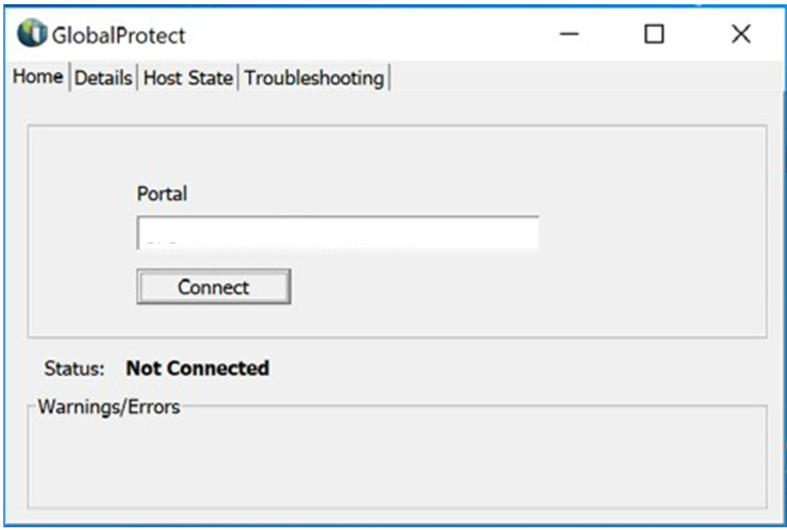 |
1. Start the GlobalProtect client
2. Click Connect
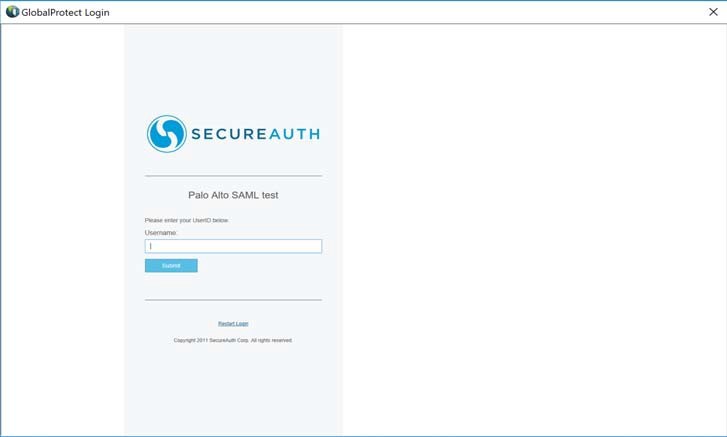 |
3. You should be redirected to SecureAuth IdP for authentication
4. Enter the appropriate username, password, and passcode as required, and then click Submit
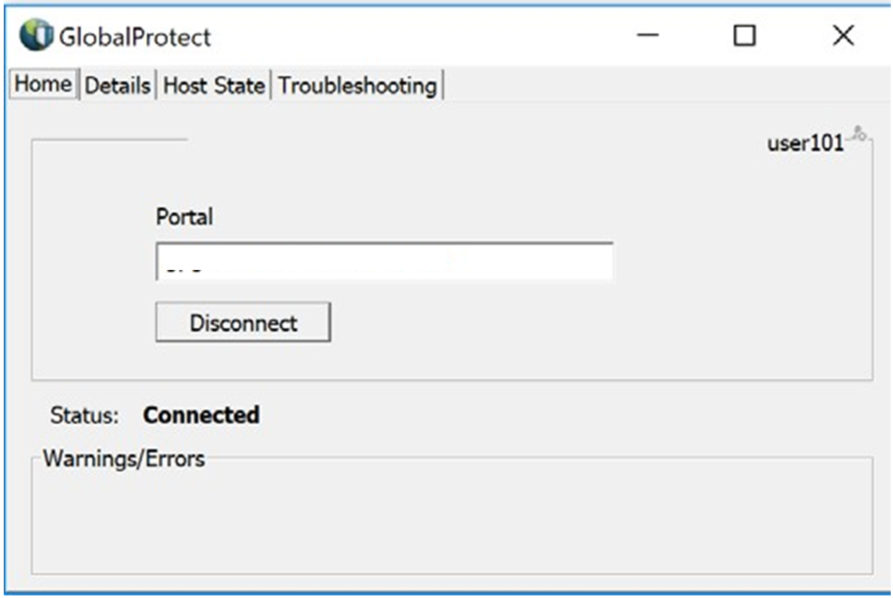 |
5. If successfully authenticated, the GlobalProtect client returns a screen as shown here
Troubleshooting
When end-users attempting to authenticate enter their credentials in an embedded browser, they may receive this script error message: "'WebForm_DoPostBackWithOptions' is undefined". Refer to the SecureAuth Support article Embedded Browser Error: An error has occurred in the script on this page to resolve this issue.