PFX Certificate Installation on Mac or Windows Browser
Introduction
This document provides information on installing a PFX certificate on an Apple Mac or Windows PC desktop using a supported browser type
Apple Mac | Windows PC |
|---|---|
Chrome | Chrome |
Firefox | Firefox |
Safari |
Prerequisites
1. SecureAuth IdP appliance with PFX realm instantiated
SecureAuth IdP Version | OS Version |
|---|---|
6.x+ |
|
2. End-user account and Apple Mac / Windows PC desktop that uses a PFX certificate to authenticate to the VPN
PFX Certificate Installation Steps
Notice
Screenshots included in these steps were made on a SecureAuth IdP Version 9.0.0 configured to use the 2016 Light theme
Certificate installation pages the end-user sees may differ from these images depending on browser settings, SecureAuth IdP version, and theme configured on the Web Admin
Mac (Later IdP Version) - Chrome Browser Configuration Steps
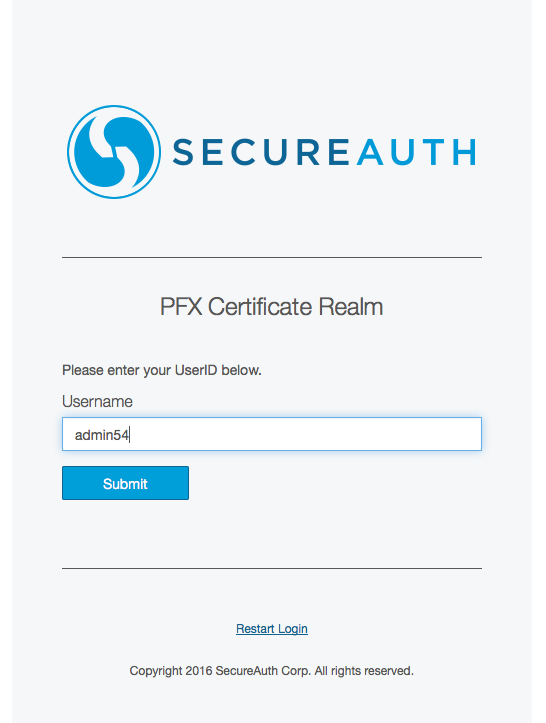
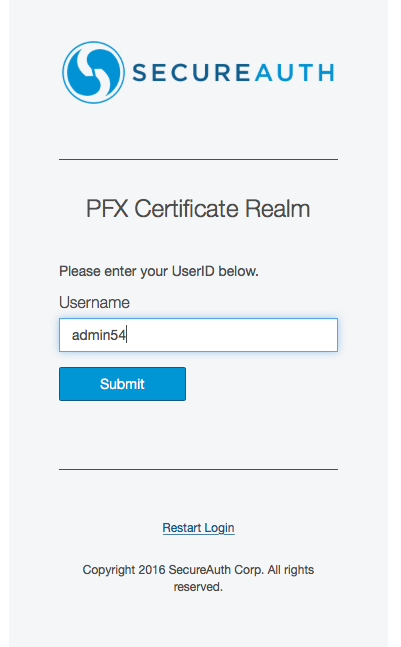
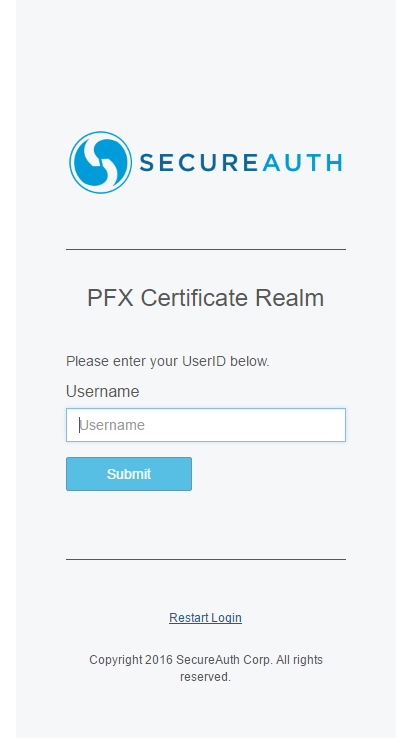
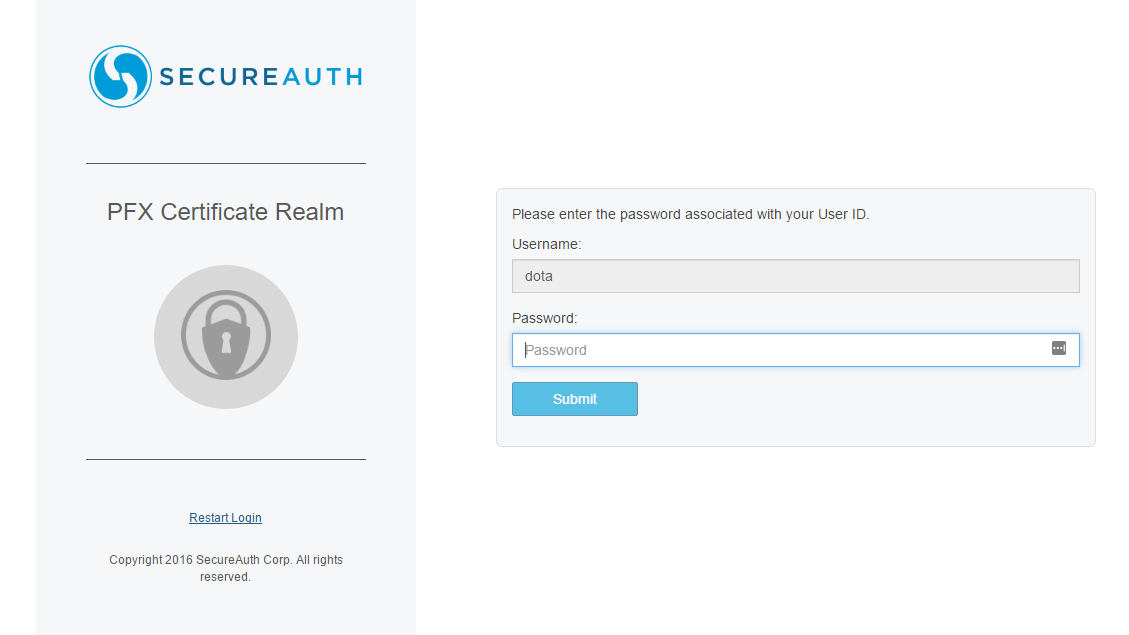
1. In a Chrome browser, enter the URL for the PFX realm and Submit the username to be associated with the PFX file
 |
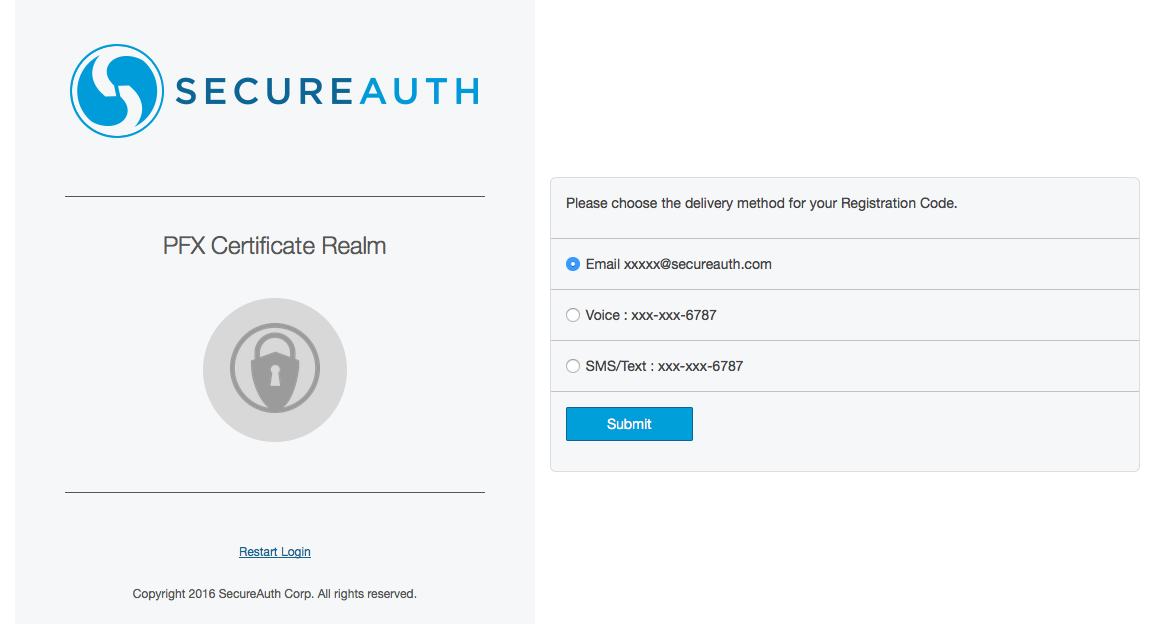
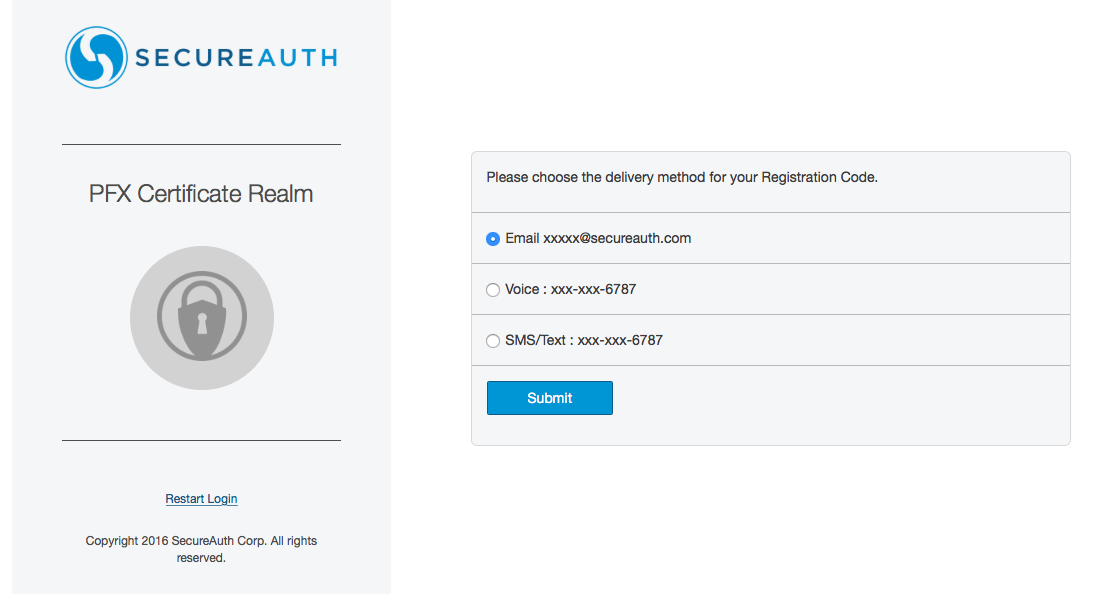
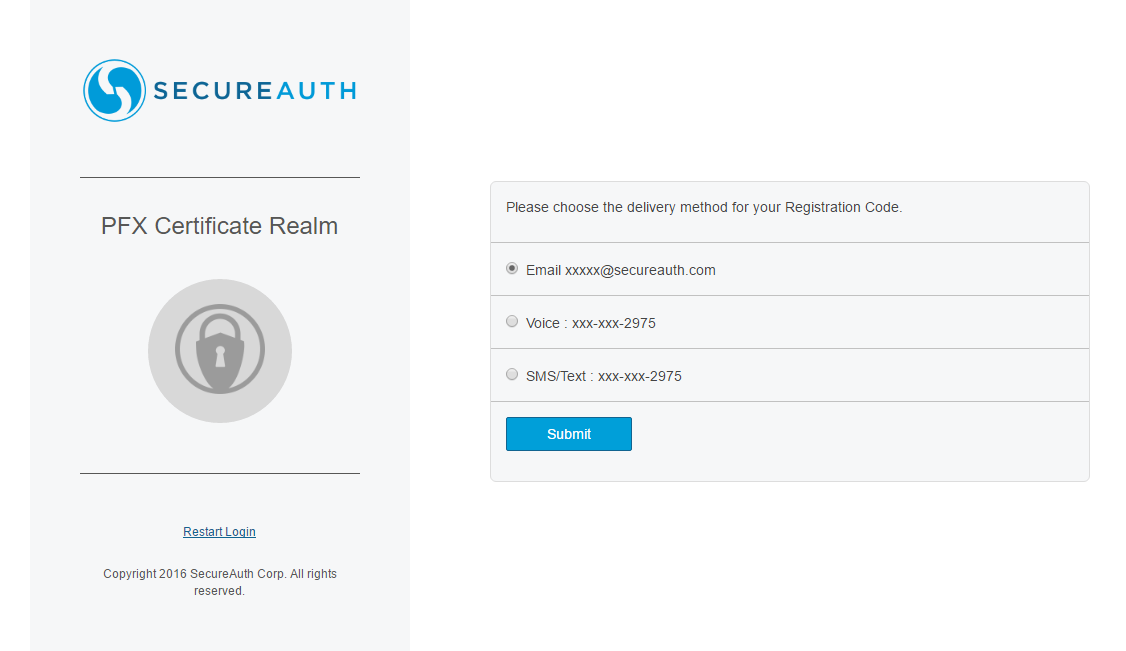
2. Select an applicable method to receive a One Time Registration Code and click Submit
 |
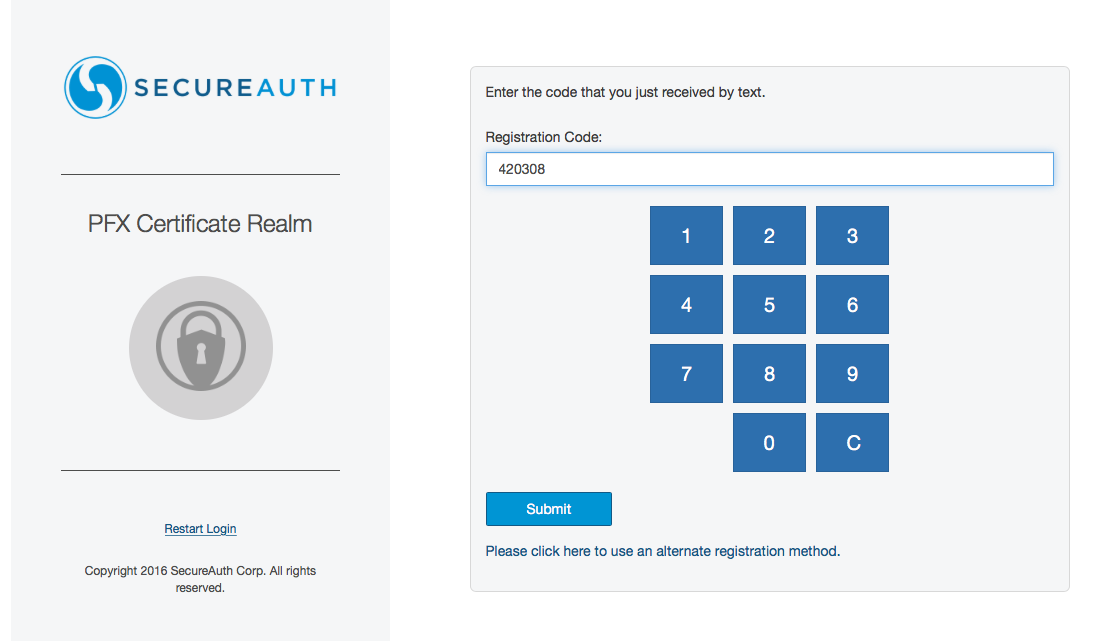
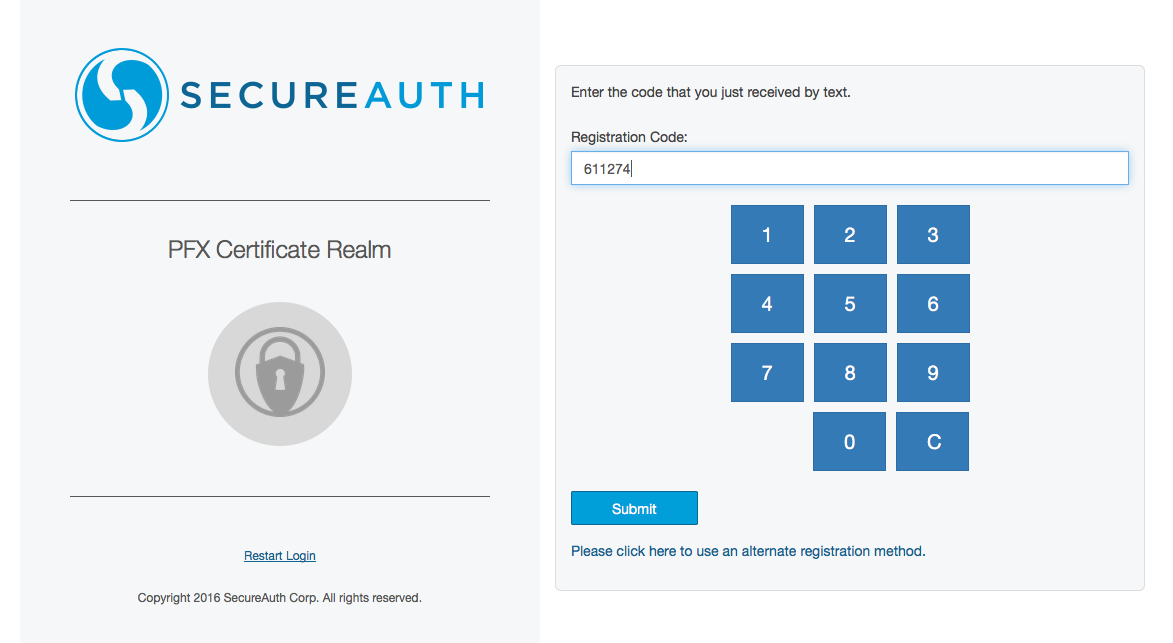
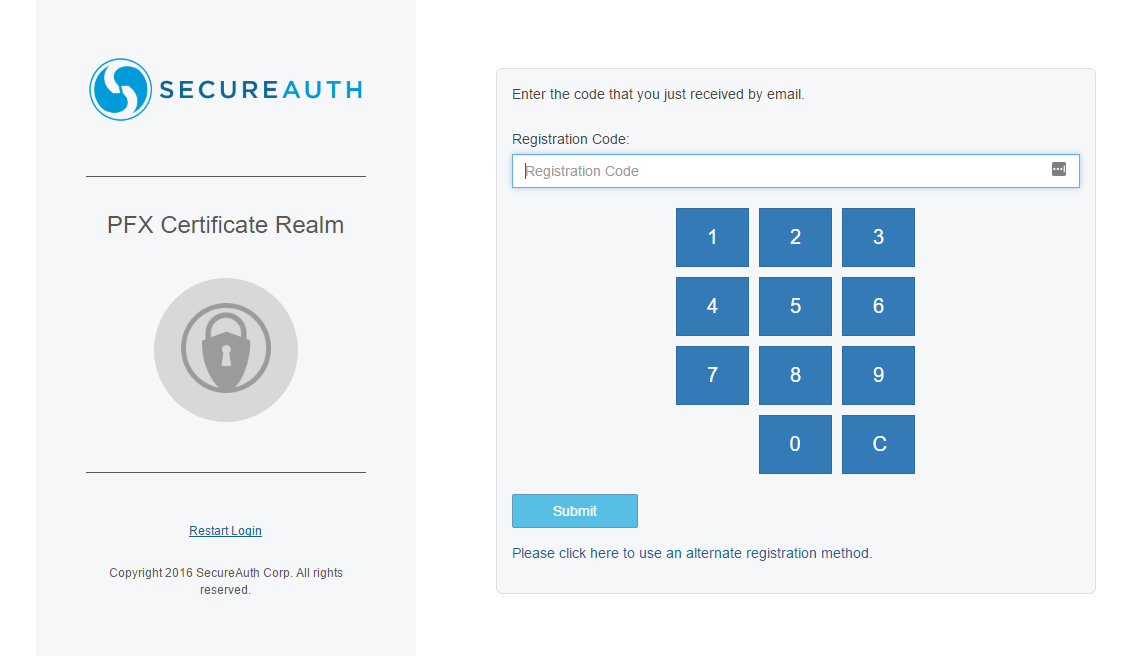
3. Input the One Time Registration Code disseminated from the previously selected method and click Submit
 |
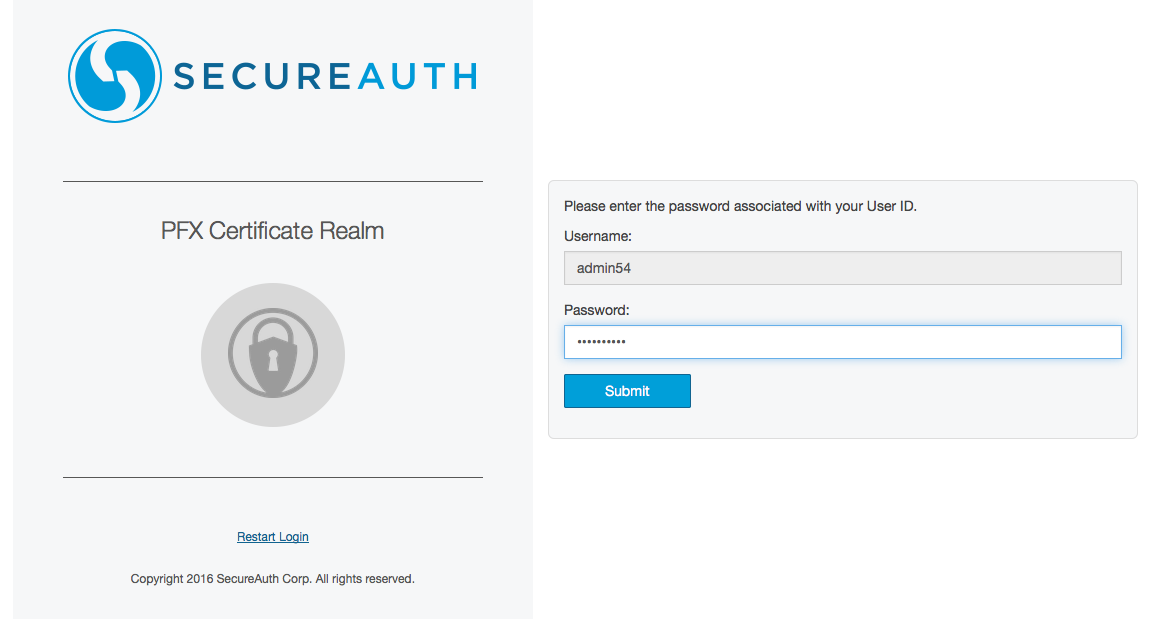
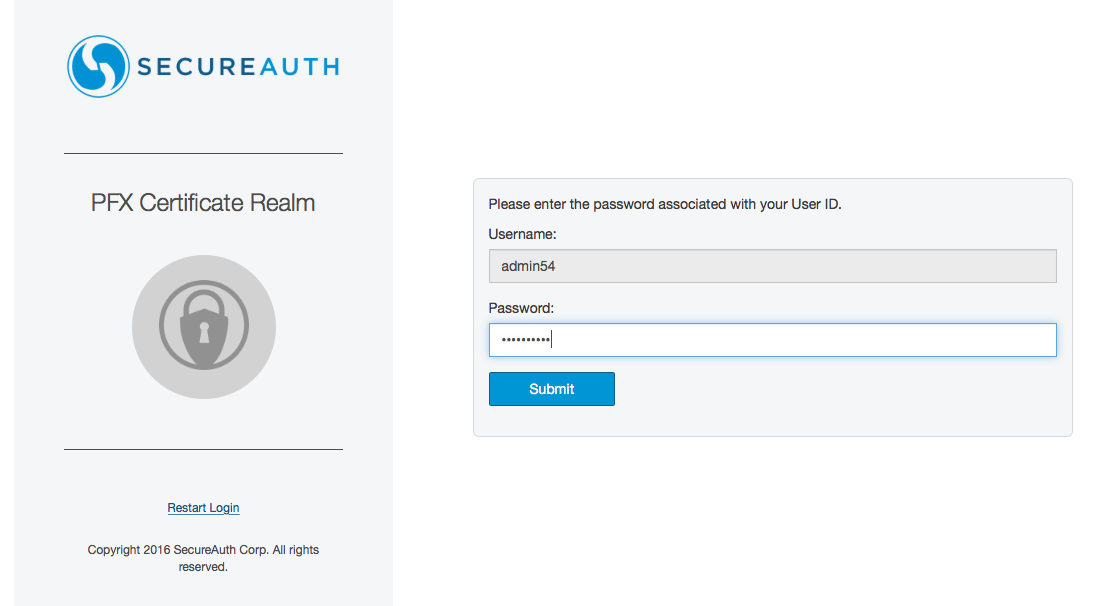
4. Input the Password credential for the previously supplied username and click Submit
 |
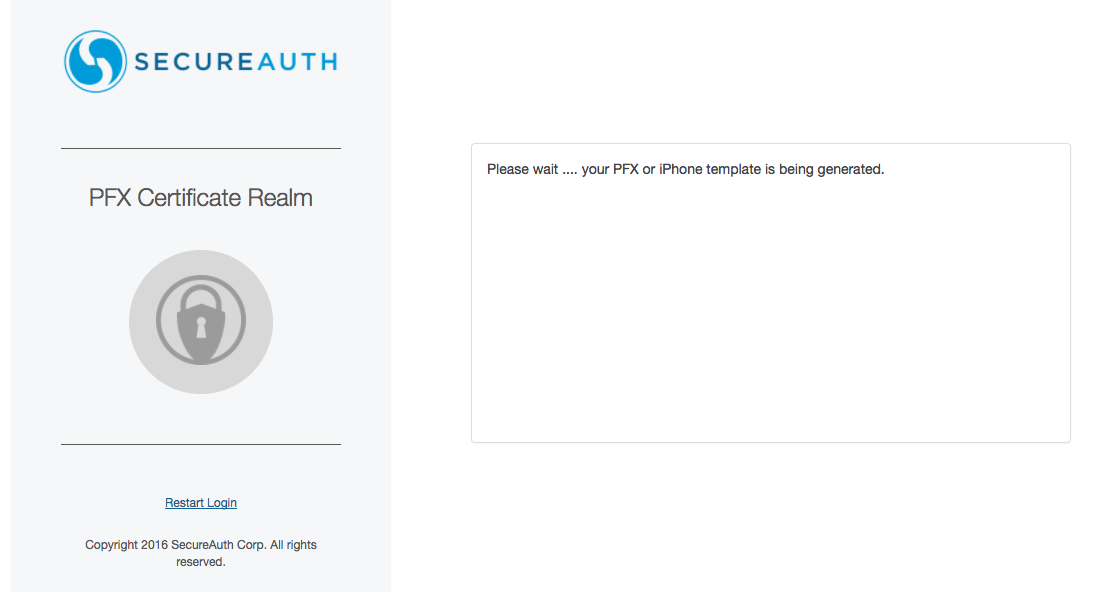
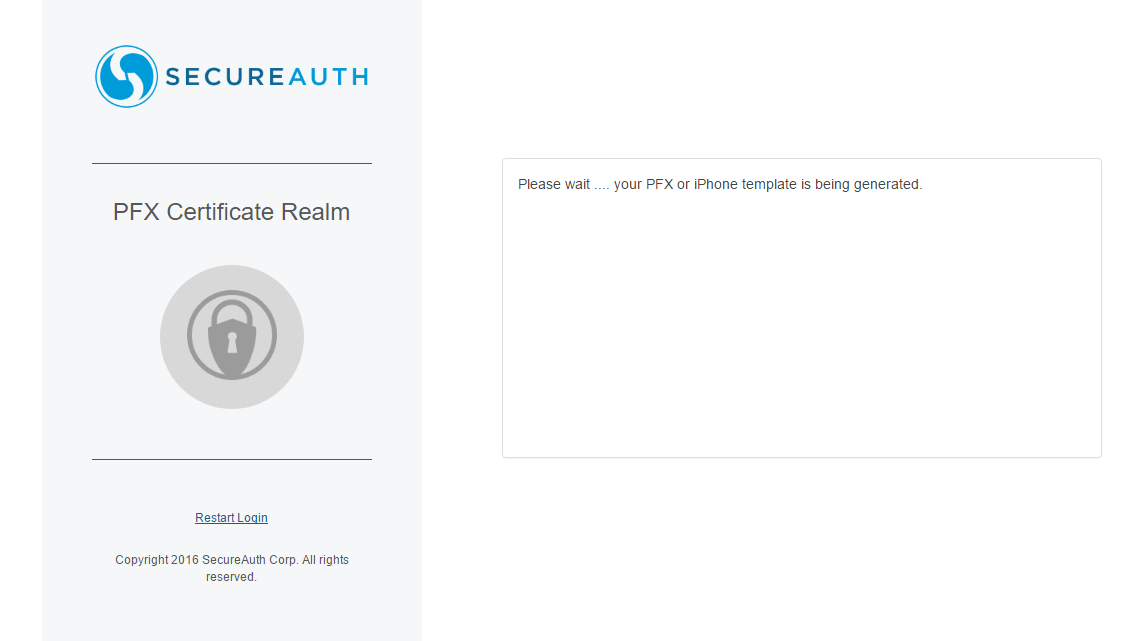
5. Wait for the PFX file to be created; Chrome automatically saves the file to the Downloads directory
 |
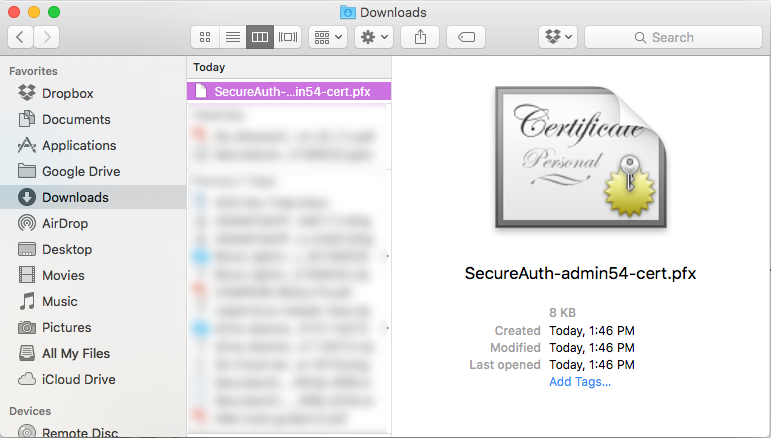
6. Navigate to the download path of the PFX certificate file
 |
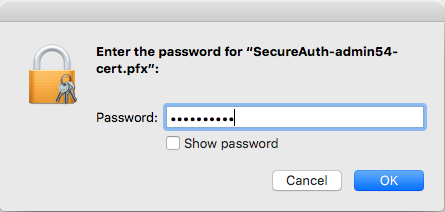
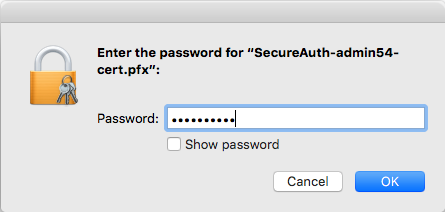
7.To install the PFX file, begin by double-clicking the file
When prompted for the privatekey Password, enter the same password supplied in step 4 and click OK
 |
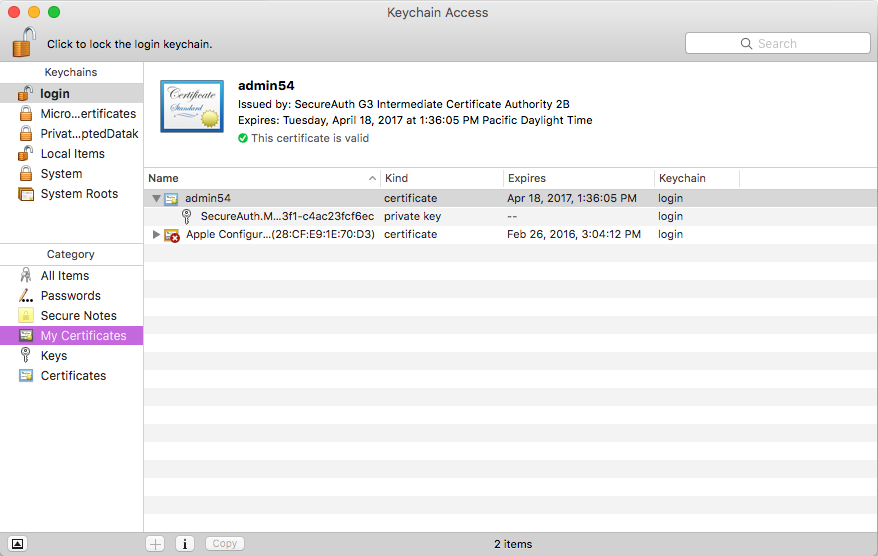
8. Keychain Access now starts, allowing end-user validation, verification and certificate viewing
 |
Note
The steps above let the non-IPSec end-user install the PFX certificate for VPN access and connect to the VPN to be authenticated
IPSec and SSLVPN end-users must complete the remaining two steps below
Steps for IPSec Users and SSLVPN end-users
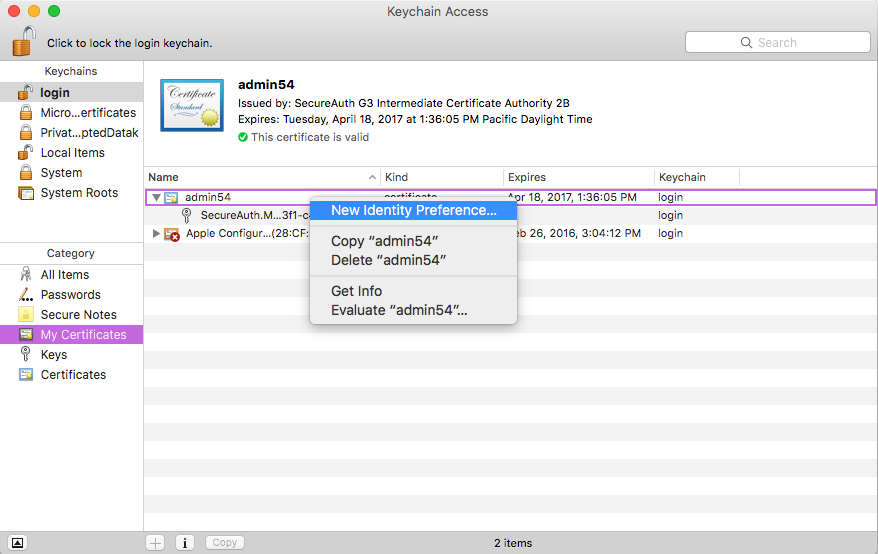
9.Right-click the PFX certificate and select New Identity Preference
 |
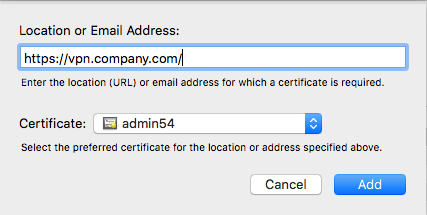
10. Input the VPN URL used for authenticating with the PFX certificate
Select Add and then close Keychain Access
Notice
The trailing '/' of the URL string may or may not be required based on the browser cache
 |
With the PFX certificate now installed, the VPN can now be accessed for authentication
Mac (Later IdP Version) - Firefox Browser Configuration Steps
1. In a Firefox browser, enter the URL for the PFX realm and Submit the username to be associated with the PFX file
 |
2. Select an applicable method to receive a One Time Registration Code and click Submit
 |
3. Input the One Time Registration Code disseminated from the previously selected method and clickSubmit
 |
4. Input the Password credential for the previously supplied username and clickSubmit
 |
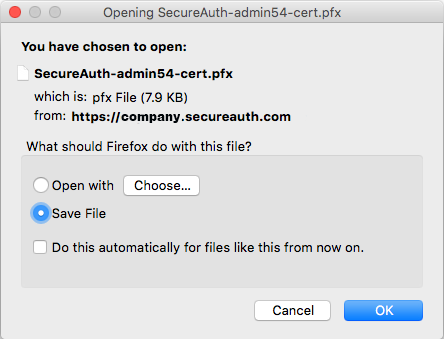
5. After the PFX file is created, select Save File rather than Open with when prompted by the browser window, then click OK
 |
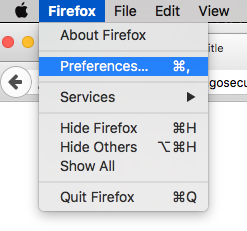
6. Select Preferences from the Firefox application menu
 |
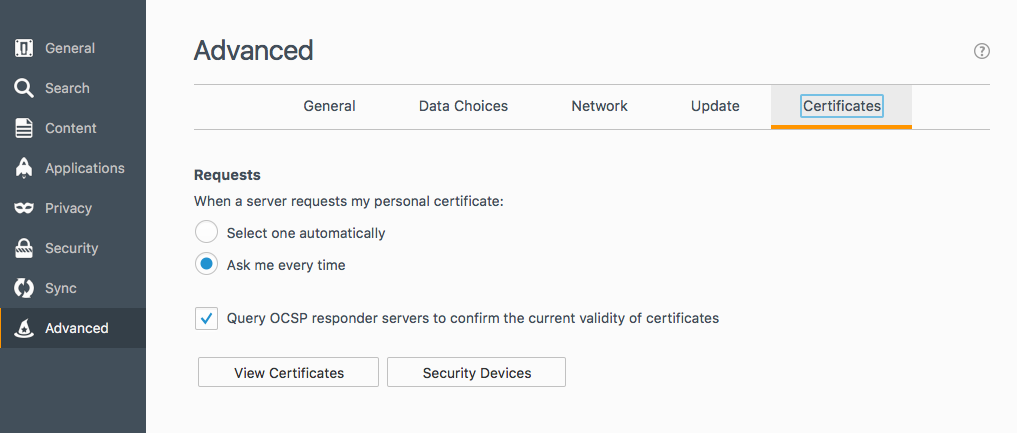
7. Select the Advanced link and the Certificates sub-tab, and finally click View Certificates to start the Certificate Manager
 |
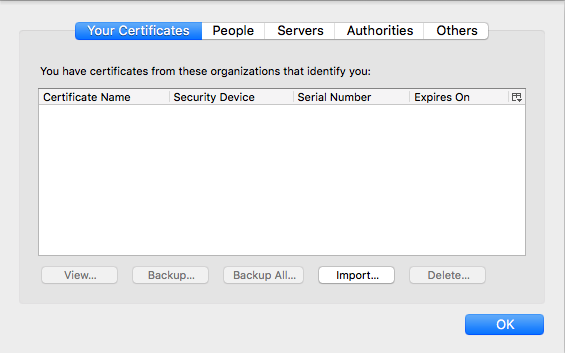
8. With the Your Certificates tab selected, click Import
 |
9. Input the VPN URL used for authenticating with the selected PFX Certificate and click Add
 |
10. When prompted for the private key Password used to encrypt the certificate, supply the same password used in step 4 and click OK
 |
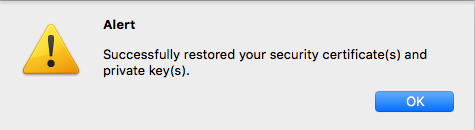
11. The success Alert indicates the PFX certificate has been successfully imported and installed; click OK
 |
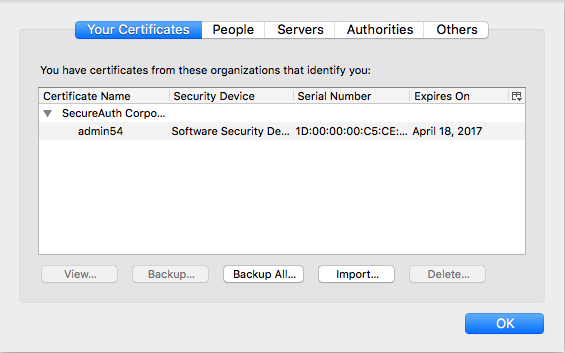
12. Certificate Manager now lets the end-user validate, verify, and view the newly-installed certificate
Click OK to close Certificate Manager
 |
With the PFX certificate now installed, the VPN can now be accessed for authentication
Mac (Later IdP Version) - Safari Browser Configuration Steps
1. In a Safari browser, enter the URL for the PFX realm and Submit the username to be associated with the PFX file
 |
2. Select an applicable method to receive a One Time Registration Code and click Submit
 |
3. Input the One Time Registration Code disseminated from the previously selected method and click Submit
 |
4. Input the Password credential for the previously supplied username and click Submit
 |
5. Wait for the PFX file to be generated; Safari 5.1 and later automatically accepts the download and saves it to the default download directory path: Users/[useraccountname]/Downloads
Navigate to the download directory path of the PFX certificate file
 |
6. To install the PFX file, begin by double-clicking the file
When prompted for the privatekey Password, enter the same password supplied in step 4 and click OK
 |
7. Keychain Access now starts, allowing end-user validation, verification and certificate viewing
 |
Note
The steps above let the non-IPSec end-user install the PFX certificate for VPN access and connect to the VPN to be authenticated
IPSec end-users must complete the remaining two steps below
Steps for IPSec Users
8. Right-click the PFX certificate and select New Identity Preference
 |
9. Input the VPN URL used for authenticating with the PFX certificate
Select Add and then close Keychain Access
Notice
The trailing '/' of the URL string may or may not be required based on the browser cache
 |
With the PFX certificate now installed, the VPN can now be accessed for authentication
Windows (Later IdP Version) - Chrome Browser Configuration Steps
1. In a Chrome browser, enter the URL for the PFX realm and Submit the username to be associated with the PFX file
 |
2. Select an applicable method to receive a One Time Registration Code and click Submit
 |
3. Input the One Time Registration Code disseminated from the previously selected method and clickSubmit
 |
4. Input the Password credential for the previously supplied username and clickSubmit
 |
5. Wait for the PFX file to be created
 |
6. Chrome automatically saves the file to the Downloads directory – by default the file is also accessible via the downloads tab at the bottom of the browser window
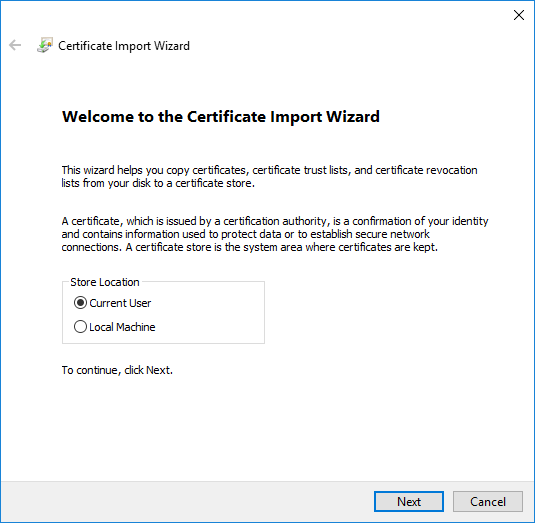
Double-click the PFX certificate file to start the Certificate Import Wizard
7. Leave the default Store Location setting and click Next
 |
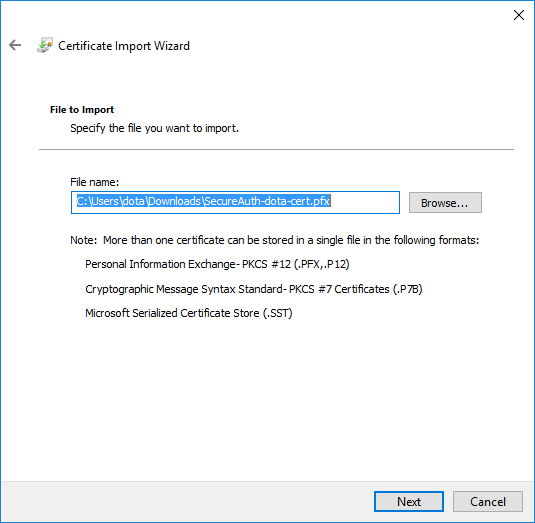
8. Browse to select the PFX certificate and click Next
 |
9. When prompted for the privatekey Password, enter the same password supplied in step 4 and then click Next
 |
10. Proceed with the default selection Automatically select the certificate store based on the type of certificate and click Next
 |
11. The PFX certificate has now been successfully installed and the Certificate Import Wizard window can be closed by clicking Finish
 |
12. Click OK to dismiss the success pop-up alert – the VPN can now be accessed for authentication
Windows (Later IdP Version) - Firefox Browser Configuration Steps
1. In a Firefox browser, enter the URL for the PFX realm and Submit the username to be associated with the PFX file
|
2. Select an applicable method to receive a One Time Registration Code and click Submit
|
3. Input the One Time Registration Code disseminated from the previously selected method and click Submit
|
4. Input the Password credential for the username previously supplied and click Submit
|
5. Wait for the PFX file to be created
Select Save File rather than Open with when prompted by the dialog, then click OK
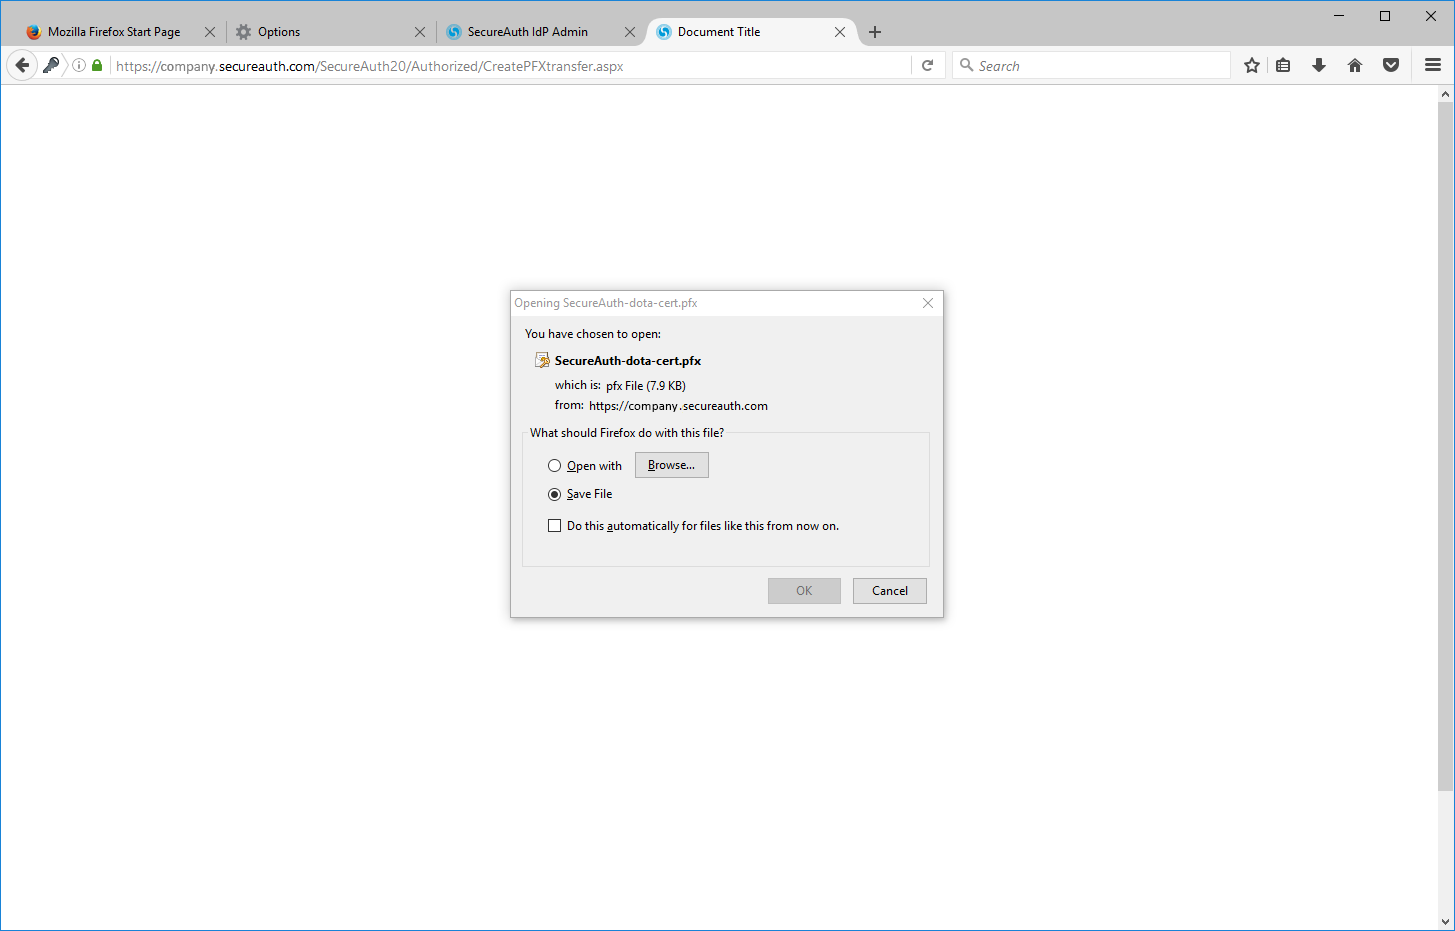 |
6. Navigate to the download path of the PFX file and double-click it to start the Certificate Import Wizard
 |
7. Leave the default Store Location setting and click Next
|
8. Browse to select the PFX certificate and click Next
|
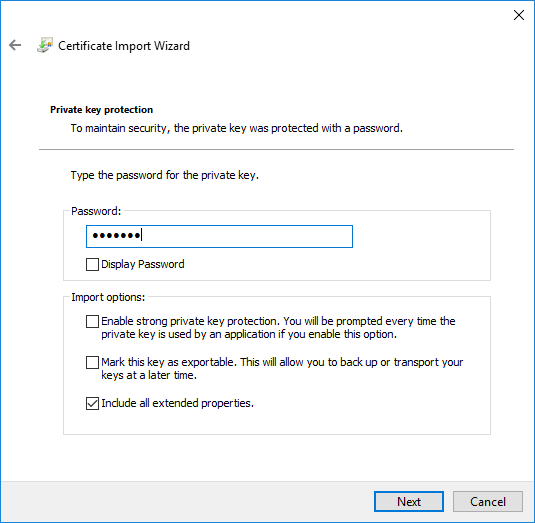
9. When prompted for the private key Password used to encrypt the certificate, supply the same password used in step 4and click Next
|
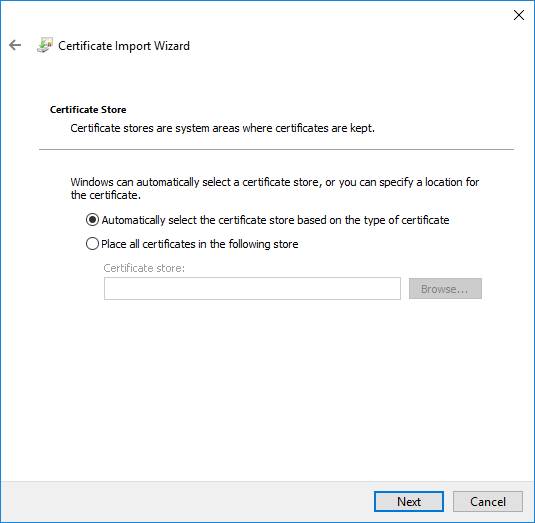
10. Proceed with the default selection Automatically select the certificate store based on the type of certificate and click Next
|
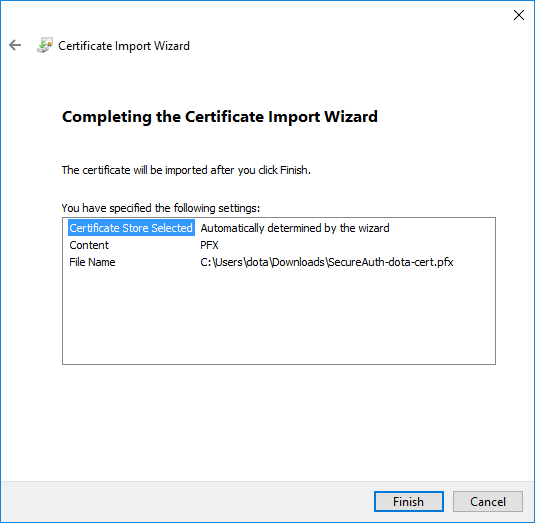
11. The PFX certificate has now been successfully installed and the Certificate Import Wizard window can be closed by clicking Finish
|
12. Click OK to dismiss the success pop-up alert – the VPN can now be access for authentication