OWA on KEMP (SP-initiated) integration guide
Introduction
Use this guide to enable Single Sign-on (SSO) access via SAML to Microsoft Exchange Outlook Web Access (OWA) on KEMP.
The KEMP Managed SSO module works as an authentication broker only allowing Kerberos for back-end server authentication. A Kerberos Constrained Delegation (KCD) account in KEMP must be set up for the OWA and ECP virtual directories for each of the Exchange client access servers (CAS).
Prerequisites
Hardware and software requirements
SecureAuth IdP version 9.1 or later with a realm ready for the KEMP integration
Active Directory
KEMP load balancer version 7.2.39
Internal PKI certificate
NOTE: Due to KEMP limitations, the default SecureAuth IdP certificate for SAML Assertion Signing cannot be used. Use a certificate issued by a locally trusted CA (internal PKI). This is confirmed by KEMP support and will be addressed in future versions.
Active Directory requirements
1. The following configurations must be made in Active Directory (AD):
OWA and ECP must be set to Integrated Windows Authentication
Basic Authentication must be unchecked (not selected)
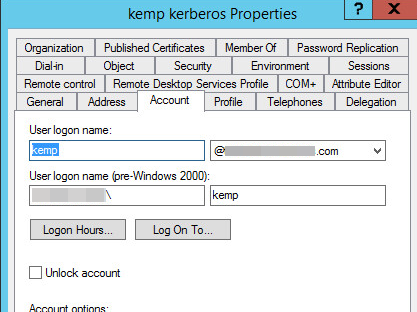
2. In the KEMP Kerberos Properties, go to the Account tab and create an Active Directory account for the KEMP load balancer.
The name of the account must match the hostname of the load balancer.
 |
3. From your domain controller to delegate the service account, run the following command line:
setspn –A http/kemp svcaccountname
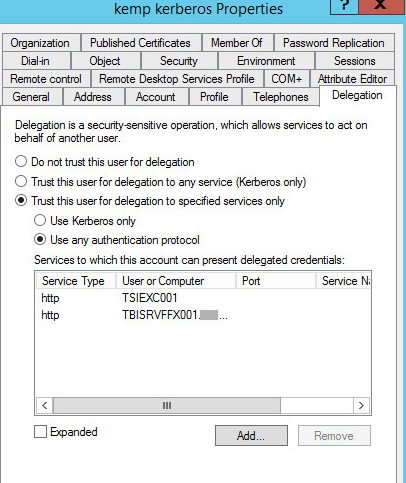
4. Go to the Delegation tab and specify the Exchange front-end CAS servers.
If you have more than one server, specify each server.
 |
KEMP Kerberos configuration steps
1. In KEMP, configure a server-side SSO configuration.
 |
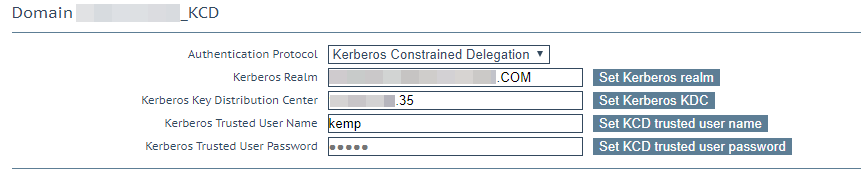
2. Specify the Kerberos account you created in the Active Directory.
 |
SecureAuth IdP configuration steps
1. Log in to your SecureAuth IdP Admin console.
Post Authentication tab
2. Select the Post Authentication tab.
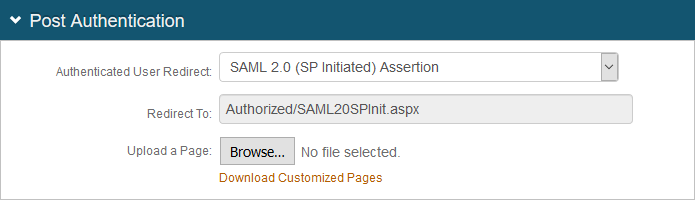
3. In the Post Authentication section, make the following entry:
a. Set Authenticated User Redirect to SAML 2.0 (SP Initiated) Assertion.
 |
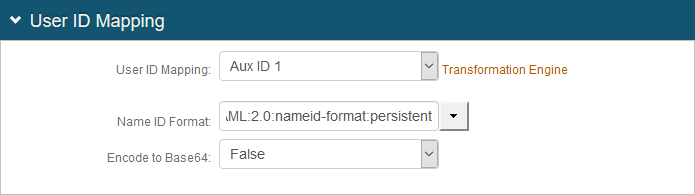
4. In the User ID Mapping section, make the following entries:
a. Set User ID Mapping to Aux ID 1.
b. Set Name ID Format to urn:oasis:names:tc:SAML:2.0:nameid-format-persistent.
 |
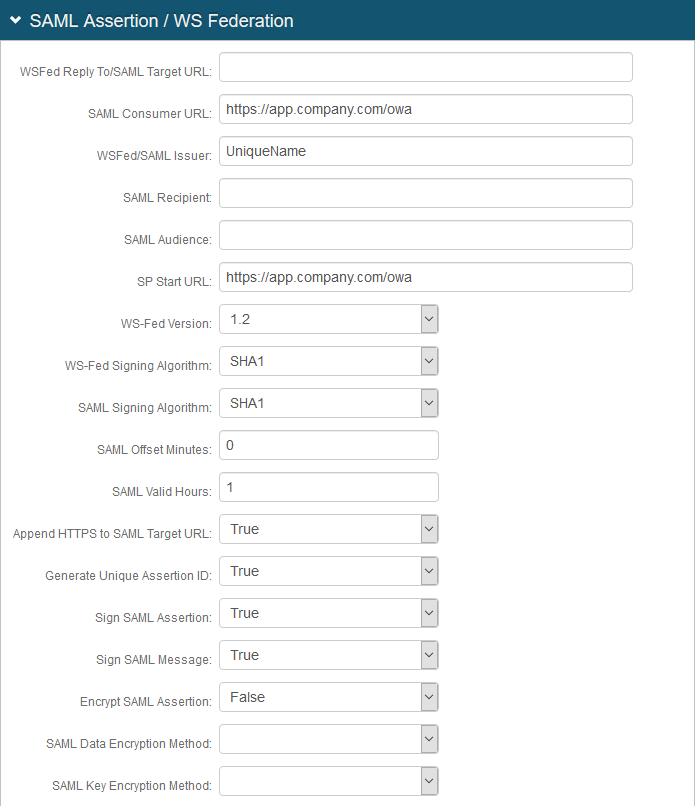
5. In the SAML Assertion / WS Federation section, make the following entries:
a. Set the SAML Consumer URL to the KEMP URL used to accept a SAML assertion.
b. Set WSFed/SAML Issuer to a unique name that identifies the SecureAuth IdP to the application (as the SAML ID).
This value is shared with the application and can be any word, phrase, or URL, but must match exactly in the SecureAuth IdP and KEMP configurations.
c. Provide the SP Start URL to enable SSO and to redirect users appropriately to access KEMP.
For example, the SP Start URL might be https://mail.company.com/owa.
d. Set Sign SAML Assertion to True.
e. Set Sign SAML Message to True.
 |
f. Next to the Signing Cert Serial Number field, click the Select Certificate link to select the SAML assertion signing certificate.
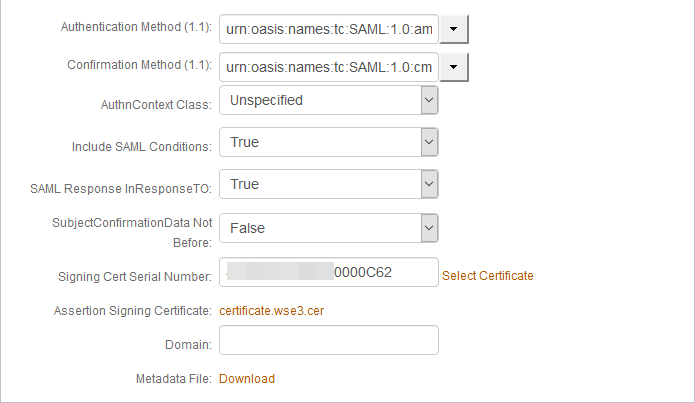 |
g. Select the certificate created from the local Root CA authority.
 |
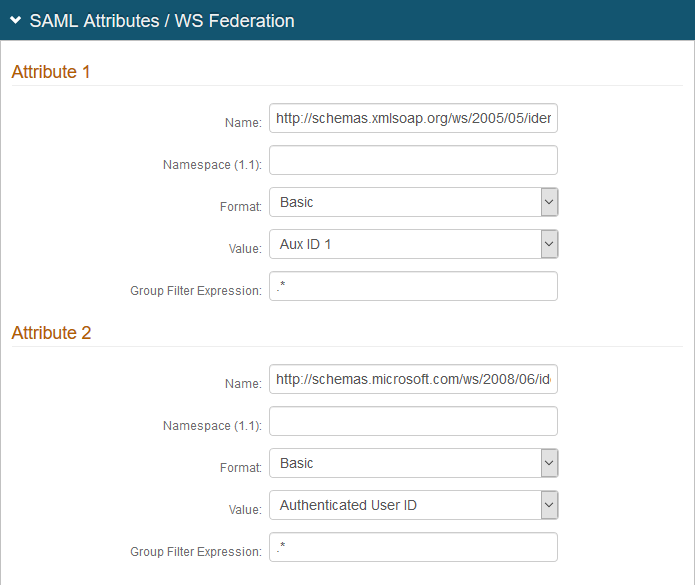
6. In the SAML Attributes / WS Federation section, make the following entries:
Section | Field | Description / Recommendation |
|---|---|---|
Attribute 1 | Name | Set to http://schemas.xmlsoap.org/ws/2005/05/identity/claims/upn Note: You must send the attributes to match the ADFS claims name format. It needs to be specified in the Name section of the attribute and not in the NameSpace field. |
Format | Set to Basic | |
Value | Set to Aux ID 1 | |
Attribute 2 | Name | Set to http://schemas.microsoft.com/ws/2008/06/identity/claims/windowsaccountname Note: This attribute is defined for sAMAccountName. |
Format | Set to Basic | |
Value | Set to Authenticated User ID |
 |
7. Click Save.
KEMP SAML configuration steps
1. To import the Root CA certificate in KEMP, go to the Certificates & Security section and select Intermediate Certs.
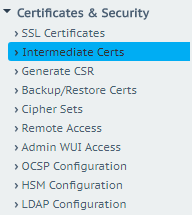 |
2. Click the name of the certificate to import.
 |
3. In the Domain settings for the SecureAuth IdP, create a client side SSO with SAML parameters.
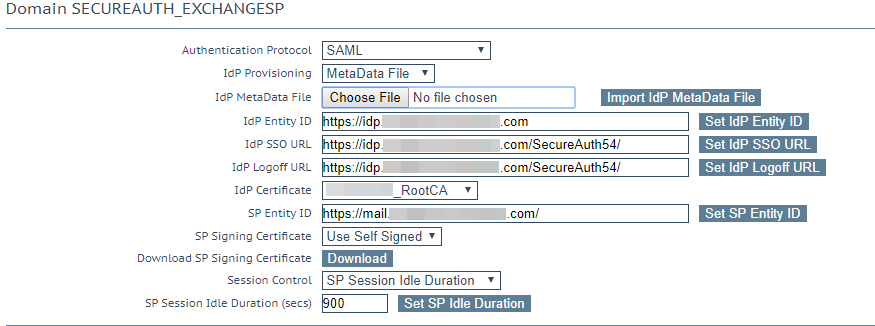 |
4. In the IdP MetaData File field, click Choose File to, select the Root Certificate you imported in step 2.
5. Expand the Sub-Virtual Services (SubVSs) section for Email.
The ECP and OWA Sub-Virtual Servers both must be configured.
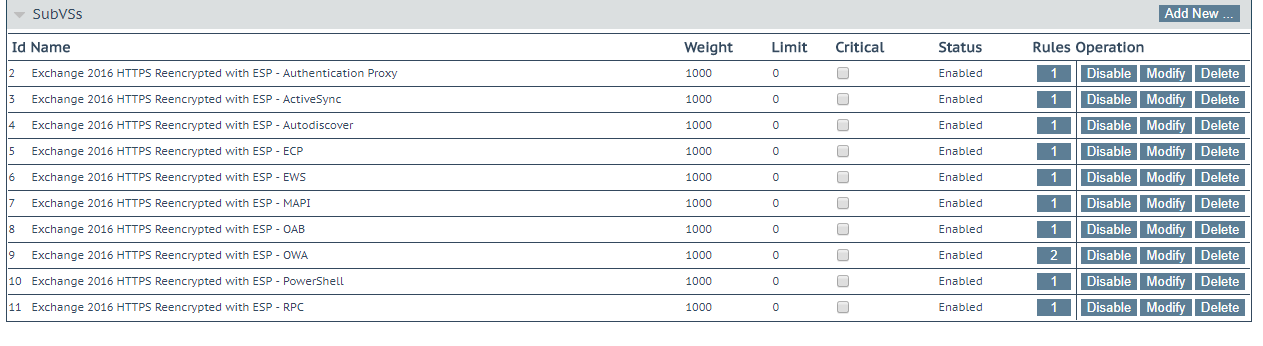 |
6. Repeat the remaining steps for each of the virtual directories for ECP and OWA.
a. For the ECP virtual directory, click Modify and proceed to steps 7a-c.
b. For the OWA virtual directory, click Modify and proceed to steps 7a-b and d.
7. In the ESP Options section, configure the following:
a. Select the Enable ESP check box.
b. Set Client Authentication Mode to SAML.
c. For the ECP virtual directory, set the remaining client SSO configurations using SAML, as required.
 |
d. For the OWA virtual directory, set the remaining Kerberos server-side SSO configurations using SAML, as required.
 |