Joomla - miniOrange (SP-initiated) integration guide
Introduction
Use this guide to enable Single Sign-on (SSO) access via SAML to Joomla - miniOrange.
Prerequisites
Joomla! account
Administrative access to Joomla!
Be sure to have the following extensions installed and enabled:
Plugin: miniOrange Joomla! SP
Authentication: miniOrange
System: miniOrange SAML Single Sign-on
SecureAuth IdP version 9.1 or greater, with a realm ready for the Joomla - miniOrange integration
Joomla! configuration steps - part 1
This procedure explains how set the appropriate URL settings before configuring the SecureAuth IdP. More steps for configuring Joomla (part 2) are explained later in this document after the SecureAuth configuration procedure.
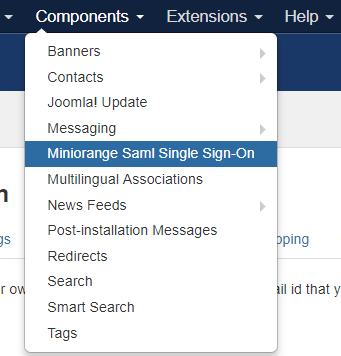
1. Log on to the Joomla! Admin page.
2. On the toolbar, select Components > Miniorange Saml Single Sign-On as shown in the following screen capture.
 |
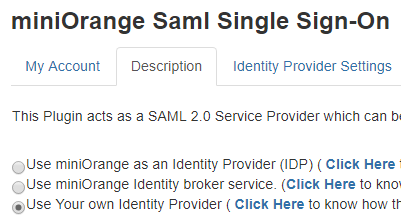
3. Select the Description tab.
4. Select the Use Your own Identity Provider option as shown in the following screen capture.
 |
5. On the Description tab, make note of the URLs in the table.
Name | URL |
|---|---|
SP-EntityID / Issuer | https://my.demojoomla.com/plugins/authentication/minorangesaml/ |
ACS (AssertionConsumerService) URL / Single Sign-On URL (SSO) | https://my.demojoomla.com/?morerequest=acs |
Audience URI | https://my.demojoomla.com/?morereqeust=sso |
NameID Format | urn:oasis:names:tc:SAML:1.1:nameid-format:emailAddress |
SecureAuth IdP configuration steps
1. Log on to your SecureAuth IdP Admin console.
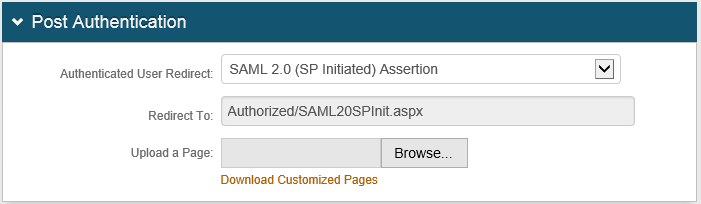
Post Authentication section
2. Go to the Post Authentication tab.
3. From the Authenticated User Redirect drop-down list, select SAML 2.0 (SP Initiated) Assertion as shown in the following screen capture.
 |
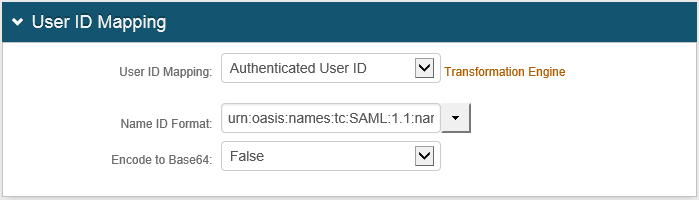
User ID Mapping section
4. From the User ID Mapping drop-down list, select Authenticated User ID.
5. From the Name ID Format drop-down list, select urn:oasis:names:tc:SAML:1.1:nameid-format:emailAddress.
6. From the Encode to Base64 drop-down list, select False.
An example of these settings is shown next:
 |
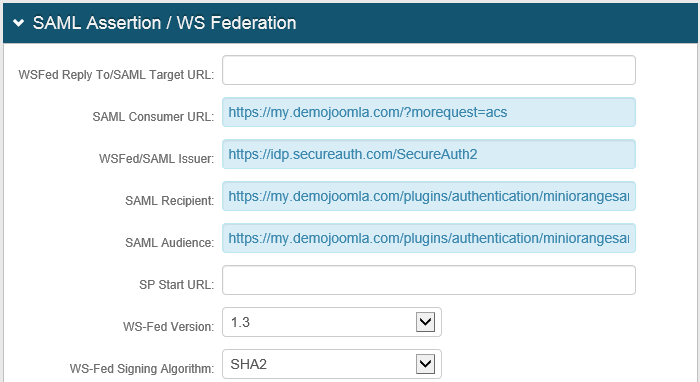
SAML Assertion / WS Federation section
7. In the SAML Consumer URL field, set the URL to the ACS (AssertionConsumerService) URL located on the miniOrange Description tab (for example, https://my.demojoomla.com/?morequest=acs).
8. In the WSFed/SAML Issuer field, set the URL to the SecureAuth IdP Realm (for example, https://idp.secureauth.com/SecureAuth2).
9. In the SAML Recipient field, set the URL to the SP-EntityID value located on the miniOrange Description tab (for example, https://my.demojoomla.com/plugins/authentication/miniorangesaml/).
10. In the SAML Audience field, set the URL to the SP-EntityID value located on the miniOrange Description tab (same as the previous step).
An example of these settings is shown next.
 |
11. Leave the Signing Cert Serial Number as the default value.
Otherwise, to use a third-party certificate for the SAML assertion, click Select Certificate and choose the appropriate certificate.
12. Click Save.
13. In the Domain field, set the URL to the FQDN URL of the IdP (for example, https://idp.secureauth.com).
14. In to the Metadata File field, click Download as shown in the following screen capture.
 |
15. In the download prompt, to save the Metadata.xml file from the SecureAuth IdP, click Save.
This uploads the file to Joomla! settings.
Joomla! configuration steps - part 2
This procedure explains how include the IDP Metadata certificate and set the attribute mapping after configuring the SecureAuth IdP. Previous steps for configuring Joomla (part 1) were explained at the beginning of in this document before the SecureAuth configuration procedure.
1. Log on to the Joomla! Admin page.
2. In the toolbar, select Components > Miniorange Saml Single Sign-On.
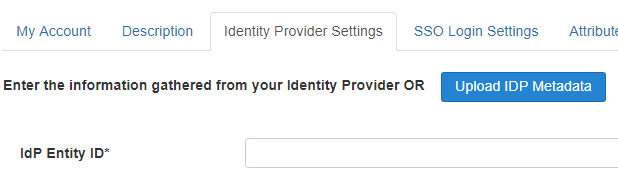
3. Select the Identity Provider Settings tab as shown in the following screen capture.
 |
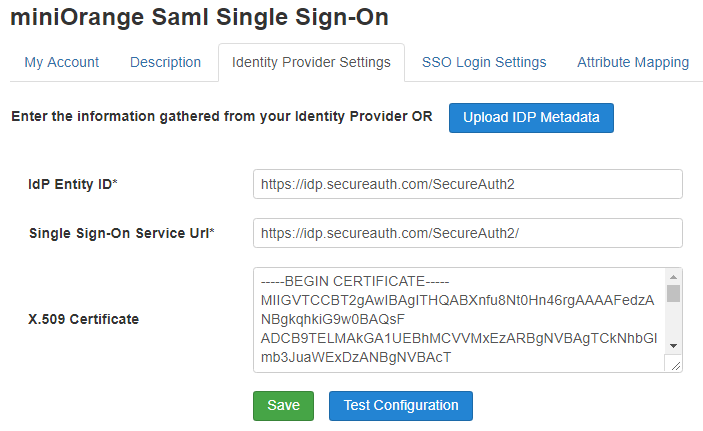
4. Click Upload IDP Metadata.
5. Click Choose File, and select the recently downloaded Metadata.xml file from the previous section.
6. Click Upload.
7. Click Save.
The following screen capture shows how uploading and saving the Metadata.xml file fills out the fields.
 |
8. Select the Attribute Mapping tab.
9. In the Match Joomla Account By section, select Username.
10. Click Save Attribute Mapping.
11. Log on using the Audience URI set on the Description tab (for example, https://my.demojoomla.com/?morequest=sso).