Unlock Account (show status) page configuration
The Identity Management (IdM) tool in SecureAuth® Identity Platform (formerly SecureAuth IdP) contains an account unlock feature with the Password Reset page.
Notice
This Unlock Account (show status) page configuration option can unlock a user account and display the account's current status on the Account Unlock page. This configuration option requires two chained realms.
The Unlock Account page configuration option can unlock a user account, but it shows the user account status as "normal" for locked accounts.
There are three password reset mode methods:
Enforce mode – Useful for most Active Directory and LDAP use cases. This mode enforces password history requirements like not using a previous password or does not allow frequent password updates.
Administrative mode – Useful for SQL-type data stores, in a Help Center environment, and if your data store supports password history checks.
Administrative mode with history check – Useful for SQL-type data stores, in a Help Center environment, and if your data store does not support password history checks.
Prerequisites
Data store with service account set with write privileges to modify (needed to change user account statuses)
Have two realms for the Unlock Account (show status) page. To distinguish the two realms in this guide, we'll name them Realm A and Realm B.
Note
Realm A is the unlock account realm and Realm B is the user login realm.
Have the following tabs configured before setting up the Post Authentication tab:
Overview (Realms A and B)
Data (Realms A and B)
Workflow (Realm B)
Multi-Factor Methods (Realm B)
Realm A configuration
You can allow end users to unlock their account or have administrators unlock user accounts in the Help Desk. After end users authenticate in Realm B, it redirects them to Realm A, the unlock account realm.
Go to the Data tab.
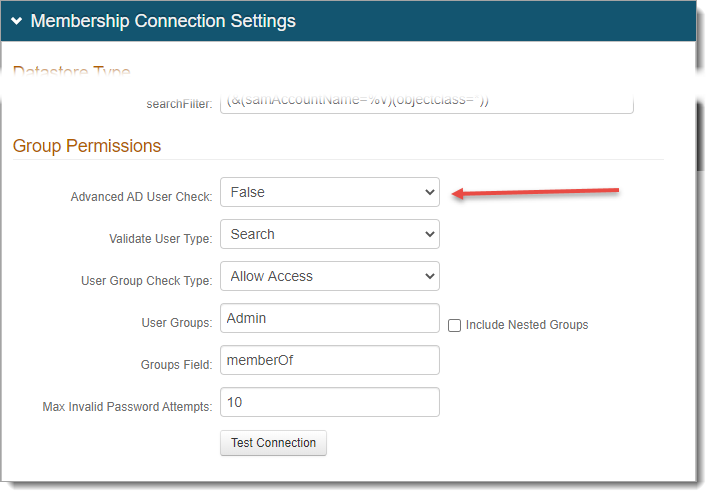
In the Membership Connection Settings > Group Permissions section, set Advanced AD User Check to True.

Save your changes.
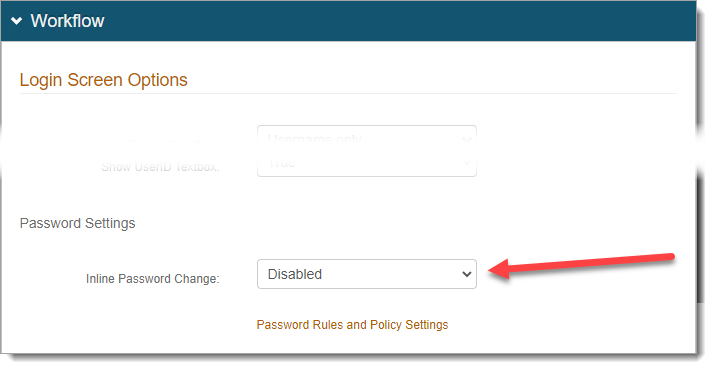
Go to the Workflow tab > Login Screen Options section, and set Inline Password Change to Disabled.
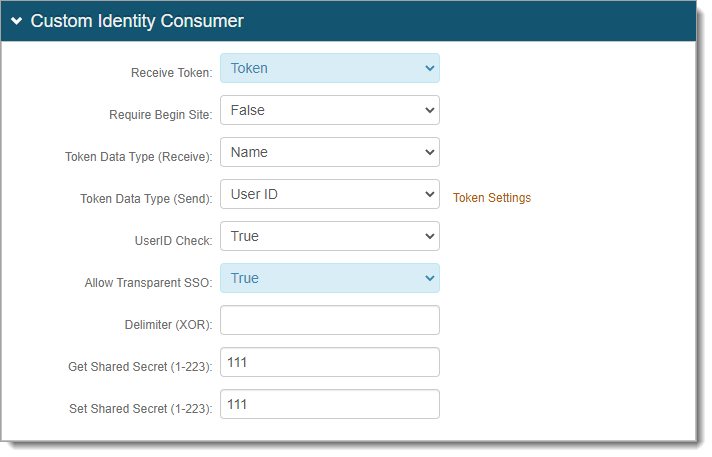
In the Custom Identity Consumer section, set the following.
Receive Token
Set to Token.
Allow Transparent SSO
Set to True.
Save your changes.
Go to the Post Authentication tab.
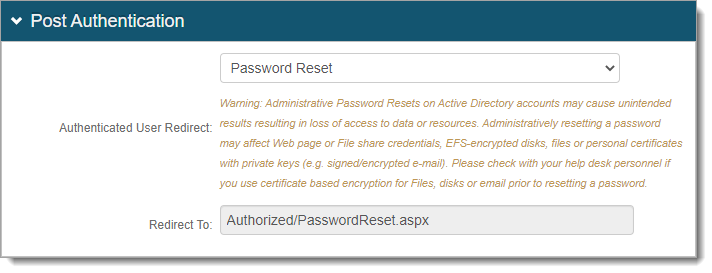
In the Post Authentication section, set the following.
Authenticated User Redirect
Set to Password Reset.
Redirect To
This field is autopopulated with the post authentication .aspx page. This is appended to the domain name and realm number in the web address bar. For example, Authorized/PasswordReset.aspx.
Save your changes.
In the Password Reset section, click the Configure password reset page link.

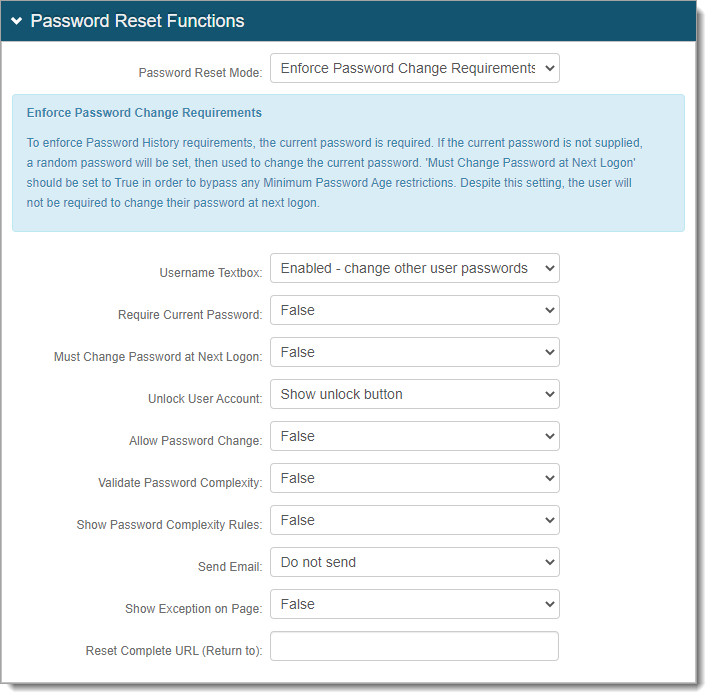
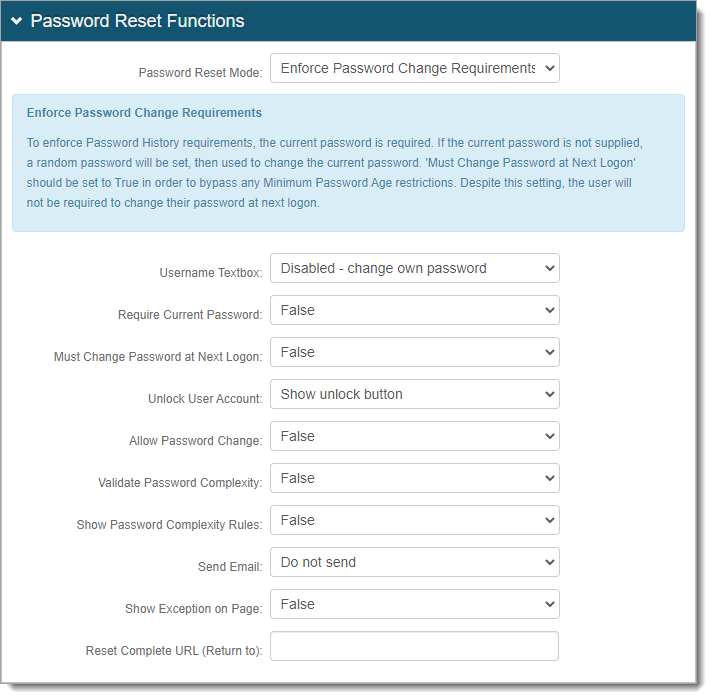
In the Password Reset Functions section, set the Password Reset Mode to one of the following options:
Enforce Password Change Requirements (Enforce mode) – To enforce password history rules, it must use the current password. If the current password is not given, a random password is set, then used to change the current password.
Note: Use this option for Active Directory and LDAP directory types and must have password history checks.
Administrative Password Reset (Admin mode) – This does not enforce password history rules. The current password is not required for this rule.
Note: Use this option for SQL directory types and do not need or support password history checks.
Administrative Reset with History Check (Administrative mode with history check) – Enforces password history rules and does not require current password. This mode is not guaranteed to work with non-AD LDAP data stores. For Active Directory, you need to open SSL Outbound Port 636.
Note: This is not supported for eDirectory.
Continue with the rest of the configuration settings. The settings are the same for all password reset modes, unless otherwise specified.
Username Textbox
Set to Enabled - change other user passwords – Do not allow username search box. User can change their own password.
Require Current Password
Set to False.
Notice
This field displays only when Password Reset Mode is set to Enforce Password Change Requirements.
Must Change Password at Next Logon
Set to False.
Unlock User Account
Set to Show unlock button.
Allow Password Change
Set to False.
Notice
This option disables password reset in the Account Unlock process.
For other password reset configuration options, including password reset with account unlock, see Reset Password configuration.
Validate Password Complexity
Set to False.
Show Password Complexity Rules
Set to False.
Send Email
Set to Do not send.
Show Exception on Page
Set to False.
Save your changes.
Go to the Data tab.
In the Membership Connection Settings > Group Permissions section, set Advanced AD User Check to False.
Save your changes.
Go to the Post Authentication tab.
In the Post Authentication section, set the following.
Authenticated User Redirect
Set to Password Reset.
Redirect To
This field is autopopulated with the post authentication .aspx page. This is appended to the domain name and realm number in the web address bar. For example, Authorized/PasswordReset.aspx.
Save your changes.
In the Password Reset section, click the Configure password reset page link.
In the Password Reset Functions section, set the Password Reset Mode to one of the following options:
Enforce Password Change Requirements (Enforce mode) – To enforce password history rules, it must use the current password. If the current password is not given, a random password is set, then used to change the current password.
Note: Use this option for Active Directory and LDAP directory types and must have password history checks.
Administrative Password Reset (Admin mode) – This does not enforce password history rules. The current password is not required for this rule.
Note: Use this option for SQL directory types and do not need or support password history checks.
Administrative Reset with History Check (Administrative mode with history check) – Enforces password history rules and does not require current password. This mode is not guaranteed to work with non-AD LDAP data stores. For Active Directory, you need to open SSL Outbound Port 636.
Note: This is not supported for eDirectory.
Continue with the rest of the configuration settings. The settings are the same for all password reset modes, unless otherwise specified.
Username Textbox
Set to Disabled - change own password – Do not allow username search box. User can change their own password.
Require Current Password
Set to False.
Notice
This field displays only when Password Reset Mode is set to Enforce Password Change Requirements.
Must Change Password at Next Logon
For Enforce mode, set to True to bypass any minimum password age restrictions.
For Admin mode and Admin mode with history check, set to False.
Unlock User Account
Set to Automatically or Show unlock button.
Allow Password Change
Set to False.
Notice
This option disables password reset in the Account Unlock process.
For other password reset configuration options, including password reset with account unlock, see Reset Password configuration.
Validate Password Complexity
Set to False.
Show Password Complexity Rules
Set to False.
Send Email
Set to Do not send.
Show Exception on Page
Set to False.
Save your changes.
Generate new machine keys
You will need to generate new machine keys and copy them to use in Realm B.
From the Post Authentication tab, in the Forms Auth / SSO token section, click the link to generate new keys.

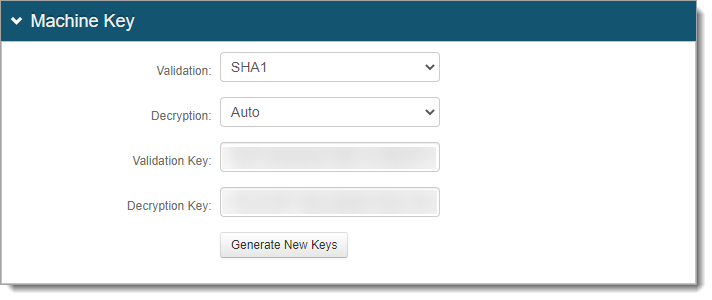
In the Machine Key section, click Generate New Keys.
Realm B configuration
Realm B is the login realm that redirects end-users to the unlock account page (Realm A).
The URL in Realm B is where end users and administrators log in to unlock accounts. This is where you set up the login workflow and multi-factor authentication (MFA) methods.
Go to the Data tab.
In the Membership Connection Settings > Group Permissions section, set Advanced AD User Check to False.
Save your changes.
Go to the Workflow tab > Login Screen Options section, and set Inline Password Change to Disabled.
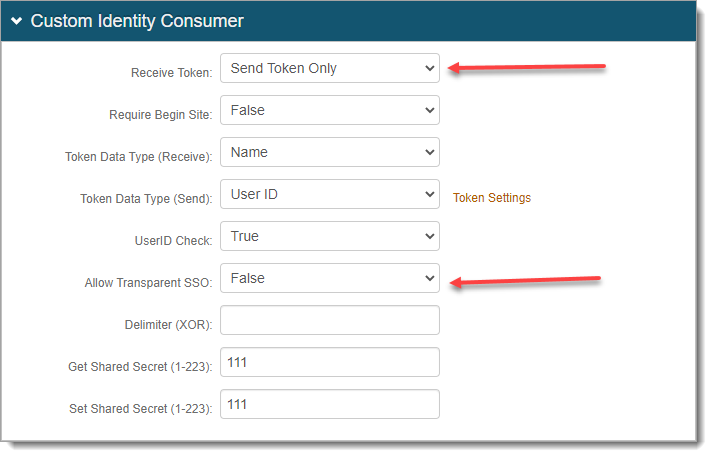
In the Custom Identity Consumer section, set the following.
Receive Token
Set to Send Token Only.
Allow Transparent SSO
Set to False.
Save your changes.
Go to the Post Authentication tab.
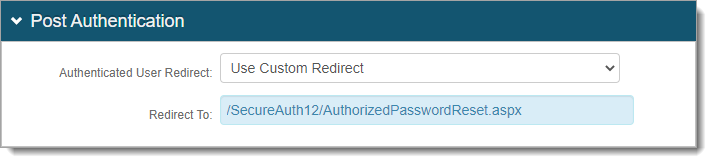
In the Post Authentication section, set the following.
Authenticated User Redirect
Set to Use Custom Redirect.
Redirect To
Set to the path of Realm A.
For example, /SecureAuth12/AuthorizedPasswordReset.aspx.
Save your changes.
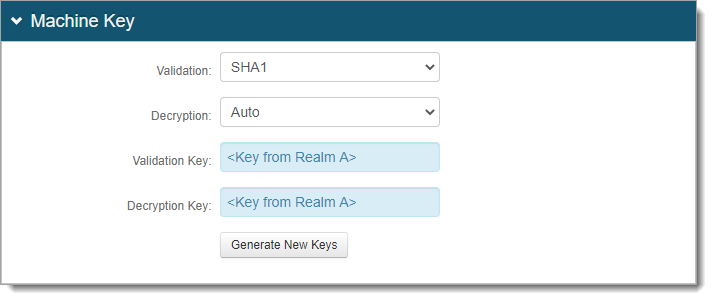
From the Post Authentication tab, in the Forms Auth / SSO token section, click the link.
In the Machine Key section, copy and paste the Validation and Decryption keys from Realm A.
Warning
Do not click Generate New Keys.
In the Authentication Cookies section, set Persistent to False - Session Cookie.
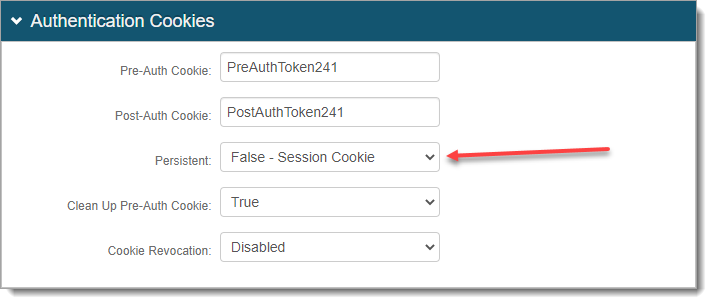
Save your changes.