Bulk User Load with CSV Configuration Guide
Use this configuration guide to import large amounts of user data in one .CSV file upload to SecureAuth IdP. The bulk user import feature saves time when adding new users or updating user information.
Prerequisites
Prepare a .CSV file containing all user profiles to be uploaded, including each profile on a separate line, using the comma-delimited format
SecureAuth IdP version 9.1 or later
Create a new realm for uploading a CSV file to the SecureAuth IdP appliance
Configure the following tabs on the SecureAuth IdP Web Admin:
Overview– the description of the realm and SMTP connections must be defined
Data– an enterprise directory must be integrated with SecureAuth IdP
Workflow– the way in which users will access the target must be defined
Multi-Factor Methods– the Multi-Factor Authentication methods that will be used to access the target must be defined
Post Authentication– the target resource or post authentication action must be defined
Logs– the logs that will be enabled or disabled for this realm must be defined
SecureAuth IdP Web Admin Configuration
Go to the Data tab.
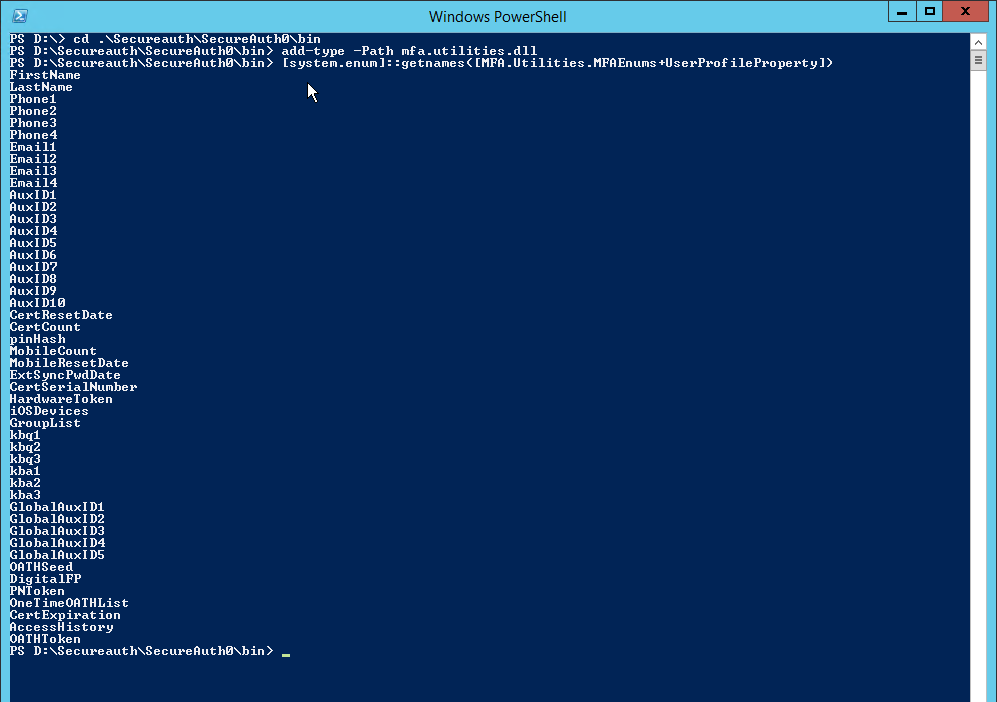
In the Profile Fields section, map the designated Field to the Property for each identifier to be included in the user profile on the .CSV file – e.g.company toAux ID 2
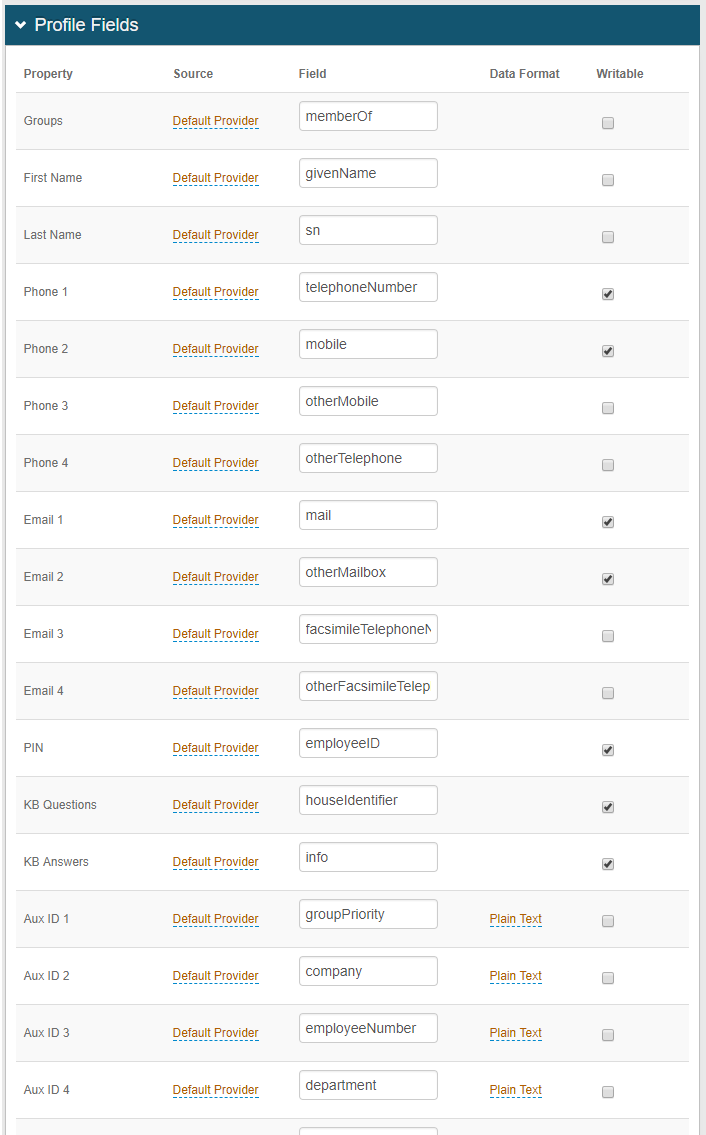
Save your changes.
Go to the Post Authentication tab.
In the Post Authentication section, select Use Custom Redirect from the Authenticated User Redirect dropdown.

For Redirect To, enter customized/Template/CSVImport.aspx.
Save your changes.
User Experience
Log on the SecureAuth IdP realm.
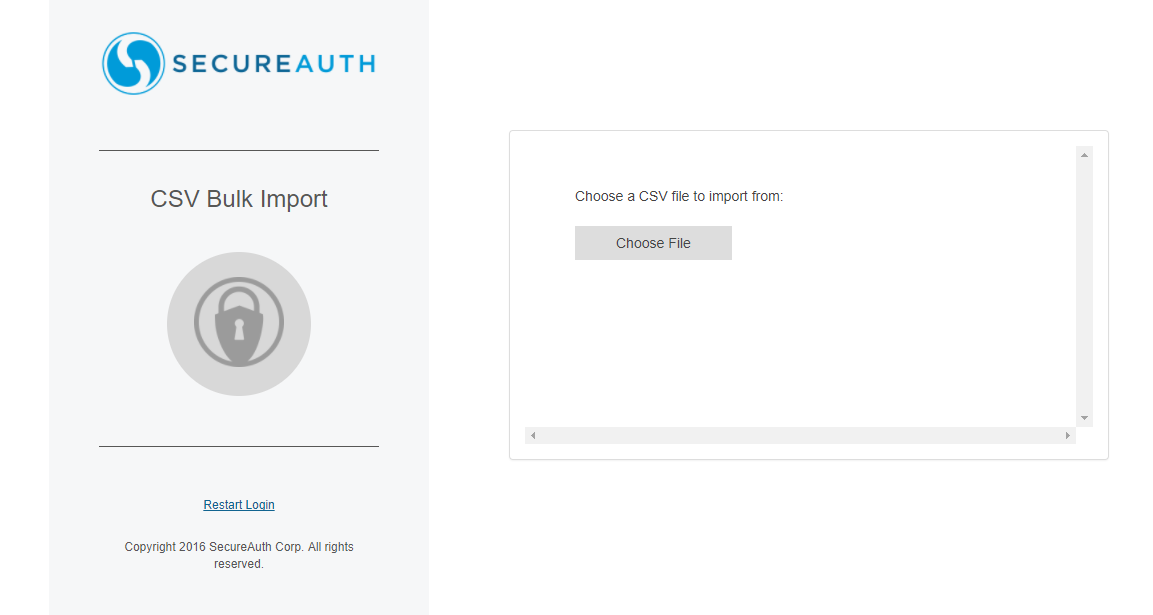
Click Choose File and browse to find the .CSV file to be imported.
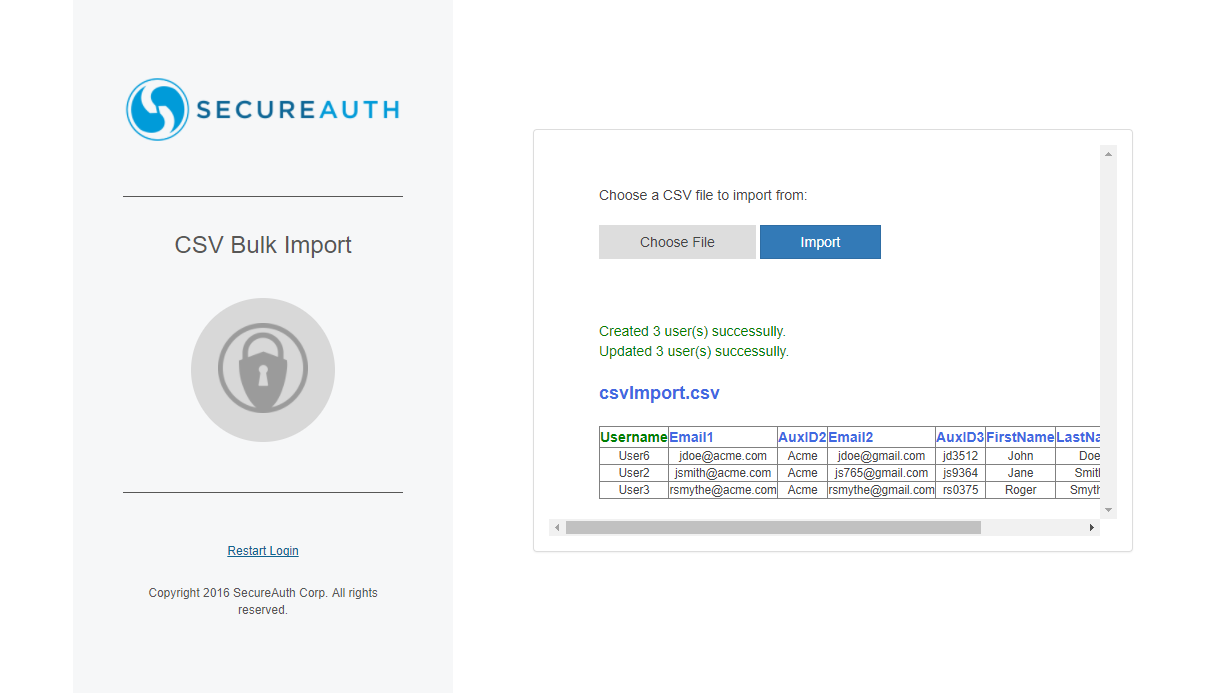
For example, the filename in this example is csvImport.csv.
View results in the table that appears beneath the .CSV filename.
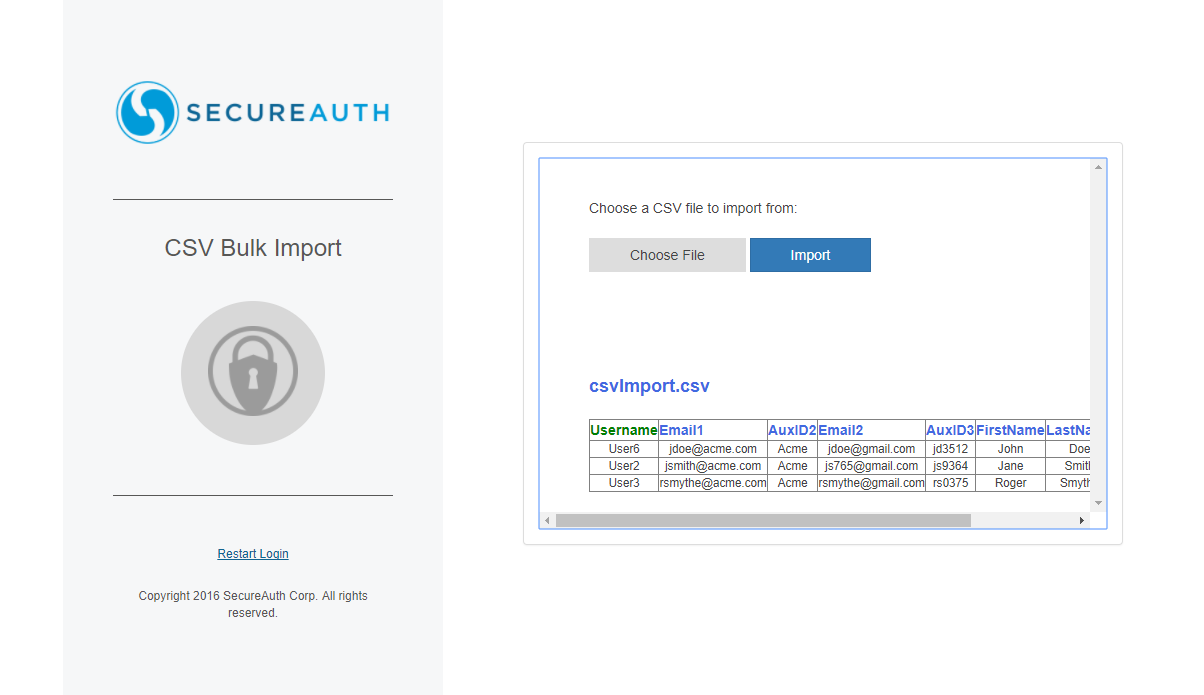
The first row of the .CSV file contains the column headers included in the profile string.
The color of the field name in this header indicates if the attribute is valid.
Blue or Green: valid
Red: invalid


Tip
If one or more columns is flagged with red text, verify the nomenclature to ensure the Profile Field is spelled correctly, with the same case-formatting applied
NOTE: If you need to make edits to the .CSV file, update the file and then repeat steps 2 and 3.
When you are ready to upload the .CSV file, click Import.
The status above the filename shows the number of new users successfully added, and the number successfully updated
