SecureAuth Identity Platform configuration, v20.06
Use the following sections to set up SecureAuth RADIUS Server with the cloud and hybrid model of SecureAuth® Identity Platform version 19.07 or later.
You will configure the Identity Platform and the Classic Experience to use SecureAuth RADIUS Server. If your team wants to use biometric identification (face (iOS only) or fingerprint recognition), you must complete the following set up. Only the Identity Platform v19.07 and later supports biometric identification. You will set up the authentication API in the Classic Experience; this is necessary until feature parity is achieved with the Identity Platform.
Prerequisites
The following steps must be completed before you can set up MFA methods; some steps are specific to cloud and they are called out accordingly. Most active sites will have performed the first two steps already and can begin at "Set up a policy."
1. Cloud: Download and install the SecureAuth Connector on your Windows data store server to begin the Identity Platform deployment.
See Data Stores for a discussion and prerequisites. See Install the SecureAuth Connector for prerequisites and steps.
2. Add a data store.
See Add an Active Directory data store or Add a SQL Server data store for steps.
Set up a policy
Policies in the Identity Platform allow you to define rules to authenticate and block your users to certain applications. See How policies are used in the Identity Platform to learn about policies.
If you have an existing policy or default policy that will meet your security needs, you can use that policy; otherwise, you can set up a new policy specifically for endpoints.
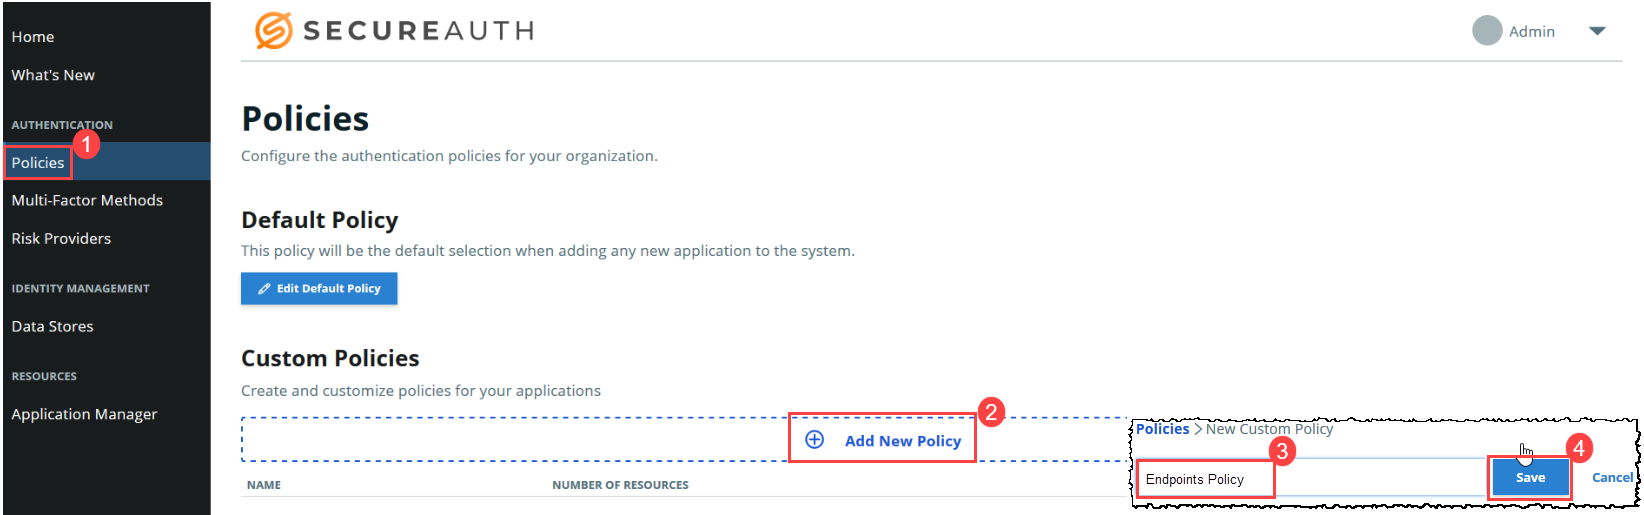
1. Set up a policy for SecureAuth RADIUS Server.
On the left side of the Identity Platform page, click Policies. Click Add New Policy and give the policy a name. Add a minimum of two authentication rules.
 |
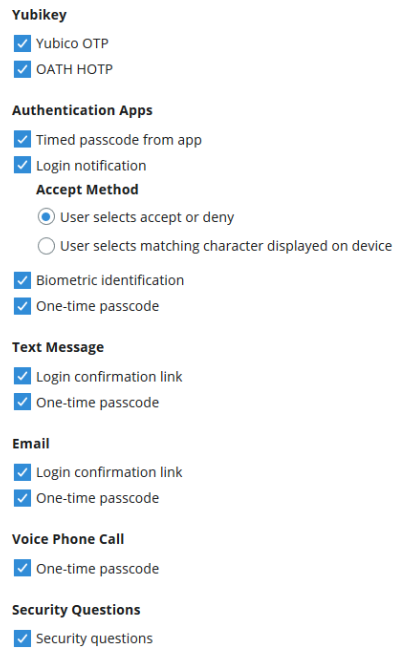
2. Select the MFA methods that you want to enable for the new SecureAuth RADIUS Server policy that you created in the previous step. The MFA methods will be available to your end users as their end user login workflow experience.
Open the policy you created in the previous step and select the Multi-Factor Methods tab. Define the login workflow and multi-factor methods settings for the policy and save the choices. The following image shows the available MFA methods available in SecureAuth RADIUS Server.
 |
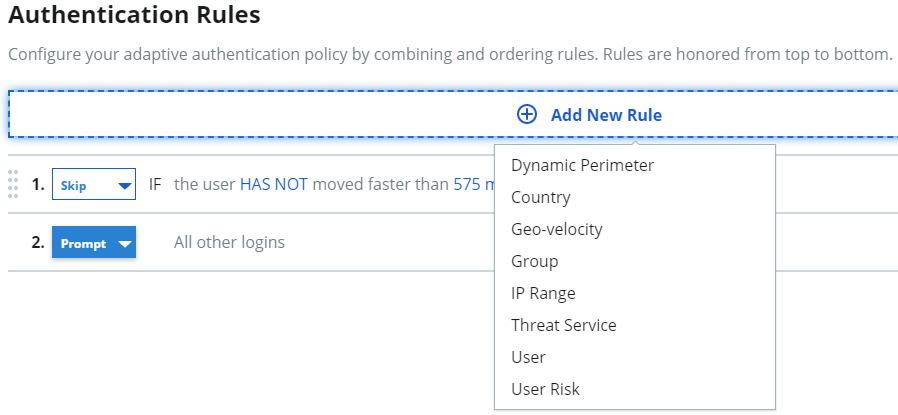
3. Optional: Set up rules to prompt or skip MFA when end users authenticate by comparing rules like their country, group access, and more.
On the policy page, select the Authentication Rules tab. See Adaptive authentication rules settings in a policy to learn more about setting rules.
If you make changes, be sure to save the changes.
 |
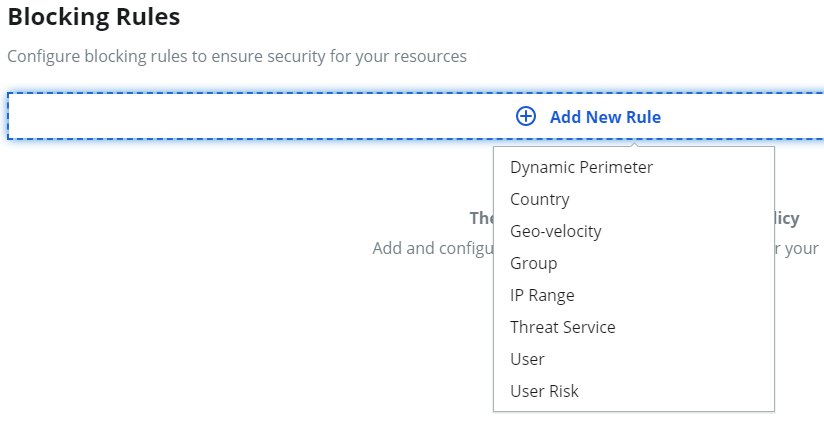
4. Optional: Set up rules to evaluate behaviors that will cause an end user to be blocked from authenticating in. such as IP range, group access, and more.
On the policy page, select the Blocking Rules tab. See Blocking rules settings in a policy to learn more about rules.
If you make changes, be sure to save the changes.
 |
5. Save the policy.
Add an application
Use the Application Manager tool to select an application template from over 500 applications in the library, then use the common components to customize each new application integration. See Application Manager overview to learn more.
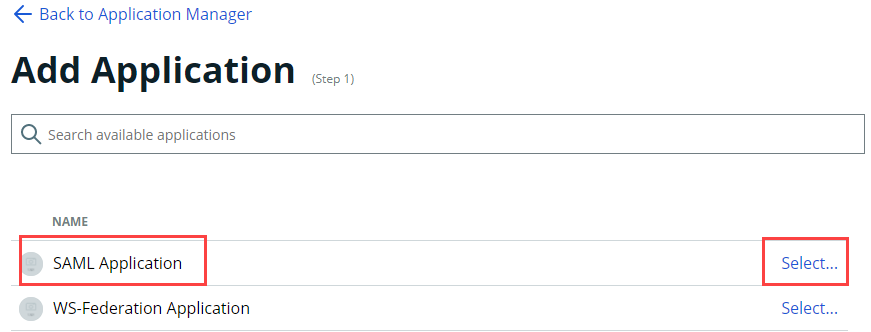
1. Add a Security Assertion Markup Language (SAML) application. This SAML application serves as a substitute for a SecureAuth RADIUS Server-specific option, which might be available as a feature in a future version. It will associate the SecureAuth RADIUS Server to the Identity Platform so that underlying API communication occurs between them, which will allow your team to use biometric identification.
On the left side of the Identity Platform page, click Application Manager and then click Add an Application. On the list of applications, select SAML Application.
 |
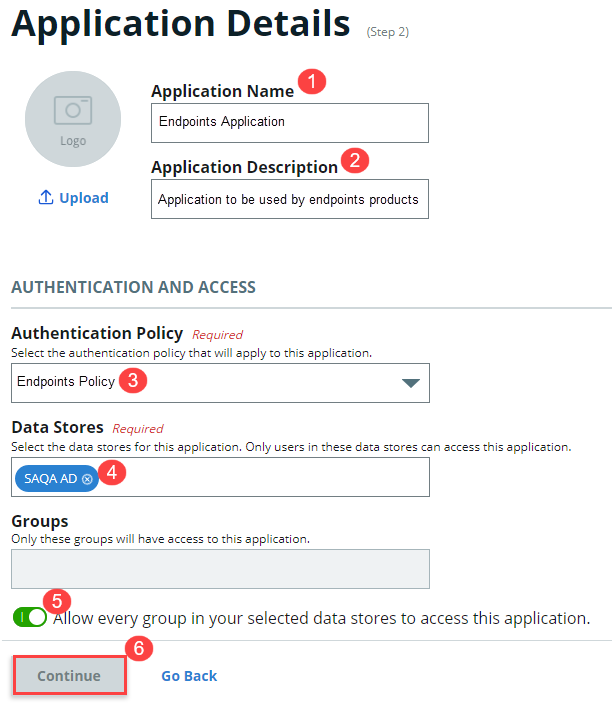
2. On the Application Details screen, set up the application to be used by endpoints products, such as SecureAuth RADIUS Server.
a. Provide a name for the application.
b. Provide a description for the application.
c. Select the name of the policy you created previously.
d. Select the data store for this application.
e. Select the user groups that can access to this application. Hint: Admins typically select Allow every group in your selected data stores to access this application. Additionally, you can add specific user groups only; for example, to let a test group use it for a short time period before adding more or all groups.
f. Click Continue.
 |
3. On the Connections Settings screen, under IdP Signing Certificate, click Select Certificate. Select an IdP signing certificate. (You do not need to set up anything else on the page. You are setting up a realm to add endpoints options in the Classic Experience.)
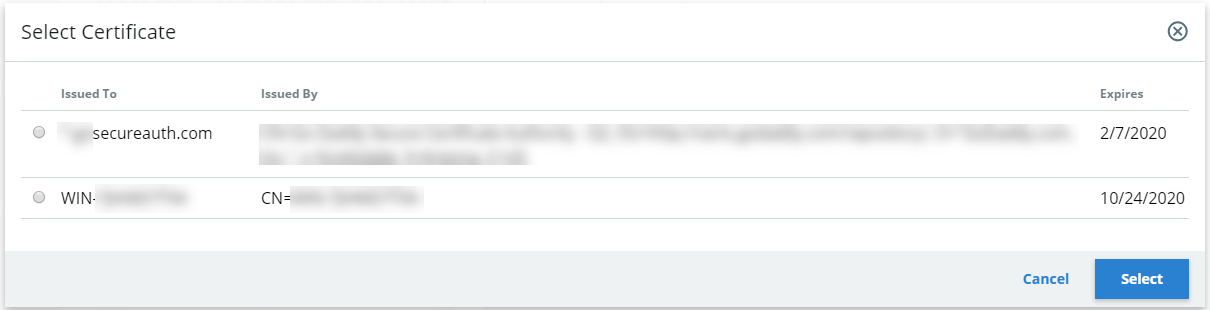 |
The IdP-initiated signing certificate integrates the SAML application with IdP so that the login process starts at the Identity Platform.
After end users successfully authenticate, they are asserted back to the RADIUS server application.
4. Add the application.
On the Connections Settings screen, at the bottom, click Add Application. You will receive a success message when the application is added.
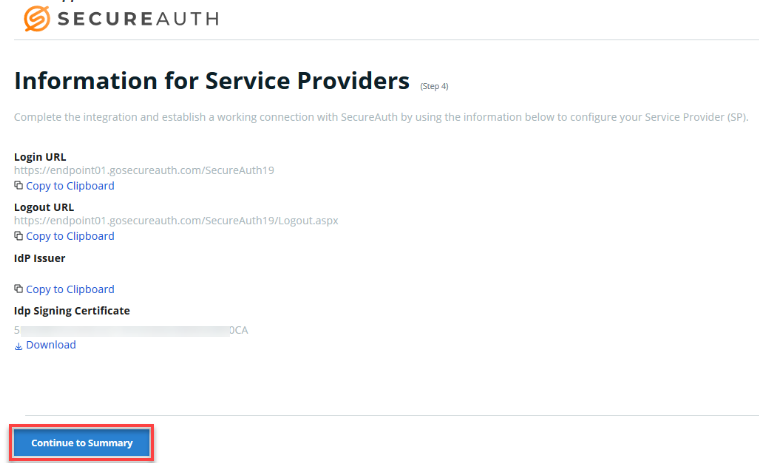
5. Check the Information for Service Providers screen to ensure the information is correct, and then click Continue to Summary.
 |
6. Check the summary information. If you need to edit, click the pencil icon to the right of the field to be edited. Be sure to click Update Settings in each screen that you change.
API
Set up the authentication API in the Classic Experience.
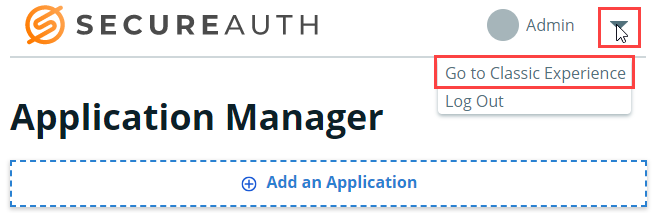
1. Open the Classic Experience.
On the Identity Platform page, click the Admin pull-down menu and select Go to Classic Experience.
 |
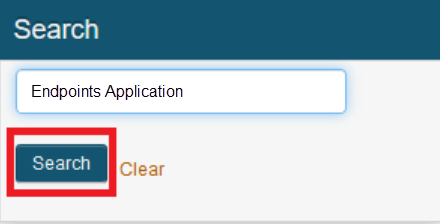
2. Search for the endpoints application you created previously.
 |
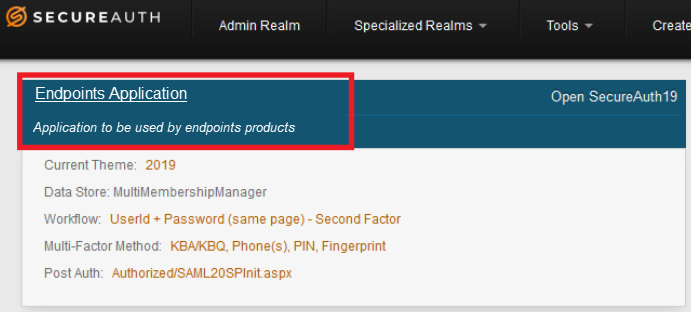
3. Select the application you created previously.
 |
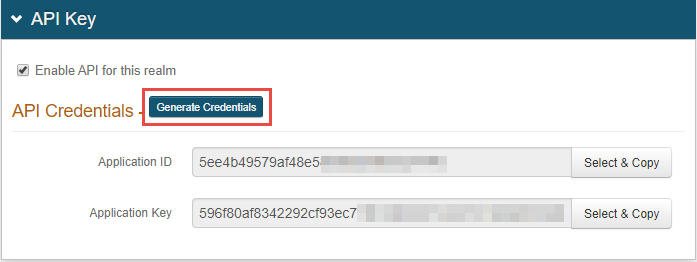
4. Generate API credentials.
In the Admin Overview page, click the API tab on the top menu bar.
The Application ID and Application Key are required and used in the config.json file for all scenarios using SecureAuth RADIUS Server. The Identity Platform contains an endpoints API; the config.json file calls the Identity Platform endpoints API.
On the top section, API Key, click Generate Credentials.
 |
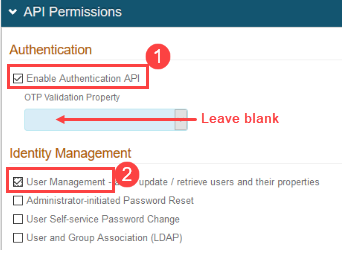
5. Set up the authentication API for SecureAuth RADIUS Server. In the API Permissions section, complete the following:
a. Select Enable Authentication API.
b. Ensure that OTP Validation Property is empty.
c. User Management to ensure that the SecureAuth IdP API is allowing API requests to retrieve user profiles.
 |
6. Click Save, located on the left side of the page, at the bottom.