CheckPoint R77.20 Integration Guide (RADIUS)
Introduction
Use this guide to enable Multi-Factor Authentication access via RADIUS to CheckPoint R77.20.
Prerequisites
1. Have CheckPoint R77.20
2. Install and configure the SecureAuth RADIUS Server
3. Configure the Multi-Factor App Enrollment Realm in the SecureAuth IdP Web Admin
CheckPoint Configuration Steps
RADIUS Host Object
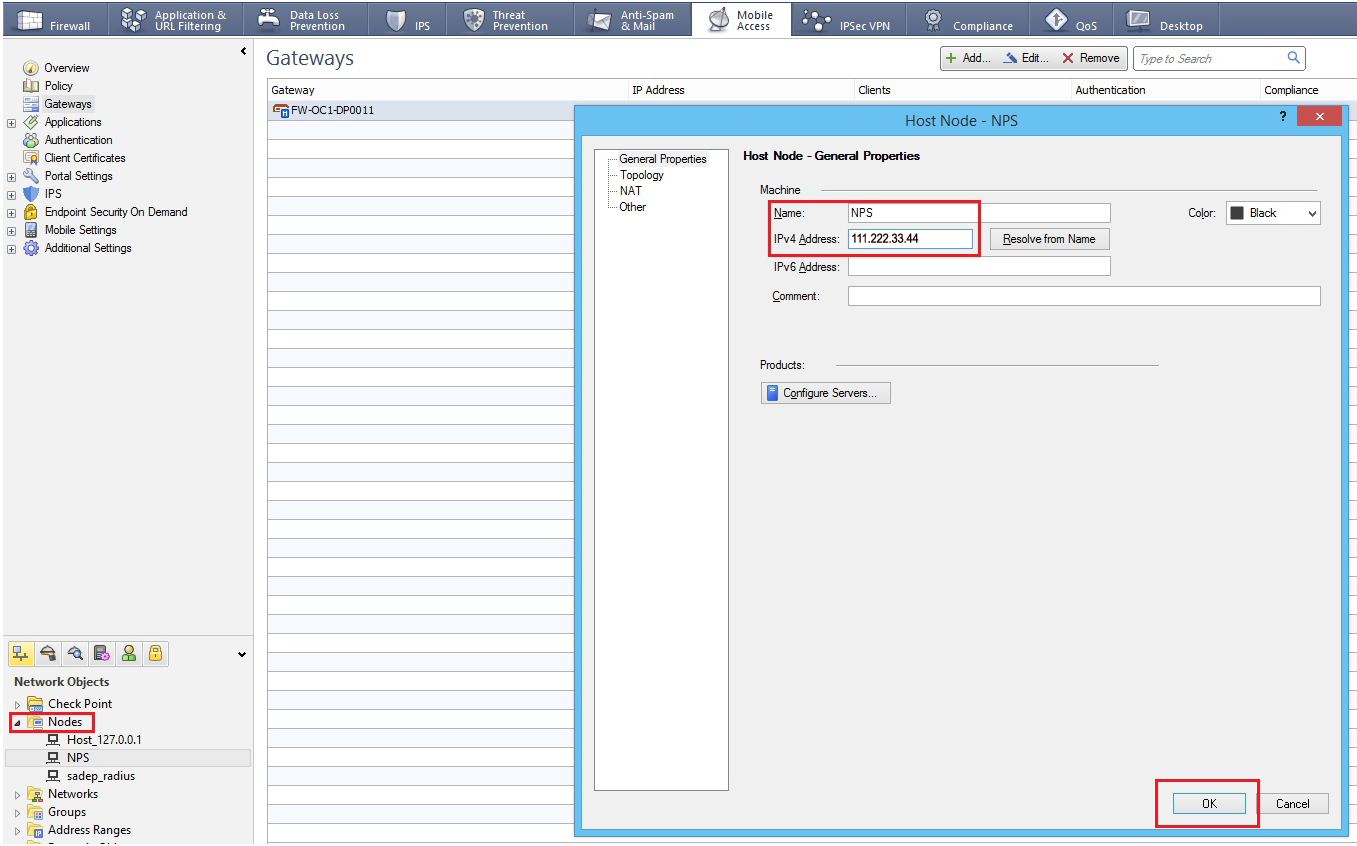 |
1. Log into the CheckPoint admin console, and create a RADIUS Host Object by selected Manage --> Network Objects --> New --> Node --> Host
2. Provide a Name for the new host object and assign it an IPv4 Address
RADIUS Server Object
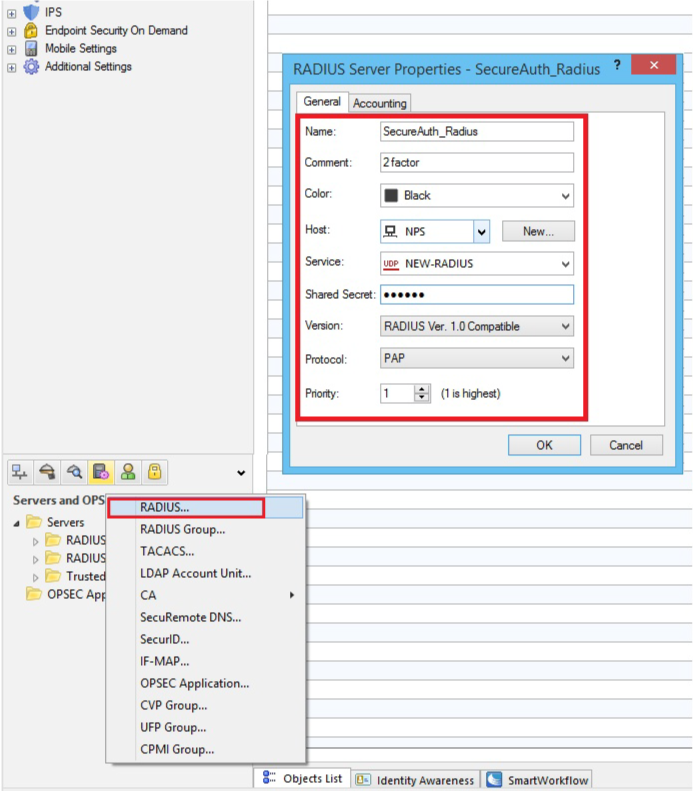 |
3. In the admin console, create a RADIUS Server Object by selecting Manage --> Server and OPSEC Applications --> New --> RADIUS
4. Set a Name for the new server object
5. Select the newly created RADIUS Host Object (steps 1 - 2) from the Host dropdown
6. Select NEW-RADIUS (Port 1812 service) from the Service dropdown
The default setting is RADIUS, but the RADIUS standards group recommends using NEW-RADIUS because Port 1645 can conflict with the data metrics service running on the same Port
7. Set the Shared Secret to to the same Shared Secret configured for the SecureAuth RADIUS Server (see prerequisites)
8. Select RADIUS Ver. 1.0 Compatible, which is RFC 2138-compliant; or RADIUS Ver. 2.0 Compatible, which is RFC 2865-compliant from the Version dropdown
9. Assign a Priority if using more than one RADIUS Authentication Server
10. Click OK
RADIUS Authentication
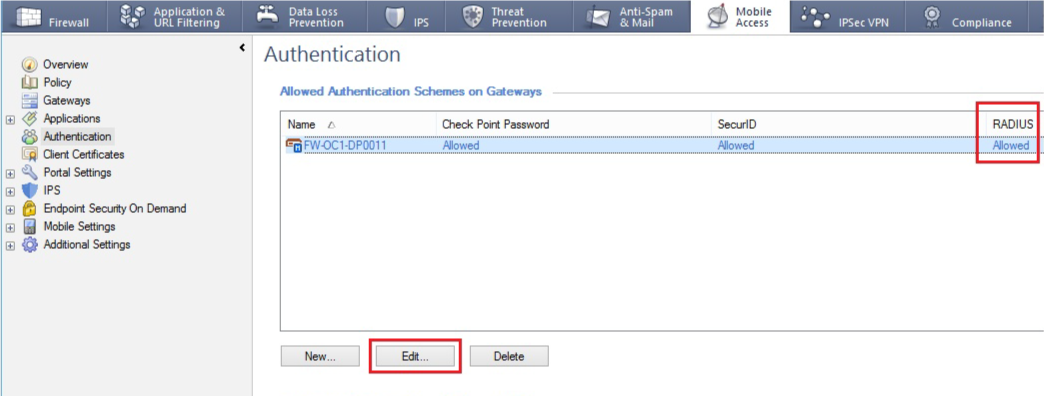 |
11. Right-click the gateway object and select Edit, then Authentication
12. Enable the RADIUS authentication
User Group
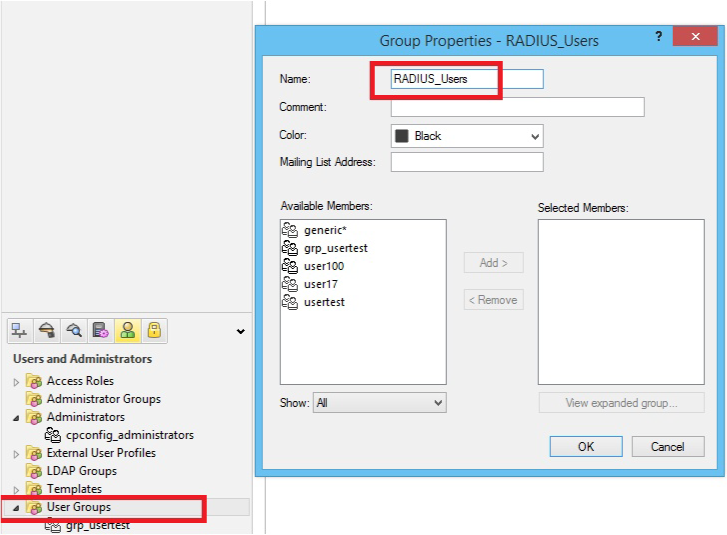 |
13. Define a user group by selecting Manage --> Users & Administration --> New --> User Group
14. Provide a Name for the user group, e.g. RADIUS_Users
User Profile
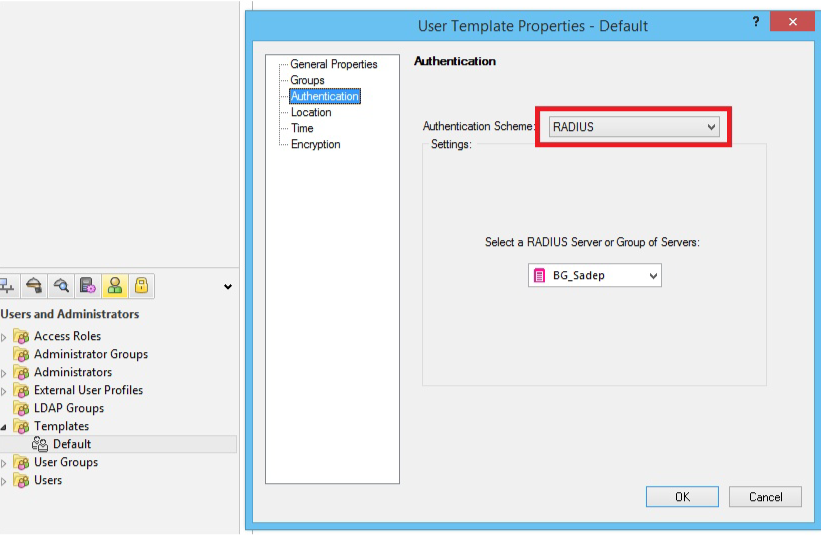 |
15. Enable RADIUS Authentication for Security Gateway users by selecting Manage --> Users & Administration --> New --> User by Template --> Default; and / or enable RADIUS Authentication for users without Security Gateway user accounts by creating an External User Profile at Manage --> Users & Administration --> New --> External User Profile --> Match all users or Match by domain (to support more than one external authentication scheme, define the External User Profiles with Match by domain)
User Template and External User Profile Properties
Note
These steps are for both User Template Properties and External User Profile Properties
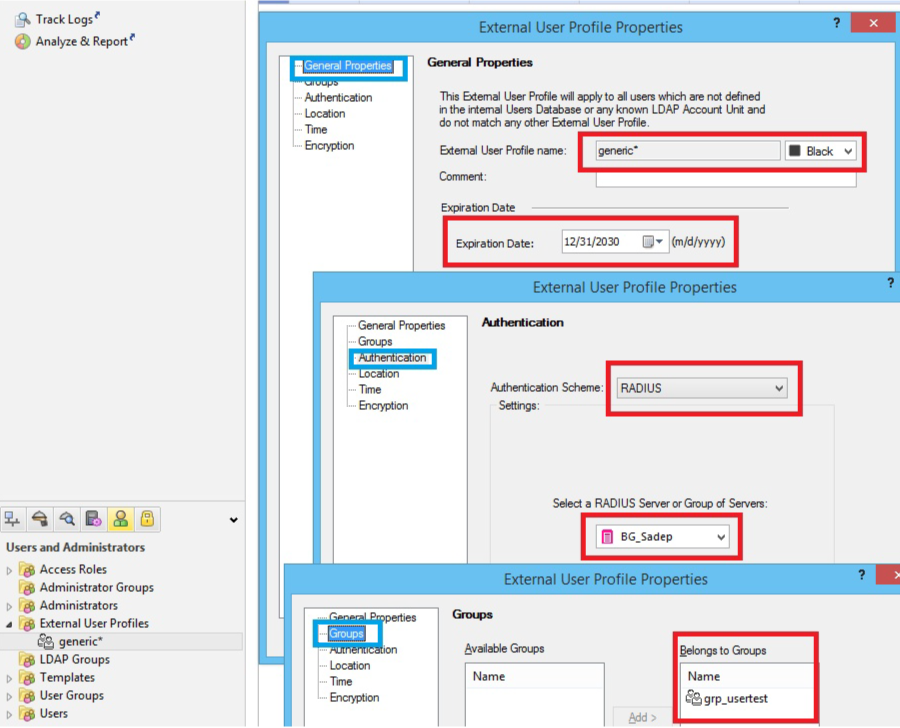 |
16. In the General tab, provide the default login name for the RADIUS server
When employing Match all users, generic* is automatically assigned
17. In the Personal tab, adjust the Expiration Date
18. In the Authentication tab, select RADIUS from the Authentication Scheme dropdown
19. In the Groups tab, add the user profile to the newly created user group (e.g. RADIUS_Users)
20. Verify that the communication between the firewall and the RADIUS Server are not defined in the Address Translation Rule Base
21. Save the changes, verify the information, and install the policy