Password Throttling Configuration Guide
Introduction
Use this guide to configure Password Throttling on SecureAuth IdP to prevent bad actors from accessing a realm via repeated attempts to guess an end-user's password.
The Password Throttling feature can be configured to either block the end-user from making further password login attempts, or lock the targeted account once reaching the maximum number of invalid attempts within the set timespan.
This feature uses a dynamic, rolling time period for managing the count of password login attempts.
Each time the end-user starts the realm login page, the attempt count value increments by 1. The attempt is active for the duration of the set time period:
The configured throttling action occurs if the attempt count exceeds the number of incorrect password attempts allowed for the allotted time period.
Once the time period for that attempt has elapsed, the attempt count decrements by 1.
Upon a successful authentication, the attempt count is reset to 0.
NOTE: Password Throttling is enabled on a per realm basis, though all realms share the same attempt count value
Prerequisites
1. Ensure SecureAuth IdP v9.1 or later is running
2. Create a New Realm or access an existing realm on which this feature will be configured
3. Configure the following tabs in the Web Admin prior to configuring the Password Throttling feature
Overview – the description of the realm and SMTP connections must be defined
Data – an enterprise directory must be integrated with SecureAuth IdP
Workflow – the way in which users will access the target must be defined
Multi-Factor Methods – the Multi-Factor Authentication methods that will be used to access the target must be defined
Post Authentication – the target resource or post authentication action must be defined
Logs – the logs that will be enabled or disabled for this realm must be defined
SecureAuth IdP Web Admin Configuration
Data
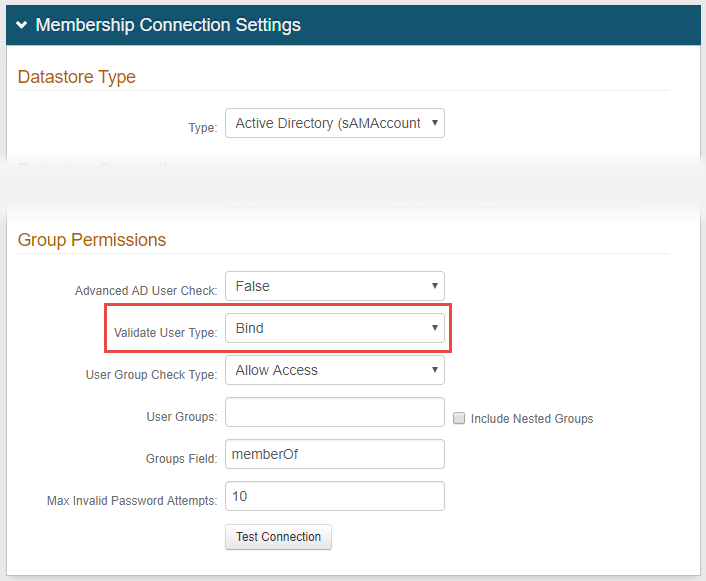
1. In the Membership Connection Settings section, under Group Permissions select Bind from the Validate User Type dropdown
 |
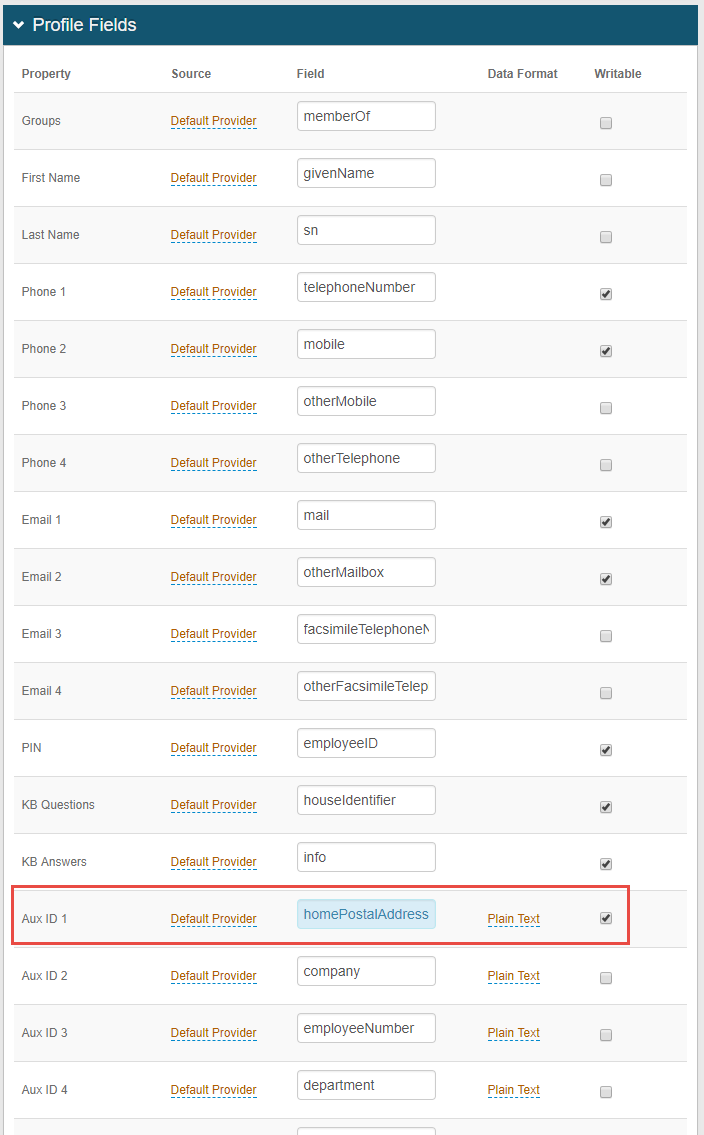
2. In the Profile Fields section, map the designated Field to the Property to store the date and time of each invalid password login attempt, and make this property Writable– e.g. maphomePostalAddress toAux ID 1
 |
Notice
Field requirements: |
|---|
|
Property selections: | |
|
Note
The Field and Property selected in step 1 will be tied to the Unlock button which can be used on any realm to unlock accounts – see the Unlock End-user Account section below for more information
IMPORTANT: To avoid losing valuable user data, be sure to select a Property that is not being used by any other realm, and will only be used for the password unlock function
NOTE: The Property selected in this step must be selected in step 7
Warning
Click Save once the configuration is complete and before leaving the Data tab to avoid losing changes
Workflow
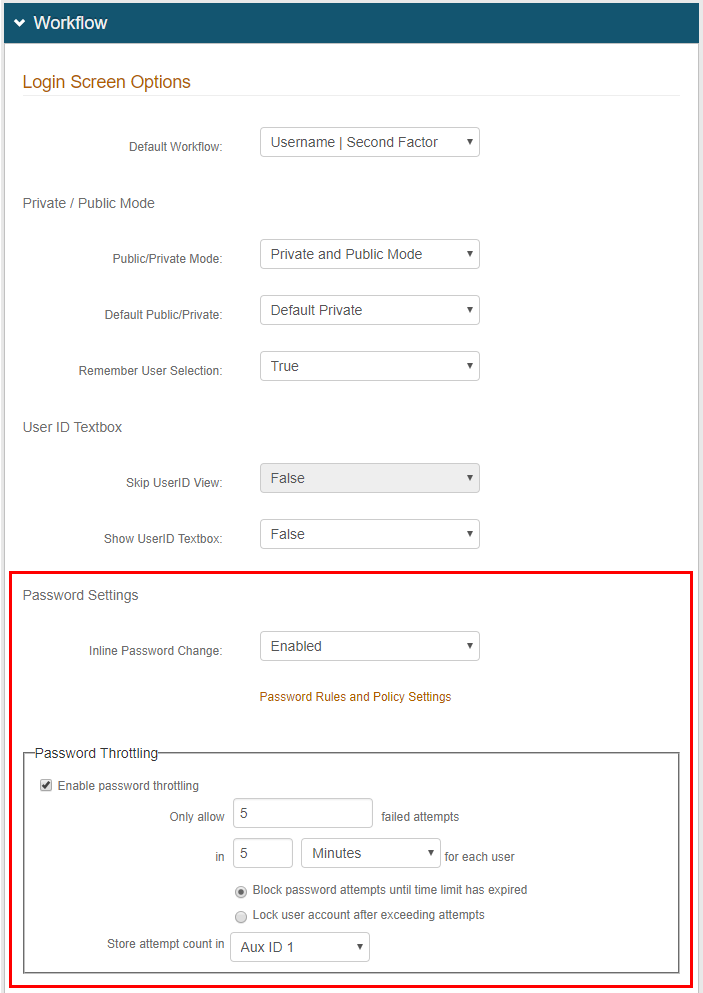 |
3. In the Workflow section, optionally select Enabled from the Inline Password Change dropdown to specify that end-users who successfully authenticated can change their own passwords
4. If enabling the Inline Password Change option in step 3, click Save to save this setting, and then click Password Rules and Policy Settings to configure Password Reset functionality
5. In the Password Throttling frame, check the box to Enable password throttling
6. Set the values for Only allow 'X' failed attempts in 'X' [timeframe] for each user and select the timeframe (Minutes, Hours, Days) from the dropdown
This configuration specifies the rolling time period before throttling takes effect
Notice
To prevent an Active Directory lockout during a password throttling session, SecureAuth recommends:
The failed attempts value should be less than the Account lockout threshold setting configured for the AD Default Domain Policy
The time value should be greater than the Reset account lockout counter after setting configured for the AD Default Domain Policy
For example:
Default Domain Policy | Password Throttling |
|---|---|
Account lockout threshold is set to 10 invalid logon attempts | Only allow 'X' failed attempts should be set to 9 |
Reset account lockout counter after is set to 20 minutes | in 'X' [timeframe] for each user should be set to 21 Minutes |
7. Select the radio button to specify the action to execute when the end-user exceeds the maximum allowed number of authentication attempts:
Block password attempts until time limit has expired – the end-user is prevented from making another login attempt until the attempt count has decremented by at least 1
Lock user account after exceeding attempts – the end-user's account is locked at the directory level – refer to Unlock Account Configuration Guide for more information about locked accounts
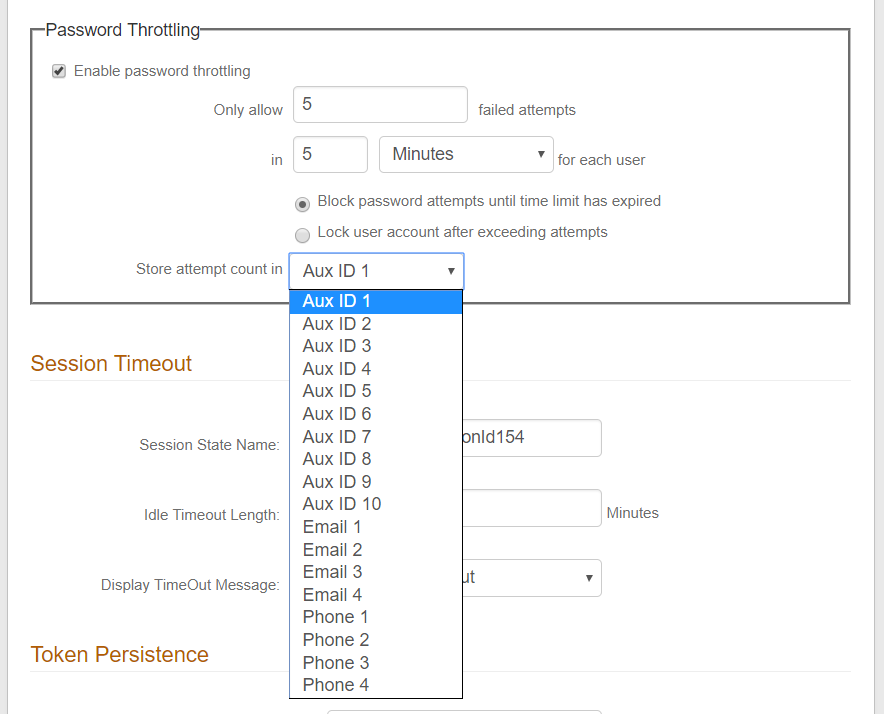
8. Select the Property (from step 1) in which to Store attempt count in – in this example, Aux ID 1 is selected from the dropdown
Warning
Click Save once the configuration is complete and before leaving the Workflow tab to avoid losing changes
End-user Experience
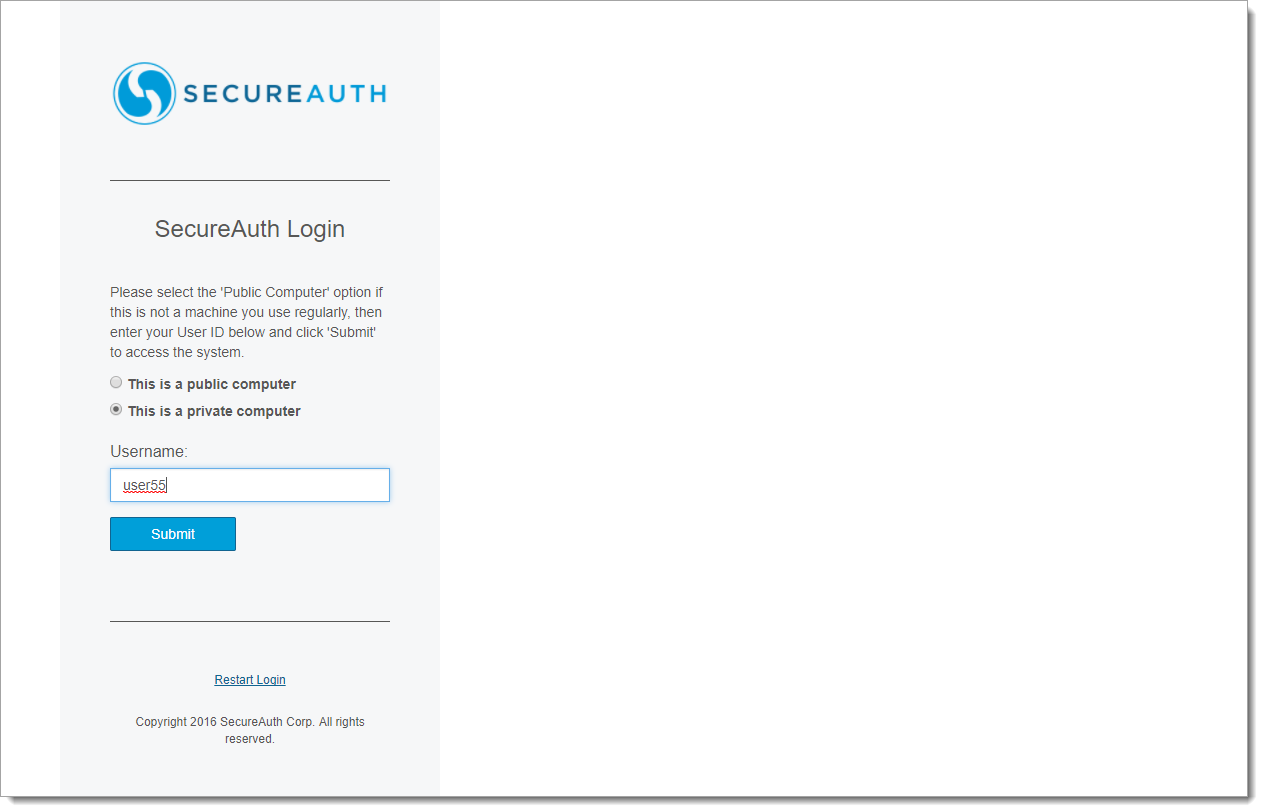
1. Start the login page and enter the account Username
 |
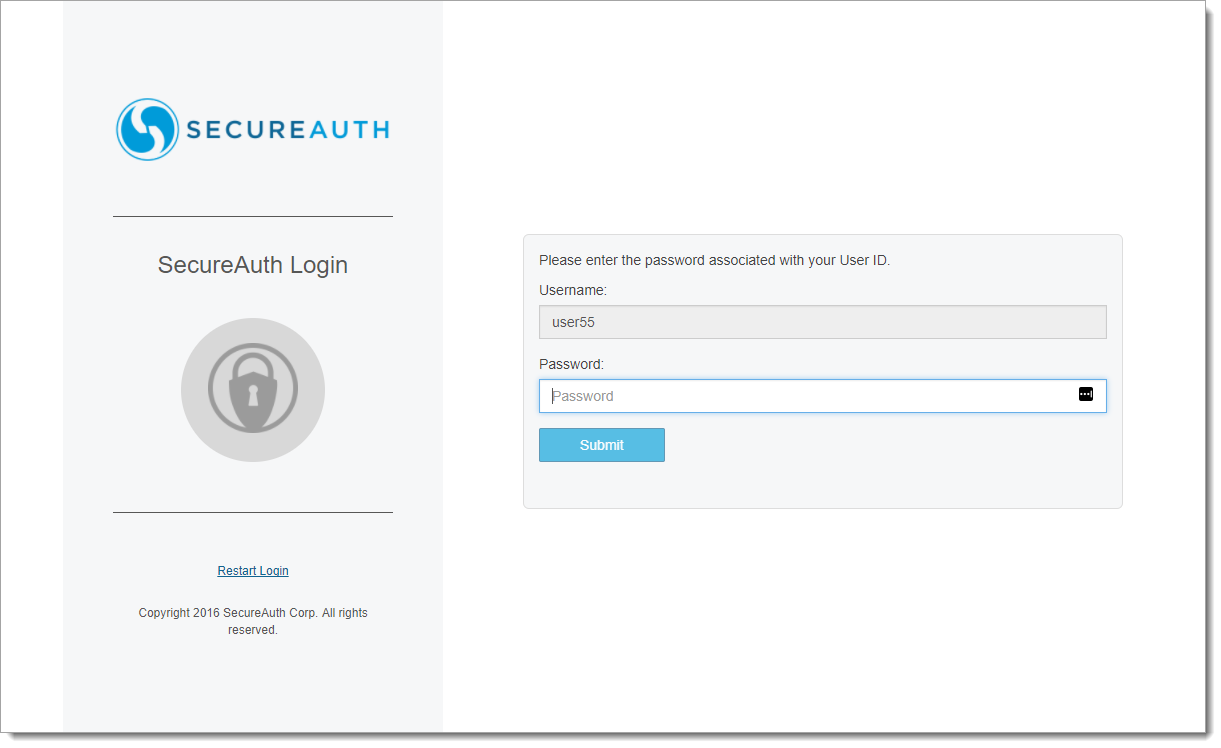
2. Enter the Password, then click Submit
 |
3. When entering an invalid password, the Password does not match message appears
 |
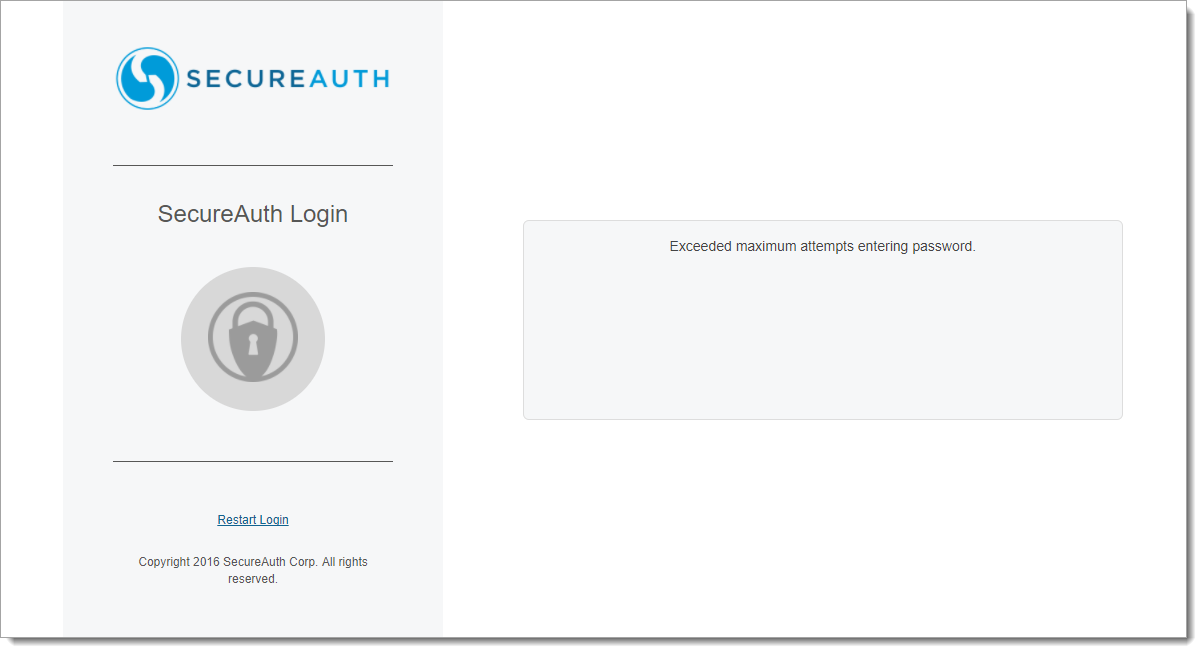
4. After entering an invalid password for the configured maximum number of failed attempts within a given timeframe, the Exceeded maximum attempts entering password. message appears
 |
5. If the end-user continually attempts to log in using an invalid password, the screen shown in step 3 continues to appear until the maximum number of failed attempts within the time limit is attained, shown in the screen for step 4
If the Block password attempts until time limit has expired feature is enabled, the end-user can enter a password again when the time limit has expired
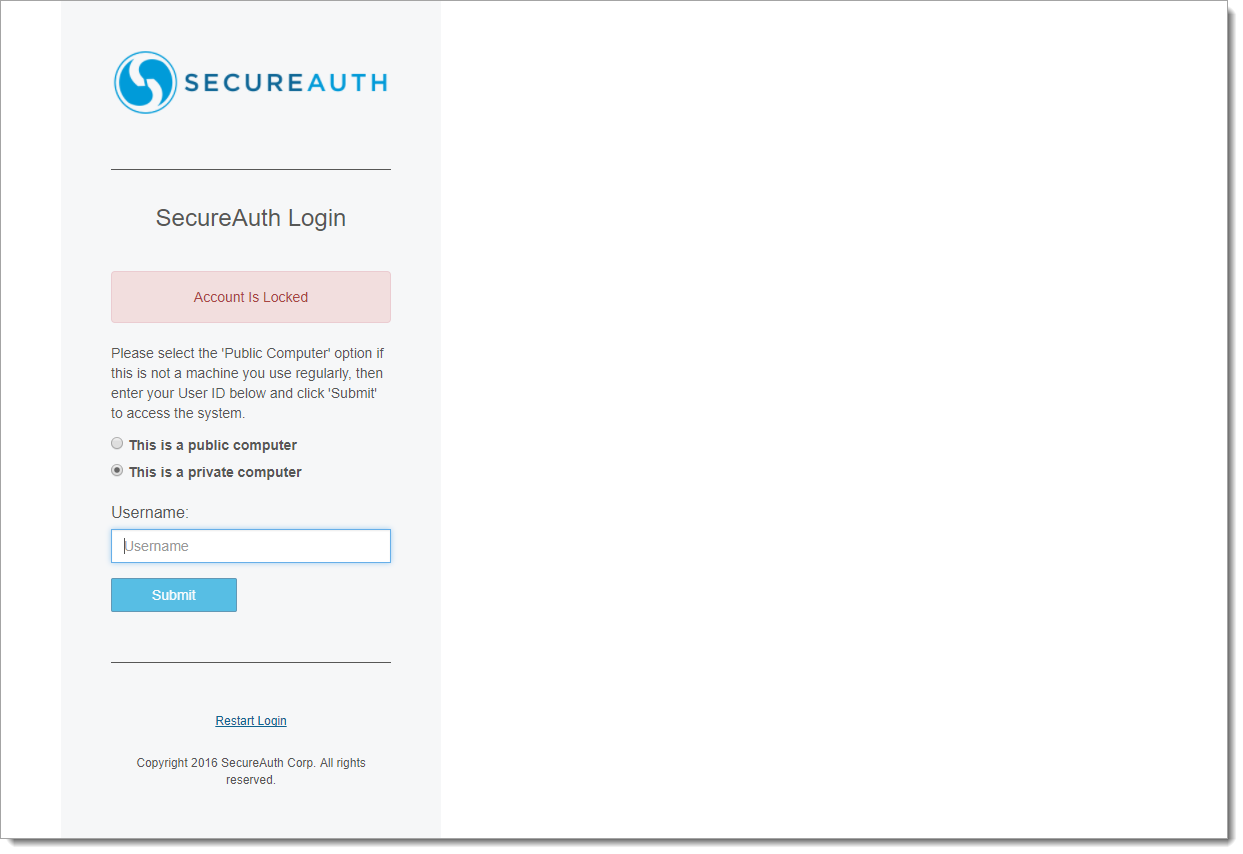
6. If the Lock user account after exceeding attempts feature is enabled, when the maximum number of failed attempts within the time limit is attained and a new session is started, the end-user is presented with the Account is Locked screen
Making an entry on this screen and clicking Submit re-displays the Account is Locked screen – only an administrator can unlock the user's account
 |
Unlock an End-user Account
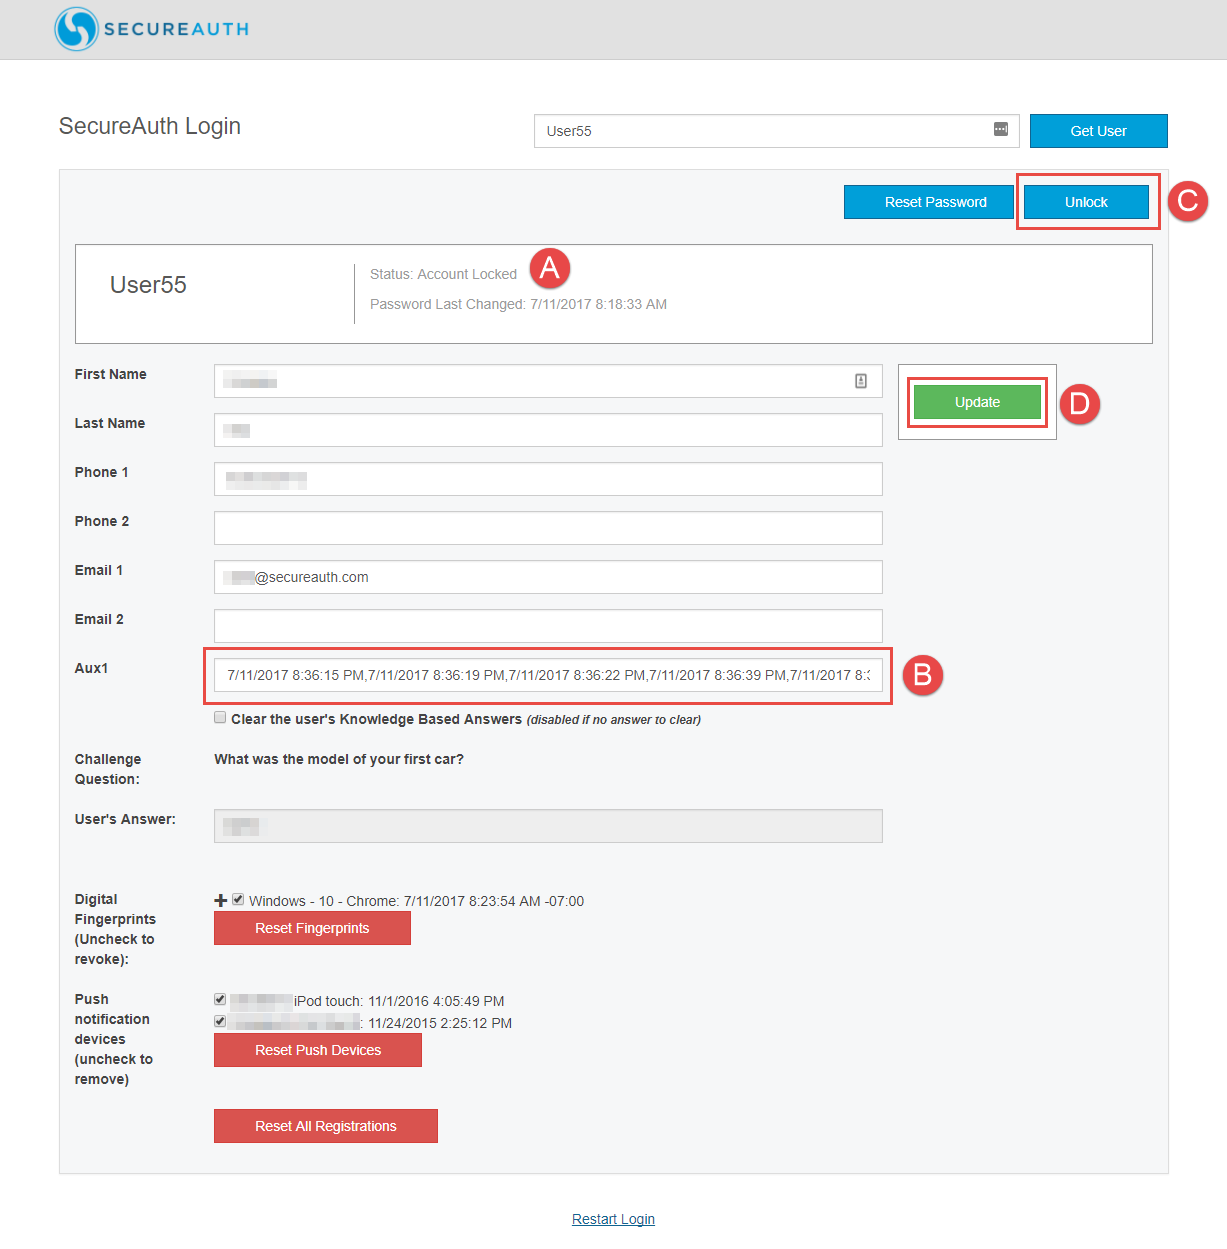 |
1. Log on the designated realm and retrieve the end-user's locked account
2. Note the Status: Account Locked information appears (item A)
3. Note the history of invalid password entries in the Aux1 field (item B)
This information includes the date and time of each failed attempt (using the MM/DD/YYYY HH:MM:SS AM/PM format), separated by a comma
4. Click Unlock (item C) – this action clears the history of invalid password entries on the Aux1 field and unlocks the account on the directory (see warning message below)
5. Click Update (item D)
Warning
WARNING: If any other realm is used to unlock user accounts – e.g. Unlock Account realm – when the administrator clicks Unlock for a specified user on that realm, content in the Aux1 field on this screen will be cleared – regardless of the field to which this property is mapped – and the user account will also be unlocked on all other realms