Modify the Codebase Attribute in Java Development Kit 7u55+
Introduction
Due to security enhancements added in Java Runtime Environment (JRE) starting with version 7u55, the Java Security Warning dialog can appear each time an end-user attempts to access a SecureAuth IdP realm configured to use a Java workflow. The presence of this dialog could prevent the end-user from experiencing a seamless workflow, which might be undesirable to an organization.
This article provides steps on how to modify the codebase attribute for the SecureAuth IdP Java applet for version 7u55+ in order to prevent the Security Warning dialog from appearing to the end-user.
Note
As of October 2016, SecureAuth IdP supports Java 8, starting with Java Development Kit (JDK) 8u111
To install JDK 8u111, click here to access the Oracle Java SE Downloads page
Applies to
SecureAuth IdP Version | OS Version | JRE Version |
|---|---|---|
7.x+ |
| 7u55+ |
Discussion
Why sign the SecureAuth IdP Java applet?
Starting with Java version 7u55, Oracle has increased security to show a Security Warning dialog when an asterisk (*) is used for the codebase attribute. The asterisk indicates all domains are allowed to be used with a cryptographically-signed Java applet. As a commercial product that used by companies across the world, Java is the only viable option for SecureAuth Corporation to use.
The Security Warning and a method to mitigate its appearance is documented in the support article Java Security Warning: Allow access to the following application from this web site? This mitigation, however, requires that the end-user take action which might not be desirable or allowed in some corporate environments. Organizations that wish to prevent the Security Warning from appearing can use these instructions to tailor the SecureAuth IdP Java applet to their IT environment and avoid burdening the end-user.
Modification of the Java applet behavior involves updating the codebase attribute in the JAR file manifest and then cryptographically signing the applet with the company's own code signing certificate. These actions prevent the JRE from presenting the end-user with the Security Warning and eliminates any involvement by the end-user.
The instructions presented in this document are optional and should only be used if the mitigation strategy defined in the support document Java Security Warning: Allow access to the following application from this web site? is not acceptable by the organization's business and / or IT Security policies.
Step 1: Download and Install Java JDK 7u55
Installation of Java JDK is required because it contains all the necessary tools for signing the SecureAuth IdP Java applet
The instructions in this document cover a JDK environment installation for JDK 7u55 on a Windows machine
NOTE: Though Linux, Solaris and Mac OS X installations are also supported, installation instructions for these platforms are not covered in this document
Requirements
OS requirements for the Java SE Development Kit (7u55) necessary to sign the Java applet
Platform | CPU | Version | Notes |
|---|---|---|---|
Windows Vista | x86 / x64 | SP2 | |
Windows 7 | x86 / x64 | SP1 | |
Windows 8 | x86 / x64 | 8.x | Modern UI (Metro) is not supported |
Windows 10 | x86 / x64 | 10.x |
Step 1A: Download JDK 7u55
1. Download JDK 7u55 from the Oracle Technet website
Choose either the Windows x86 (32-bit) or Windows x64 (64-bit) package for download, depending on the version of Windows installed
Step 1B: Install JDK 7u55
1. Start the Java SE Development Kit 7u55 installer
32-bit (x86): If running on a 32-bit (x86) version of Windows, the installer is titled jdk-7u55-windows-i586
64-bit (x64): If running on a 64-bit (x64) version of Windows, the installer is titled jdk-7u55-windows-x64
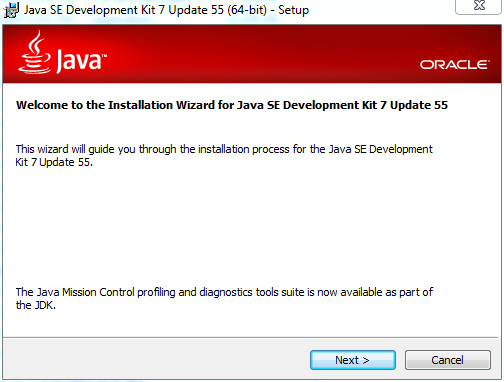
2. The Welcome screen appears
Read the instructions, then click Next > to continue
 |
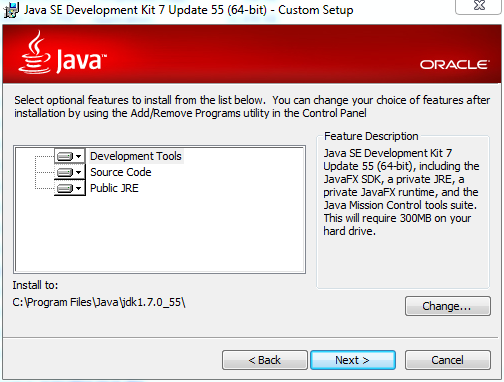
3. On the Custom Setup screen, do not select any additional options
Click Next > to continue
 |
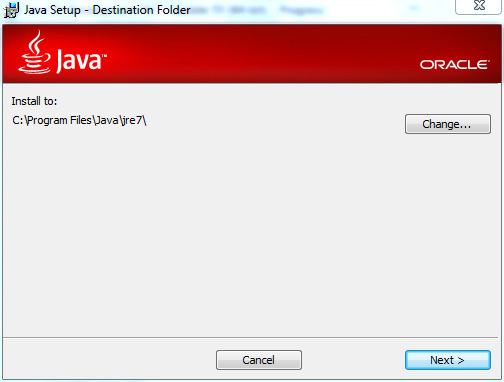
4. On the Destination Folder screen, accept the default option and click Next >
 |
5. The Complete screen appears when the process is successfully completed
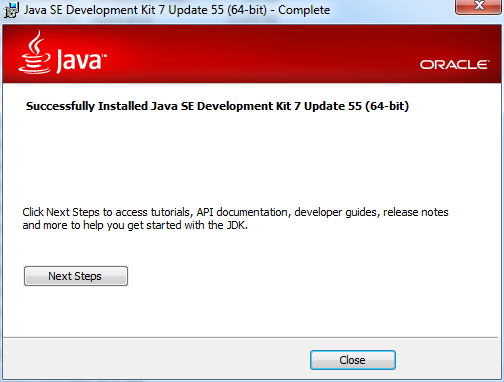 |
Click Close to exit the installer
Step 2: Purchase and Install a Code Signing Certificate
Follow these steps to prepare a Certificate Signing Request (CSR) and purchase a code signing certificate for the organization
Code signing is the process of digitally signing an executable or script to confirm the software's author and guarantee that the code has not been altered or corrupted since it was signed
Step 2A: Create a Java KeyStore
In this step, a Java KeyStore (JKS) is created to store cryptographic keys and certificates
1. Execute the command pertinent to the type of operating system
For 32-bit systems: | "C:\Program Files (x86)\Java\jdk1.7.0_55\bin\keytool" -genkey -alias signing_key -keyalg RSA -keysize 2048 -keystore secureauth.jks |
For 64-bit systems: | "C:\Program Files\Java\jdk1.7.0_55\bin\keytool" -genkey -alias signing_key -keyalg RSA -keysize 2048 -keystore secureauth.jks |
Options to define the KeyStore appear
2. Select a password to protect the KeyStore (see warning box below)
|
|
Warning
SecureAuth recommends using either Symantec Identity Safe Password Generator or LastPass Generate Password to create a strong password
Be sure to record this password and store it in a safe place since it is needed for other steps
3. Enter information about the organization
| Enter the company name |
| Enter a department within the organization (e.g. IT) |
| Enter the company name |
| Enter the city in which the company is located |
| Enter the State or Province in which the company is located |
| Enter the ISO 3166-1 alpha-2 two-letter country code for the country in which the company is located (e.g. US) |
| Choose No if there are errors or Yes if everything is correct |
| Press Enter to use the same password as the KeyStore or enter another password to create a unique password |
The executed command creates a Java KeyStore file named secureauth.jks
Step 2B: Create a CSR Request
In this step, a CSR request from the secureauth.jks KeyStore is created which can be submitted to a Certificate Authority (CA) of choice
1. Select the appropriate code for the OS
For 32-bit systems: | "C:\Program Files (x86)\Java\jdk1.7.0_55\bin\keytool" -certreq -alias signing_key -file csr.csr -keystore secureauth.jks |
For 64-bit systems: | "C:\Program Files\Java\jdk1.7.0_55\bin\keytool" -certreq -alias signing_key -file csr.csr -keystore secureauth.jks |
2. Enter the KeyStore password
Use the password assigned in the Create a Java KeyStore step
When the command finishes executing, a private key and a CSR is created and saved as a .jks file and as a .csr file
Step 2C: Order and Install a Signing Certificate
After the CSR Request is generated, proceed with this step to order and install the code signing certificate
1. Submit a request to a Certificate Authority (CA) to purchase a code signing certificate
NOTE: Though any CA can be chosen, SecureAuth recommends using one of the larger CAs listed below to help ensure the intermediate and root certificates are already present on the end-user workstation without requiring administrative intervention
Note
Disclaimer
Information about products or services not offered by SecureAuth Corporation is provided for information purposes only and does not constitute SecureAuth Corporation's recommendation or endorsement
Ordering and Installation Instructions | Notes | |
|---|---|---|
Code signing certificate must be downloaded in the PKCS#7 format | ||
2. Once the CA is received, follow the vendor's instructions to install the certificate
Step 3: Sign the Java Applet
Now that the code signing certificate is installed, sign the Java certificate
Step 3A: Determine Which Applet to Sign
1. On the SecureAuth IdP appliance, start the SecureAuth IdP Web Admin
2. Navigate to System Info
SecureAuth IdP Configuration: System Info
3. On the Plugin Info section, note the value in Java Applet for JRE 7 – e.g. 1.7.4.3
 |
Warning
Click Save once the configuration has been completed and before leaving the System Info page to avoid losing changes
Step 3B: Locate the Java Applet in the File System
1. On the SecureAuth IdP appliance, navigate to D:\SecureAuth\SecureAuth1
2. In the SecureAuth1 directory, verify that a folder corresponding to the value noted in step 3 of the Determine Which Applet to Sign step exists for Java Applet for JRE 7
3. Copy the SecureAuth.jar file in this folder to the workstation on which Java JDK 7u55 was installed
Step 3C: Install a RAR Viewer
JAR files are compressed in the RAR format, and Windows does not provide native support for these files
Therefore, SecureAuth suggests using a .zip file utility (e.g. 7-zip or WIN zip, etc.) to open and work with RAR files
1. If a RAR utility already exists on the JDK workstation, proceed to step 3D
Otherwise, go to the 7-Zip website
2. Download the version of the .msi file pertinent to the Windows operating system (32 or 64 bit)
For 32-bit systems: download the 32-bit x86 .msi
For 64-bit systems: download the 64-bit x64 .msi
3. Start the installer and let it finish
Step 3D: Use RAR Viewer to Remove Existing Cryptographic Signature
Note
The RAR viewer should be used to remove the SecureAuth IdP-supplied cryptographic signature from the Java applet before signing it with the new code signing certificate
1. View the SecureAuth.jar file using the RAR tool
2. In the JAR archive, locate the folder named META-INF
In this folder, delete the files with the extensions .SF and .RSA
3. Locate the MANIFEST.MF file and make these edits
a. Find the Caller-Allowable-Codebase attribute
b. Remove the asterisk (*) and replace it with the domain of the organization or FQDN of the SecureAuth IdP appliance
NOTE: See JAR File Manifest Attributes for Security for the proper format
c. Remove the following entries from the file
Entries to delete
Name: SecureAuth$11.class
 SHA-256-Digest: m1mmWkXMT12G5IUNuHjSLPqtLyXfRIxW+gA+zp5jRM0=
Name: SecureAuth.class
 SHA-256-Digest: fPfs46cfF1Ni+T/617CL83wMEWhXa9WtXCfnBX4rAoQ=
Name: SecureAuth$8.class
 SHA-256-Digest: S3lckkC3QOvDINDxFGLKiDPP1TiIdTf9ee2UnlMJl3k=
Name: SecureAuth$3.class
 SHA-256-Digest: CLpcj61grz7Gck0eZs9irLmJ9RTM1Xt+sZ90i9SPQhQ=
Name: SecureAuth$7.class
 SHA-256-Digest: VoBhuO6Npxe3dyb6mxH4cQzd1+ALlOvredVi6IoajOw=
Name: SecureAuth$10.class
 SHA-256-Digest: vh7UQMKOUOb1+L3XK//j24tSEZ3+wsuRGsJGks+gozI=
Name: SecureAuth$12.class
 SHA-256-Digest: 1i9sUwffj1znja8R/7ZI6SKUBMfexOZJKifNqhHYzd4=
Name: SecureAuth$5.class
 SHA-256-Digest: vjhwSRNc9T+qtLp/bmCX8wWS0FkUtQUxfSys7sw+40M=
Name: SecureAuth$9.class
 SHA-256-Digest: uIozdFRNEKnn6FSaQmIKBdWjtVYMU+x47bWFi07rG+0=
Name: SecureAuth$1.class
 SHA-256-Digest: xWQtIxRdaT48nnAklBBNl13RNBDMuYj+qrmwjD72dlM=
Name: SecureAuth$13.class
 SHA-256-Digest: XFV0wix9h6vG+MN1TCFUUCzDHqdBnDxtZyxzw8ESORo=
Name: SecureAuth$2.class
 SHA-256-Digest: PXZHfXDicGU5MT9SNGiN2fAVfHiQEI0QtuKiJDe6SvI=
Name: SecureAuth$4.class
 SHA-256-Digest: 1ou/rLgGfSWMxs3gTAHEzGuCephd0kL2EUR7MOcOY5g=
Name: SecureAuth$6.class
 SHA-256-Digest: WGTQaBBcLAZ9Xxz2/KJ6CRqUTJ+m/C0mYBvU4UdUigs=
4. Save edits to the manifest file
Step 3E: Sign the Java Applet with Jarsigner
Once the SecureAuth IdP digital signature has been removed, the signature of the one that was purchased and saved in the Create a Java KeyStore step can now be applied
When executing the steps below, make the following replacements
| replace this with the password used for generating the code signing certificate |
| replace this with the value displayed as "Alias name" by running the script in step 1 |
1. Obtain the Alias name of the code signing certificate by running the following command
For 32-bit systems: |
|
For 64-bit systems: |
|
2. To sign the SecureAuth.jar file, run the following command (sample script for a code signing certificate in .pfx format, using JDK Version 7 Update 55):
For 32-bit systems: |
|
For 64-bit systems: |
|
For more information about the jarsigner tool, consult Oracle's documentation for reference
Notice
This command does not provide any output to indicate that the code was successfully signed
Panel 3F: Verify the Signed Applet
The jarsigner command used in the previous step does not verify the signing was successfully completed
To verify the signed applet
1. Run the jarsigner -verify command from the command prompt
For 32-bit systems: |
|
For 64-bit systems: |
|
If the SecureAuth IdP applet was signed successfully, the following entries display towards the end of the output
s = signature was verified
m = entry is listed in manifest
k = at least one certificate was found in keystore
i = at least one certificate was found in identity scope

jar verified.
Step 4: Deploy the Signed Java Applet
After the Java applet is signed, deploy it in your production and development environments
Tip
SecureAuth recommends performing these steps during the normally scheduled maintenance window to ensure there is no unexpected downtime for end-users
Step 4A: Determine Which Java Applet is Currently in Use
1. On the SecureAuth IdP appliance, start the SecureAuth IdP Web Admin
2. Navigate to System Info
SecureAuth IdP Configuration: System Info
3. On the Plugin Info section, note the value in Java Applet for JRE 7 – e.g. 1.7.4.3
|
Step 4B: Create a New Java Applet for JRE 7
With the Java applet version currently in use verified, the Java applet just created must be differentiated from the stock version shipped with SecureAuth IdP
To make this differentiation, a new version (directory) must be created
1. On the SecureAuth IdP appliance, navigate to D:\SecureAuth\SecureAuth1
2. Within the SecureAuth1 directory, create a new directory that is one value greater than the Java applet for JRE 7 value
For example, if the JRE 7 value is 1.7.4.3 in the JRE Applet for JRE 7 field of the System Info tab, then create a directory named 1744
3. Copy the newly-signed Java applet into this directory
4. Repeat this process for all folders in D:\SecureAuth
Step 4C: Configure All SecureAuth IdP Realms to Use the New Java Applet
The final step for deploying the Java applet is to configure the SecureAuth IdP realms to use the new Java applet version created in the previous step
1. On the SecureAuth IdP appliance, start the SecureAuth IdP Web Admin
2. Navigate to System Info
SecureAuth IdP Configuration: System Info
3. On the Plugin Info section, update the value in Java Applet for JRE 7 to reflect the new version created in the previous step, Create A New Java Applet for JRE 7
 |
For example, if the JRE 7 value is 1.7.4.3 as displayed in the JRE Applet for JRE 7 field of the System Inf o tab, then change it to 1.7.4.4 to match the folder created in the previous step
Warning
Click Save once the configuration has been completed and before leaving the System Info page to avoid losing changes
4. Repeat this process for all realms on the SecureAuth IdP appliance
Notice
SecureAuth recommends testing one realm first before applying these settings to all realms on the SecureAuth IdP appliance