Juniper IVE Virtual Hostname Configuration Guide
Introduction
Use this guide to configure a Juniper IVE VPN Virtual Hostname.
Juniper IVE has the ability to provide the Network Address Translation in the form of a proxy service from the Internet to the private network. A new public name can be configured as a Virtual Hostname, which will allow Juniper IVE to forward traffic sent from the Internet to a public hostname, and then to a host that would normally be unavailable from the Internet.
Additionally, Juniper IVE will provide the SSL service for SecureAuth IdP, which is very convenient when a wildcard SSL certificate is installed on Juniper IVE. This also creates the possibility of passing traffic from Juniper IVE to SecureAuth IdP in either HTTP or HTTPS. Some organizations use advanced inspection tools and techniques, and prefer that the traffic on the private network to be unencrypted, which can be accomplished this way.
Prerequisites
Have a Juniper IVE VPN
Juniper IVE Virtual Hostname Configuration Steps
User Role Configuration
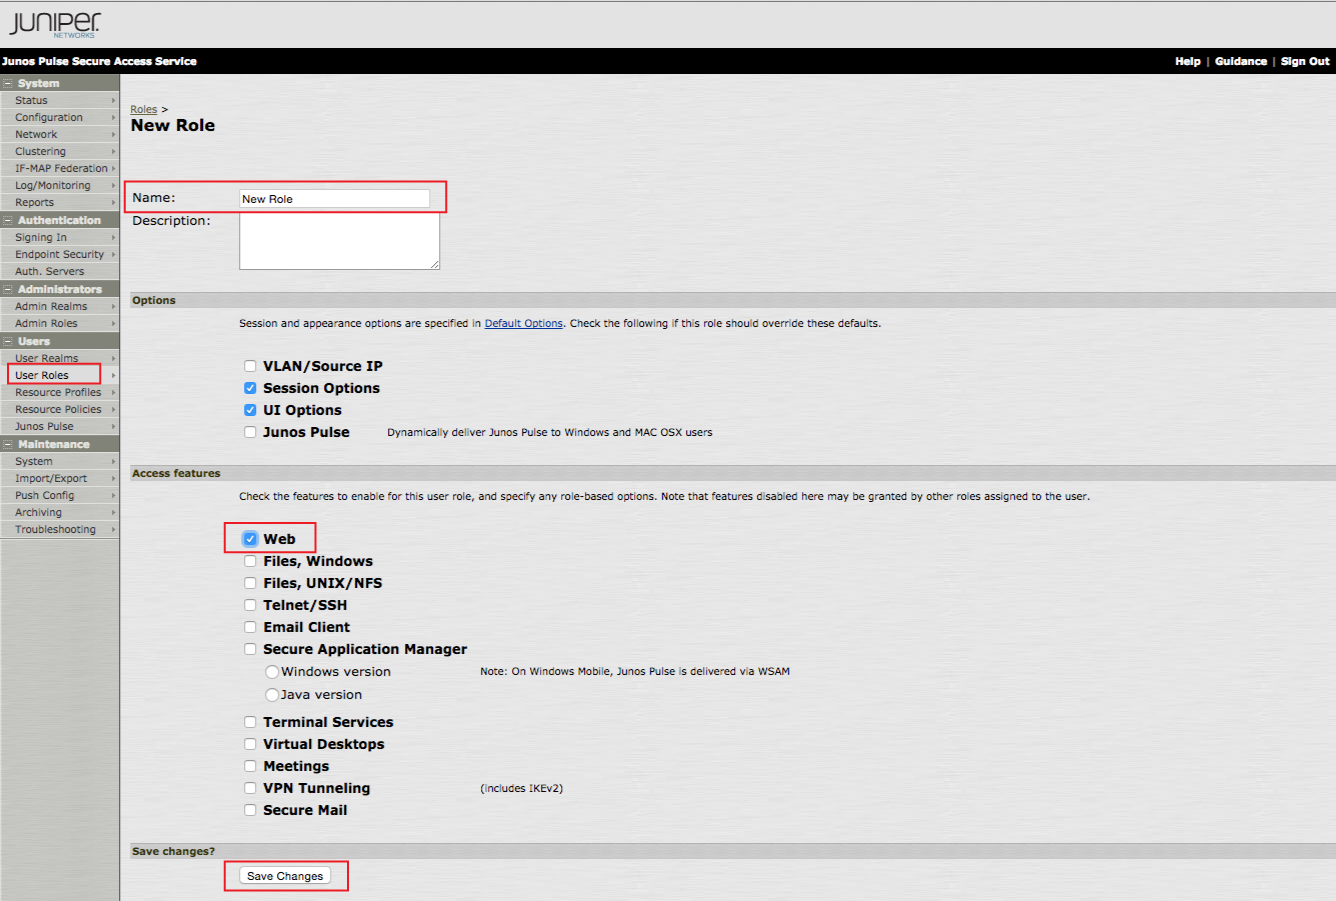 |
1. To start, create a New Role, which will be applied to the following configuration steps
2. Log into the Juniper IVE admin console, and select User Roles under Users, and click New User Role...
3. Set a Name for the new role
4. Select Web in the Access Features section
5. Click Save Changes
Signing-in Policy Configuration
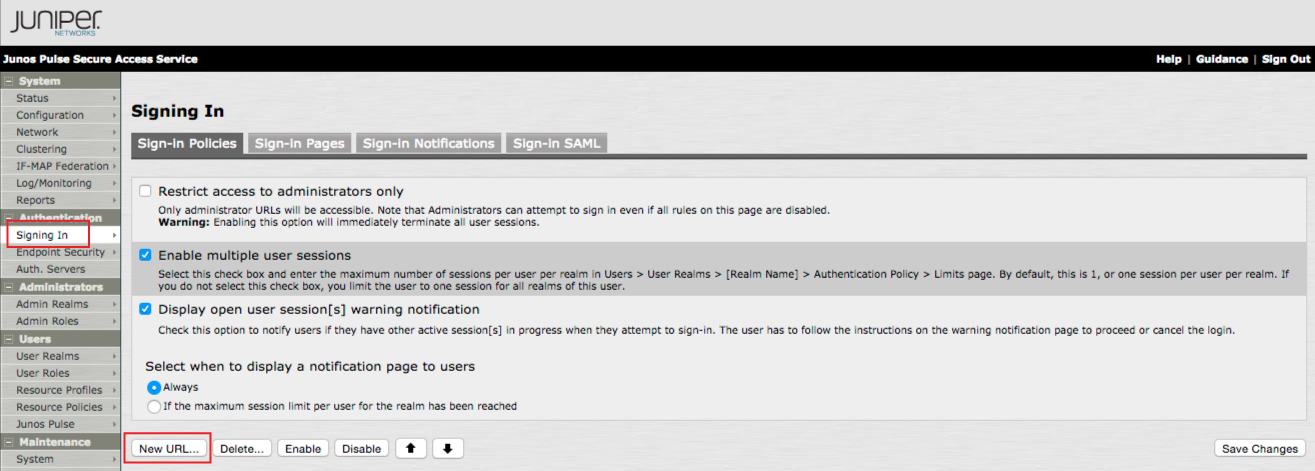 |
6. In the admin console, select Signing In under Authentication, and click Sign-in Policies
7. Click New URL... to create the new Signing-in Policy
 |
8. Select Authorization Only Access from the User type options
9. Set the Virtual Hostname to the FQDN of the SecureAuth IdP appliance, e.g. https://secureauth.company.com
10. Set the Backend URL to the internal hostname or IP Address of the SecureAuth IdP appliance
11. Select [No Authorization] from the Authorization Server dropdown
12. Select the New Role created in the previous steps from the Role Option dropdown
13. Click Save Changes
Resource Policy to Allow Access to SecureAuth IdP Configuration
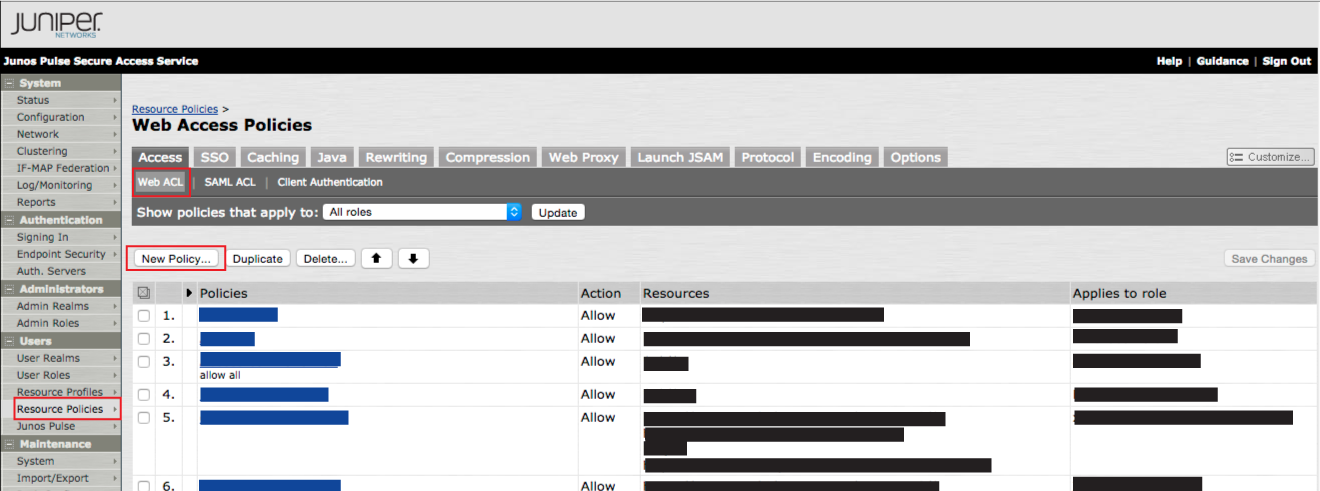 |
14. In the admin console, select Resource Policies under Users, and click Web ACL
15. Click New Policy... to create a new Policy
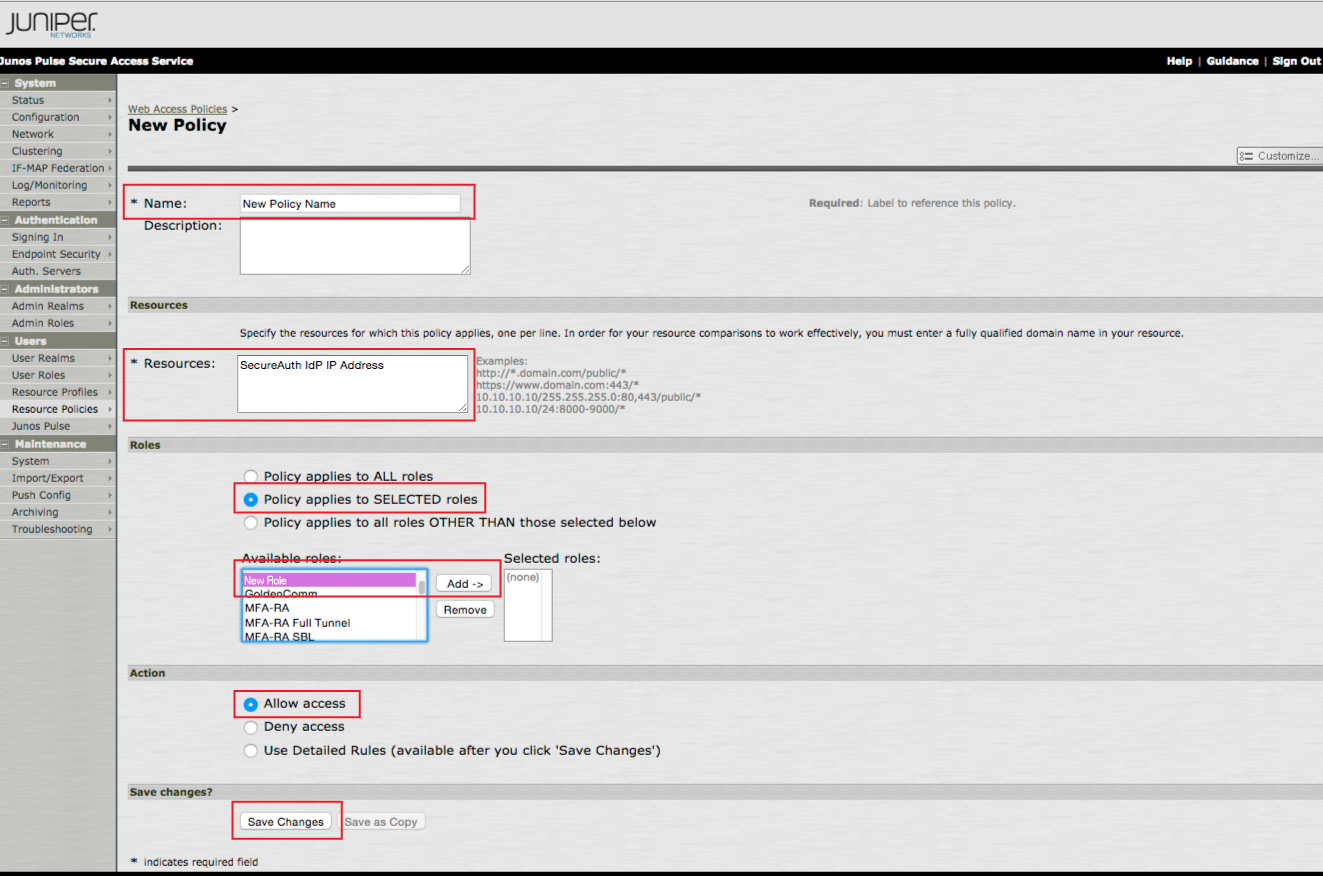 |
16. Set a Name for the new policy
17. Provide the SecureAuth IdP server IP Address in the Resources field
18. Select Policy apples to SELECTED roles in the Roles section
19. Select the New Role created in the previous steps, and click Add
20. Select Allow access in the Action section
21. Click Save Changes