SonicWALL Secure Remote Access SSL VPN Integration Guide (Certificate)
Introduction
Use this guide to enable Multi-Factor Authentication access to SonicWALL Secure Remote Access SSL VPN.
SecureAuth IdP is a Variable Authentication Solution (VAS) that conducts multi-factor enrollment to create an X.509 client certificate that is specific to the user (tied to the data store user profile) and to the device.
The user will be prompted for the client certificate to access SonicWALL; and with the presentation of the certificate, a successful second factor authentication is accomplished.
Prerequisites
1. Have a SonicWALL Secure Remote Access SSL VPN and access to the web-based management console
2. Download the SecureAuth CA Public Certificates zip bundle
3. Create a New Realm for the SonicWALL integration in the SecureAuth IdP Web Admin
4. Configure the following tabs in the Web Admin before configuring the Post Authentication tab:
Overview – the description of the realm and SMTP connections must be defined
Data – an enterprise directory must be integrated with SecureAuth IdP
Workflow – the way in which users will access this application must be defined
Multi-Factor Methods – the Multi-Factor Authentication methods that will be used to access this page (if any) must be defined
SecureAuth IdP Configuration Steps
SonicWALL Configuration Steps
CA Certificate Import
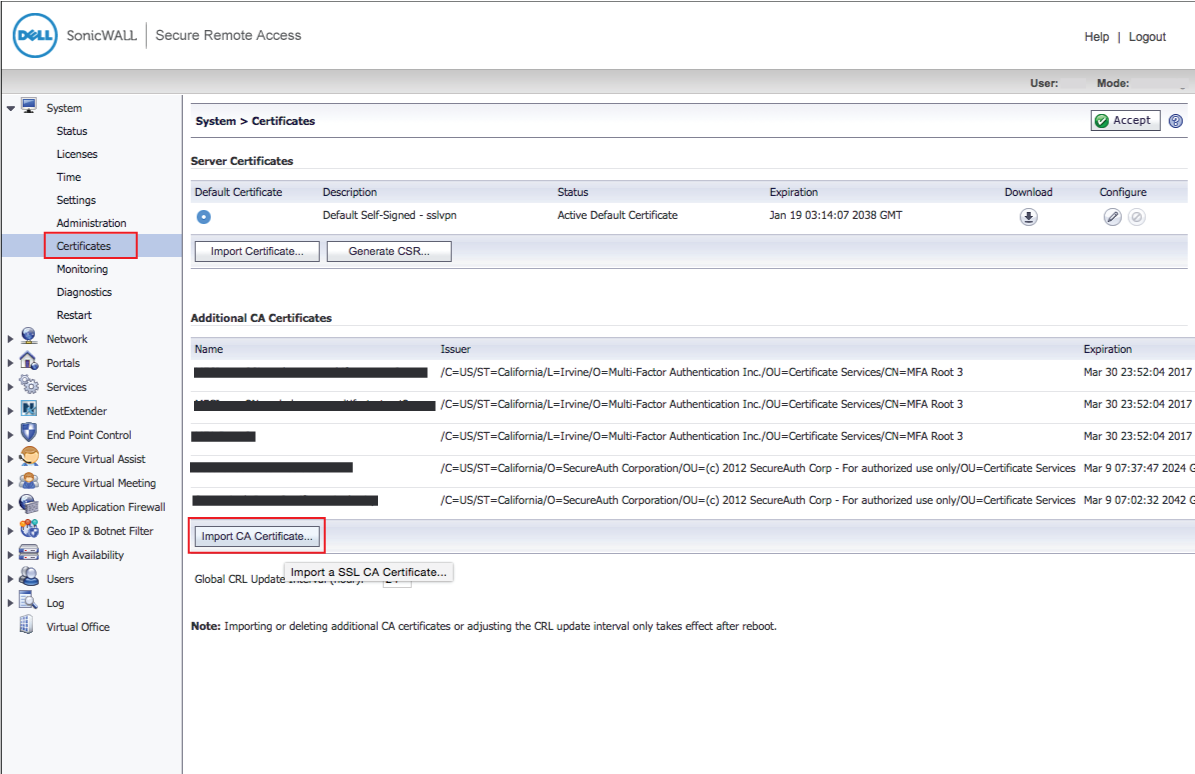 |
1. Log into the SonicWALL admin console, and select Certificates under System
2. Click Import CA Certificate...
3. Click Browse to locate the SecureAuth CA Public Certificates, and click Upload
4. Click Accept
Portals Configuration
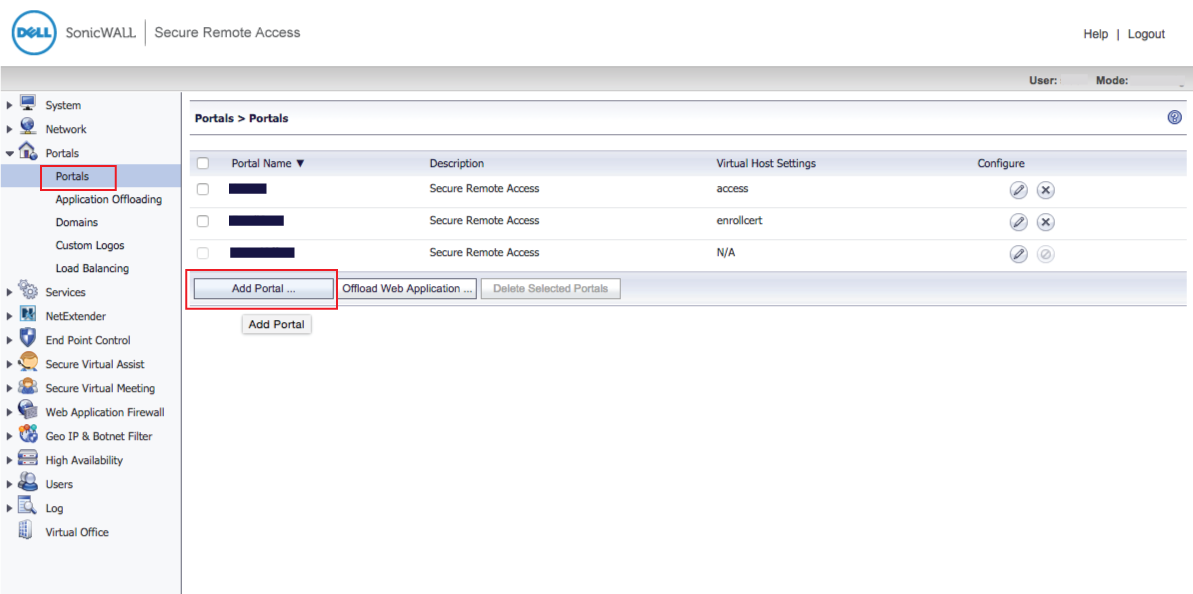 |
5. In the admin console, select Portals under Portals
6. Click Add Portal ...
Enroll Portal
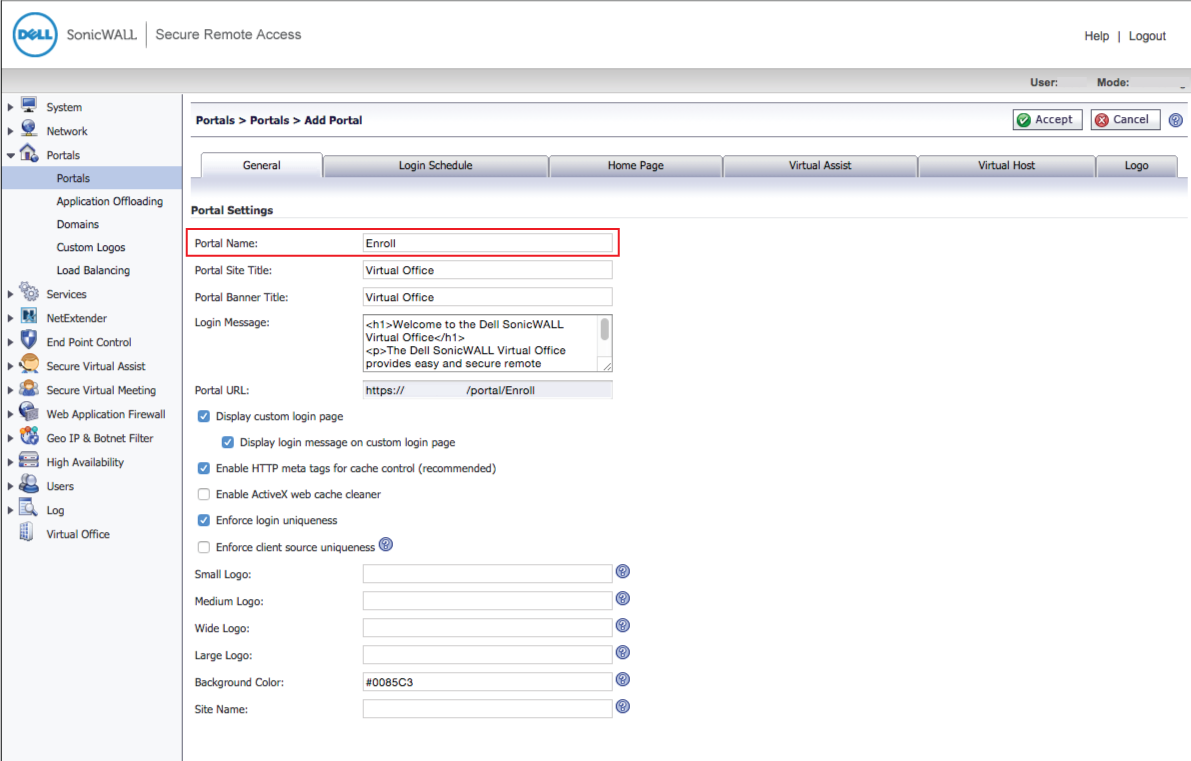 |
7. Set the Portal Name to Enroll
8. Make any other preference modifications, and click OK
Access Portal
 |
9. In the Portals section, click Add Portal ...
10. Set the Portal Name to Access
11. Make any other preference modifications, and click OK
12. Click Accept
Domain Configuration
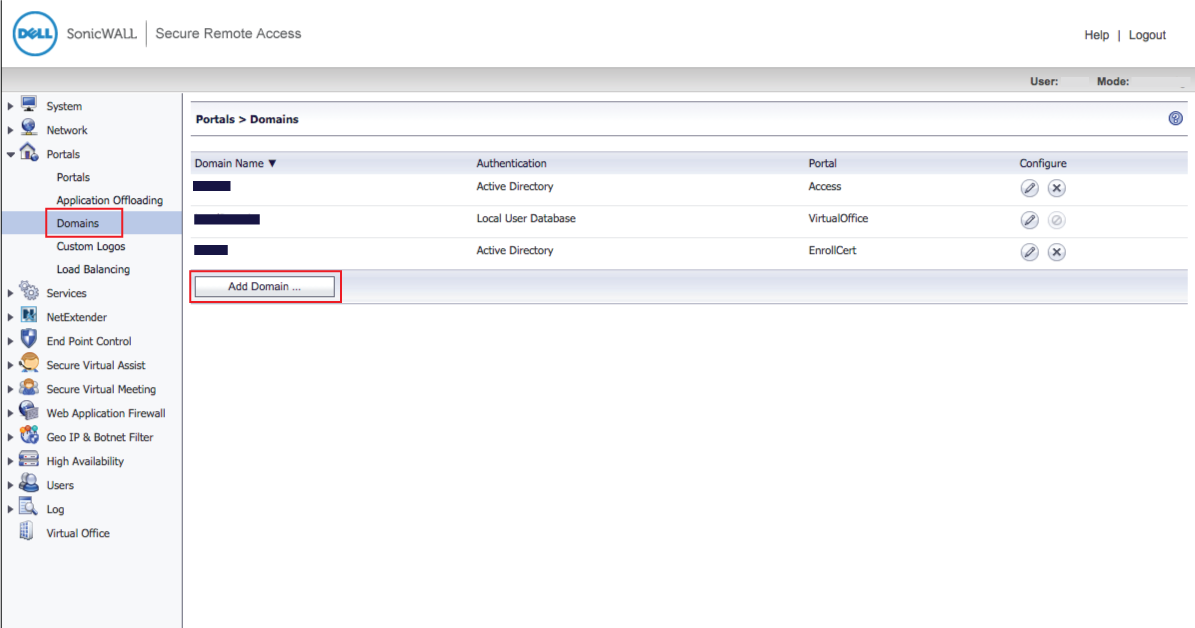 |
13. In the admin console, select Domains under Portals
14. Click Add Domain ...
Enroll Domain
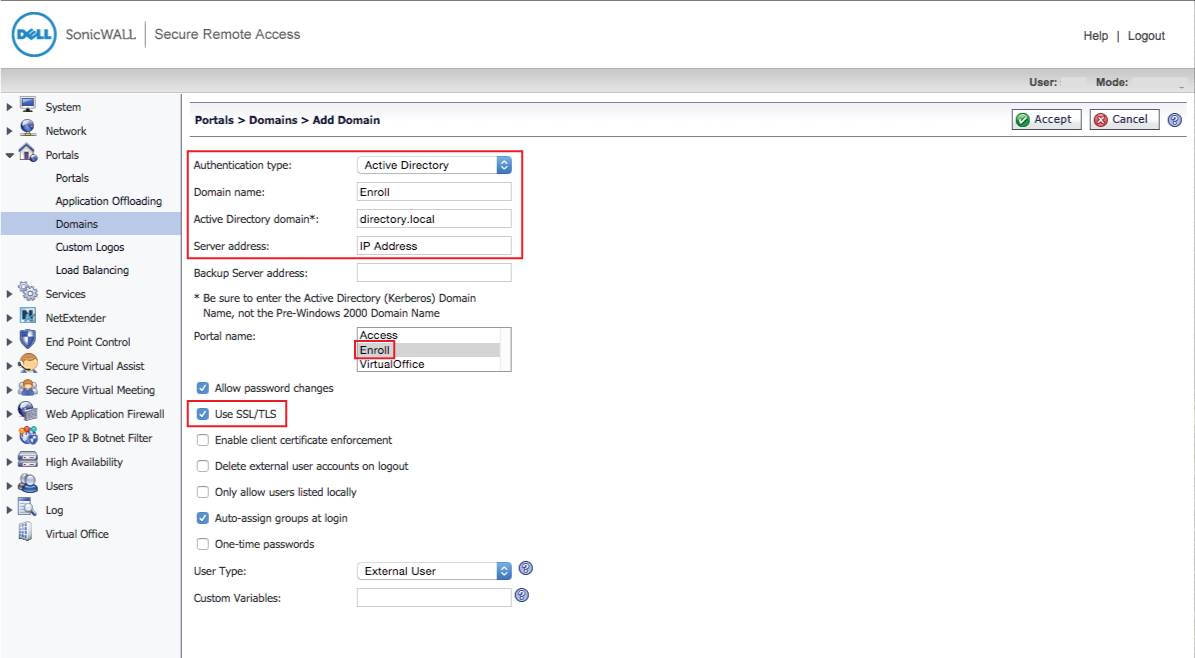 |
15. Select Active Directory from the Authentication type dropdown
16. Set the Domain Name to Enroll
17. Provide the Active Directory domain, e.g. company.local
18. Set the Server address to the IP Address of the domain controller
19. Select Enroll from the Portal Name options
20. Check Use SSL/TLS
21. Click Add
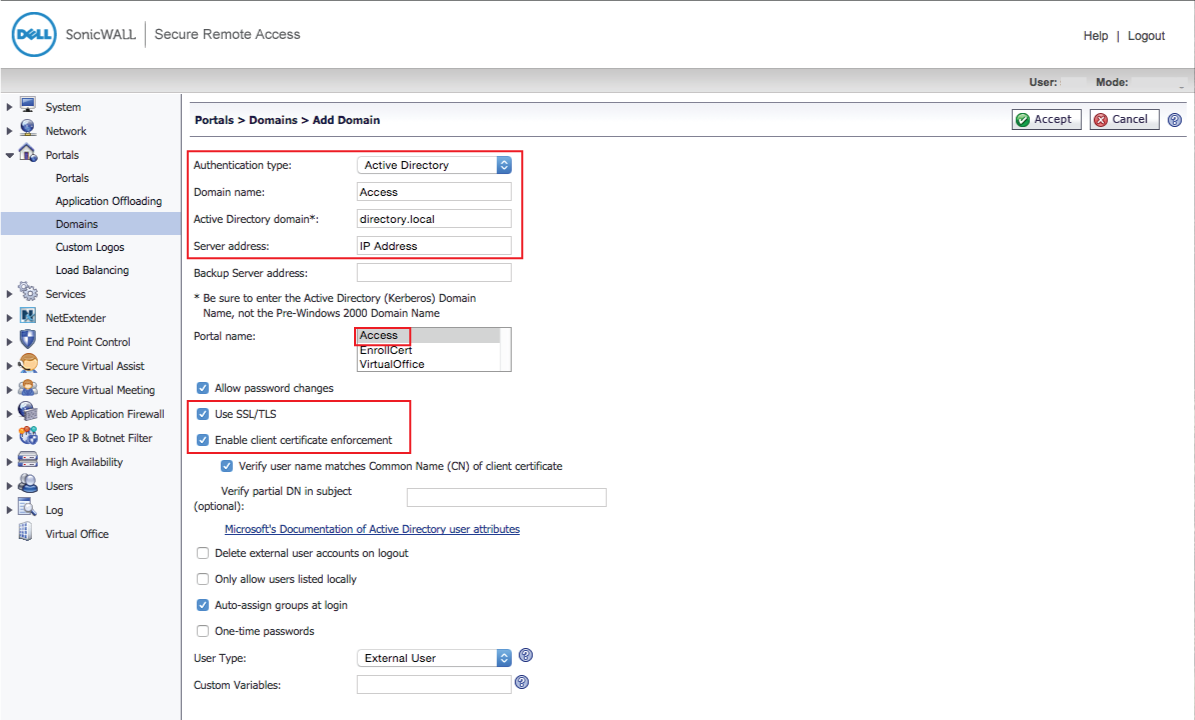
Access Domain
 |
22. In the Domains section, click Add Domain ...
23. Select Active Directory from the Authentication type dropdown
24. Set the Domain Name to Access
25. Provide the Active Directory domain, e.g. company.local
26. Set the Server address to the IP Address of the domain controller
27. Select Access from the Portal Name options
28. Check Use SSL/TLS
29. Check Enable client certificate enforcement
30. Click Add
31. Click Accept
Bookmark Configuration
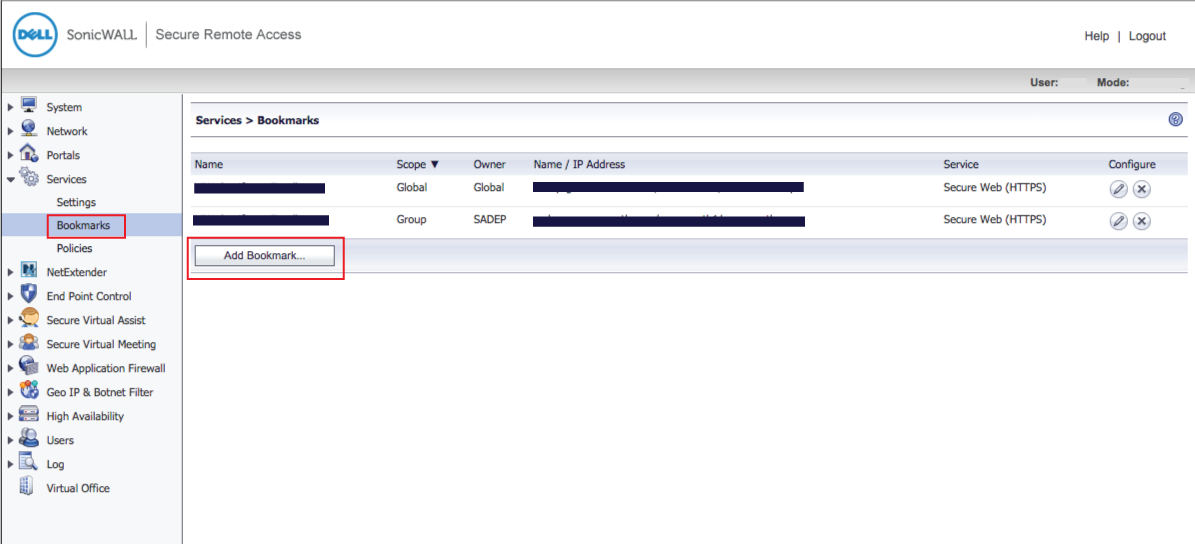 |
32. In the admin console, select Bookmarks under Services
33. Click Add Bookmark...
Enroll Bookmark
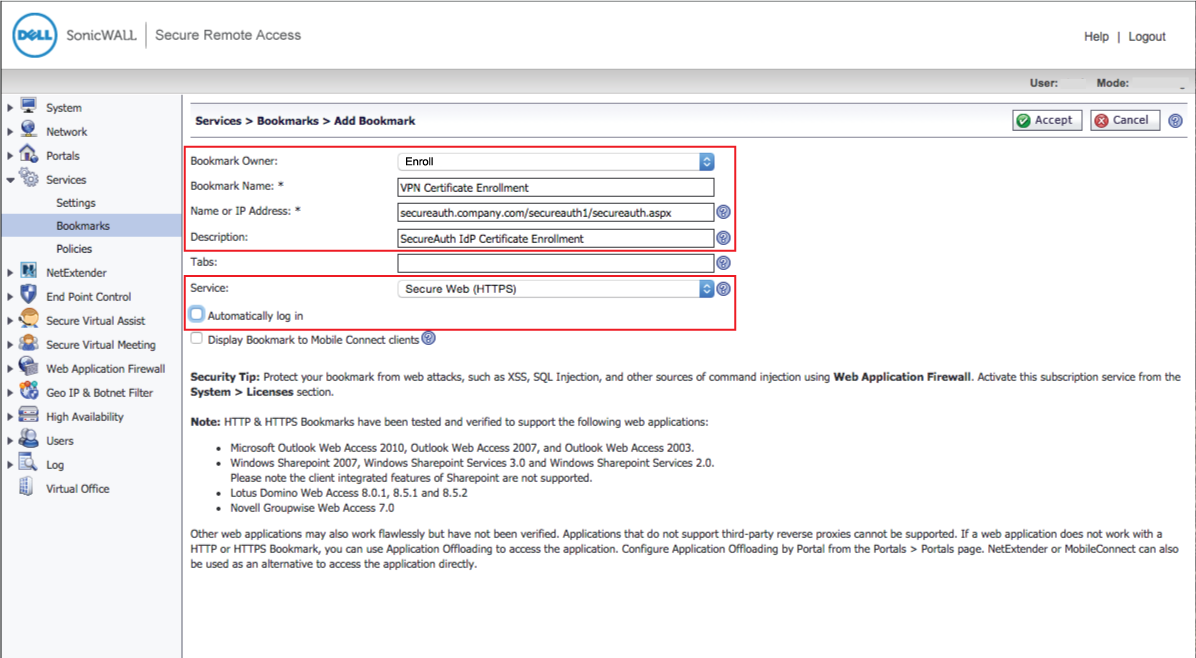 |
34. Select Enroll from the Bookmark Owner dropdown
35. Set the Bookmark Name to VPN Certificate Enrollment
36. Set the Name or IP Address to the Fully Qualified Domain Name (FQDN) of the SecureAuth IdP appliance, followed by the SecureAuth IdP SonicWALL-integrated realm, e.g. https://secureauth.company.com/secureauth1/secureauth.aspx
37. Select Secure Web (HTTPS) from the Service dropdown
38. Uncheck Automatically log in
39. Click OK
Access Bookmark
Note
If just using the NetExtender Client, then the Access Bookmark is not required
 |
40. In the Bookmarks section, click Add Bookmark...
41. Select Access from the Bookmark Owner dropdown
42. Set the Bookmark Name to VPN Certificate Enrollment
43. Set the Name or IP Address to the FQDN of the SecureAuth IdP appliance, followed by the SecureAuth IdP SonicWALL-integrated realm, e.g. https://secureauth.company.com/secureauth1/secureauth.aspx
44. Select Secure Web (HTTPS) from the Service dropdown
45. Uncheck Automatically log in
46. Click OK
47. Click Accept
NetExtender Client Settings
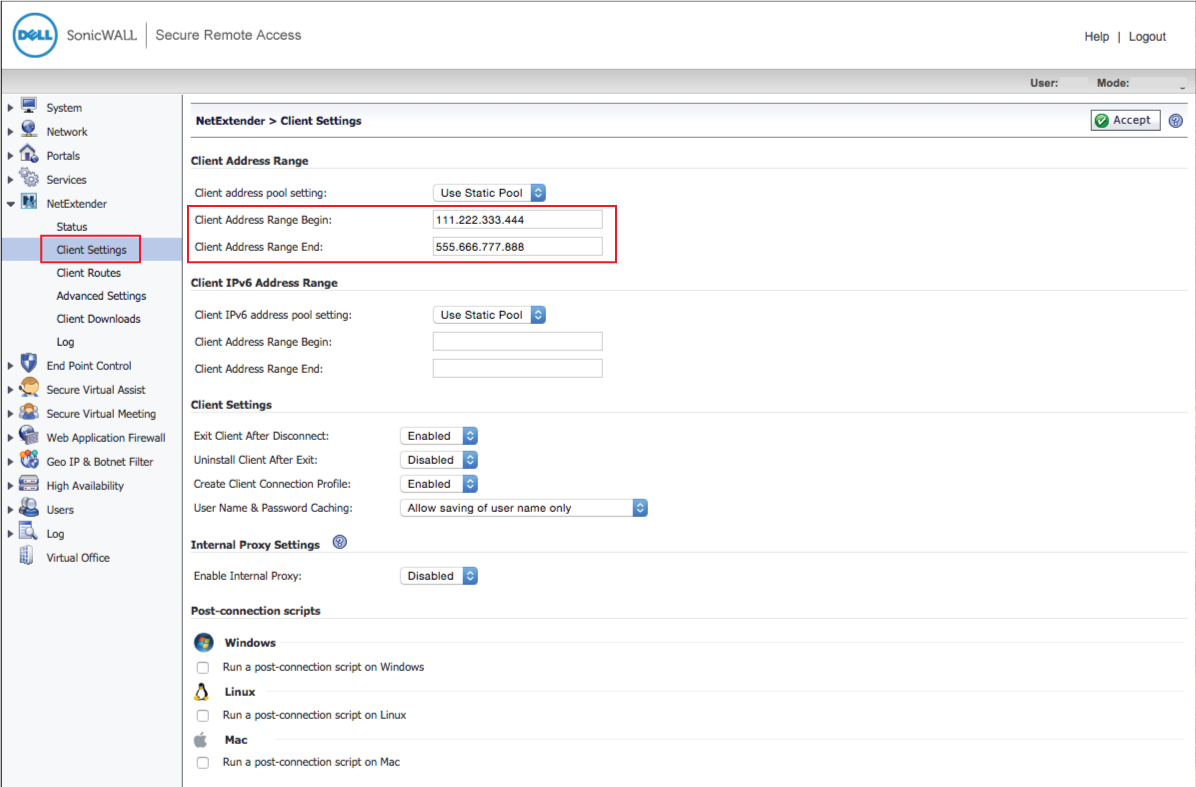 |
48. In the admin console, select Client Settings under NetExtender
49. Set the Client Address Range Begin to the first client address in the range
50. Set the Client Address Range End to the last client address in the range
51. Click Accept
NetExtender Client Routes
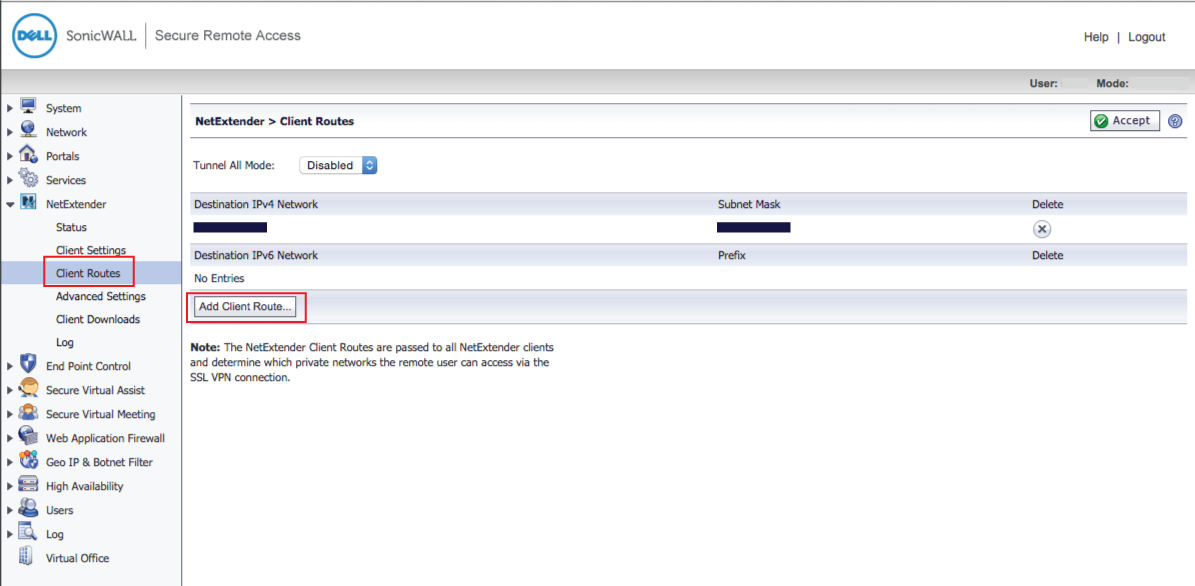 |
52. In the admin console, select Client Routes under NetExtender
53. Click Add Client Route... and add routes and/or individual resources as needed
Note
The NetExtender Client Routes are passed to all NetExtender clients and determine which private networks the remote user can access via the SSL VPN connection
End-user Experience
See Certificate Enrollment Workflow to learn more about the end user experience.