Virtual: Install and power-on the SecureAuth IdP virtual appliance
Introduction
Follow these instructions to install the SecureAuth IdP virtual machine on your virtual host server. To help you save time, the appliance is configured by default to use Dynamic Host Configuration Protocol (DHCP) to automatically acquire an IP address from the network.
Prerequisites
Complete a pre-deployment meeting with your Sales Engineer.
Review and complete the requirements section before pre-deployment section of Part I: Pre-installation.
Select the virtual appliance type
Select the type of virtual appliance to configure, and follow the instructions for that appliance type:
VMware (vSphere thick client)
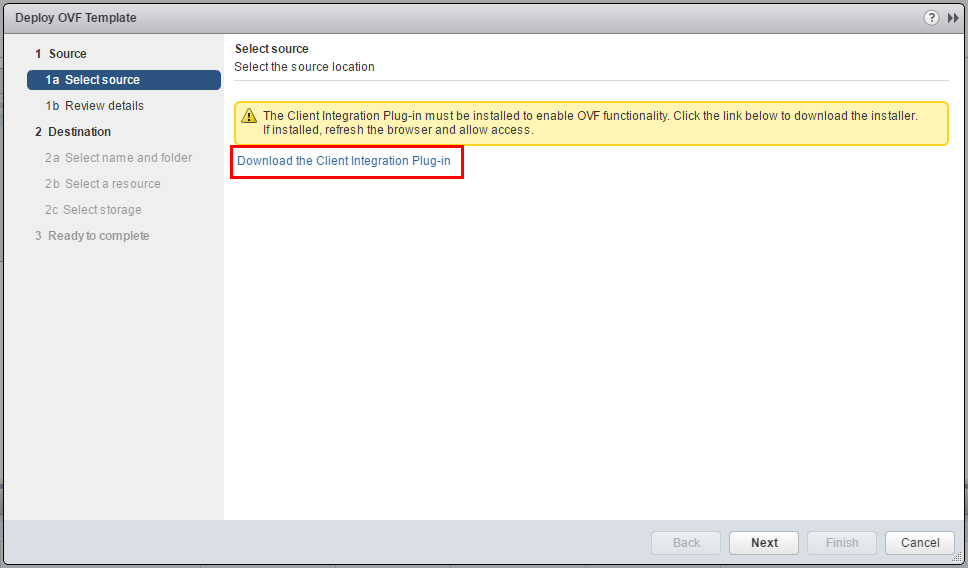
To import and deploy OVA/OVF files for VMware using vSphere thick client:
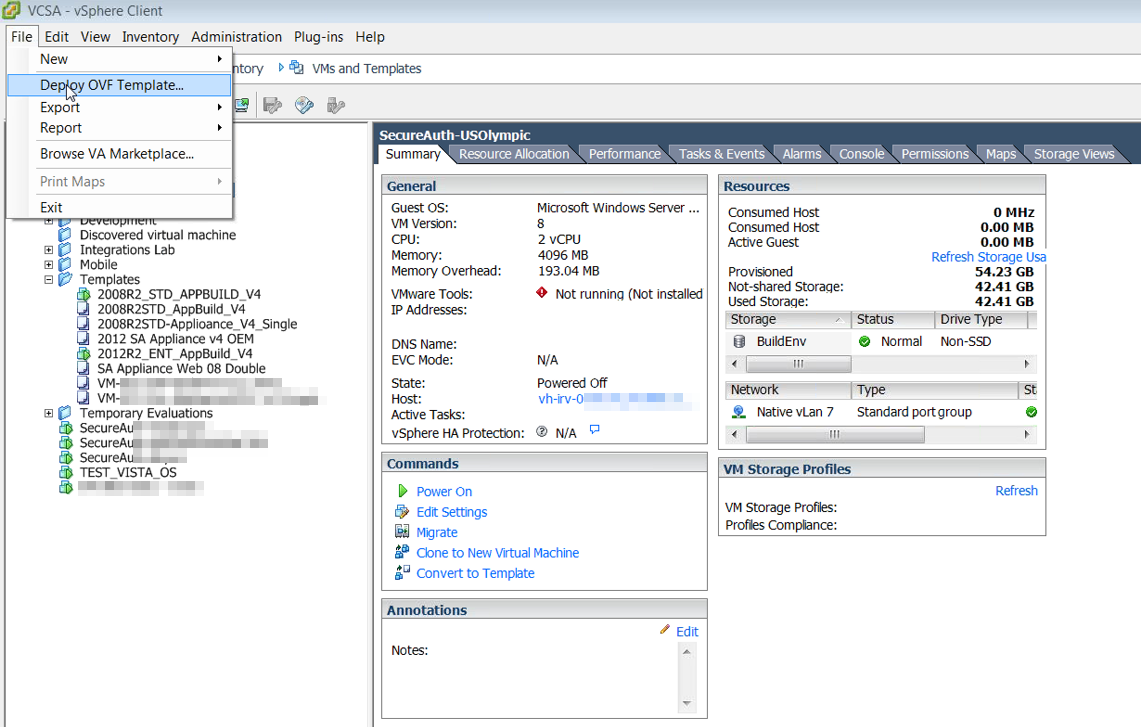
1. From the vSphere client, connect to a vCenter Server.
2. Click File and select Deploy OVF Template.
 |
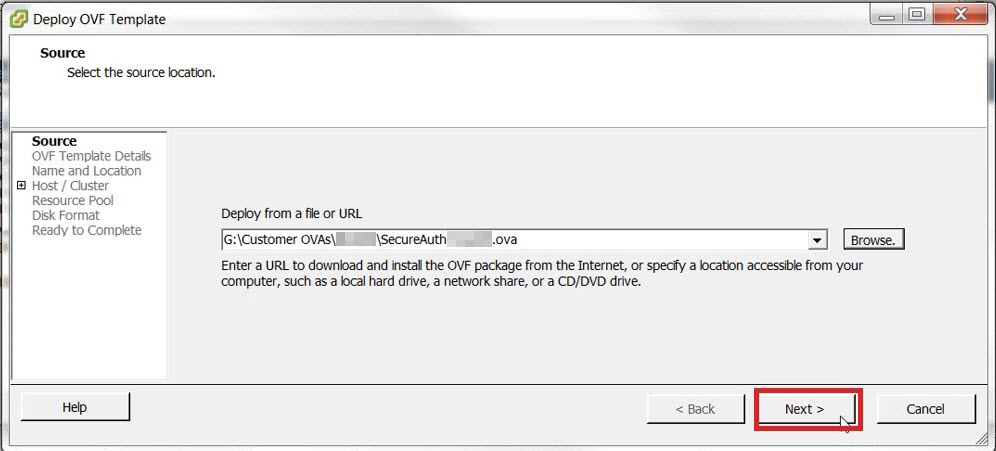
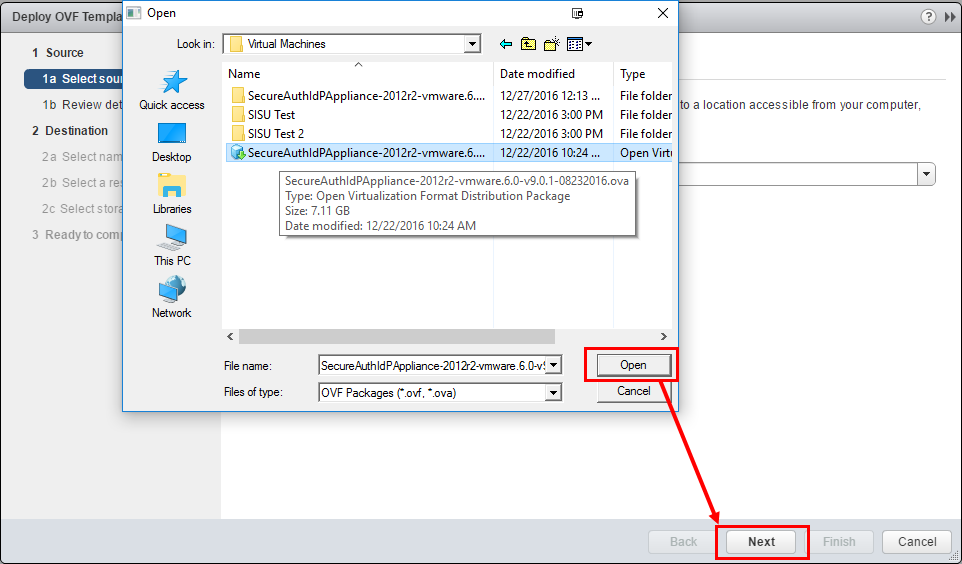
3. Browse to the OVA image and click Open, then Next.
IMPORTANT: Do not rename the .OVA file – doing so will corrupt the image.
 |
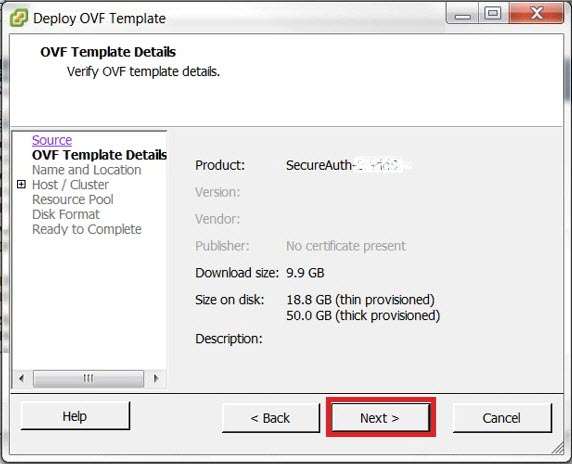
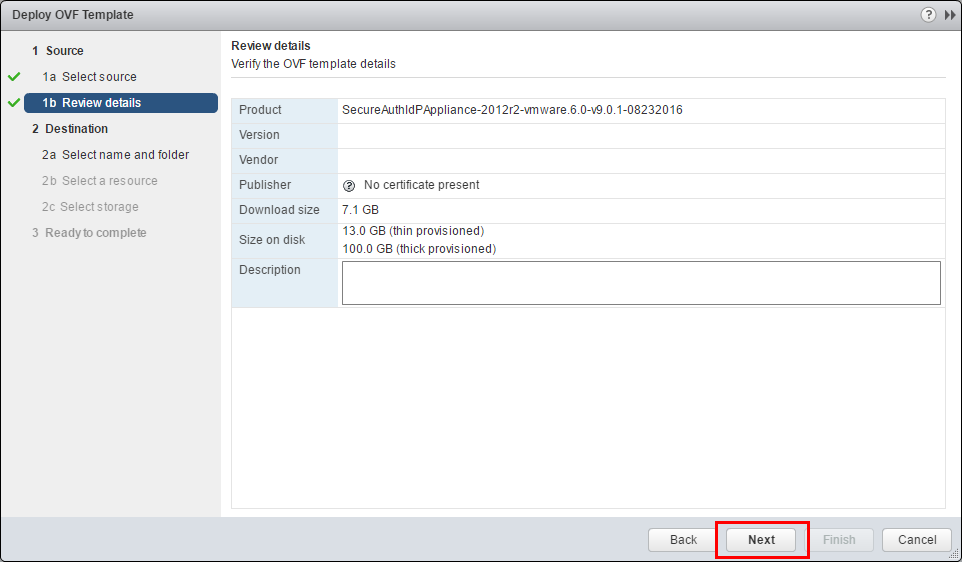
4. Verify the information is correct and click Next.
 |
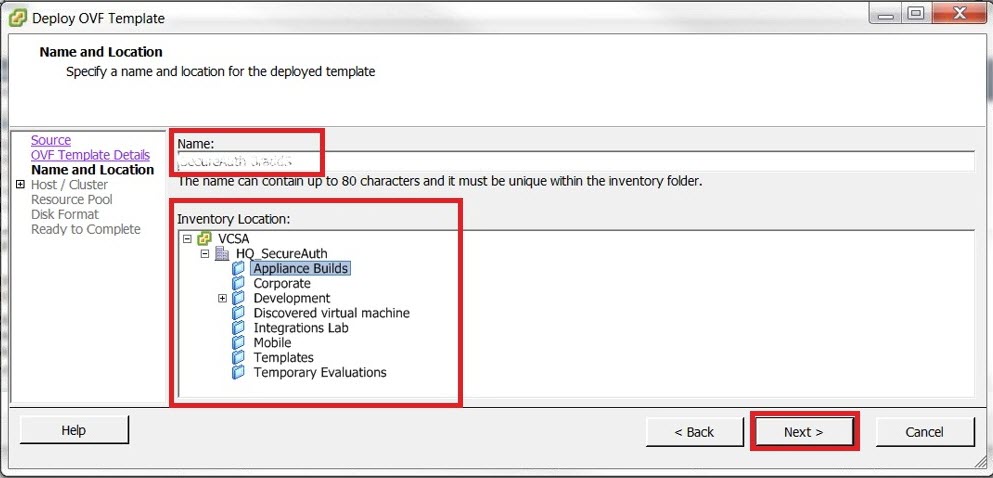
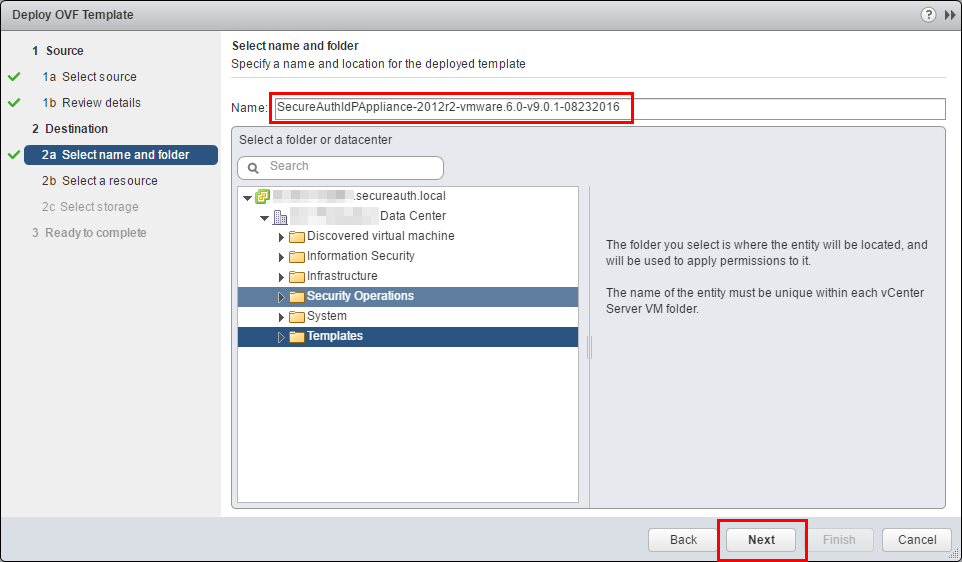
5. Enter an Appliance Name or Template Name to create, select the location, and click Next.
 |
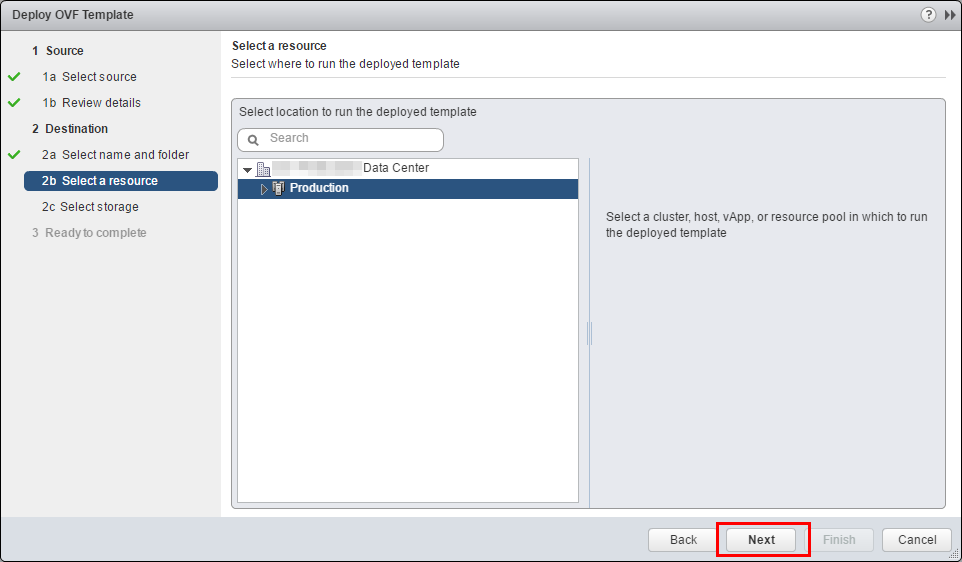
6. Select a Cluster and click Next.
 |
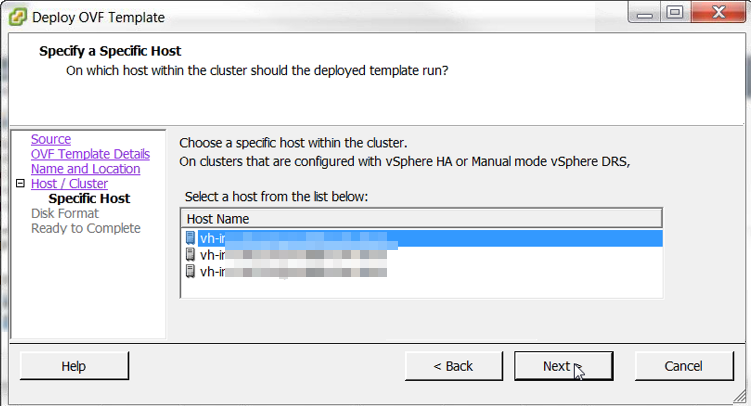
7. Select the VM Host and click Next.
 |
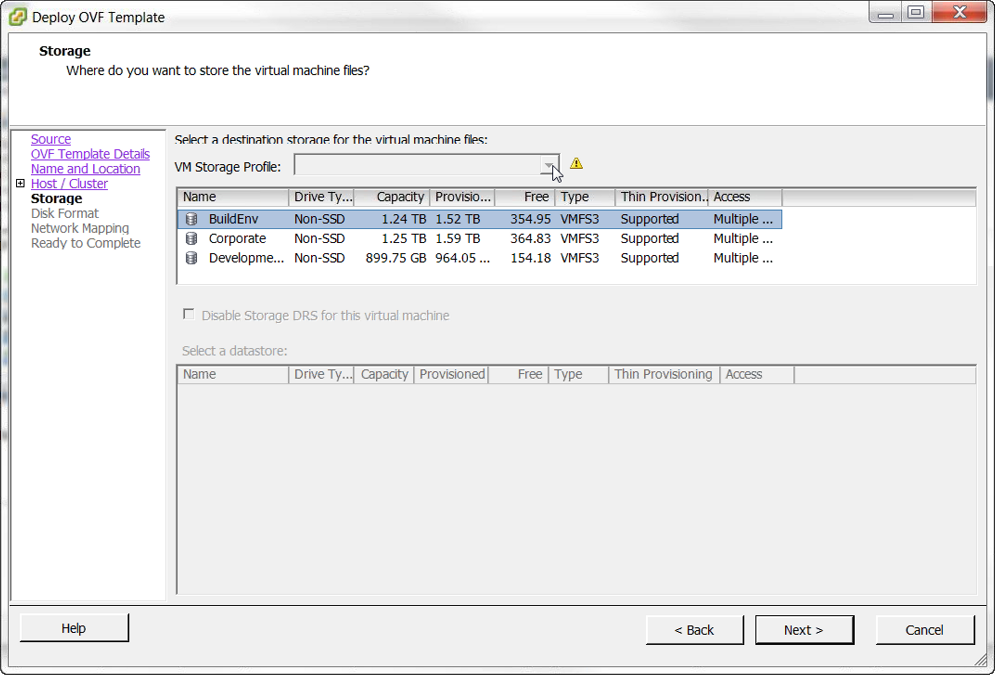
8. Select the Data store and click Next.
 |
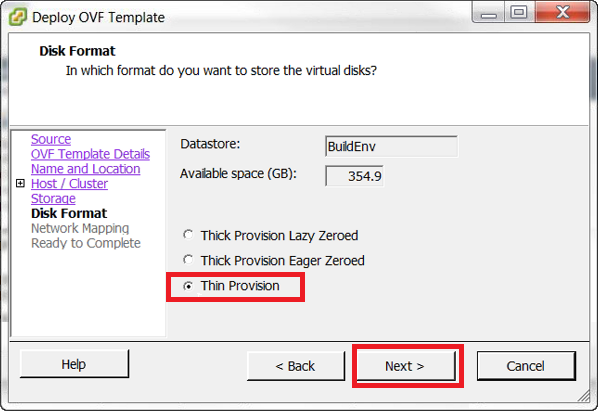
9. (Optional) Select Thin Provisioned format and click Next.
 |
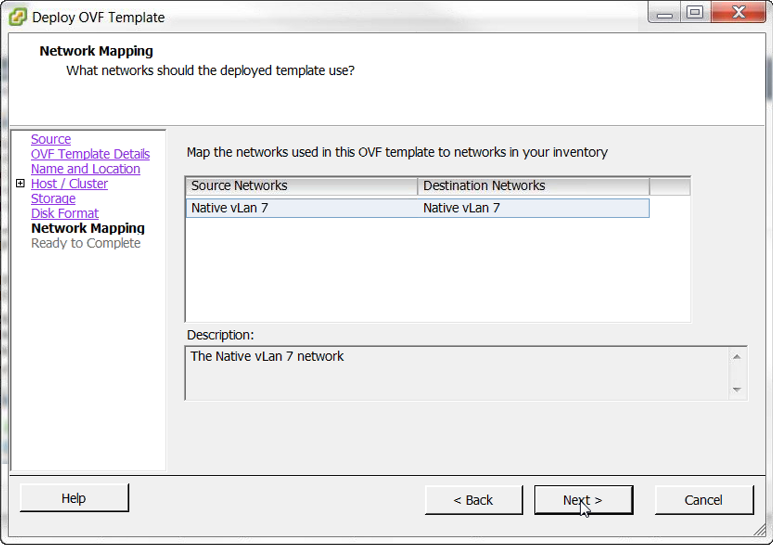
10. Select the Network and click Next.
 |
11. (Optional) To start the appliance after this process is finished, select the Power on after deployment checkbox on the Ready to Complete screen.
12. Review the Template details and click Next.
13. Review the Deployment settings and click Finish.
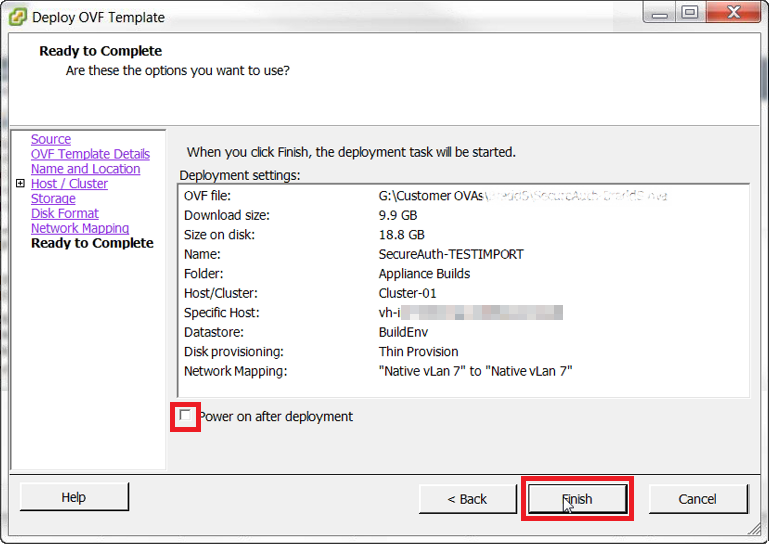 |
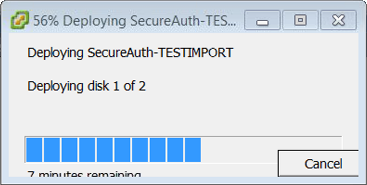
The SecureAuth IdP Appliance import begins.
 |
14. When the import is complete, power on the SecureAuth IdP Virtual Appliance (this happens automatically if the box is checked in step 11).
The Operating System Setup begins. The following notices appear on the screen while these processes complete:
Setup is installing devices
Setup is starting services
Setup continues after restarting the computer
VMware (vSphere thin client)
To import and deploy OVA/OVF files for VMware using vSphere thin client:
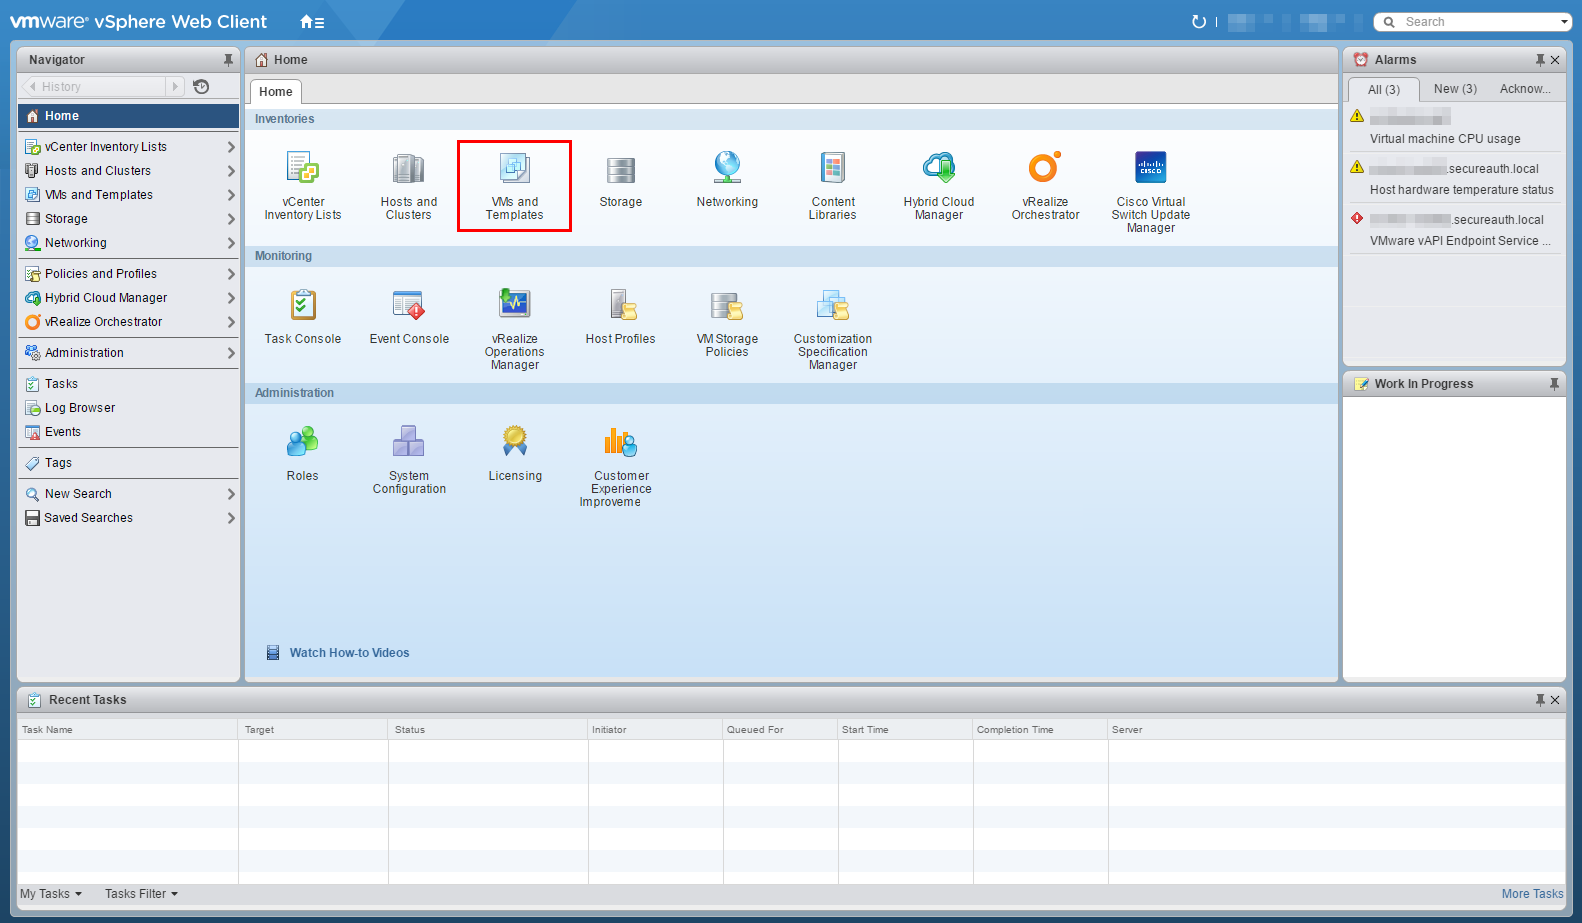
1. From the vSphere client, click VMs and Templates.
2. Connect to a vCenter Server.
 |
3. Click Actions and select Deploy OVF Template.
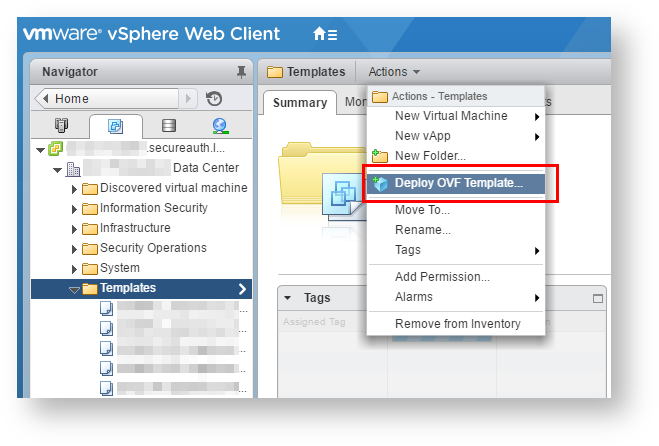 |
The Deploy OVF Template wizard starts.
4. Click the Local File radio button and click Browse.
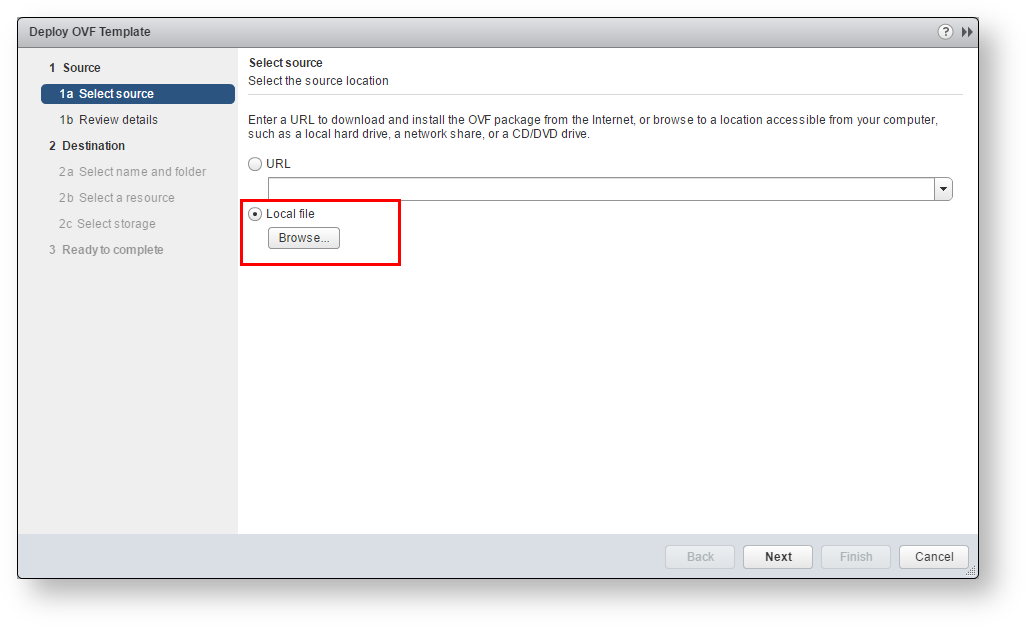 |
5. Browse to the OVA image and click Open, then Next.
IMPORTANT: Do not rename the . OVA file – doing so will corrupt the image.
 |
6. Verify that the information is correct and click Next.
 |
7. Enter an Appliance Name or Template Name to create, select the location for the entity, and click Next.
 |
8. Select a Location to run the deployed machine.
 |
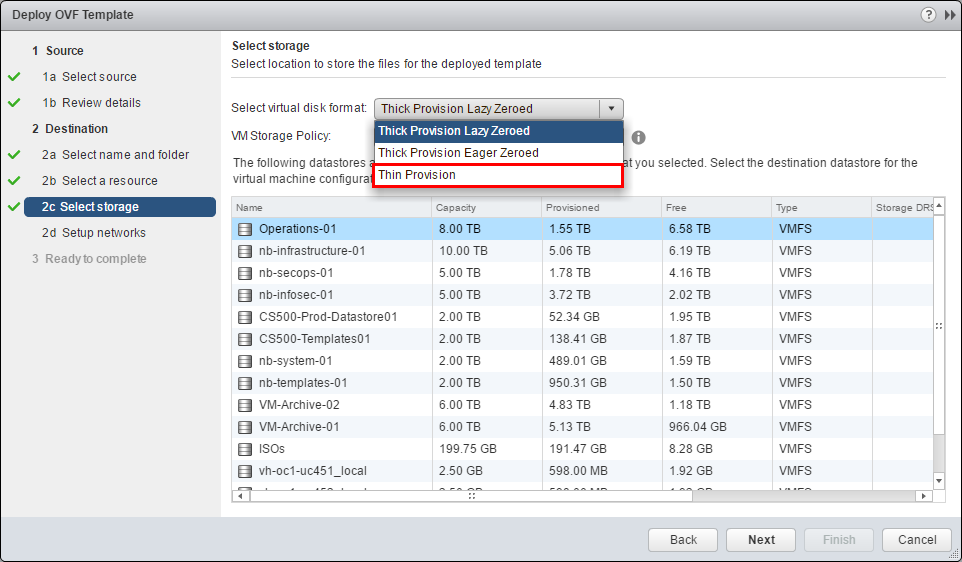
9. Select Thin Provision from the Select virtual disk format dropdown and click Next.
 |
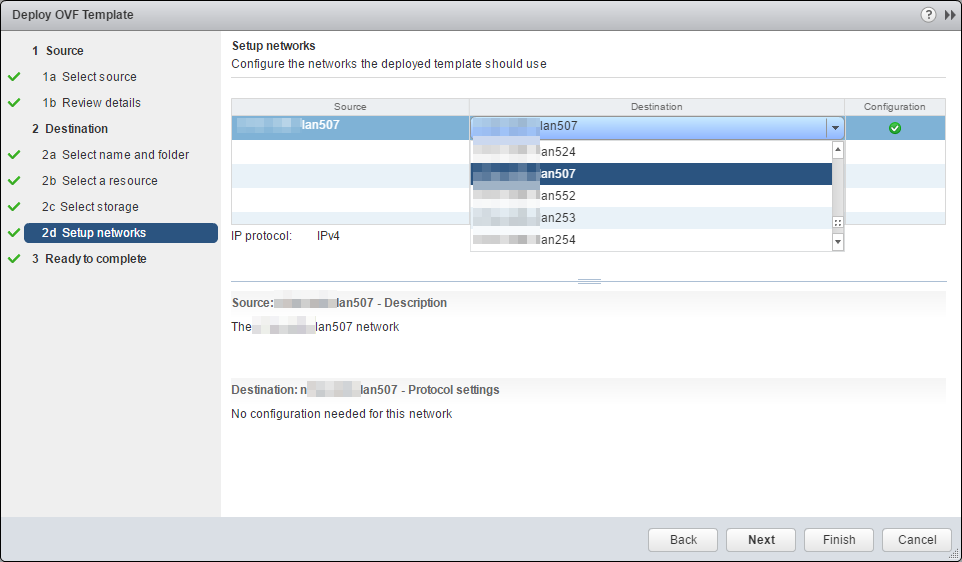
10. Select the Network to use and click Next.
 |
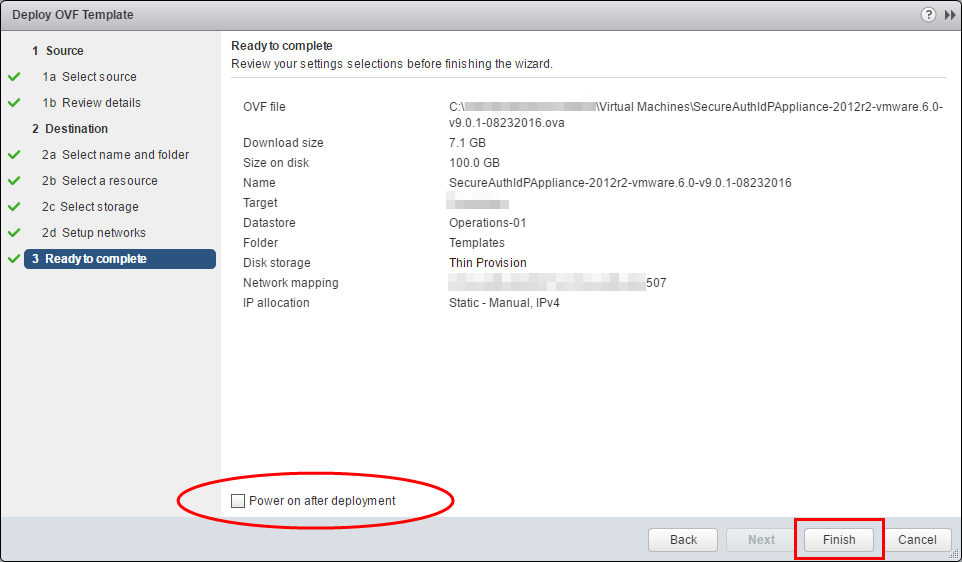
11. (Optional) To start the appliance after this process is finished, select the Power on after deployment checkbox on the Ready to complete screen.
12. Review the Deployment settings and click Finish.
 |
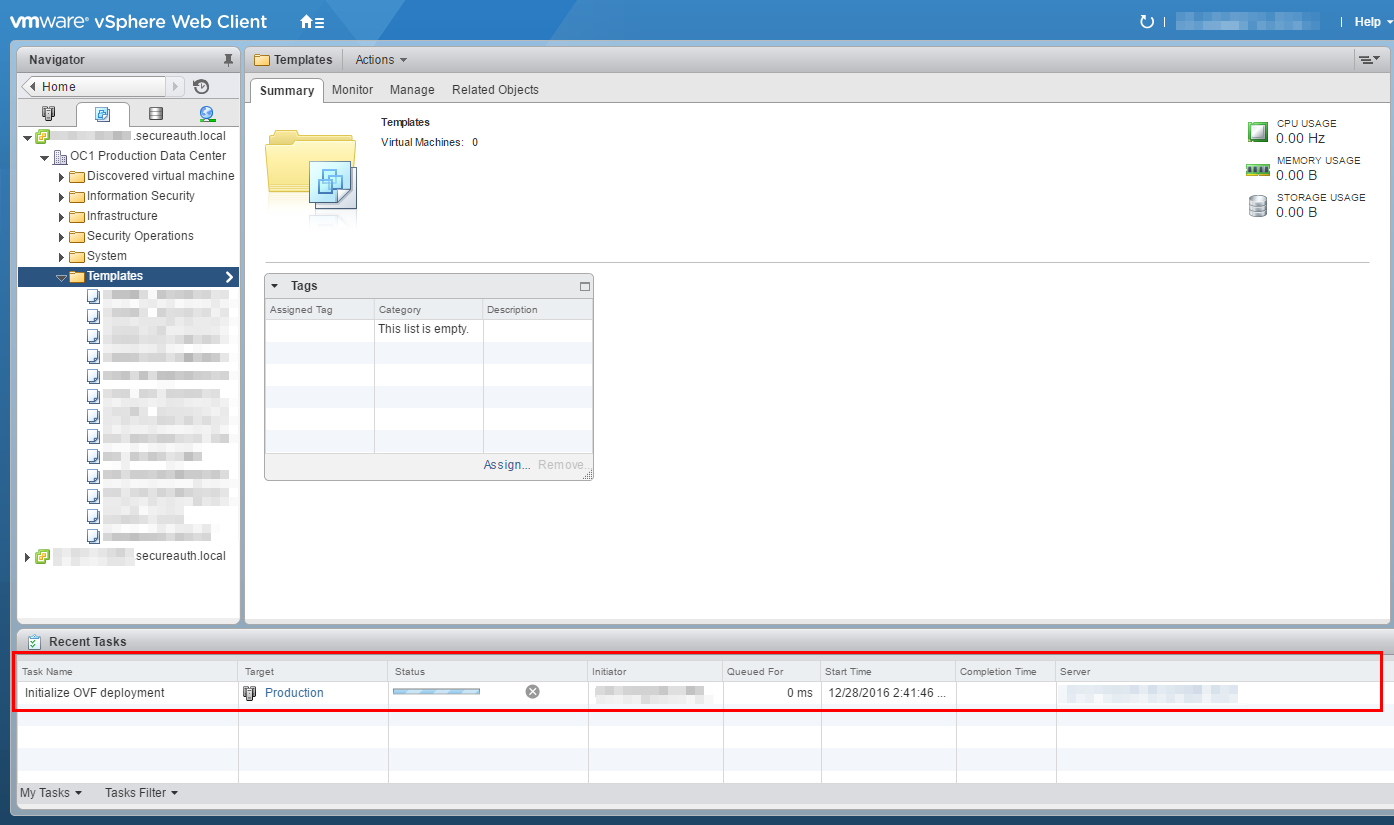
The SecureAuth IdP Appliance import begins.
 |
13. When the import is complete, power on the SecureAuth IdP Virtual Appliance (this happens automatically if the box is checked in step 11).
The Operating System Setup begins. The following notices appear on the screen while these processes complete:
Setup is installing devices
Setup is starting services
Xen Setup continues after restarting the computer
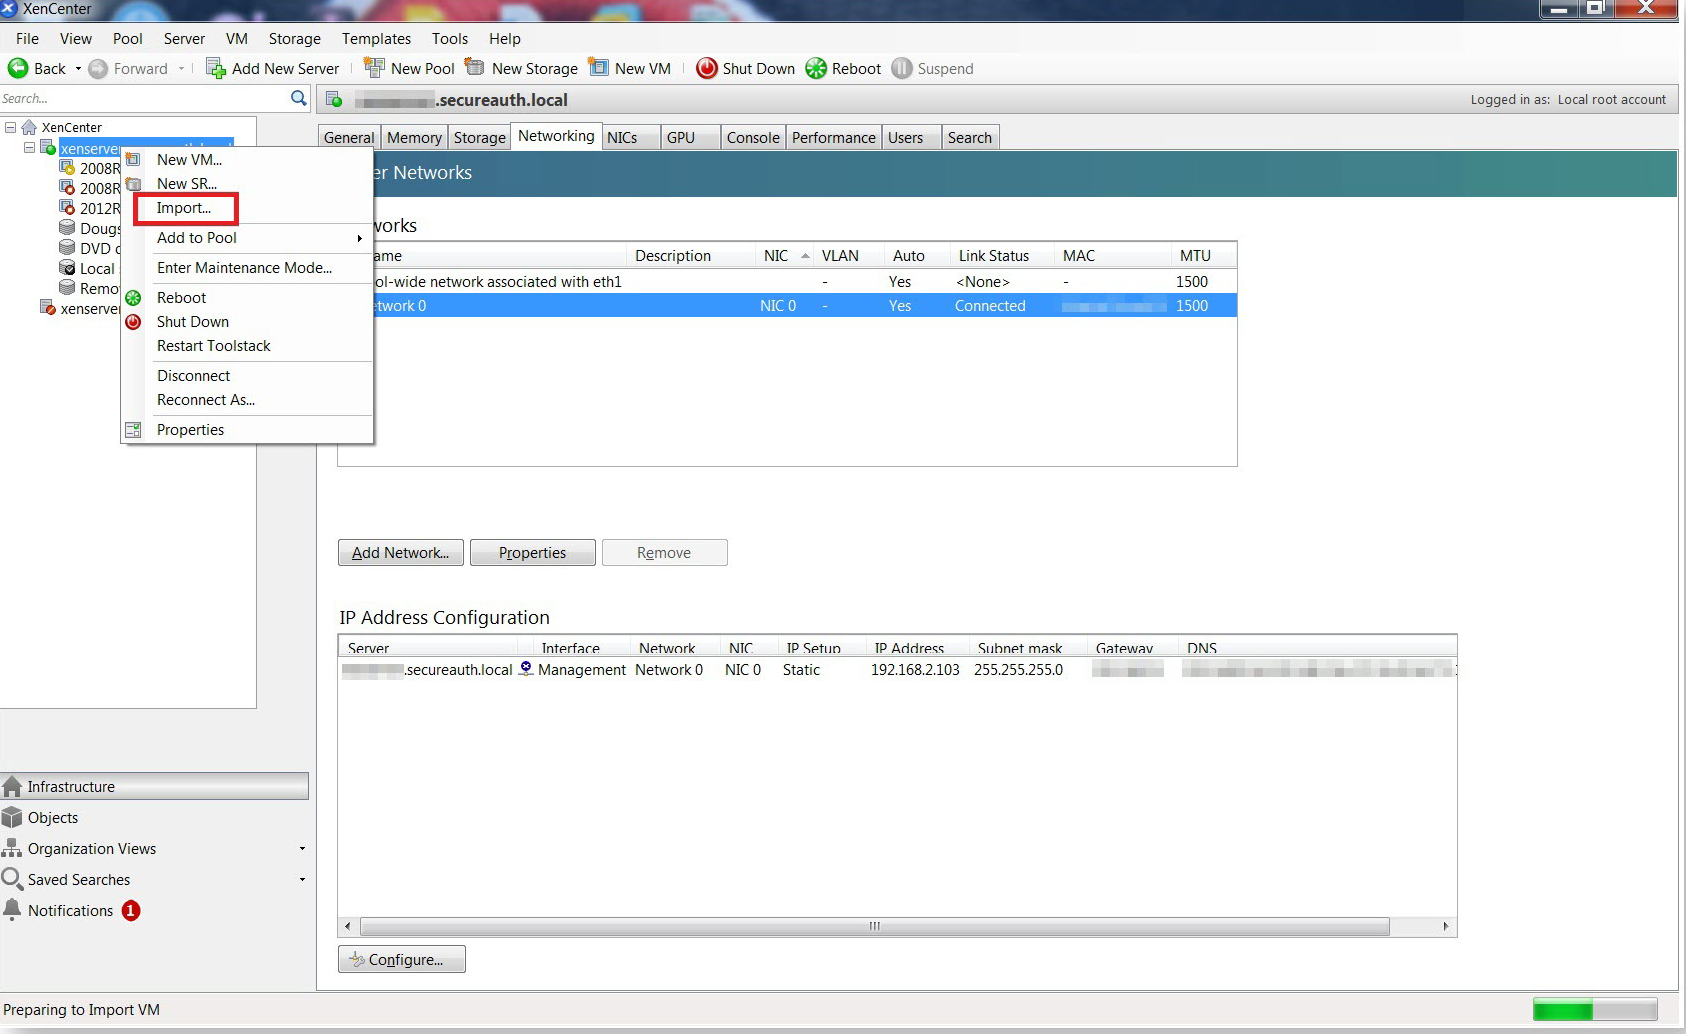
Xen
To import Xen files:
1. Open the Xen server.
2. Click Import to start the Import window.
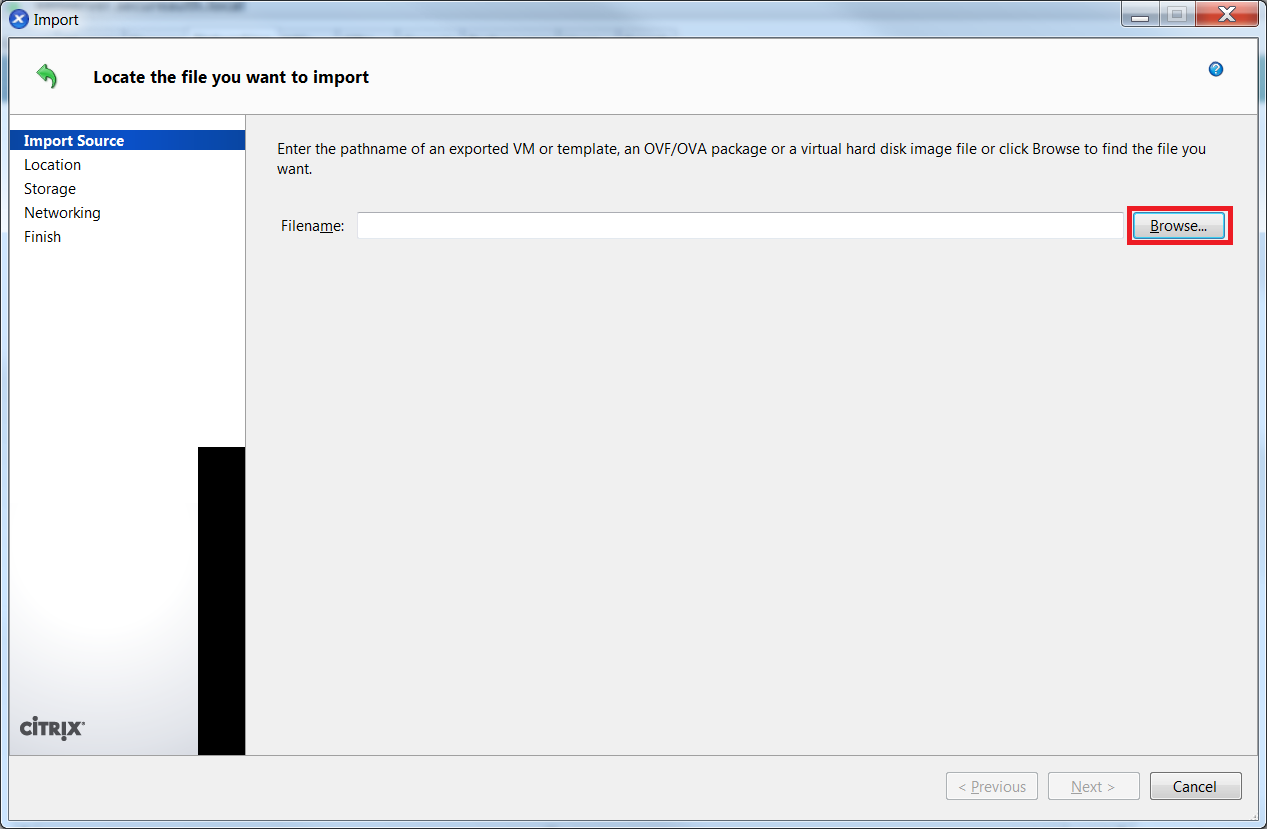
 |
3. Click Browse to navigate to the file to import.
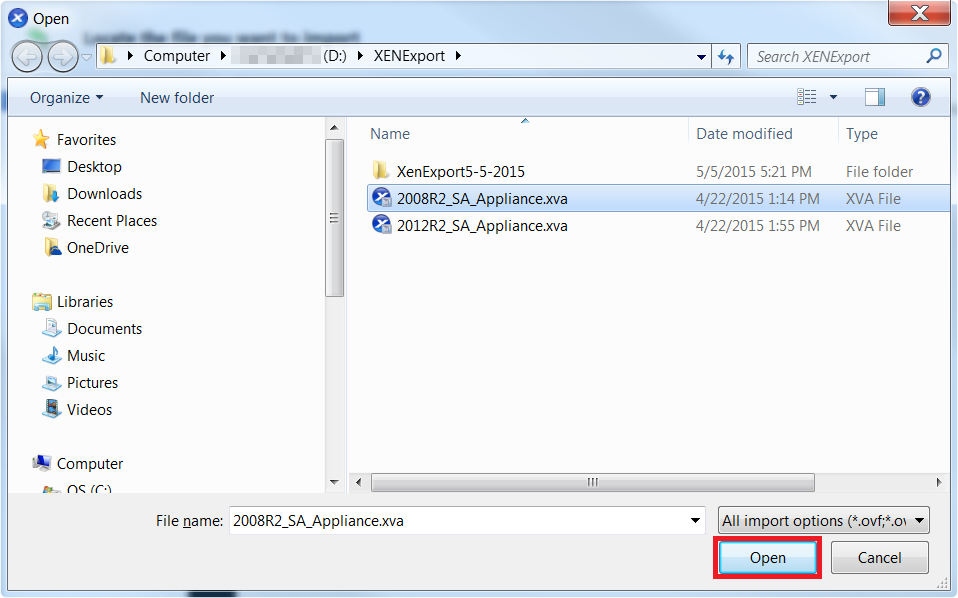
 |
4. Select the server and click Open.
 |
5. Select the location where the imported VM will be placed and and click Next.
 |
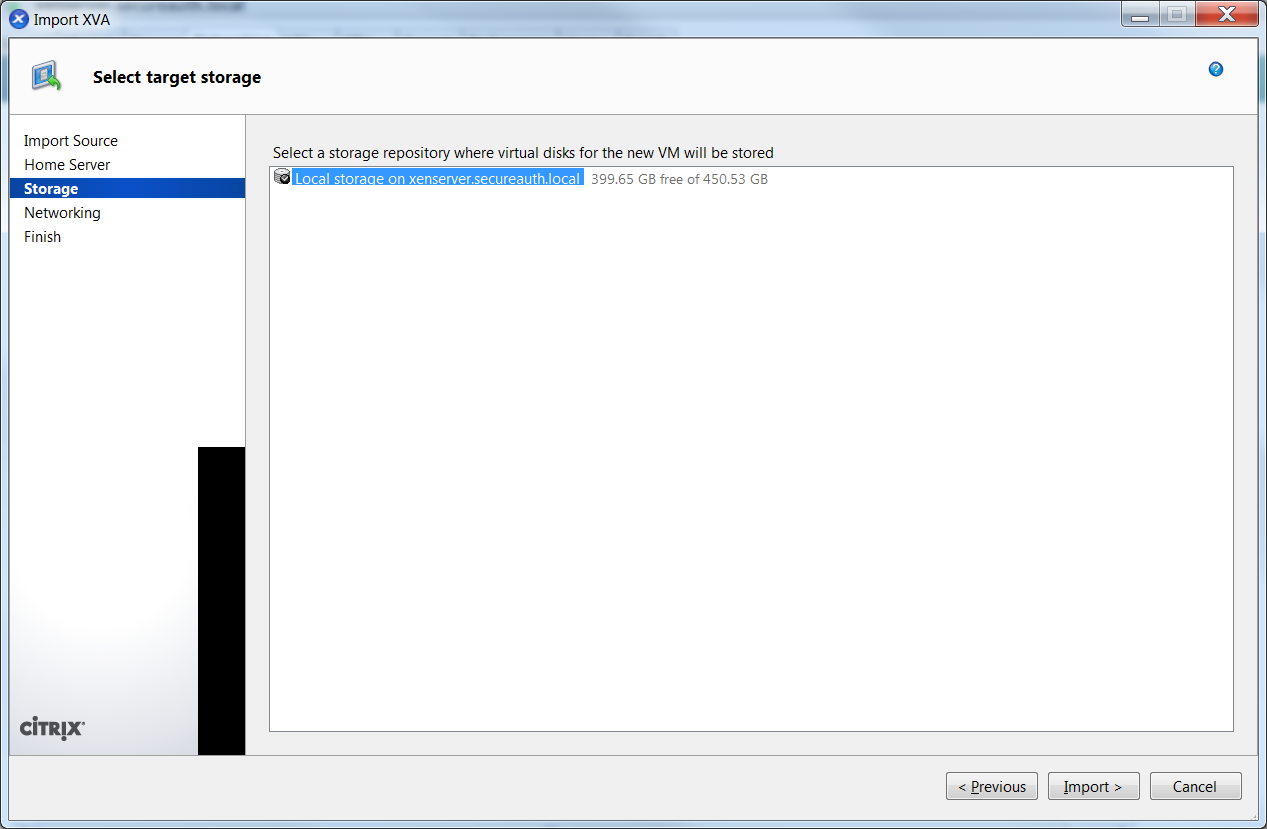
6. Select the target storage location where the virtual disks will be stored and click Import.
7. Review Local Storage and click Next.
 |
Hyper-V
After you receive SecureAuth's .zip file containing VHD files:
1. Extract the contents of the .zip file to a location on the computer.
2. In the Hyper-V Manager, click Import Virtual Machine.
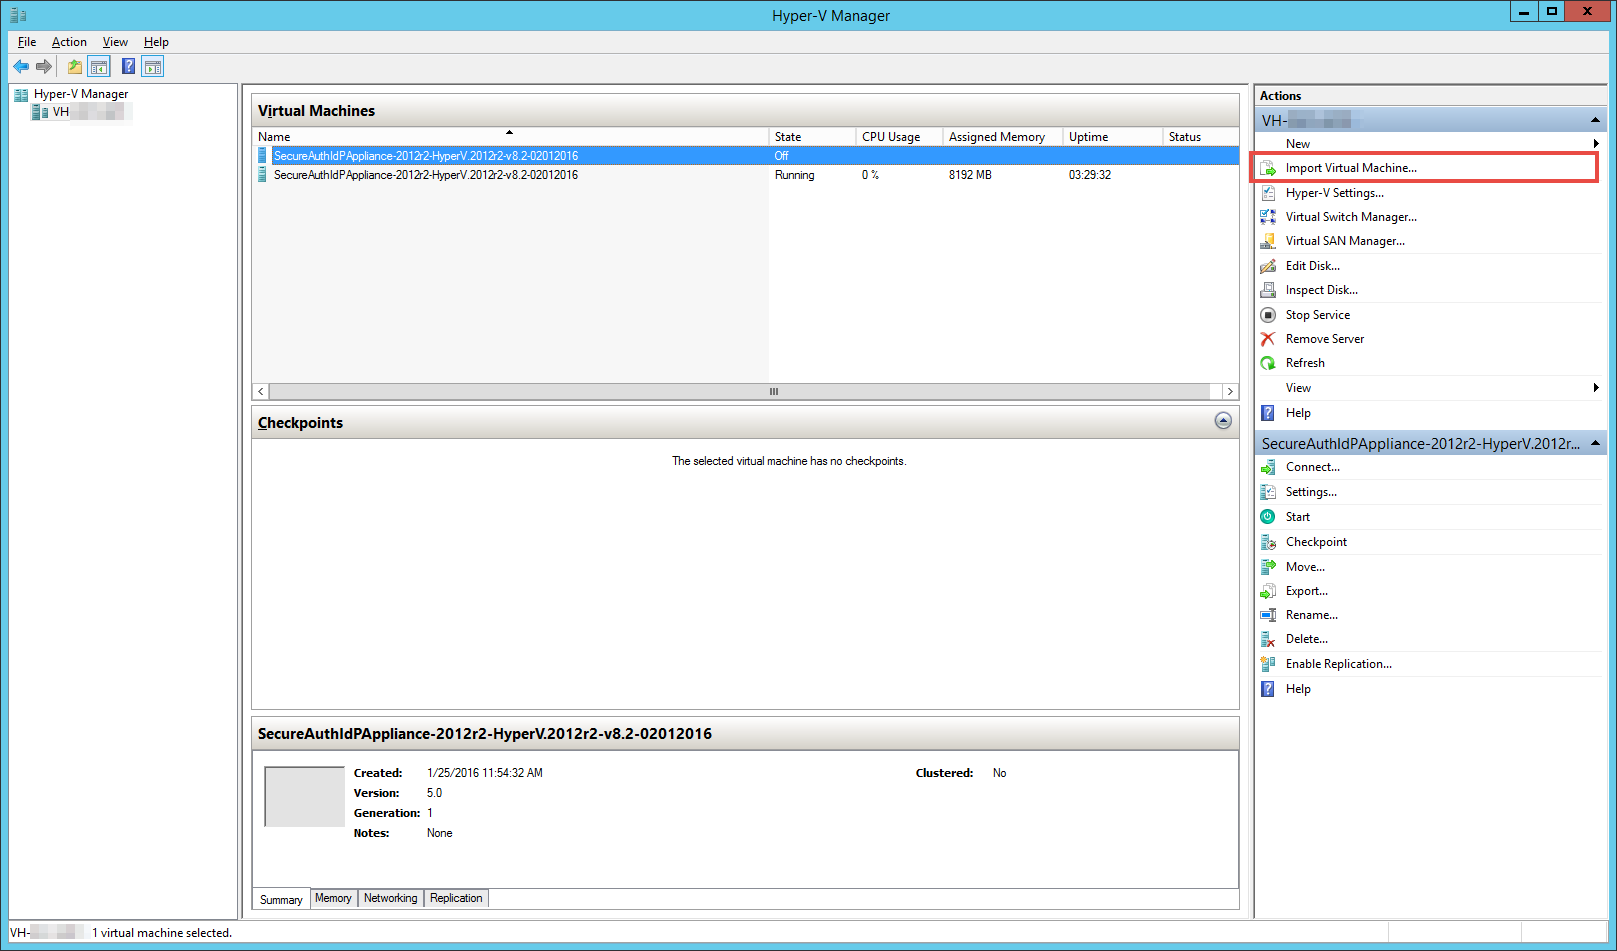 |
The Import Virtual Machine wizard starts.
3. Click Next.
 |
4. Point the wizard to the folder where the .zip folder contents were extracted.
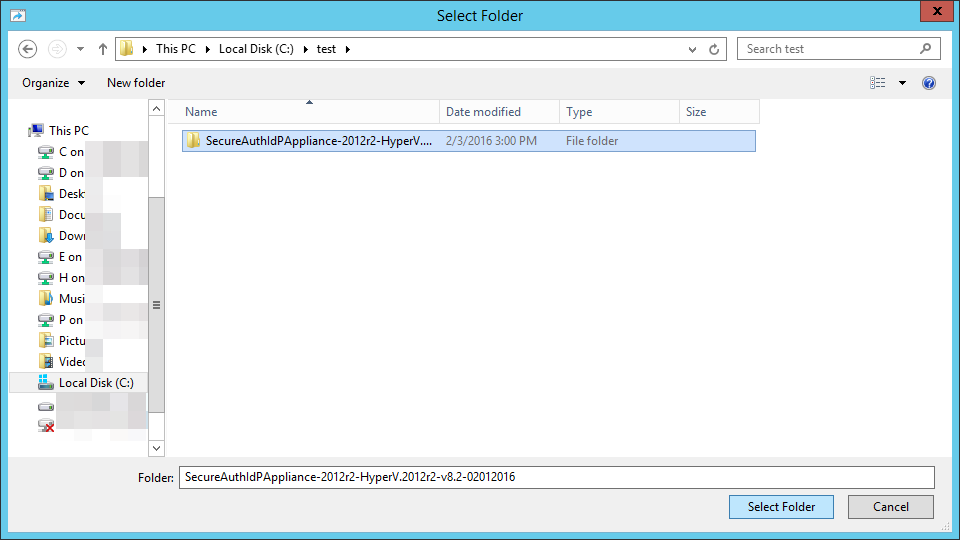 |
5. Click Next.
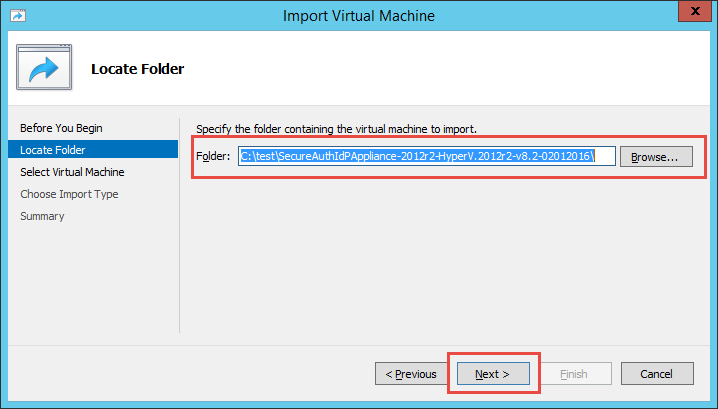 |
6. In the Select Virtual Machine window, click the virtual machine that appears and click Next.
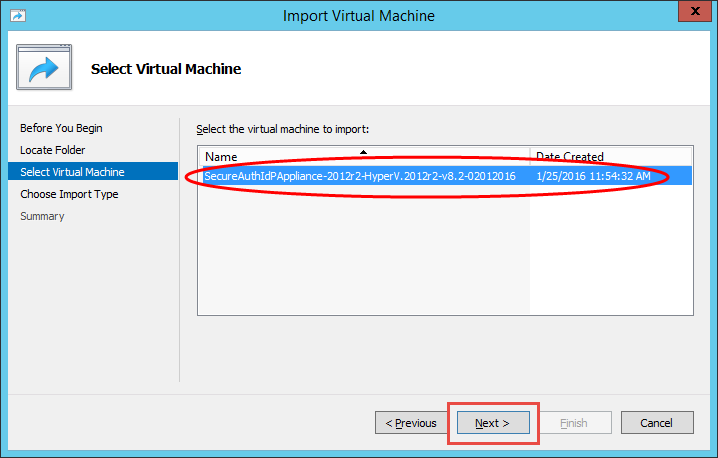 |
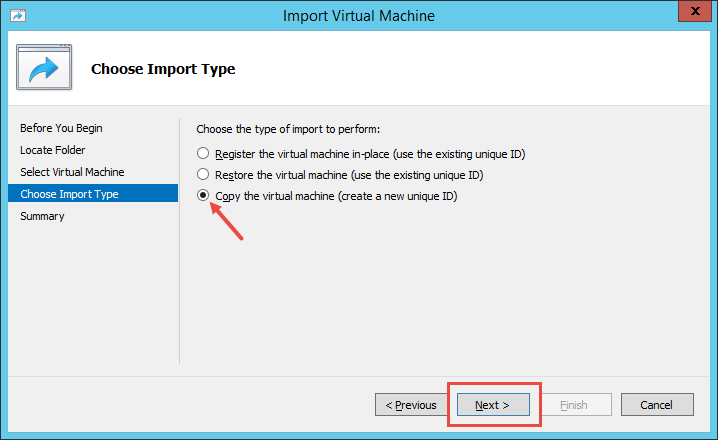
7. Select Copy the virtual machine (create a unique ID) and click Next.
 |
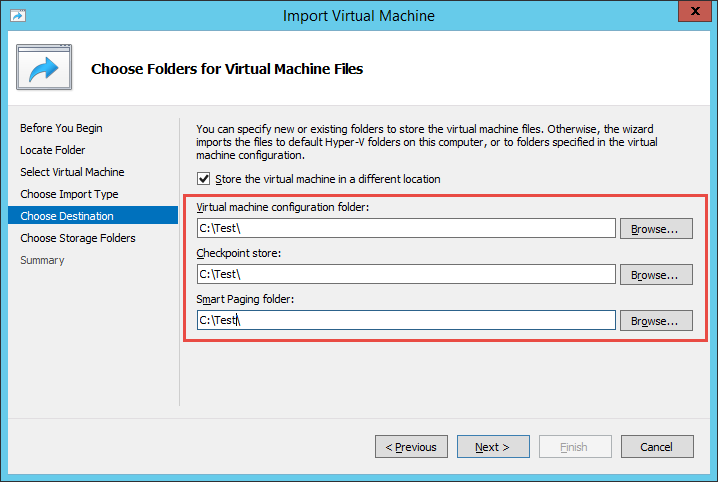
8. Specify a new or existing folder(s) to store the files for the virtual machine and click Next.
 |
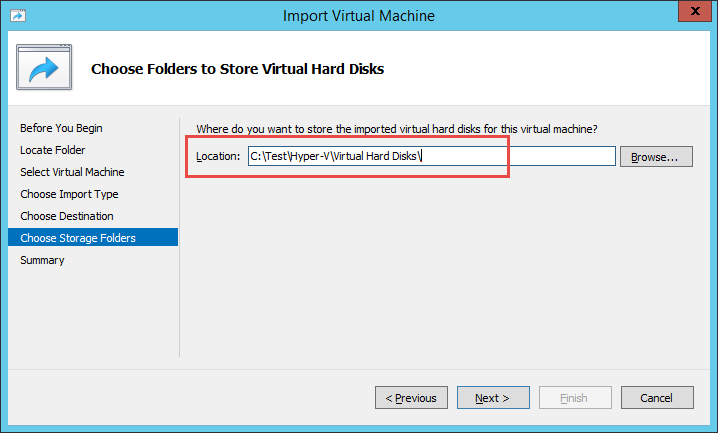
9. Specify a new or existing folder to store the virtual hard disks and click Next.
 |
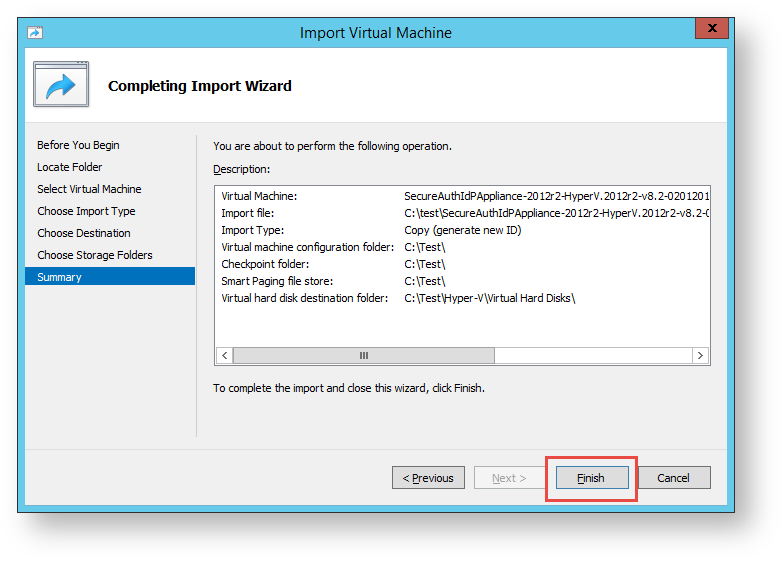
10. In the Completing Import Wizard summary, verify that the information displayed is correct, then click Finish.
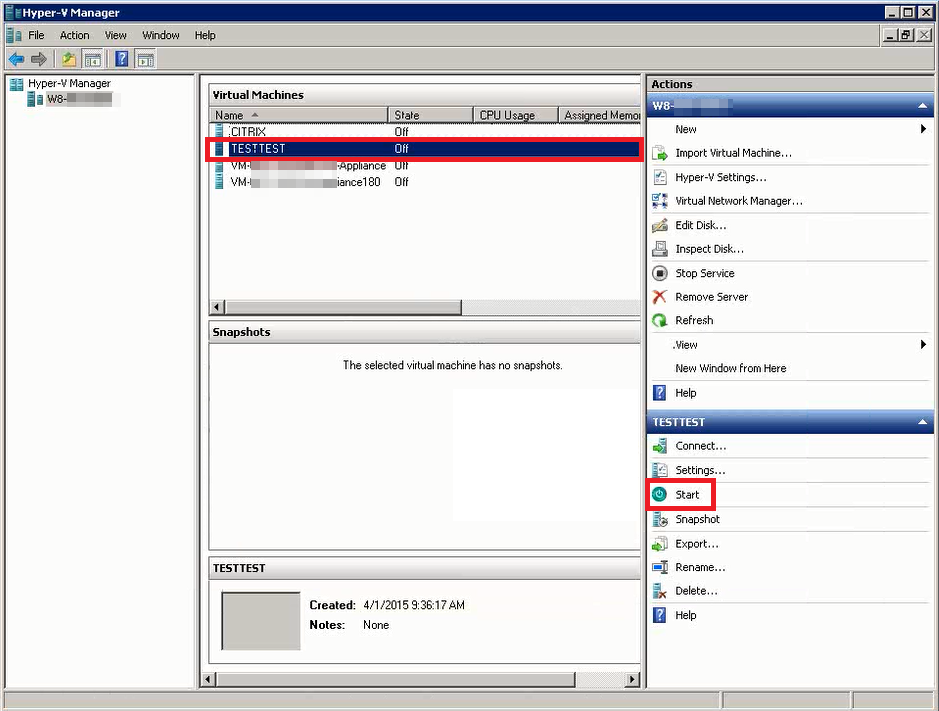
11. In the Hyper-V Manager window, verify that the Virtual Machine added is listed, then select it and click Start.
 |
Several indicators notify that the process has started.
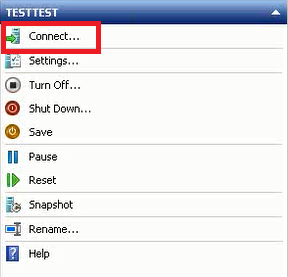
 |
12. Once the process has started, click Connect on the right panel.
 |
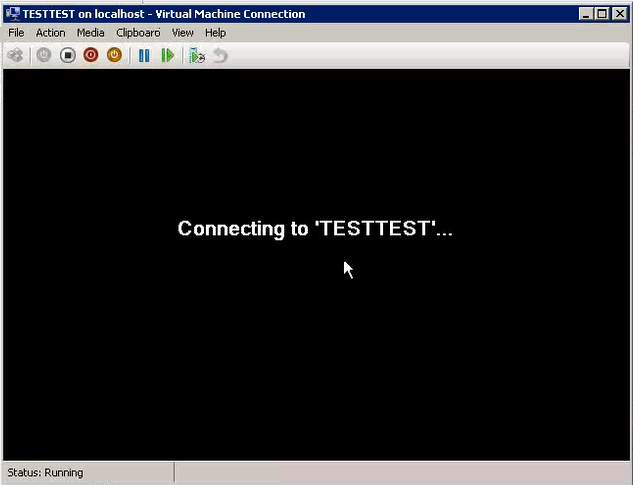
The localhost - Virtual Machine Connection window appears.
 |
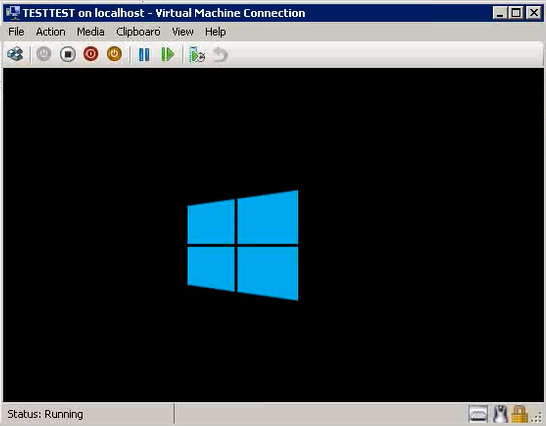
When the window appears, the virtual machine has connected and the process is finished.
 |
Azure
These instructions apply to new SecureAuth IdP appliance images only for SecureAuth IdP versions 8.1+ running on Windows Server 2012 R2.
Prerequisites
Obtain the SecureAuth IdP Azure Image from the SecureAuth Sales Team:
Email: sales@secureauth.com
Phone: +1.949.777.6959
Microsoft Azure configuration steps
To prepare the Azure Environment, VHD files must be uploaded and a VM must be created.
From the Azure files provided by SecureAuth, upload the following VHDs to a storage account:
SecureAuthIdp-Azure-DiskC-Dyn.vhd
SecureAuthIdp-Azure-DiskD-Dyn.vhd
For more information about uploading a VHD, refer to the Microsoft document, Upload a Windows VHD from an on-premises VM to Azure.
Create a VM and attach the VHDs:
SecureAuthIdp-Azure-DiskC-Dyn.vhd as the system disk
SecureAuthIdp-Azure-DiskD-Dyn.vhd as the data disk
The minimum size requirements for a SecureAuth IdP Appliance is Standard_A3 . For more information about creating a VM in Azure, refer to the Microsoft document, Create a VM from a specialized VHD.
SecureAuth IdP configuration steps
Notice
IMPORTANT: SecureAuth IdP appliances use the D Drive to store data, which conflicts with Azure's use of that drive as a temporary storage disk.
Follow the instructions to use a different drive for the temporary disk to address this issue.
Once complete, Azure will not accept the D drive if the VM moves to a different hypervisor.
1. Start the VM created in the Microsoft Azure Steps and connect to it via Remote Desktop Protocol (RDP).
2. Log into the appliance with the default credentials, Administrator / SecureAuthIdP!
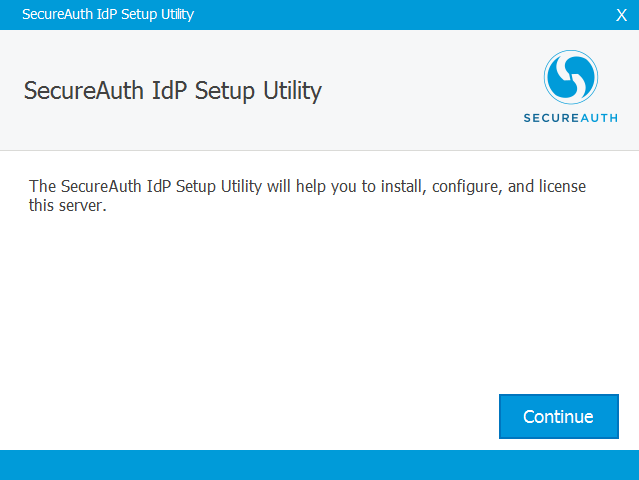
3. Close the SecureAuth IdP Setup Utility (SISU) window that displays to dismiss the utility.
 |
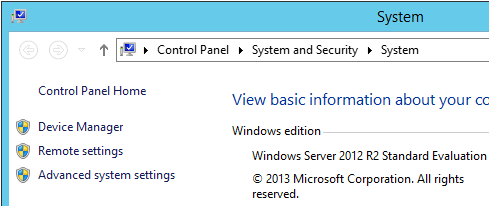
4. Temporarily move the pagefile.sys to the C Drive by right-clicking the Start menu and selecting System.
5. On the left-side menu, select Advanced System Settings.
 |
6. In the Performance section, select Settings, and click the Advanced tab.
7. In the Virtual Memory section, click Change...
8. Select Drive-C, then System Managed Size, and click Set.
9. Select Drive-D (Temporary Storage), then No paging file, and click Set.
10. Apply the settings.
11. Once the prompt appears, warning that the computer requires restart for the changes to be applied, restart the virtual machine.
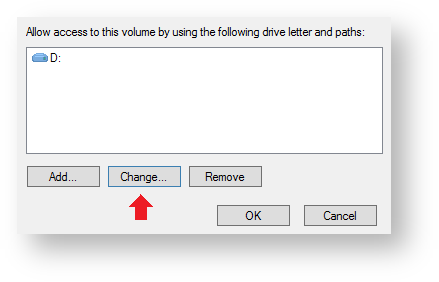
12. Right-click the Start menu, and select Disk Management to start the Windows Disk Management Utility.
13. Right-click Drive-D, the Temporary Storage Drive, and select Change Drive Letter and Paths.
14. Click Change...
 |
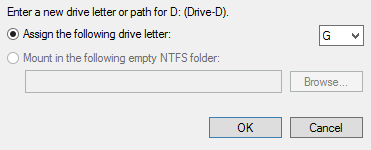
15. Select Assign the following drive letter, and then G from the dropdown.
 |
16. Right-click the data disk (Drive-D) and select Change Drive Letter and Paths.
17. Click Change...
18. Select Assign the following drive letter, and then D from the dropdown.
19. Click OK.
20. Right-click Drive-G, the Temporary Storage Drive, and select Change Drive Letter and Paths.
21. Click Change...
22. Select Assign the following drive letter, and then E from the dropdown.
23. Click OK.
The disk configuration should be as follows:
C: Drive-C
D: Drive-D
E: Temporary Disk
24. Move the pagefile.sys back to Temporary Storage by right-clicking the Start menu and selecting System.
25. On the left-side menu, select Advanced System Settings.
|
26. In the Performance section, select Settings, and click the Advanced tab.
27. In the Virtual Memory section, click Change...
28. Select Drive-C, then No paging file, and click Set.
29. Select Drive-E (Temporary Storage), then System Managed Size, and click Set.
30. Apply the settings.
31. Once the prompt appears, warning that the computer requires restart for the changes to be applied, restart the virtual machine.
AWS
Retrieve image
1. Contact SecureAuth and specify the AWS Region in which the SecureAuth IdP will be used.
2. SecureAuth sends you information pertinent to the SecureAuth IdP Amazon Machine Image (AMI) for the requested region – the AMI ID and AMI Name you receive appear in this format:
AMI ID: ami-xxxxxxxx
AMI Name: SecureAuthIdPAppliance-xxxxxxxxxxxxxxxxxxxxxxxxxxxxxxxx
NOTE: Each 'x' in AMI ID denotes an alpha-numeric character in the identification code, and the 'x' characters in the AMI Name represent code comprised of the appliance operating system, SecureAuth IdP version number, and date.
Amazon EC2 console steps
3. Start the Amazon EC2 Console at https://console.aws.amazon.com/ec2/
4. Select Launch Instance.
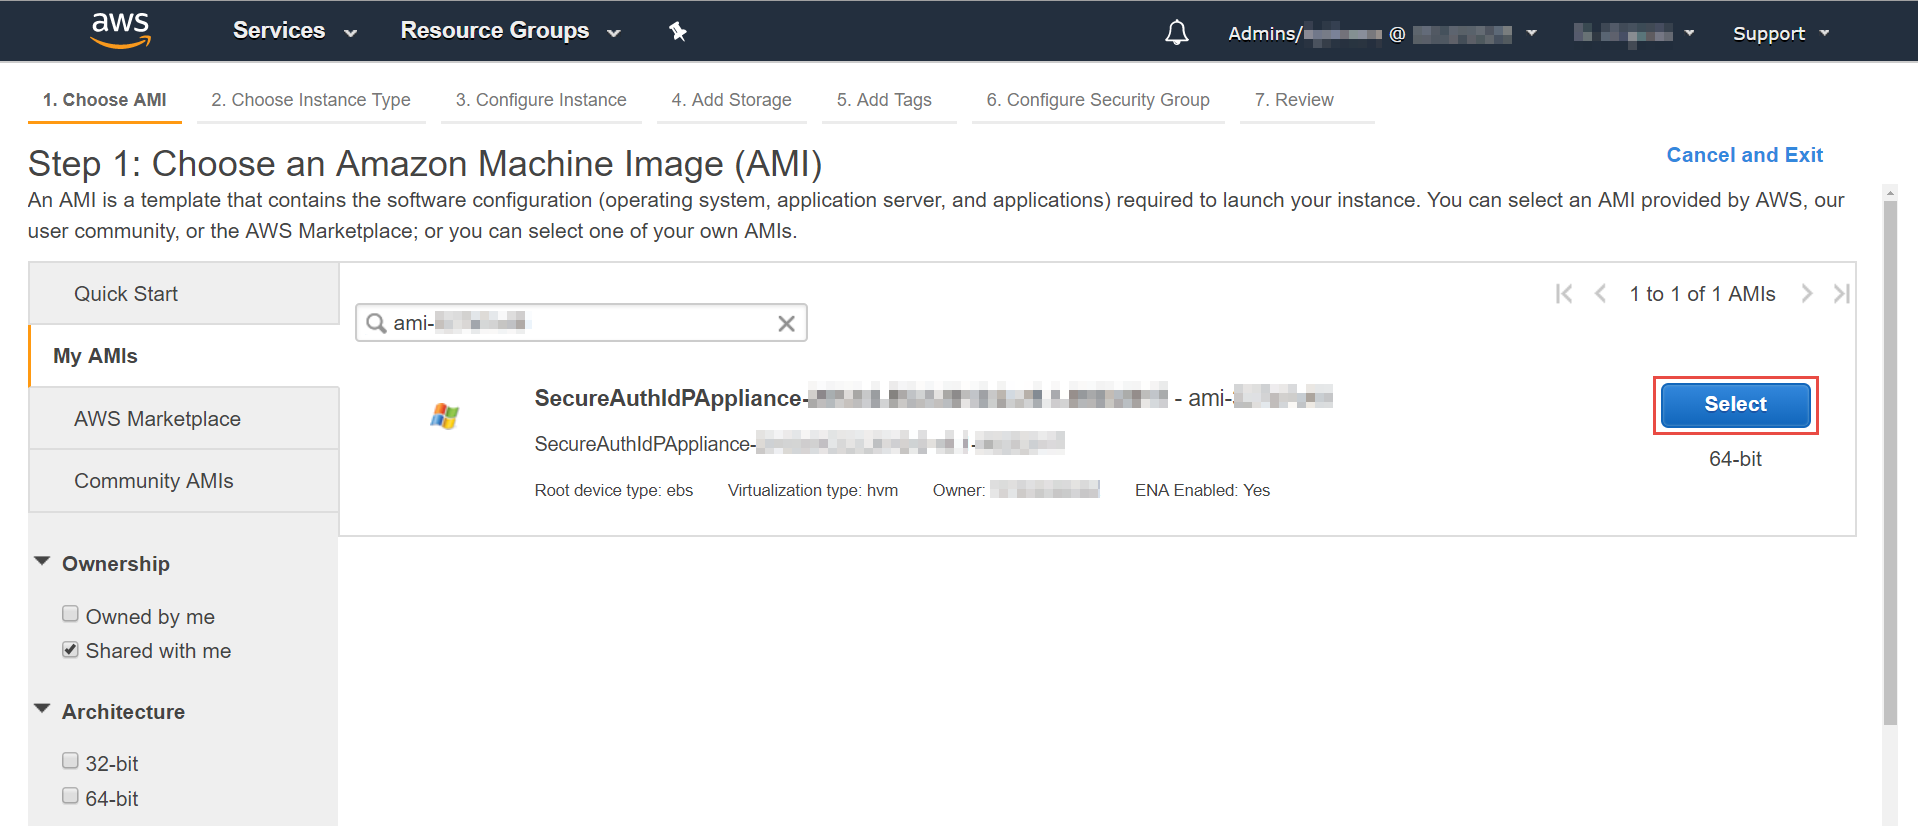
5. At Step 1: Choose an Amazon Machine Image (AMI), on the My AMIs tab, search for the AMI ID or AMI Name SecureAuth provided you.
6. When the AMI appears, click Select.
 |
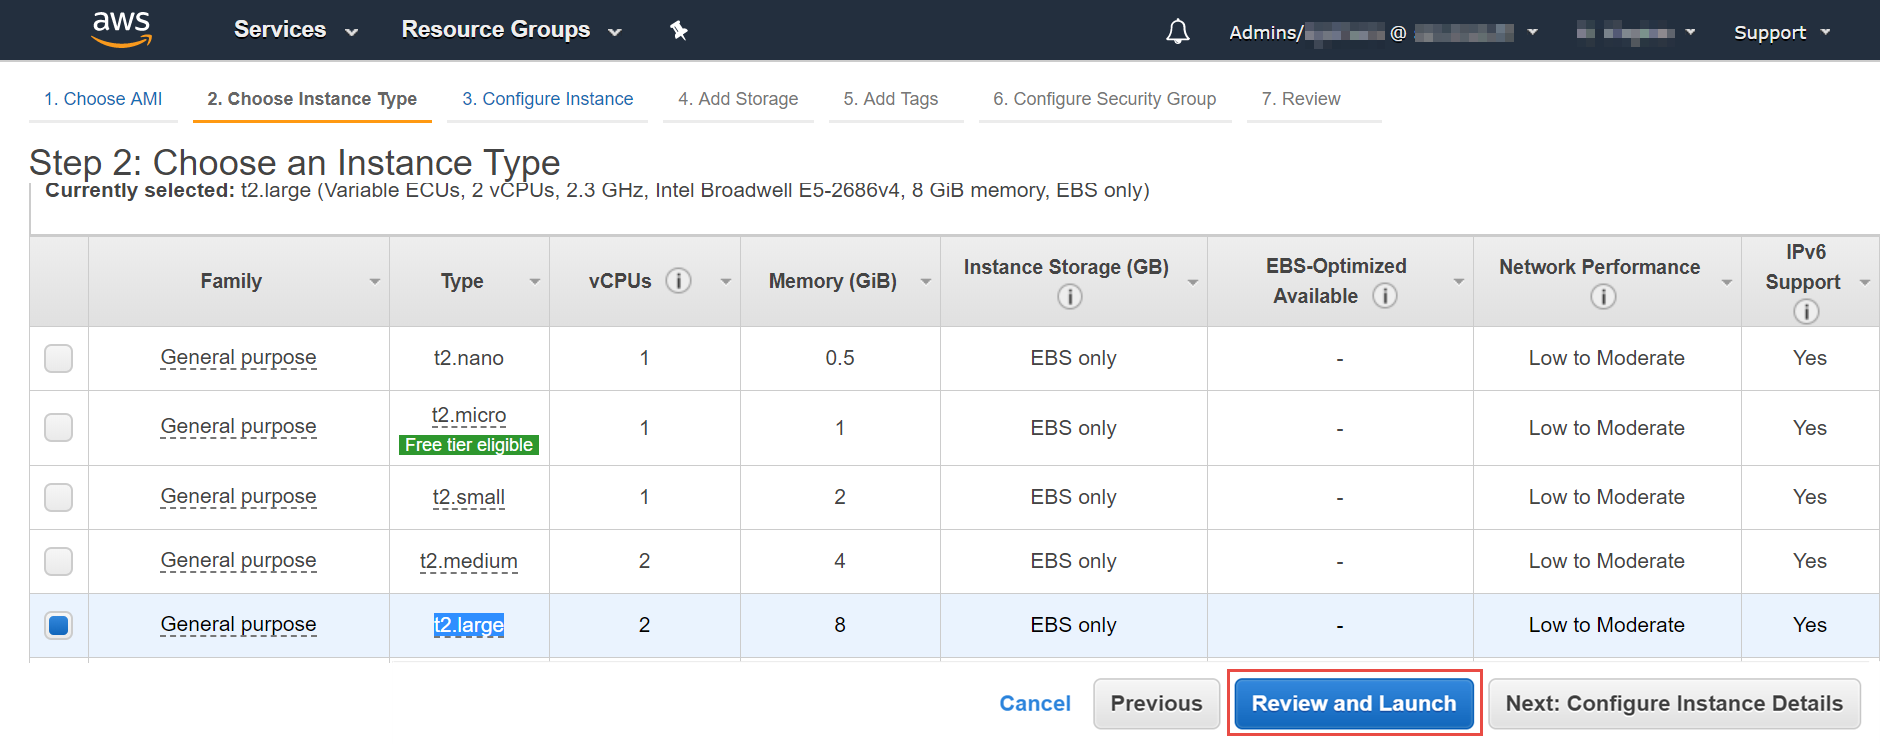
7. At this step, SecureAuth recommends selecting instance Type t2.large or greater.
8. Click Review and Launch.
 |
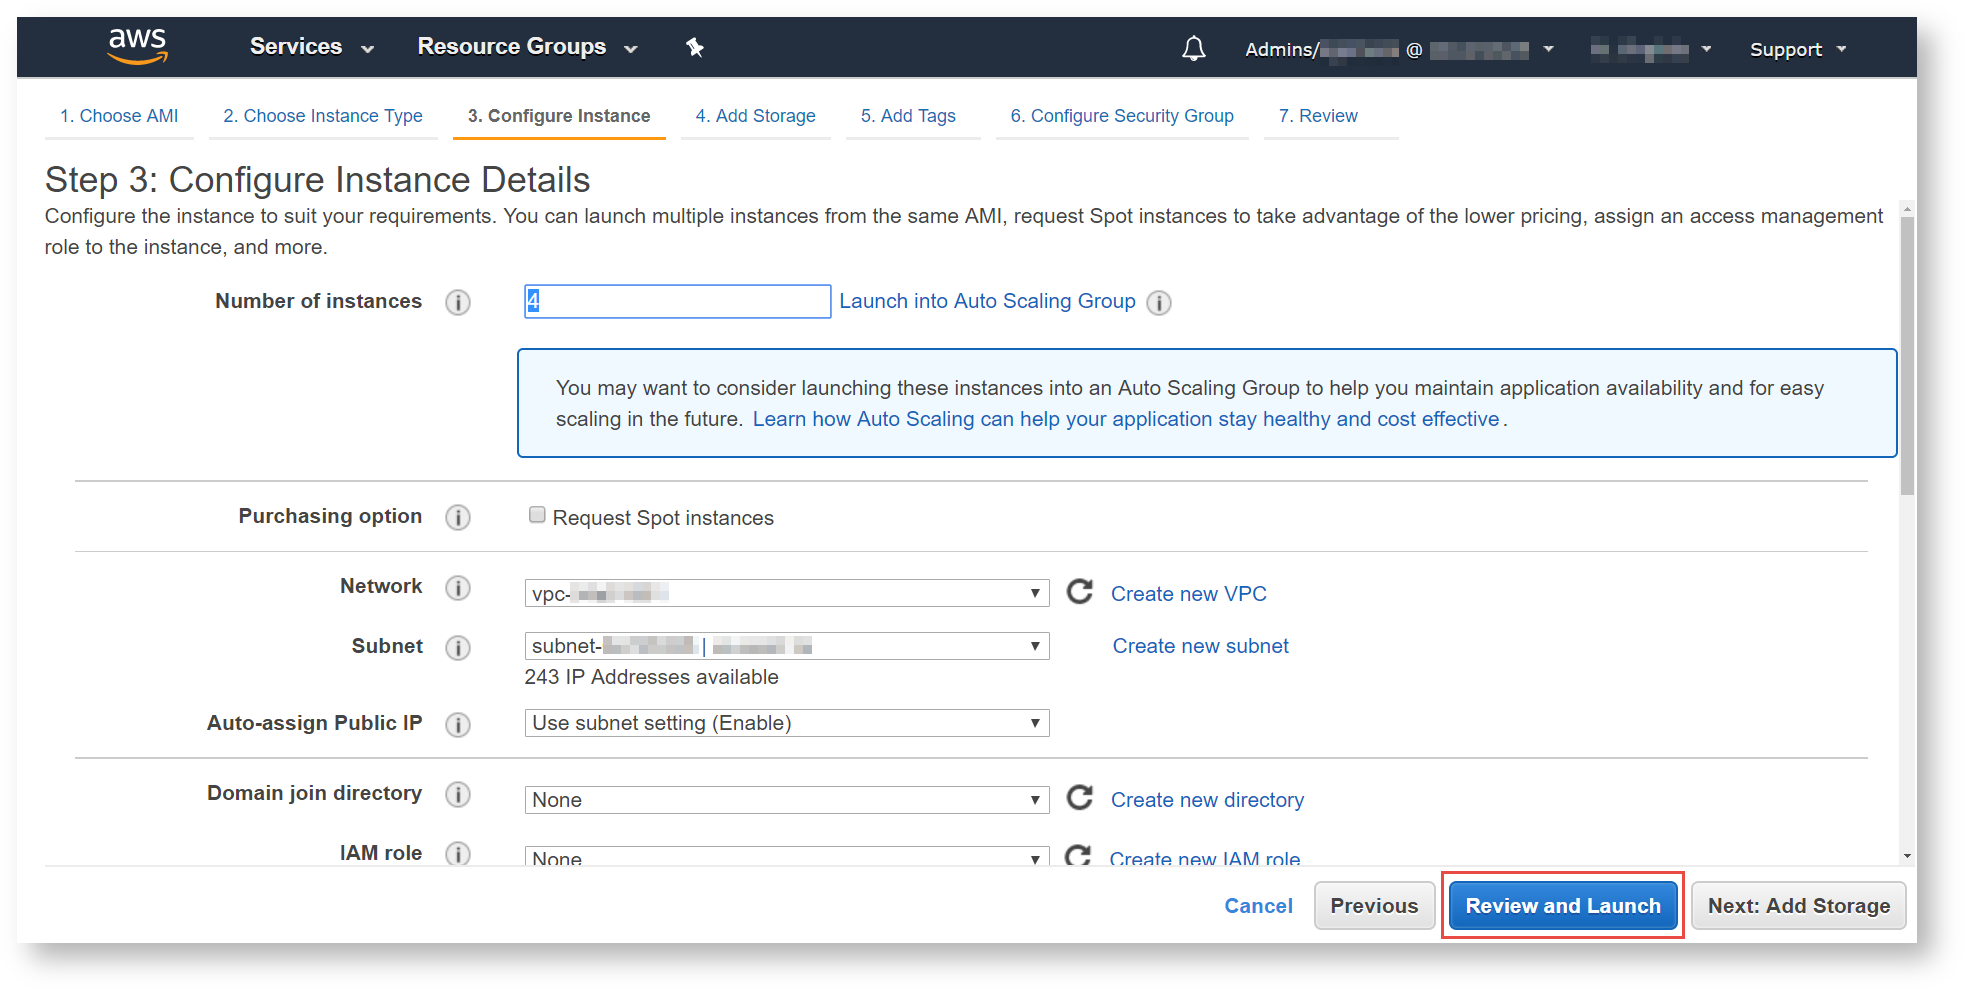
9. At this step, set the Number of instances for the environment, and configure Network and Subnet and other criteria pertinent to the environment.
10. Click Review and Launch.
 |
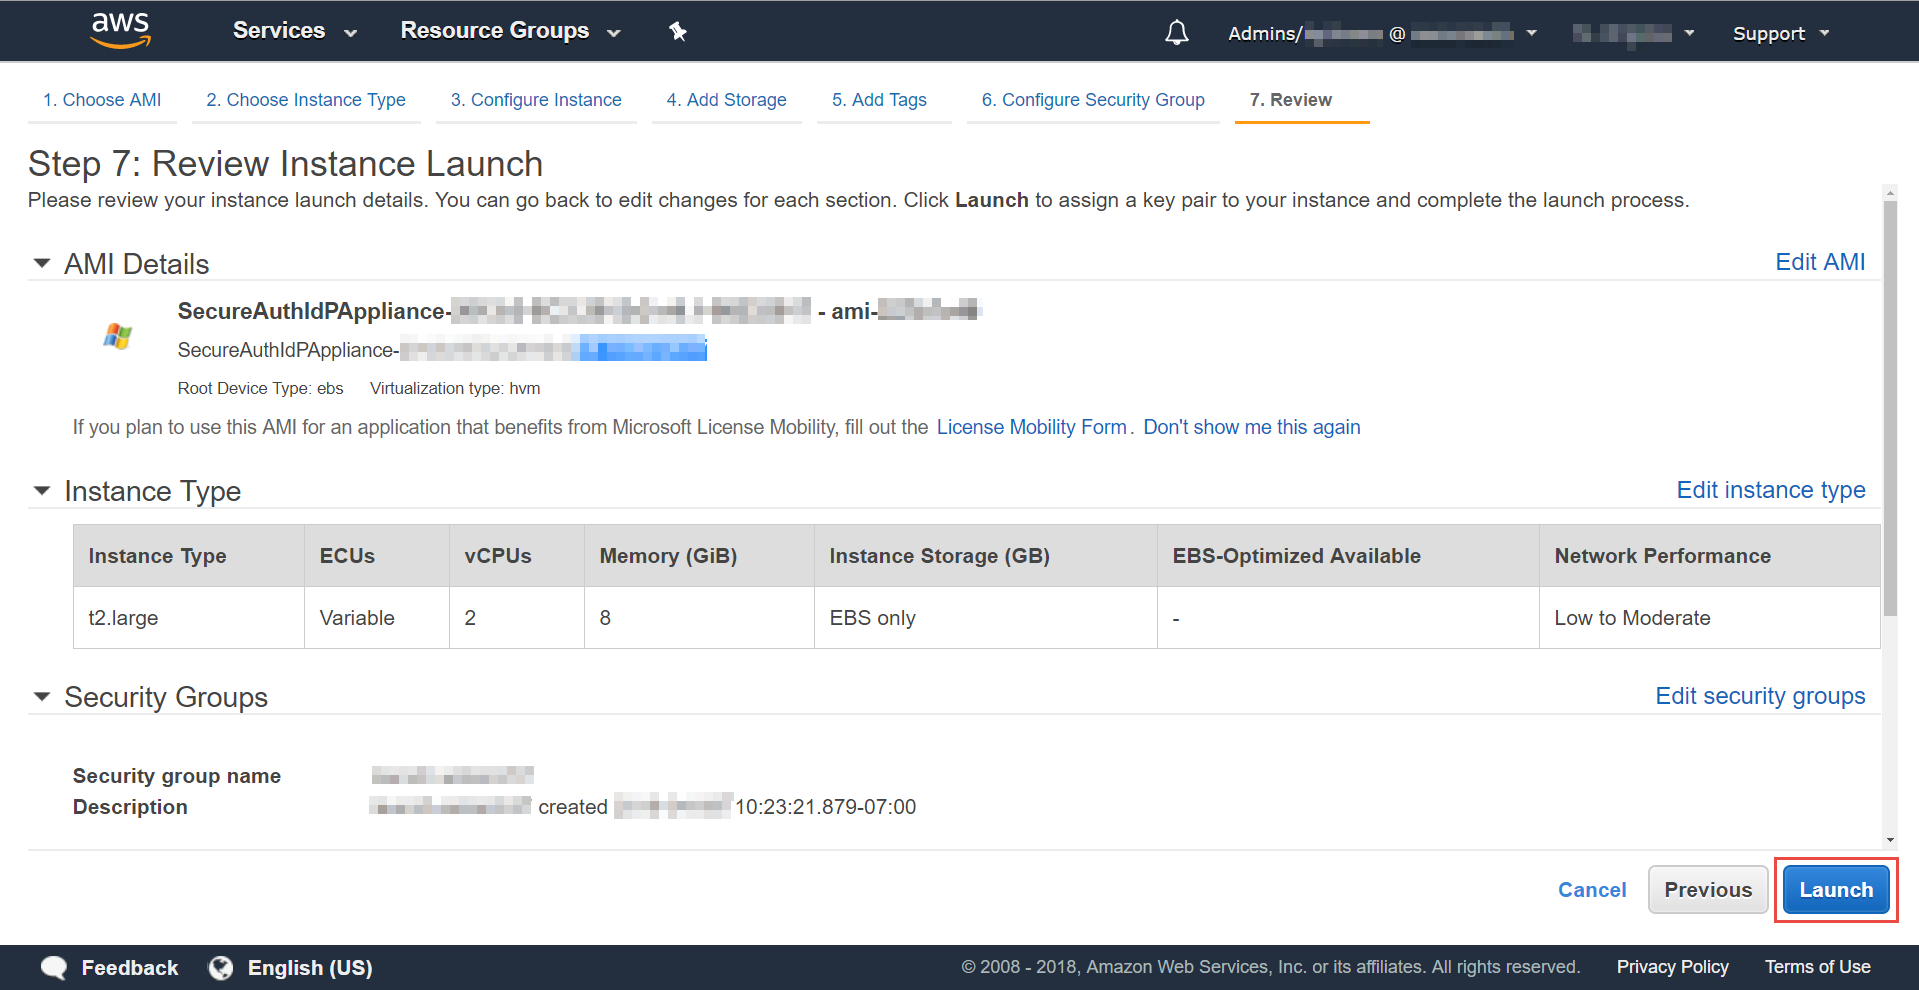
11. At Step 7: Review Instance Launch, review the configuration.
12. After reviewing the page and making any necessary adjustments to the configuration, click Launch.
 |
What's next
When all steps on this page are completed, proceed to Initialize the SecureAuth IdP Setup Utility.