Use X-Forwarded-For (XFF) with URL Rewrite Module
Introduction
Many customers deploy SecureAuth IdP Appliances behind a load balancer (LB) to provide high available and performant operation of the product. Unfortunately, any connection through the LB reveals only the source IP address of the LB which severely limits the usefulness of the URL Rewrite and logging functionalities of IIS.
To address this issue, most LB products include support for sending the X-Forwarded-For (XFF) HTTP header. When enabled on a device which supports it, the IP address of the requesting client is included in the XFF header and passed to the SecureAuth IdP Appliance.
With a few minor configuration changes to IIS, the XFF information can be logged for auditing purposes and used to build URL Rewrite rules.
Prerequisites
1. Ensure the following items are installed and running before configuring URL Rewrite
SecureAuth IdP Version 9.x+
Windows Server 2012 R2
2. Ensure URL Rewrite extension is installed on the Windows server
Note
Note that IP and Domain Restrictions in IIS take precedence over URL Rewrite
When configuring the Windows server to use the URL Rewrite add-on, set the feature settings under IP and Domain Restrictions to Allow
Configuration Steps to Add X-Forwarded-For (XFF) HTTP Header to IIS Logs
These instructions explain how to add the X-Forwarded-For (XFF) HTTP header to the IIS logs of a SecureAuth IdP Appliance
Notice
Before following the instructions below, ensure the load balancer is configured to pass the X-Forwarded-For (XFF) HTTP header to the SecureAuth IdP Appliances
 |
1. From the Start screen, click Control Panel
2. Click System and Security and then Administrative Tools
3. On the Administrative Tools window, double-click Internet Information Services (IIS) Manager
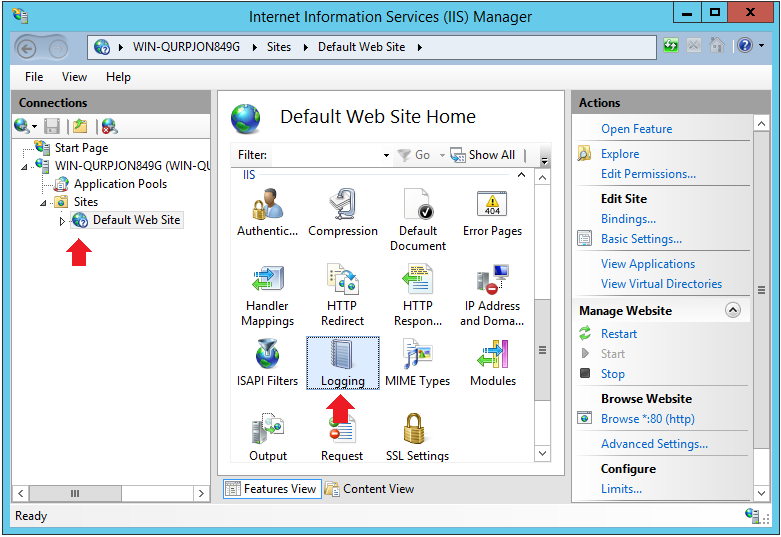
4. On the connections pane, select Default Web Site and double-click Logging on the Default Web Site Home pane
Logging
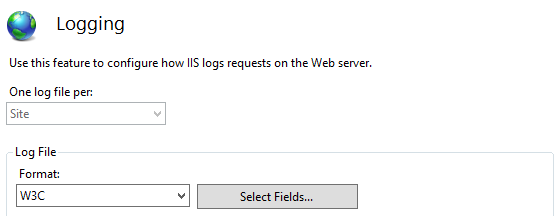 |
5. On the Logging pane, click Select Fields...
W3C Logging Fields
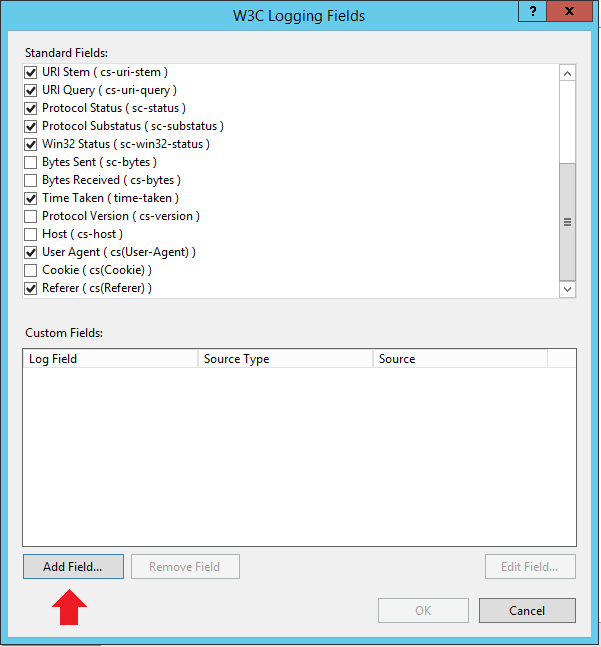 |
6. On the W3C Logging Fields dialog, click Add Field...
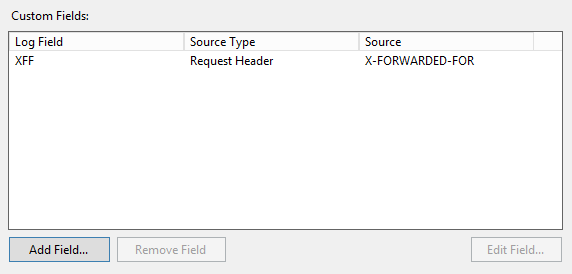 |
7. On the Add Custom Field dialog, set the Log Field name value to XFF
8. Set the Source Type value to Request Header
9. Set the Source value to X-FORWARDED-FOR
10. Click OK and then OK again to dismiss the custom field dialog
 |
11. On the Actions pane in the upper right of the screen, click Apply to confirm the changes
Notice
The log files now show "_x" appended at the end of the filename (e.g. u_ex161115_x) which indicates a custom field has been added to the log file format
Configuration Steps for URL Rewrite to Use X-Forwarded-For (XFF) HTTP Header in Load Balanced Environment
These instructions explain how to configure a URL Rewrite rule to use the X-Forwarded-For (XFF) HTTP header in a load balanced environment
The most common use case for the URL Rewrite in a SecureAuth IdP workflow is to route users between an internal and external realm based on IP
Edit Inbound Rule
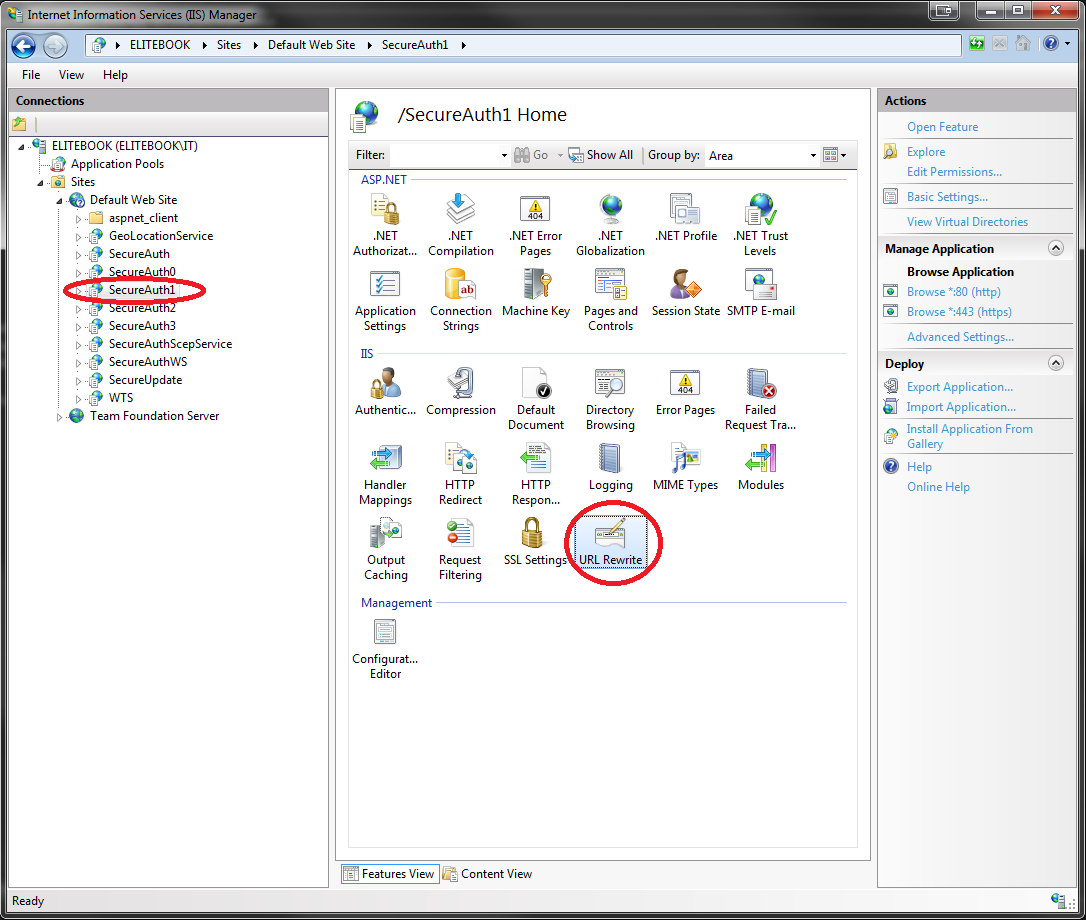 |
1. In the IIS window, select the SecureAuth IdP realm from the tree view pane
2. On the target pane, double-click the URL Rewrite icon
URL Rewrite - Edit Inbound Rule
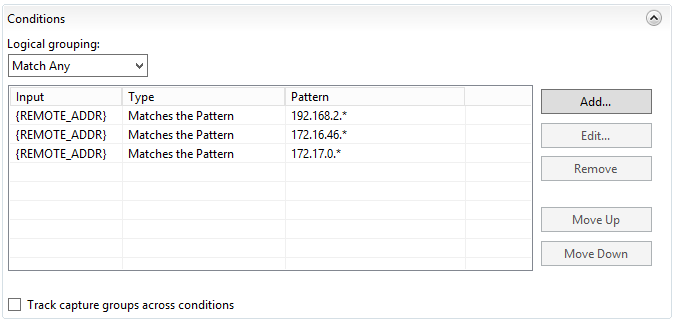 |
3. On the Edit Inbound Rule panel, in the Conditions section, note the defined conditions
Normally, the execution of URL Rewrite requires defining a condition with pattern matching and the REMOTE_ADDR Condition Input
However, in a Load Balanced environment, the REMOTE_ADDR is always the IP of the load balancer, so this rule does not execute as expected
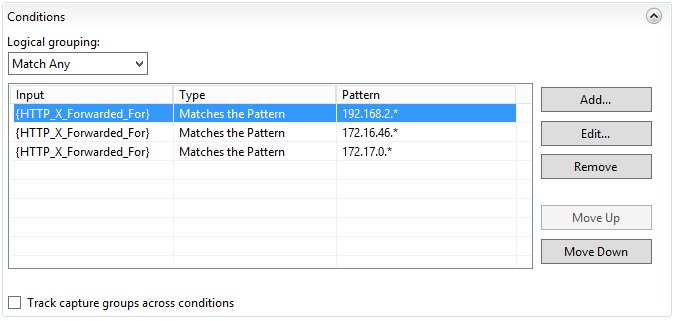 |
4. To resolve this issue, change the Condition Input of the rule from REMOTE_ADDR to HTTP_X_Forwarded_For
This edit instructs the URL Rewrite module to use the requesting client's IP in the X-Forwarded-For (XFF) HTTP header instead of the load balancer's IP
The rule should then behave as expected
Reference
Refer to SecureAuth and High Availability for information about Web service load balancing options