Amazon Cognito Integration Guide
Introduction
Use this guide to enable Multi-Factor Authentication and Single Sign-on (SSO) access via OpenID Connect / OAuth 2.0 to Amazon Cognito.
In this integration, a trust is created between SecureAuth IdP (the OpenID Connect Provider) and Amazon Cognito.
SecureAuth IdP produces a JSON token (id_token) and sends it to the custom application
The application then trades the id_token for a Cognito Token, which is then converted to temporary AWS credentials
Those credentials are then utilized to access the target resource protected by Amazon Cognito.
Prerequisites
1. Have an AWS account
2. Set up the protected resource in the Amazon Cloud
Refer to the Amazon Documentation for more information
3. Upload the latest AWS SDK version to the custom application
4. Create a New Realm for the Amazon Cognito integration in the SecureAuth IdP Web Admin
5. Configure the following tabs in the Web Admin before configuring the Post Authentication tab:
Overview – the description of the realm and SMTP connections must be defined
Data – an enterprise directory must be integrated with SecureAuth IdP
Workflow – the way in which users will access this application must be defined
Multi-Factor Methods – the Multi-Factor Authentication methods that will be used to access this page (if any) must be defined
SecureAuth IdP Configuration Steps
Post Authentication
 |
1. In the Post Authentication section, select OpenID Connect / OAuth 2 from the Authenticated User Redirect dropdown
2. An unalterable URL will be auto-populated in the Redirect To field, which will append to the domain name and realm number in the address bar (Authorized/OidcAuthorize.aspx)
Warning
Click Save once the configurations are completed and before leaving the Post Authentication page to avoid losing changes
Forms Auth / SSO Token
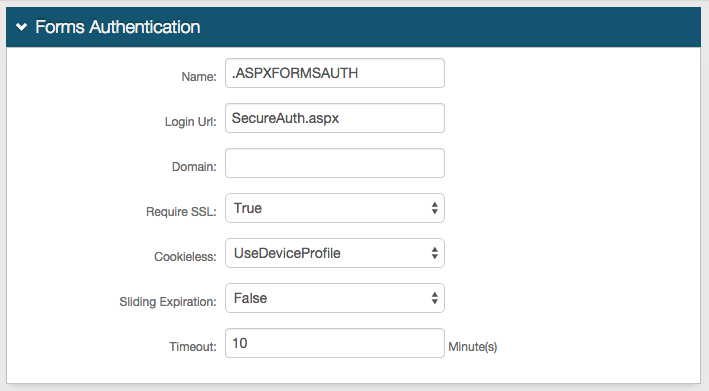
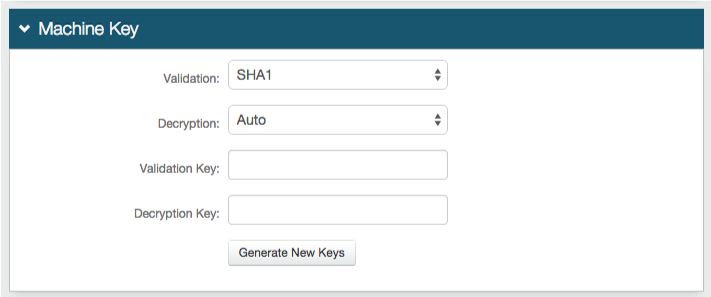
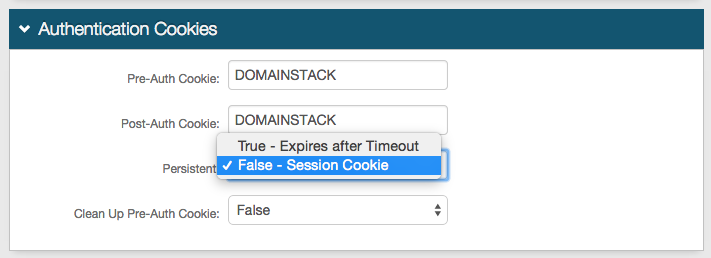
Optionally, in the Forms Auth / SSO Token section, click the View and Configure FormsAuth keys/SSO token link to configure the token/cookie settings and configure this realm for SSO.
 |
OpenID Connect / OAuth 2.0 - Settings
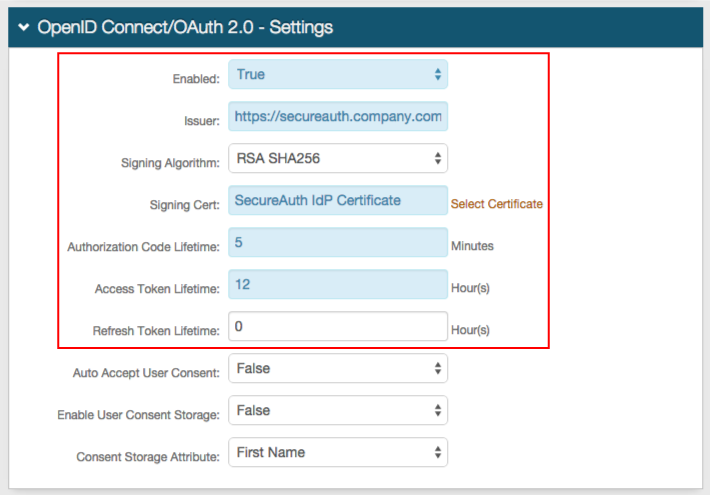 |
4. Select True from the Enabled dropdown
5. Set the Issuer to the Fully Qualified Domain Name (FQDN) of the SecureAuth IdP appliance, followed by the Amazon Cognito-integrated realm, e.g. https://secureauth.company.com/secureauth2
6. Select RSA SHA256 from the Signing Algorithm dropdown
7. Click Select Certificate to select a SecureAuth IdP or third-party certificate uploaded to the appliance to be used in the integration
8. Set the Lifetimes for the Authorization Code, Access Token, and Refresh Token
OpenID Connect / OAuth 2.0 - Scopes
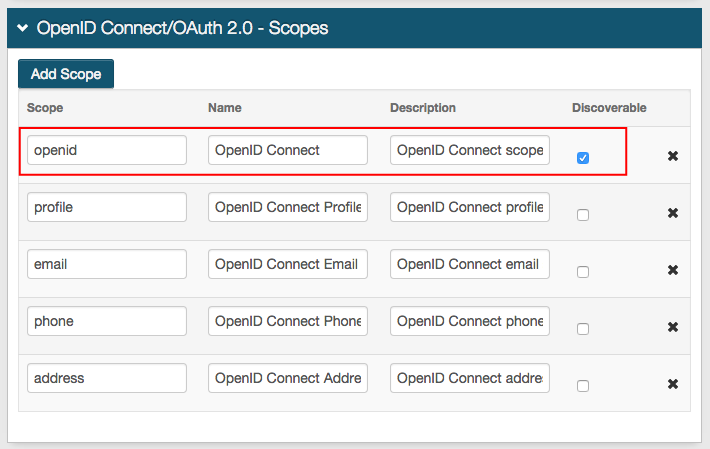 |
9. Check Discoverable from the openid Scope option
Warning
Click Save once the configurations have been completed and before leaving the Post Authentication page to avoid losing changes
OpenID Connect / OAuth 2.0 - Clients
 |
10. Click Add Client to add Amazon Cognito
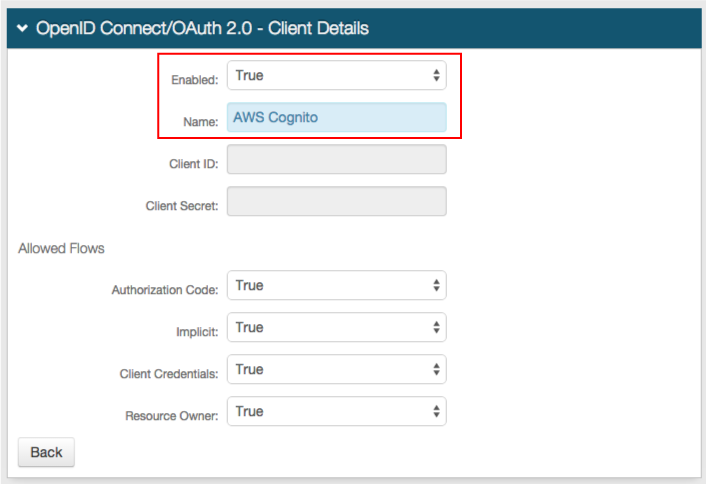 |
11. Select True from the Enabled dropdown
12. Set the Name to an identifiable name that appears in the SecureAuth IdP Web Admin, e.g. AWS Cognito
The Client ID and Client Secret are generated by SecureAuth IdP once the client is saved
The Client ID appears in the OpenID Connect / OAuth 2.0 - Clients section; and the Client Secret can be viewed by clicking on the AWS Cognito Client from the OpenID Connect / OAuth 2.0 - Clients section (once created)
 |
13. Click Add Redirect URI
14. Provide the URI of the custom application's callback endpoint, e.g. https://company.com/cognito/callback.html
Warning
Click Save once the configurations have been completed and before leaving the OpenID Connection / OAuth 2.0 Clients page to avoid losing changes
OpenID Connect / OAuth 2.0 - Claims
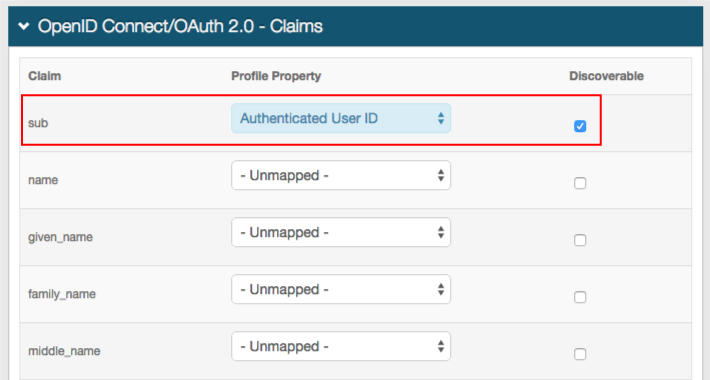 |
15. Select Authenticated User ID from the Profile Property dropdown in the sub Claim
16. Check Discoverable
Warning
Click Save once the configurations have been completed and before leaving the Post Authentication page to avoid losing changes
Amazon Cognito Configuration Steps
Identity Providers
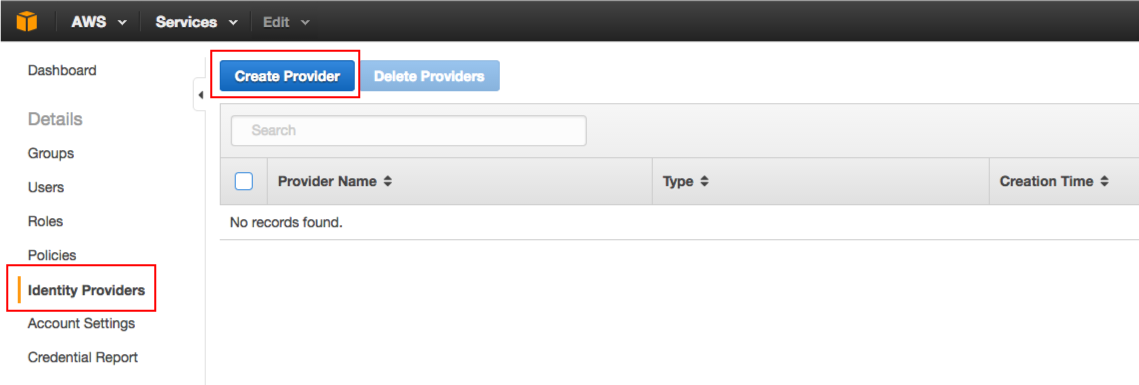 |
1. Log into the AWS IAM Console
2. Select Create Provider in the Identity Providers section
Configure Provider
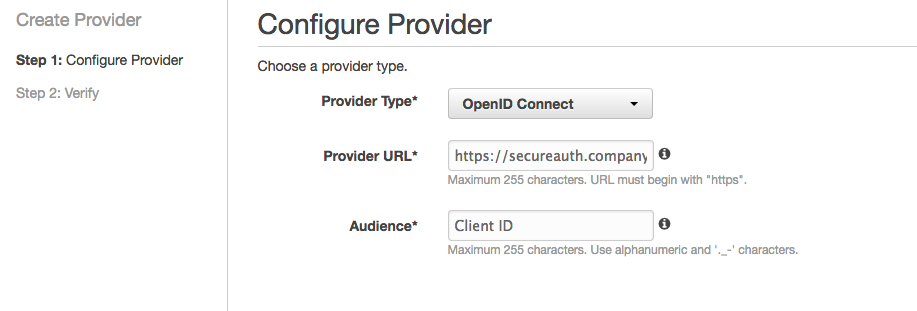 |
3. Select OpenID Connect from the Provider Type dropdown
4. Set the Provider URL to the FQDN of the SecureAuth IdP appliance, followed by the Amazon Cognito-integrated realm, e.g. https://secureauth.company.com/secureauth2
The Provider URL is the same value established in the Issuer field of the SecureAuth IdP Web Admin (step 5)
5. Set the Audience to the Client ID from the OpenID Connect / OAuth 2.0 - Clients section of the SecureAuth IdP Web Admin
6. Click Next Step
Verify Provider Information
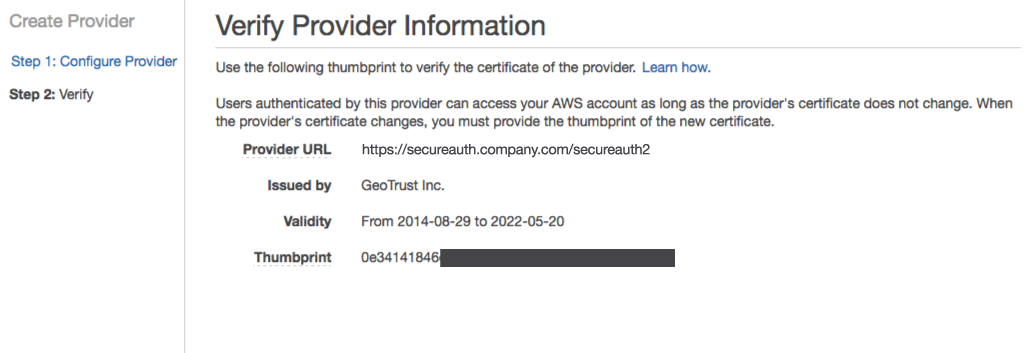 |
7. Verify the information presented, and if it is all correct, click Create
Summary
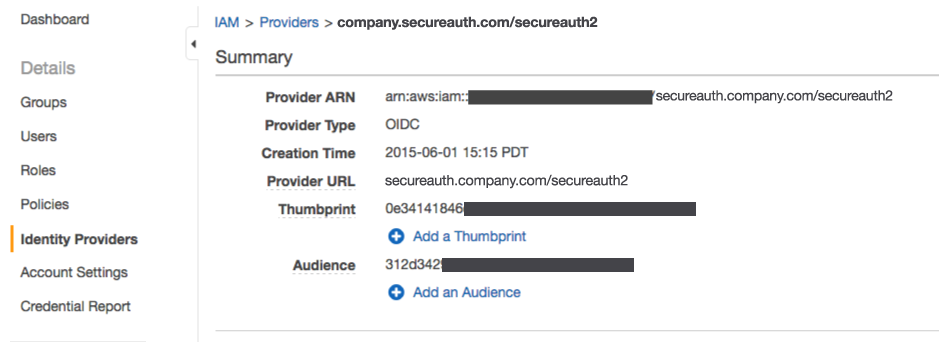 |
8. Access the Provider Summary by selecting the newly created Provider (company.secureauth.com/secureauth2) on the Identity Providers page to locate the Provider ARN, which is required for the custom application configuration
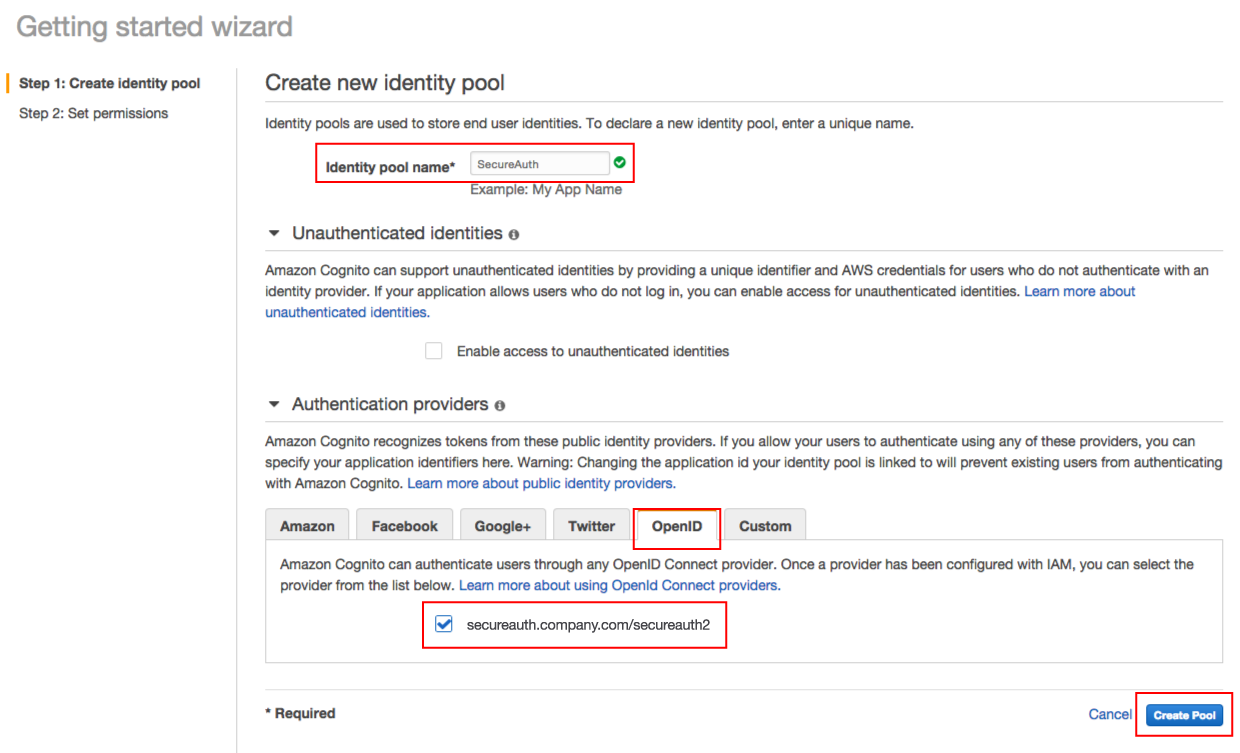
Create New Identity Pool
 |
9. Log into the Amazon Cognito Console
10. Click Get Started or New Identity Pool if already accessed
11. Set the Identity pool name to a friendly name that appears in the admin console, e.g. SecureAuth
12. Check the Provider created in the previous steps (secureauth.company.com/secureauth2) in the OpenID section
13. Click Create Pool
Role Summary
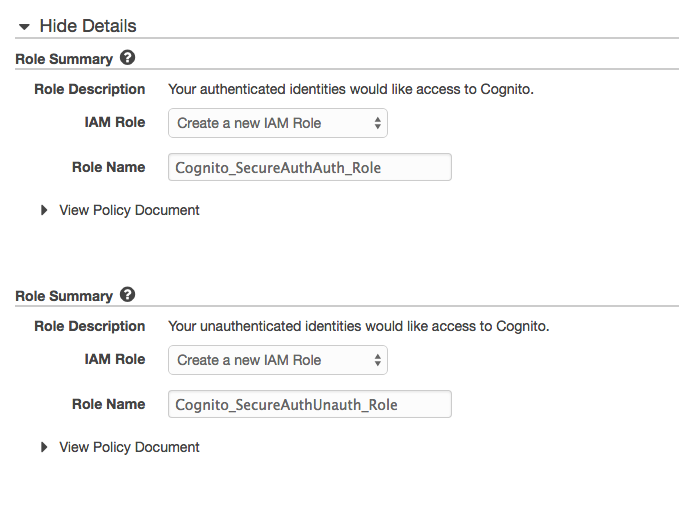 |
14. Leave the Role Summary as default, or modify the Role Names
15. Click Allow
Edit Identity Pool
 |
16. On the following screen, click Edit identity pool in the top right corner
17. Locate the Identity pool ID, which is required for the custom application configuration
