Configure a Realm for HTTP Redirect
This article explains how to configure a SecureAuth IdP realm to redirect from HTTP (unencrypted) to HTTPS (encrypted).
Applies to
SecureAuth IdP Version | OS Version |
|---|---|
7.x+ |
|
Configuration Steps
SecureAuth IdP Appliances running Windows Server 2008 R2
1. On the Start menu, select All Programs, Administrative Tools, and then Internet Information Services (IIS) Manager
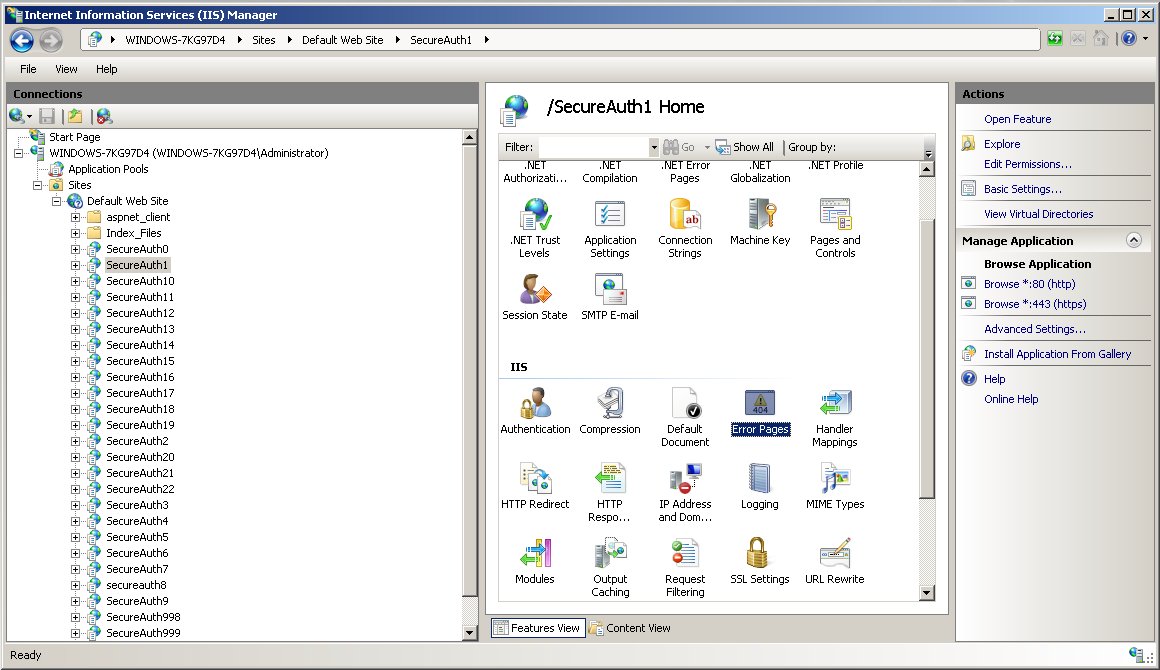
2. On the Connections pane, expand the Sites node and then the Default Web Site node
3. Select and highlight the SecureAuth IdP realm on which to apply the redirect
4. On the center pane, in the IIS section, double-click the Error Pages icon
 |
5. On the Actions pane, click the Add... link
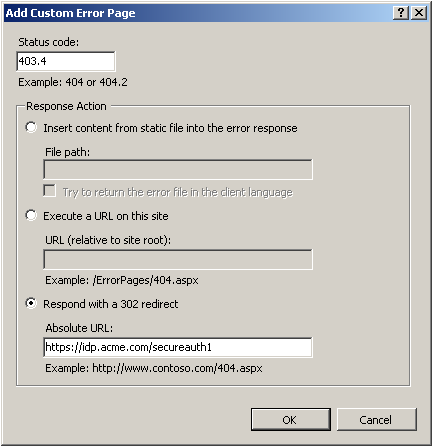
6. On the Add Custom Error Page window, locate the Status Code field and type in 403.4
7. Select the Respond with a 302 redirect radio button
8. In the Absolute URL field, type in the corrected URL
e.g. https://idp.acme.com/secureauth1
 |
9. Click OK to confirm edits
10. Test the configuration change from a browser on another computer (not from the appliance console)
SecureAuth IdP Appliances running Windows Server 2012
1. On the desktop, hover the mouse cursor in the lower right corner of the screen, and then click Settings
2. Select Control Panel
3. Select System and Security, and then Administrative Tools
4. On the Administrative Tools window, double-click Internet Information Services (IIS) Manager
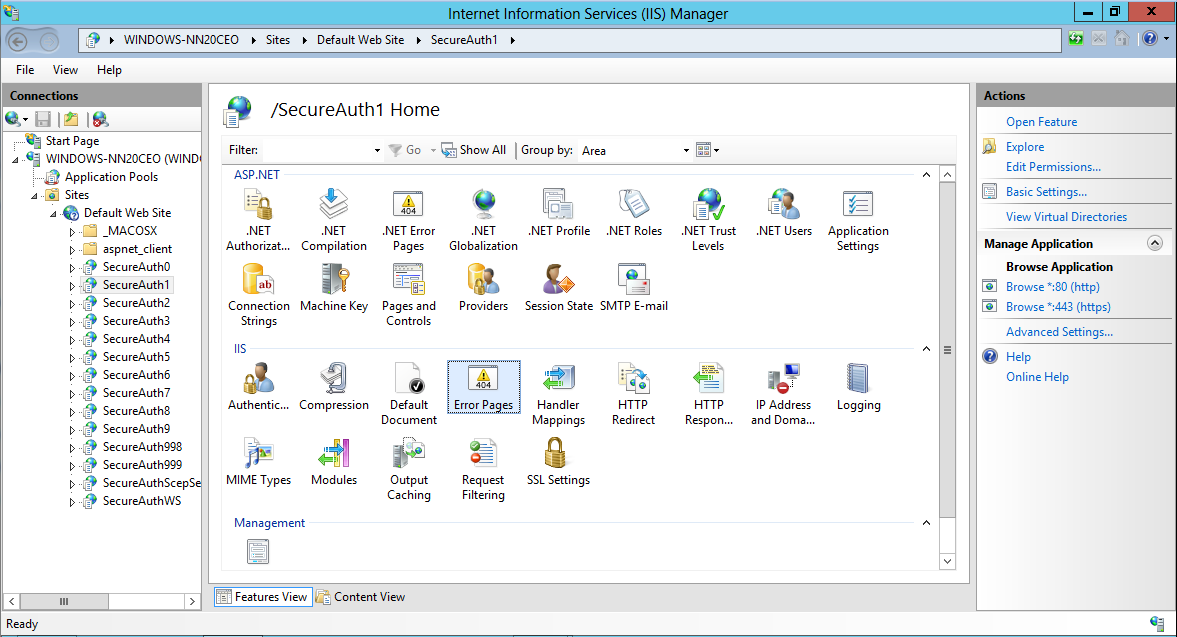
5. On the Connections pane, expand the Sites node followed by the Default Web Site node
6. Select and highlight the SecureAuth IdP realm on which to apply the redirect
7. On the center pane, in the IIS section, double-click the Error Pages icon
 |
8. On the Actions pane, click the Add... link
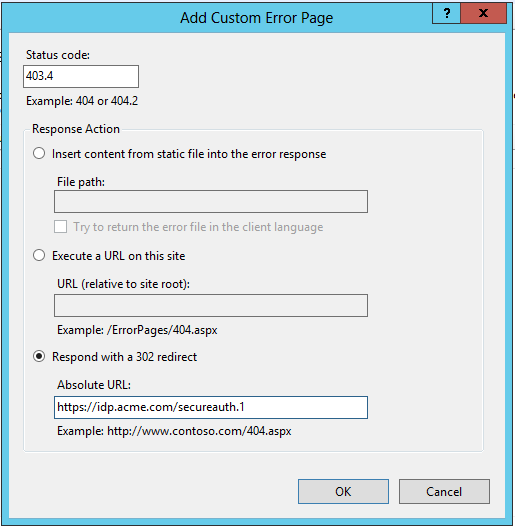
9. On the Add Custom Error Page window, locate the Status Code field and type in 403.4
10. Select the Respond with a 302 redirect radio button
11. In the Absolute URL field, type in the corrected URL
e.g. https://idp.acme.com/secureauth1
 |
12. Click OK button to confirm edits