G Suite Provisioning Configuration Guide
Introduction
SecureAuth IdP can be configured for directory - appliance - G Suite (formerly Google Apps) user profile provisioning, including password synchronization and other IdM tools. There are various ways to enable the features in SecureAuth IdP, and G Suite APIs must be configured appropriately.
Use this guide to enable user profile provisioning via G Suite APIs.
Prerequisites
1. Procure G Suite and access to the Developers Console and Admin Console
2. Create a new SecureAuth IdP realm for provisioning G Suite
3. Obtain a directory Service Account with read and write access for SecureAuth IdP
4. Set up an Active Directory field to which SecureAuth IdP can map a Profile Property
For other data stores, the field mapping must be configured through the directory
G Suite API Configuration Steps
Create Project
 |
 |
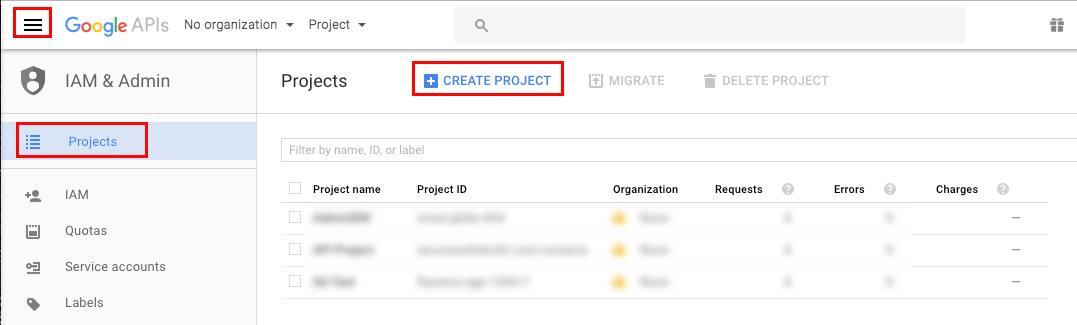
1. Log into the Google Developers' Console , and navigate to IAM & Admin > Projects from the three bars menu
2. Select Create Project
These steps can also be completed by opening the Projects dropdown menu at the top, and selecting Create project
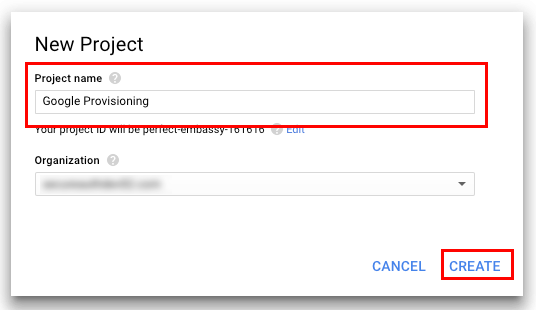
3. Provide a Project Name, and select an Organization if the project is not already being created within one
4. Click Create
Enable Admin SDK
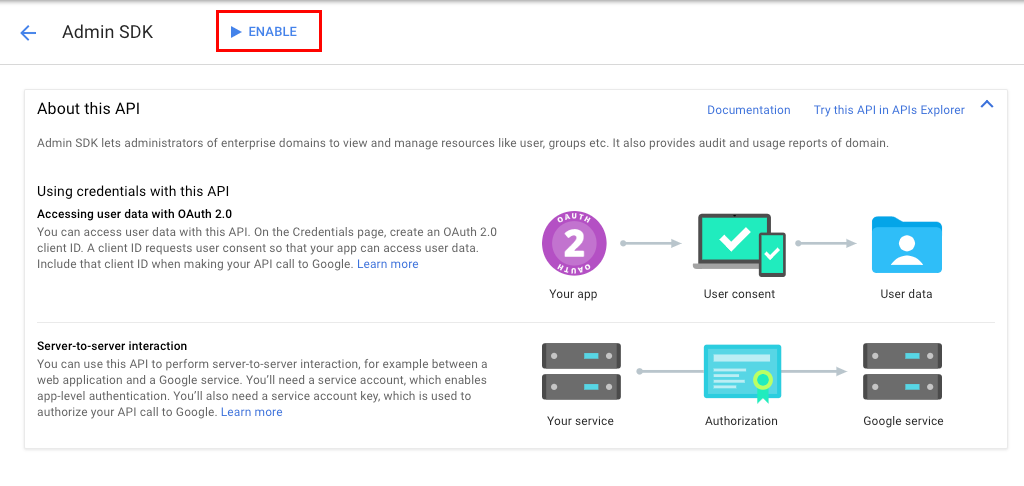 |
5. In the Libraries section, search for Admin SDK, and select the option
6. On the Admin SDK page, click Enable
Create Service Account
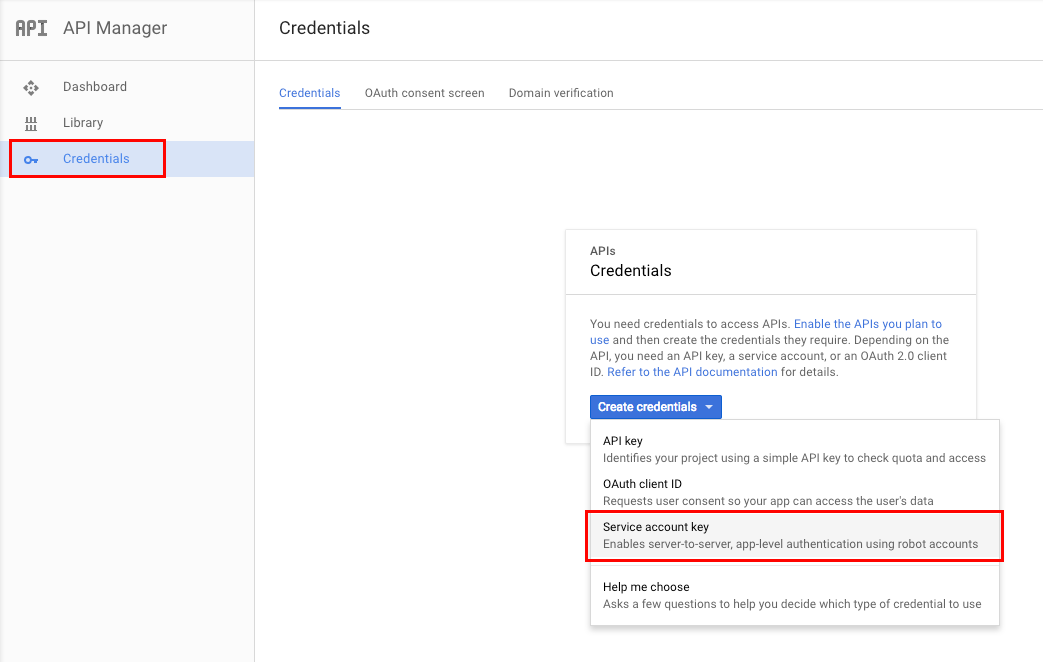 |
7. On the API Manager page (accessible via the three bars menu), navigate to the Credentials section, and click Create Credentials
8. Select Service Account Key
Create Service Account Key
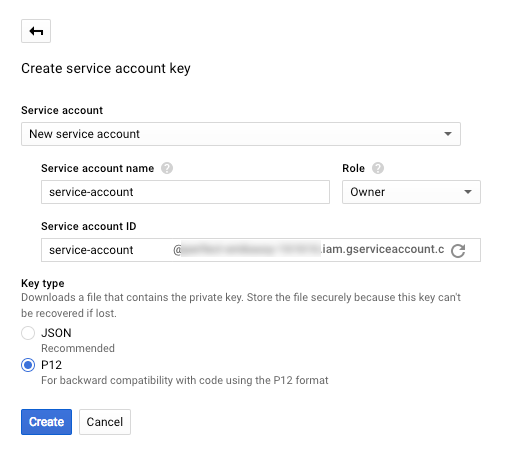 |
9. Select New service account from the Service Account dropdown, and provide a Service Account Name
10. Select Project > Owner from the Role dropdown
11. Select P12, and click Create
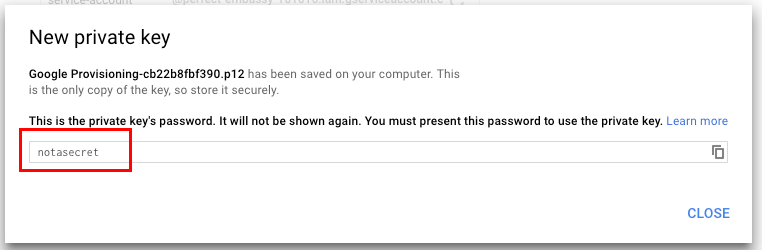
12. Save the p12 file that downloads, which is uploaded to the SecureAuth appliance (see steps below), note the Private Key Password, and click Close
 |
Manage Service Account
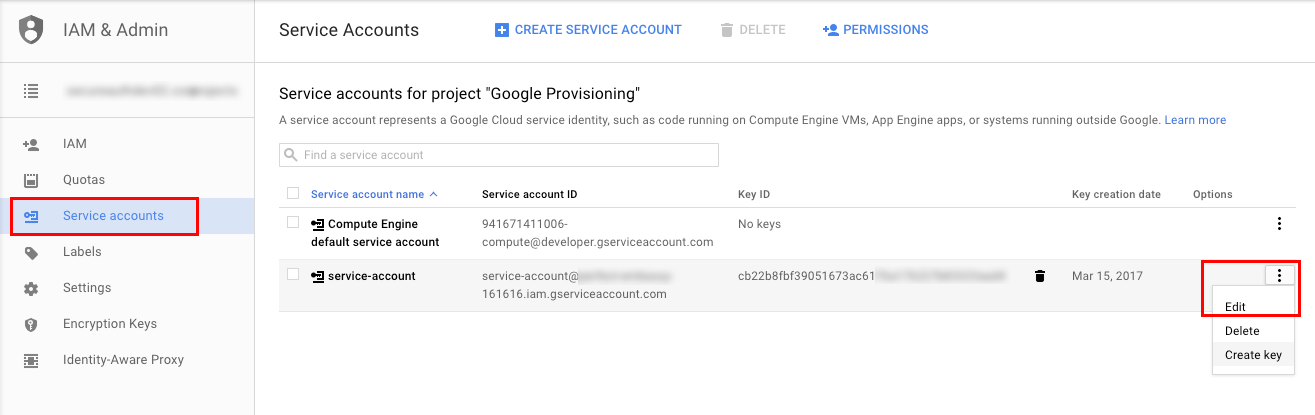 |
13. On the Credentials page, click Manage Service Accounts
14. Click the three dots on the newly-created service account, and select Edit
Edit Service Account
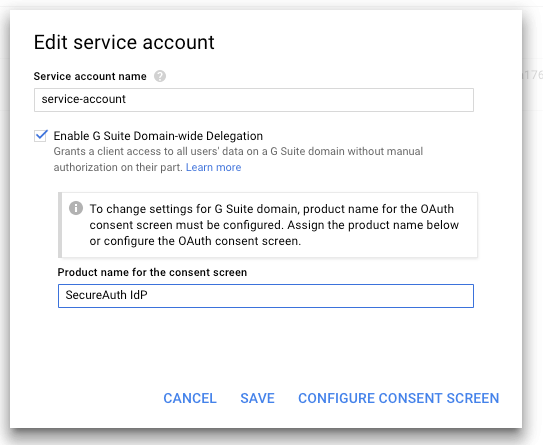 |
15. Check Enable G Suite Domain-wide Delegation and provide a Product name for the consent screen
16. Click Save
Tip
Click Configure Consent Screen to set additional (optional) preferences for the consent page; or access the configuration at API Manager > Credentials > OAuth Consent Screen
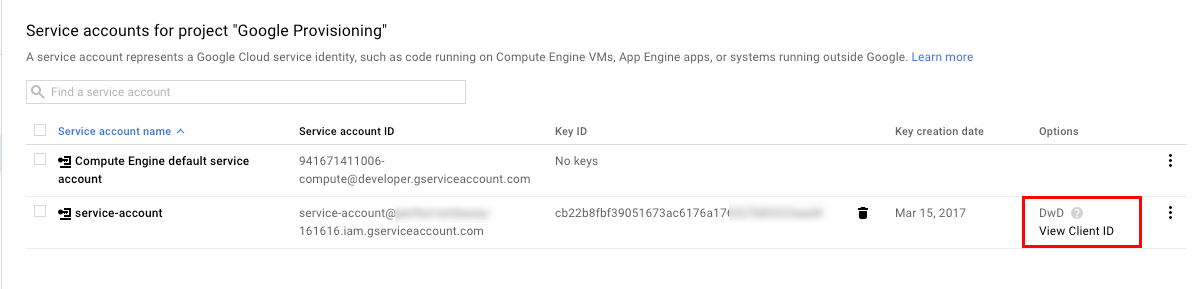 |
Back on the Service Accounts page, a new DwD section appears for the service account
17. Click View Client ID
Credentials
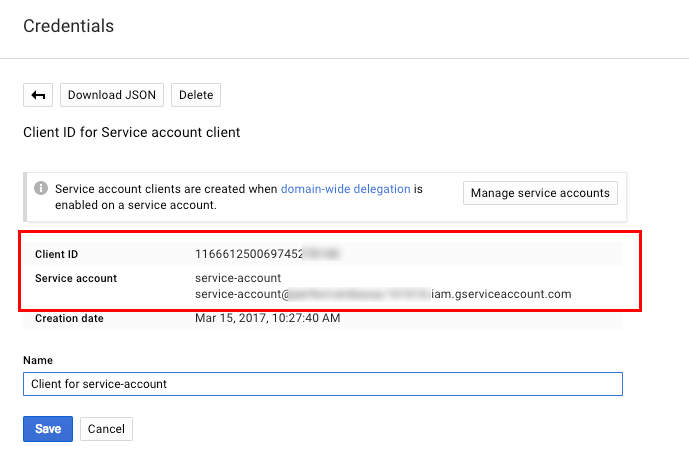 |
18. Note the Client ID, which is used in the G Suite Administrative Configuration Steps (below), and the Service Account email address, which is used in the SecureAuth IdP Configuration Steps (below)
G Suite Administration Configuration Steps
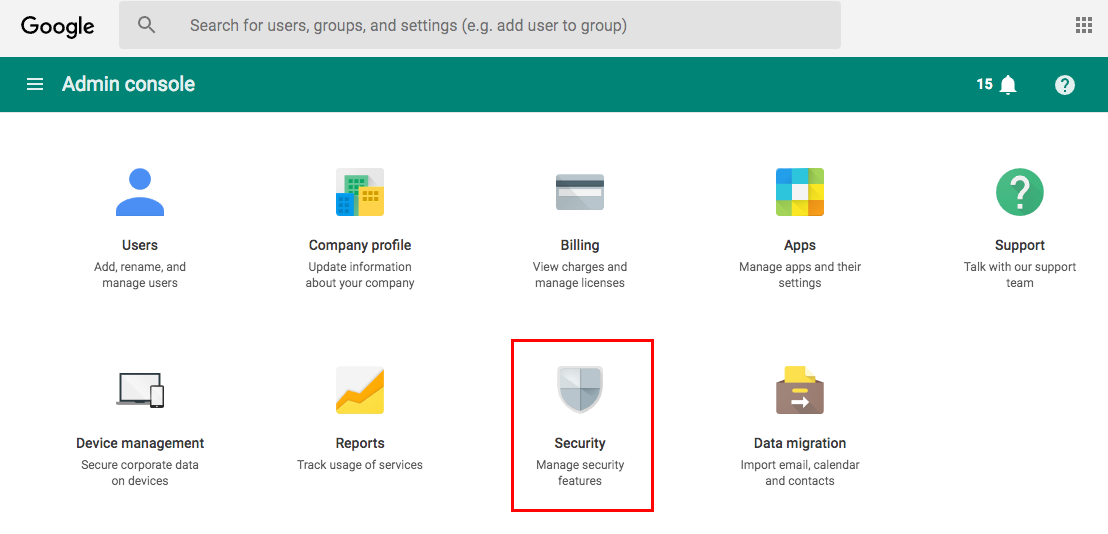 |
19. Log into the G Suite Administrative Console and select Security
Security - Advanced Settings
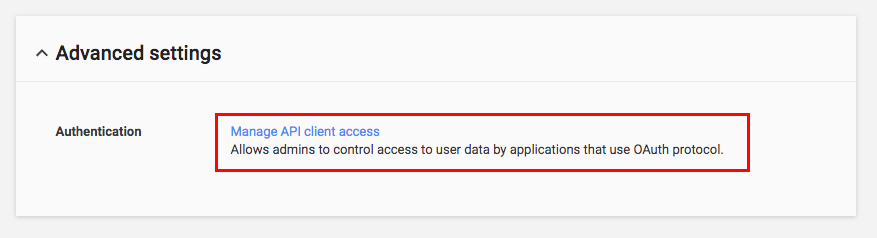 |
20. Under Advanced Settings, select Manage API Client Access
Manage API Client Access
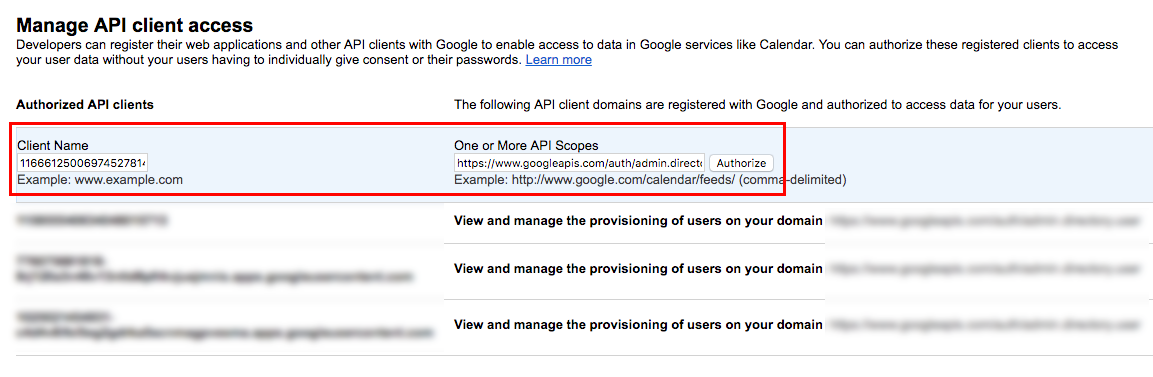 |
21. Set the Client Name to the Client ID obtained in the G Suite API Configuration Steps (step 18)
22. Set the One or More API Scopes to https://www.googleapis.com/auth/admin.directory.user and click Authorize
SecureAuth IdP Configuration Steps
Notice
The following SecureAuth IdP steps are required to enable G Suite provisioning functions from SecureAuth IdP / enterprise directory to G Suite
See the Related Documentation links below to view the configuration steps for specific provisioning features
Post Authentication
Google Apps Functions
 |
1. Leave the Google Apps Domain Name field blank
2. Set the Admin Email to the G Suite Administrative email account
3. Set the Service Email to the Service Account email address obtained from the G Suite API Configuration Steps above (step 18)
4. Click Choose File and select the p12 File obtained in the G Suite API Configuration Steps above (step 12)
5. Set the P12 Password to the Private Key Password obtained in the G Suite API Configuration Steps above (step 12)
6. Select Enabled from the Create User dropdown if SecureAuth IdP is to automatically create the G Suite user account (if it does not already exist)
7. Select Enabled from the Sync Password dropdown if SecureAuth IdP is to conduct a one-way synchronization of the user's directory password to G Suite
To synchronize on specific dates versus every time the password changes, map a directory field to the Ext. Sync Pwd Date property in the Data tab
If no field is mapped, then the password synchronizes every time
Tip
G Suite requires passwords with a minimum of 8 characters
8. Select Enabled from the Mail Forwarding dropdown if another email address will receive messages; select Disabled to disable the feature; or select Not Set if SecureAuth IdP is to not be included in this feature
9. Select the Profile Field that contains the user's Forwarding Email Address (applicable only if Enabled is selected in step 8)
Warning
Click Save once the configuration has been completed and before leaving the Post Authentication page to avoid losing changes