Cisco AnyConnect Integration Guide (RADIUS)
Introduction
Use this guide to integrate the Cisco AnyConnect client with SecureAuth IdP using RADIUS. SecureAuth IdP seamlessly integrates with Cisco ASA providing Multi-Factor Authentication via various registration methods.
Prerequisites
Configure the SecureAuth RADIUS Service v20.12 running on the SecureAuth IdP appliance with Cisco ASA added as a client
Configure the SecureAuth OTP application successfully
Have Cisco ASA AnyConnect and access via ASDM
Cisco AnyConnect Configuration Steps
Connection Profile
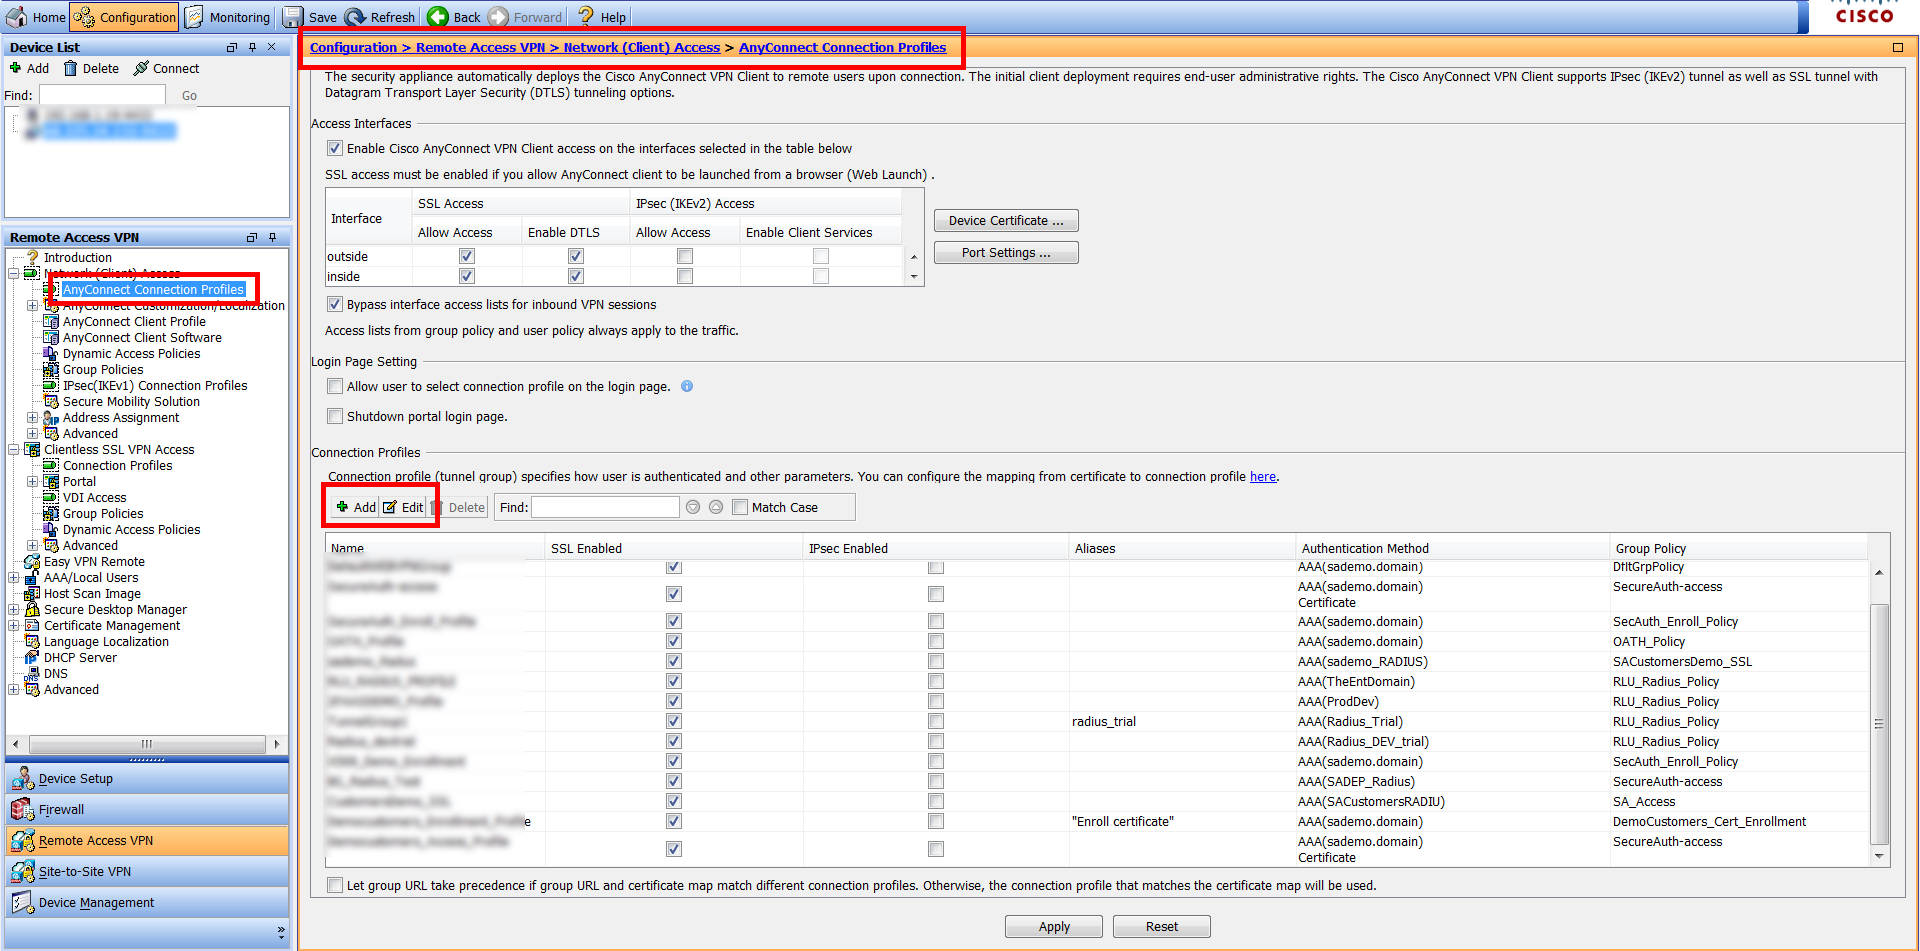 |
1. Log into Cisco ASA via ASDM
2. Navigate to Configuration > Remote Access VPN > Network (Client) Access > AnyConnect Connection Profiles
3. Click to Add a new or Edit an existing Connection Profile
Add / Edit AnyConnect Connection Profile
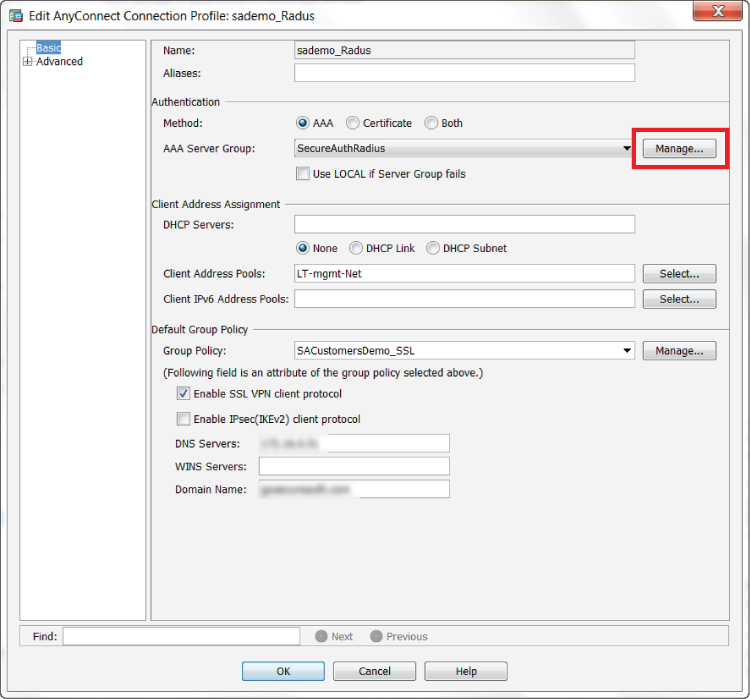 |
4. Provide a Name for the profile
5. In the Authentication section, click Manage to create an AAA authentication for the profile (SecureAuth RADIUS)
AAA Server Group
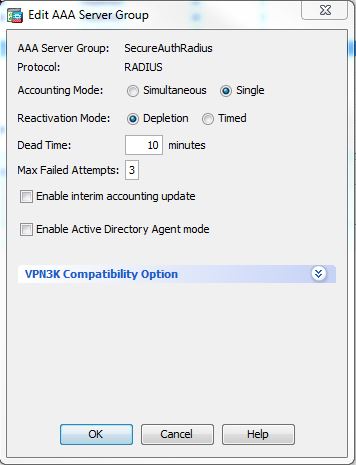 |
6. Under AAA Server Group, click Add
7. Enter a name for the AAA server group and set the Protocol to RADIUS
AAA Server
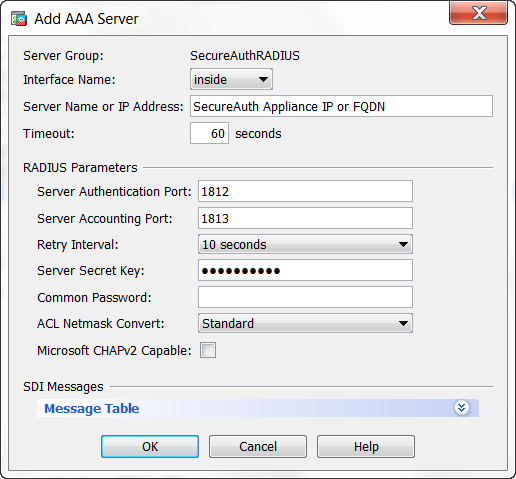 |
8. Select the newly created AAA Server Group, and select AAA on the bottom section to add the server name
9. Select the ASA interface that communicated with SecureAuth IdP from the Interface Name dropdown
10. Set the Server Name or IP Address to the Fully Qualified Domain Name (FQDN) or IP Address of the SecureAuth IdP appliance
11. Set the Timeout to 60 seconds
12. Set the Server Authentication Port to 1812
13. Set the Server Accounting Port to 1813
14. Set the Retry Interval to (recommended) 10 seconds
15. Set the Server Secret Key to the SecureAuth RADIUS Shared Secret
16. Uncheck Microsoft CHAPv2 Capable
Client Profile
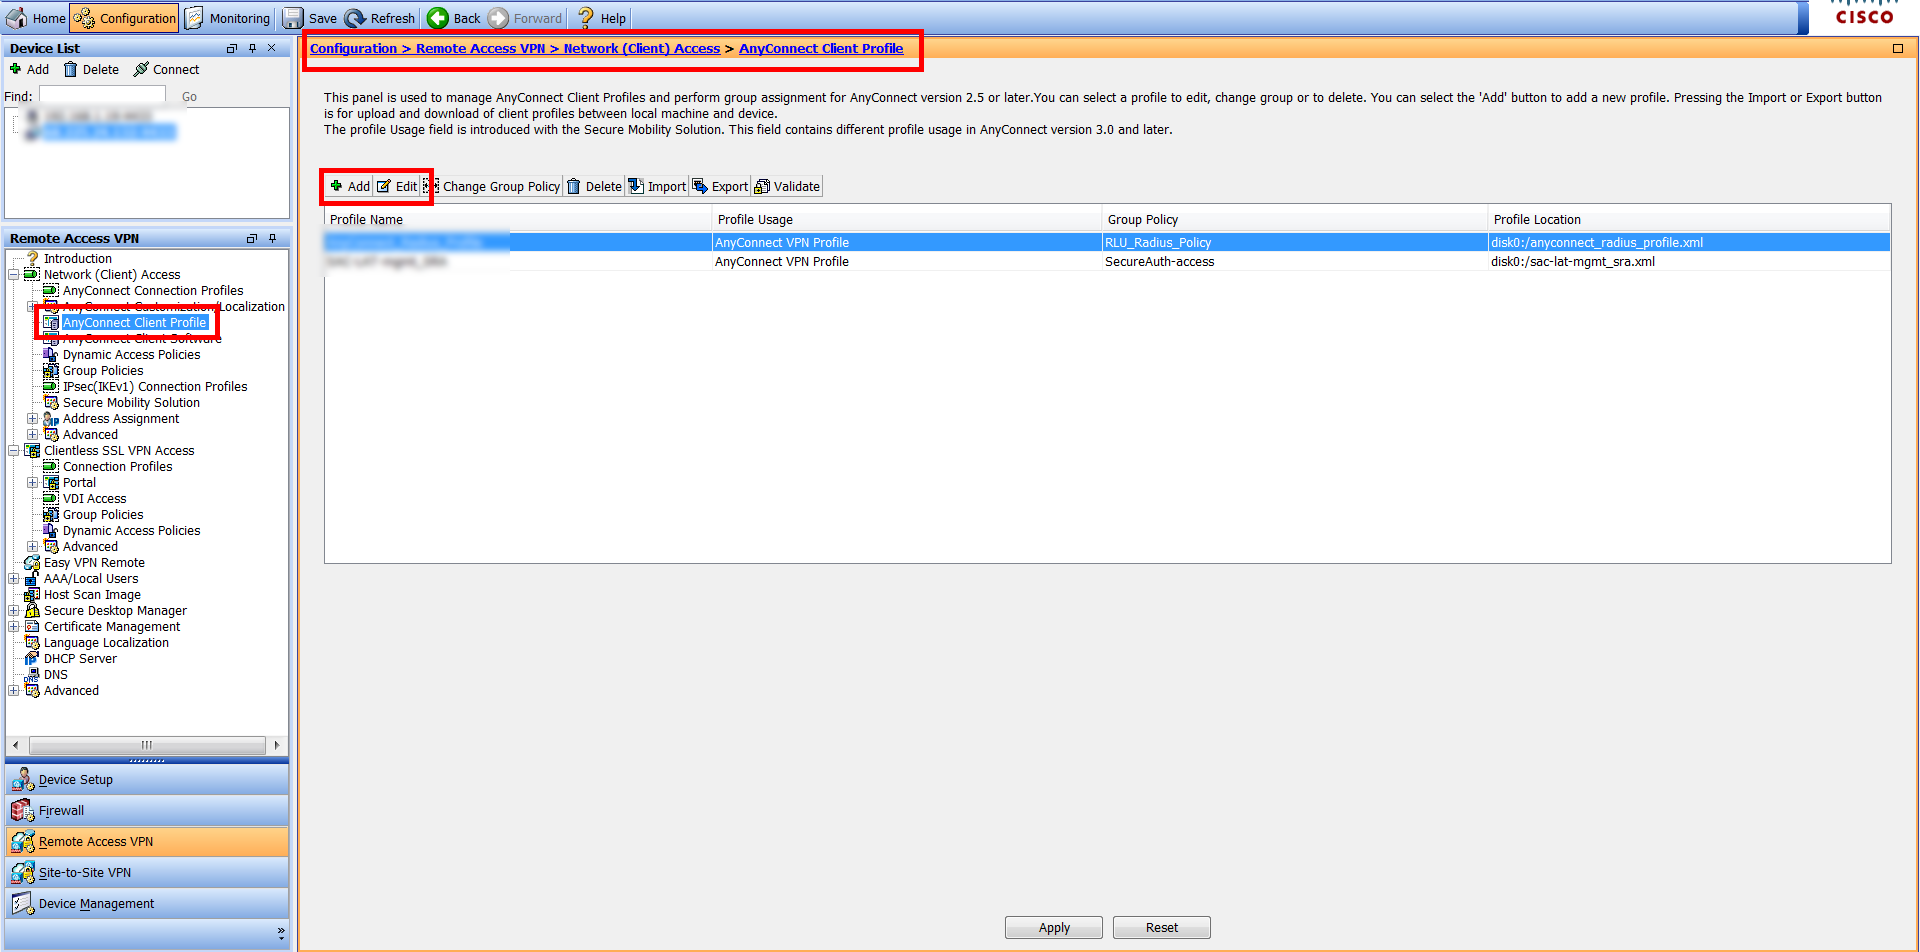 |
17. Navigate to Configuration > Remote Access VPN > Network (Client) Access > AnyConnect Client Profile
18. Click to Add a new or Edit an existing Client Profile
AnyConnect Client Profile Preferences (Part 2)
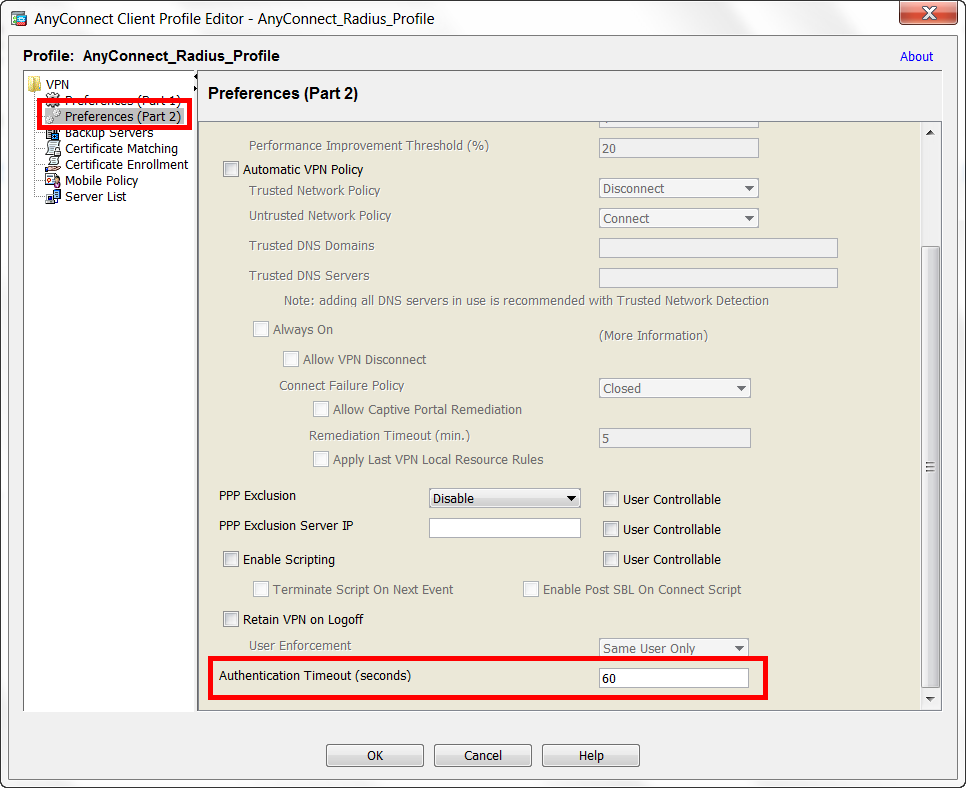 |
19. Configure the profile as preferred (if new)
20. In the Preferences (Part 2) section, set the Authentication Timeout (seconds) to 60
AnyConnect Client Profile Server List
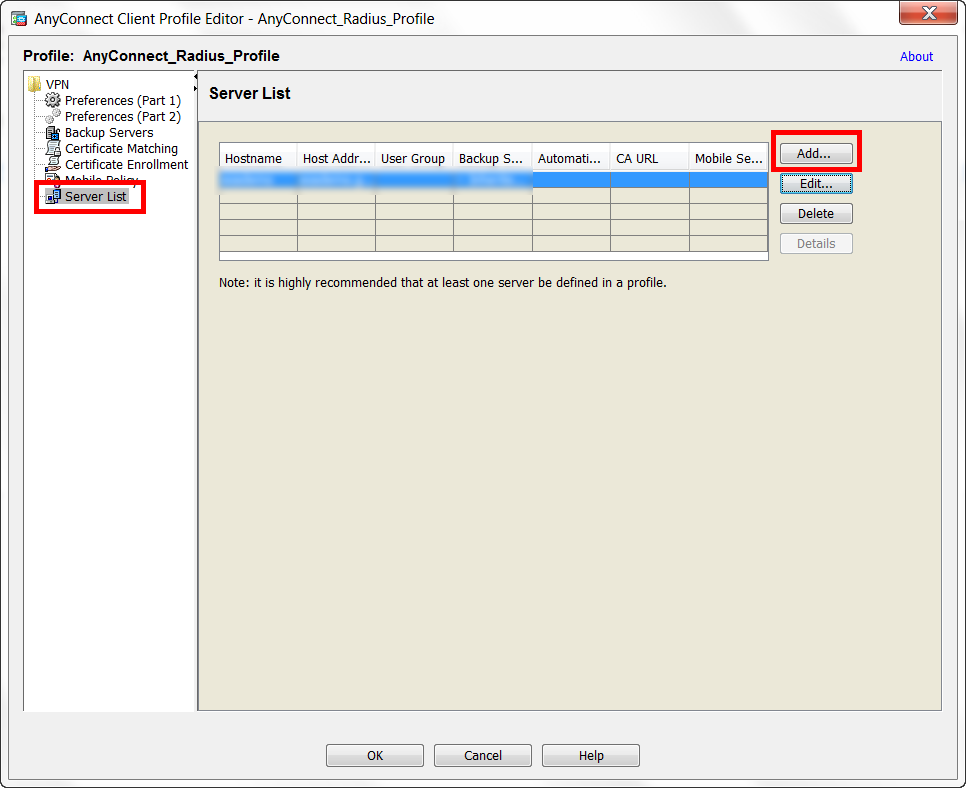 |
21. In the Server List section, click to Add a new or Edit an existing server list
Server List Entry
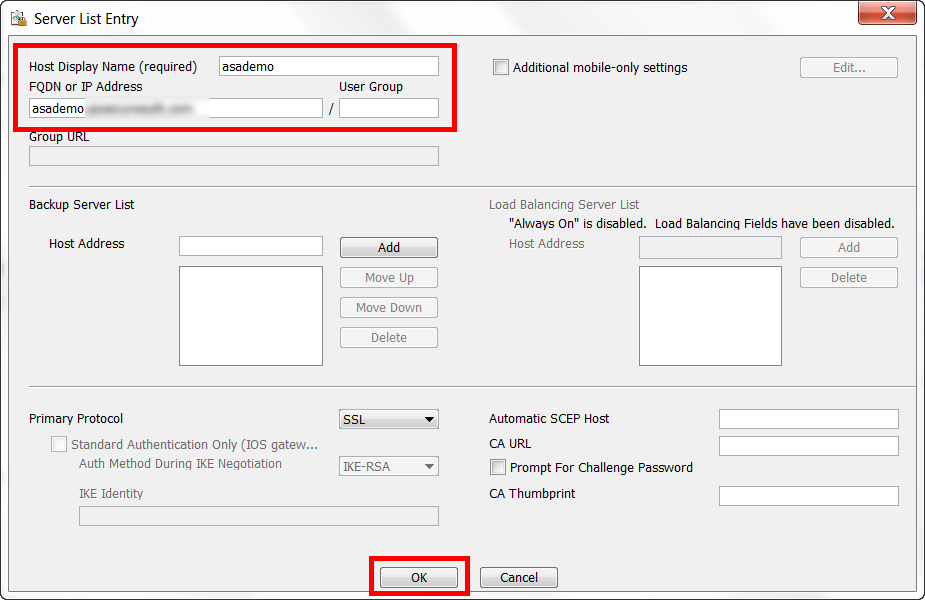 |
22. Set the Host Display Name to the host name of the Cisco ASA
23. Set the FQDN or IP Address to the FQDN of the Cisco ASA
24. Click OK