Step C: RADIUS Clients configuration, v20.06
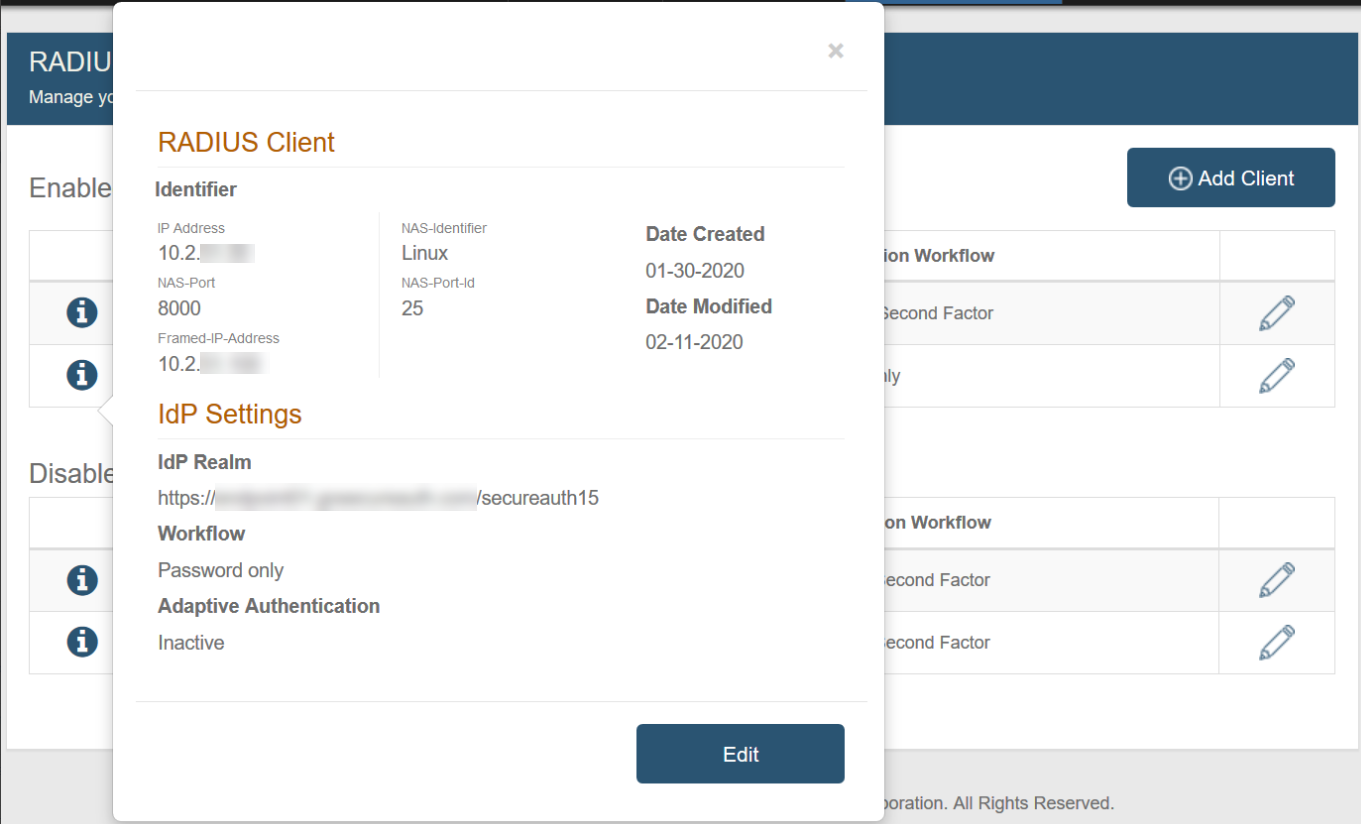
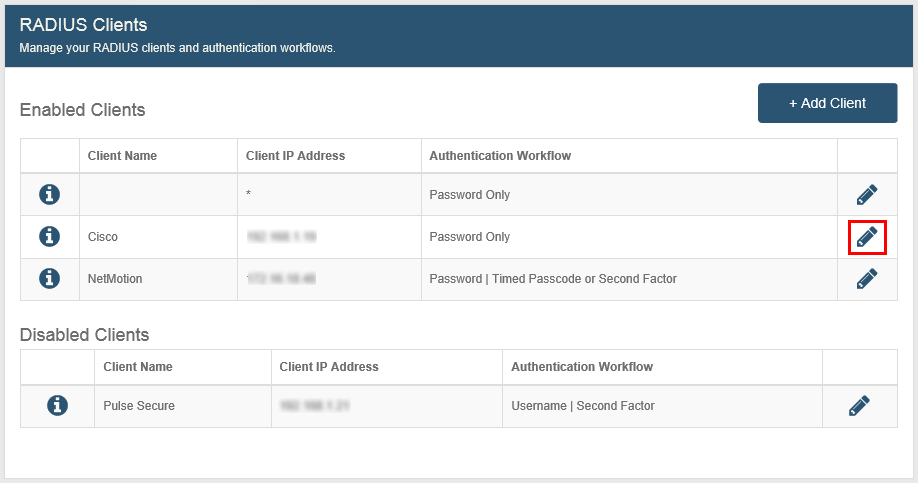
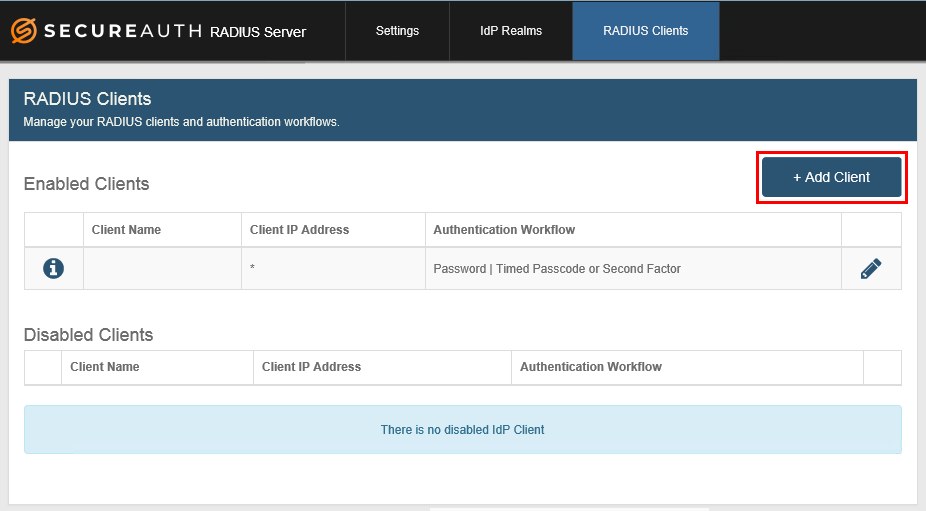
By default a single row appears populated with client information that can be modified in the To edit a client's information or remove a client from the list section at the bottom of this topic.
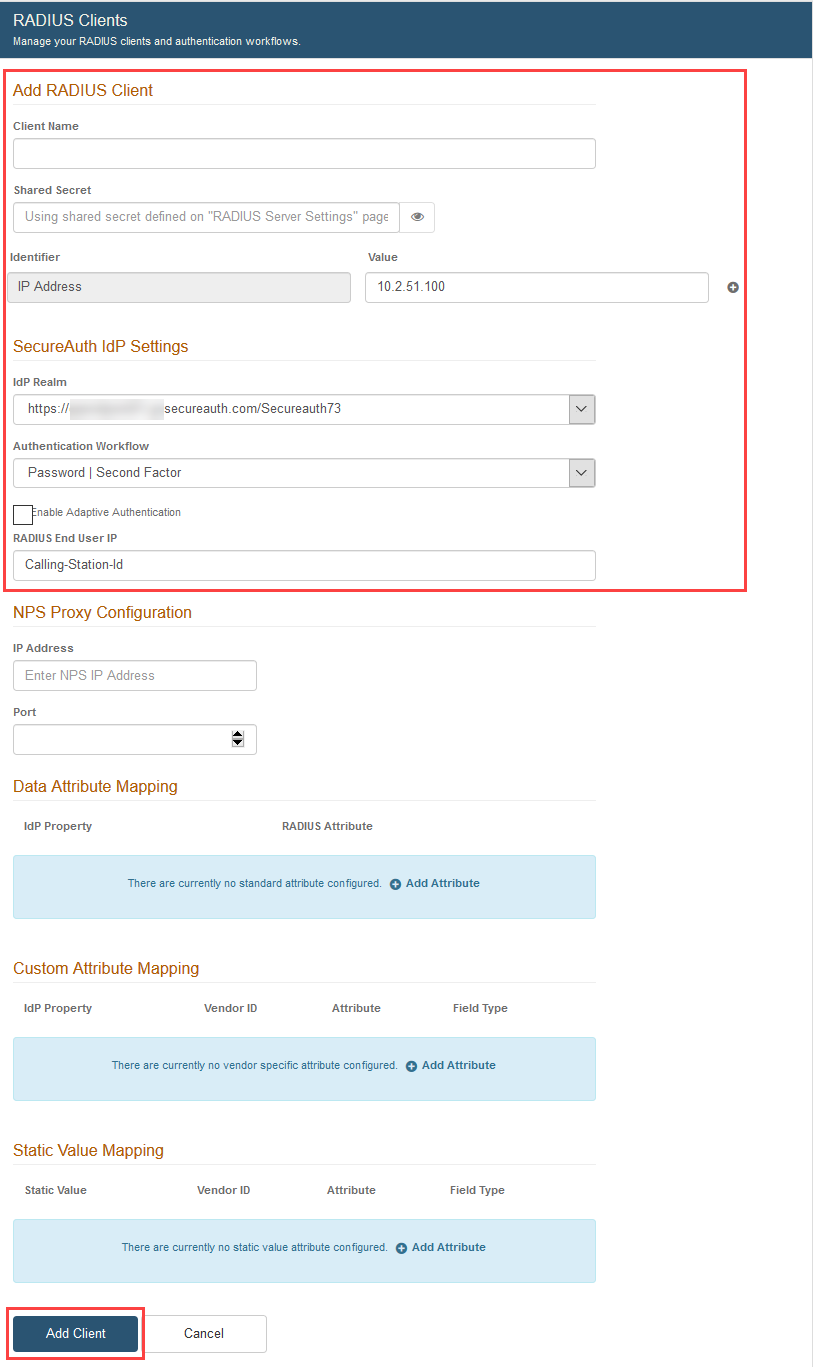
Client Name – a friendly name for the client can be manually entered.
IP Address – asterisk ( * ) indicates the client IP will be mapped to all RADIUS client IPs configured. You can also use partial wildcards, for example, 1.1.*.*=1.1.0.0/16
Authentication Workflow – default workflow selection is Password | Second Factor.
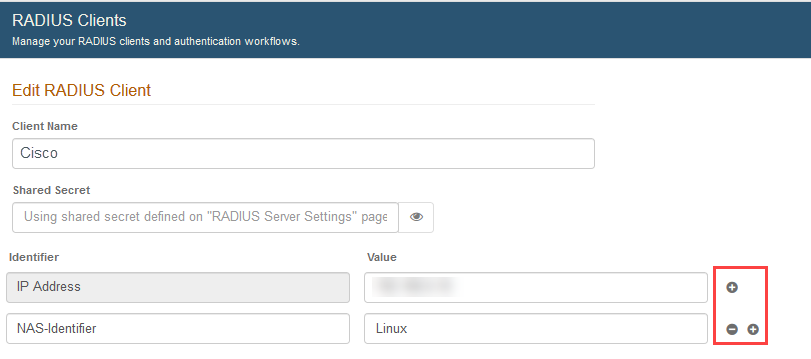
Additionally, you can add and remove identifiers and their values by using the plus and minus icons to the right of each field. Identifiers are useful for restricting access, which enables additional control over the client configuration. For a complete list of identifiers available for you to add, see page 23 in the RADIUS RFC.
Add RADIUS Client
1. Click Add Client
 |
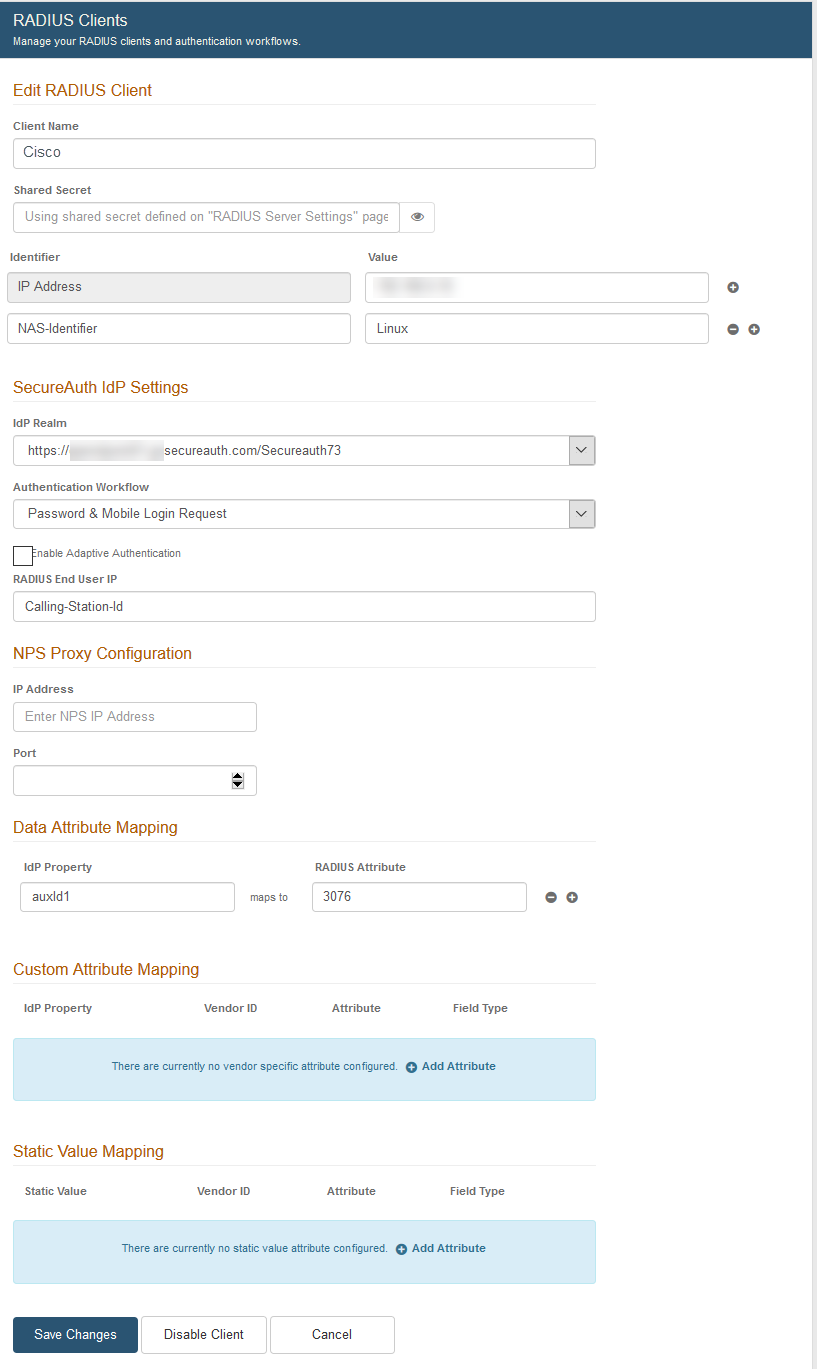
2. Enter a friendly Client Name. For example: "Cisco".
3. Enter the IP Address, located under Identifier, to filter the RADIUS client. In general, the NAS-IP address should be entered.
However, to filter the RADIUS client by the client IP address, and not the NAS-IP address, then additionally enable Use Client Source IP Address.
TIP: You can use a wild card to allow machines from only a specified subnet to connect, as in this example: 10.1.2.*
SecureAuth IdP Settings
4. Select the SecureAuth IdP Realm from the dropdown.
Selections only include Authentication API realms added on the IdP Realms page.
5. Select the Authentication Workflow from the dropdown – this must match a workflow configured and enabled on the realm selected in step 4:
Password | Second Factor
Password & Mobile Login Request (Approve / Deny)
Password Only
One-Time Passcode (TOTP/HOTP) Only
One-Time Passcode / Password
Password | One-Time Passcode (TOTP/HOTP)
One-Time Passcode (TOTP/HOTP) | Password
Username | Second Factor
Username | Second Factor | Password
PIN + OTP
Password & One-Time Passcode (TOTP/HOTP)
Yubico OTP Only
Password | Yubico OTP
Username | Fingerprint
Username | Face Recognition
NOTE: Not all authentication workflows are supported by all RADIUS clients due to RADIUS client configuration limitations. See Multi-Factor Methods configuration documents for links to versions of documents that explain how to configure realms for the supported authentication workflows.
6. OPTIONAL: If using Adaptive Authentication, check Enable Adaptive Authentication.
6a. Calling-Station-Id appears by default in the RADIUS End User IP field. This attribute is used to verify the end user's IP address.
6b. Edit the value in this field if using Palo Alto Networks or Juniper Networks platforms:
For Palo Alto Networks, enter PaloAlto-Client-Source-IP
For Juniper Networks, enter Tunnel-Client-Endpoint
NOTE: IP verification is only supported on Cisco, NetScaler, and Palo Alto Networks platforms.
7. Data Attribute Mapping is used to map an attribute from the configured SecureAuth IdP Data Store to the RADIUS client – this feature is often used with a VPN for making policy decisions.
NOTE: Only string values are supported for data attribute mapping.
8. Custom Attribute Mapping is used to map an attribute from the configured SecureAuth IdP Data Store to a vendor specific attribute – this usually occurs in a scenario in which the VPN appliance is unable to perform an LDAP lookup.
The Attribute field is mandatory and must be set in this step or in the Static Value Mapping in step 9.
9. Static Value Mapping is used to map data to the RADIUS Vendor-Specific Attribute (VSA) configuration.
The Attribute field is mandatory and must be set in this step or in Custom Attribute Mapping in step 8.
10. Click Add Client after all client entries are made, or click Cancel to return to the RADIUS Clients page without adding a client.
 |
