Cisco ASA - Requesting Identity Certificate
Introduction
Use this guide to request an identity certificate from Cisco ASA.
Installing an identity certificate on the ASA using ADSM is not complicated; however, there are specific details to know to avoid errors.
Prerequisites
1. Have a Cisco ASA VPN and access to the ADSM admin console
Cisco Configuration Steps
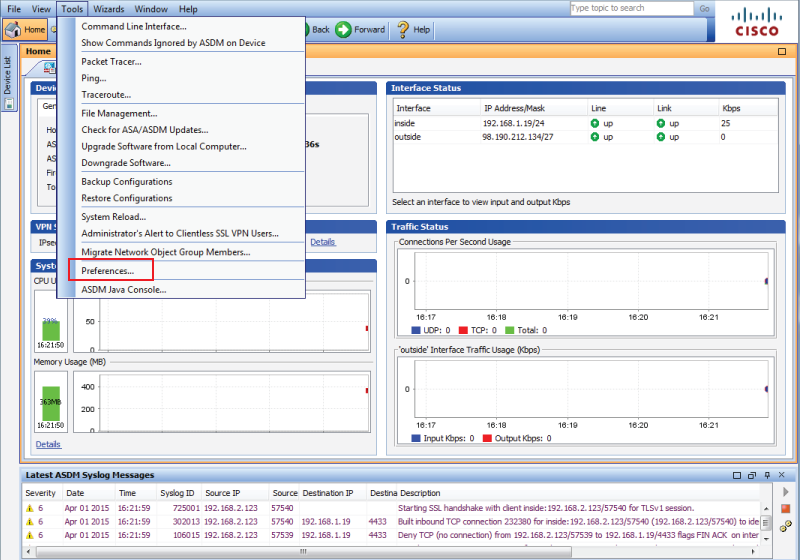 |
1. Log into the Cisco admin console, and select Preferences under Tools
Preferences
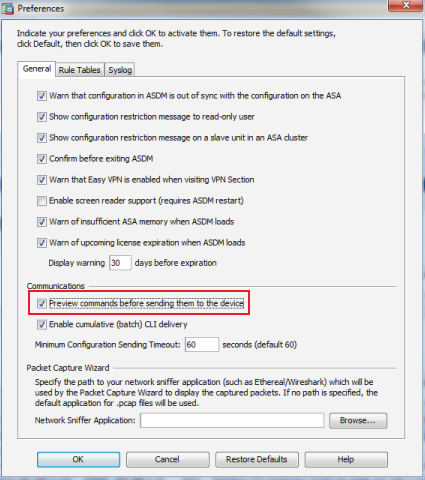 |
2. Check Preview commands before sending them to the device
This will enable review of the information that will be contained in the certificate before it is created
3. Click OK
Identity Certificate
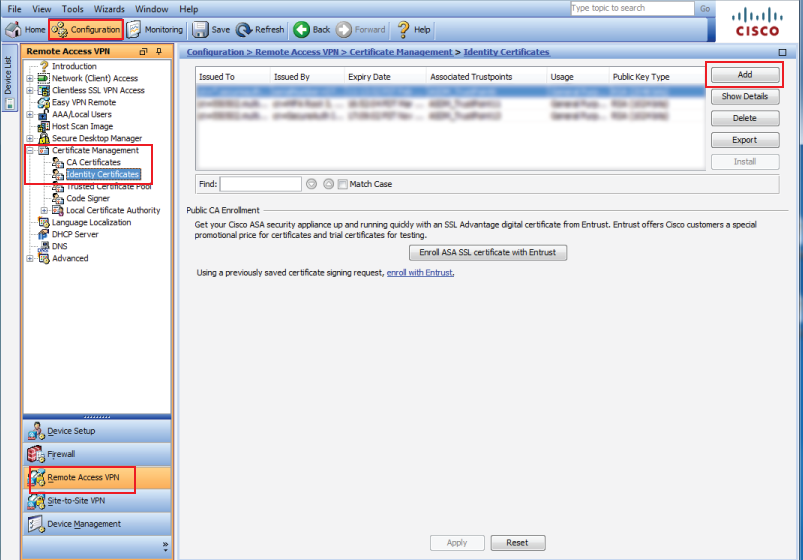 |
4. In the admin console, select Remote Access VPN under Configuration, and expand the Certificate Management menu
5. Select Identity Certificates
6. Click Add
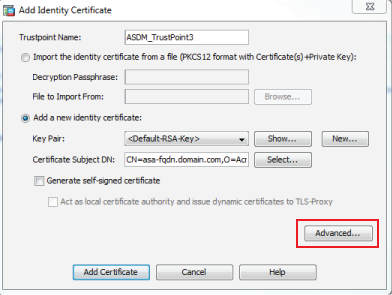
Add Identity Certificate
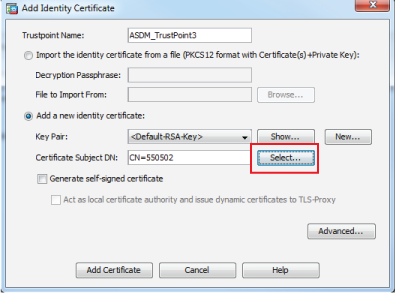 |
7. Set the Trustpoint Name or leave as default
8. Select Add a new identity certificate
9. Select the Default RSA Key from the Key Pair dropdown, or click New... to create a new one
For this configuration, the default key pair is selected
10. Click Select... in the Certificate Subject DN section
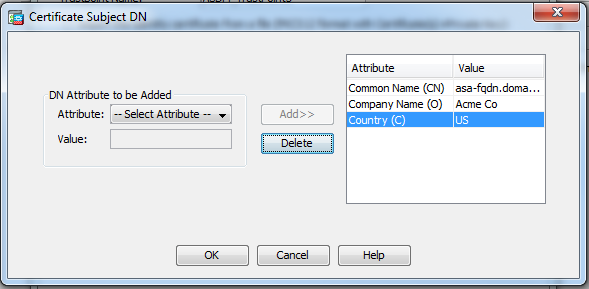 |
11. Select Common Name (CN) from the Attribute dropdown, and set the Value to the Fully Qualified Domain Name (FQDN) of the Cisco ASA appliance
12. Click Add>>
13. Select Company Name (O) from the Attribute dropdown, and set the Value to the company's name
14. Click Add>>
15. Select Country (C) from the Attribute dropdown, and set the Value to US (or other if necessary)
16. Click Add>>
17. The new attributes and values should be present in the right-hand field
18. Click OK
19. The Certificate Subject DN field should now contain the attributes and values that were created in the previous steps
20. Click Advanced... to ensure that the FQDN is correct
 |
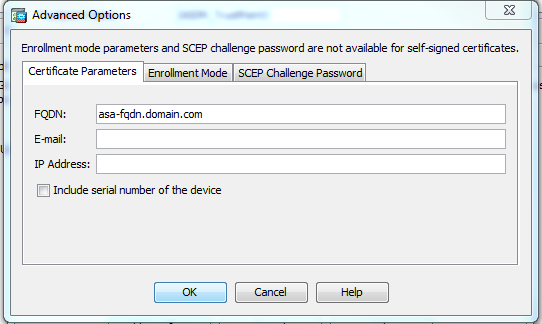 |
The FQDN may automatically be filled with the hostname and domain that are configured for the ASA
This field must match the Public Hostname (FQDN) that will be used by IPSec clients
Even if there are no initial plans to use IPSec, it is a best practice to install a certificate that will support certificate-authenticated IPSec clients
Without this field, IPSec clients cannot support certificate authentication, and the certificate would need to be replaced to enable support
21. Click Add Certificate
22. A preview window will appear, and ensure that the fqdn and subject-name are correct
23. Click Send if the configuration is correct, and an Identity Certificate Request window will appear
24. Choose a location in which to save the file, and click OK
Install Identity Certificate
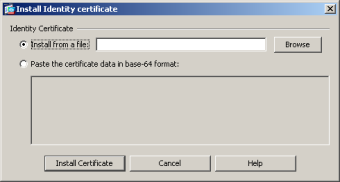 |
25. In the Identity Certificates homepage, once a reply has been received, select the identity certificate and click Install
26. The Install Identity Certificate window will appear
27. Click Browse and locate the certificate file, and click Install Certificate